


Maintaining a before-and-after audit trail for sensitive tables can be time consuming, especially with a database that is under continuous development, and particularly in teams that use continuous integration. Most table changes will break existing triggers and necessitate their update. The ability to automate the refactoring and re-creation of a trigger based auditing layer, to keep up with underlying database changes, and run this process unattended or as part of a continuous integration process can be a huge time saver.
To automate the SQL auditing triggers creation process, we’ll use ApexSQL Trigger, a tool specifically designed to automate the creation of before-and-after SQL Server auditing triggers.
Setting up ApexSQL Trigger
First ApexSQL Trigger needs to be set up and configured for use. This means it’s necessary to select which tables and fields will be used for auditing, as well as which operations (insert, delete and/or update) to audit.
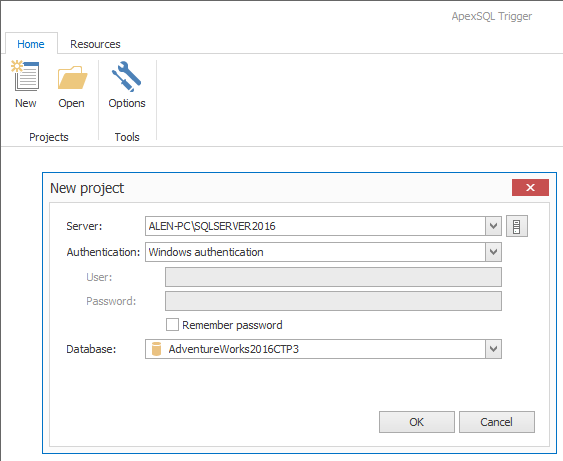
Let’s start by running ApexSQL Trigger and then create a new project. Then select a server instance and choose a database which needs to be audited and click OK.
If the selected database was not audited before with ApexSQL Trigger, an additional dialog will pop up, asking the user to install the ApexSQL Trigger structure on the database. This process will install various objects that are required to allow ApexSQL Trigger to function, including the repository database and stored procedures and views for reporting purposes.
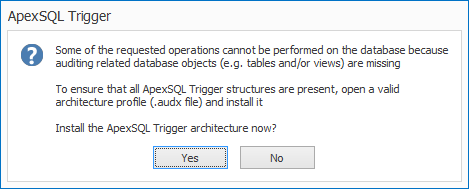
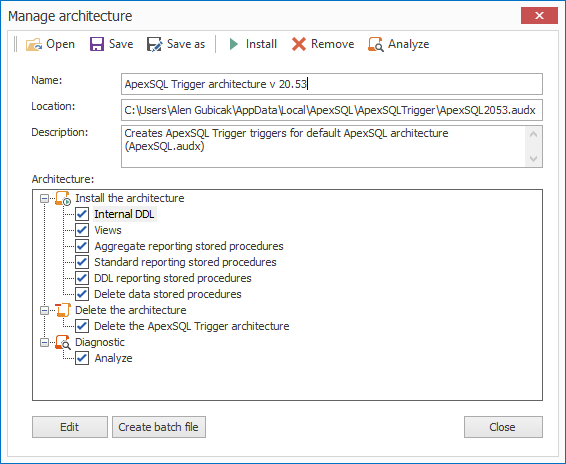
Once the dialog is confirmed, a new menu will be displayed. Install the ApexSQL Trigger architecture and continue to the next step of the setup.
|
Quick tip: If you don’t want to install the audit data repository tables in the audited database itself, you can install in another database. Read more about it in this article. |
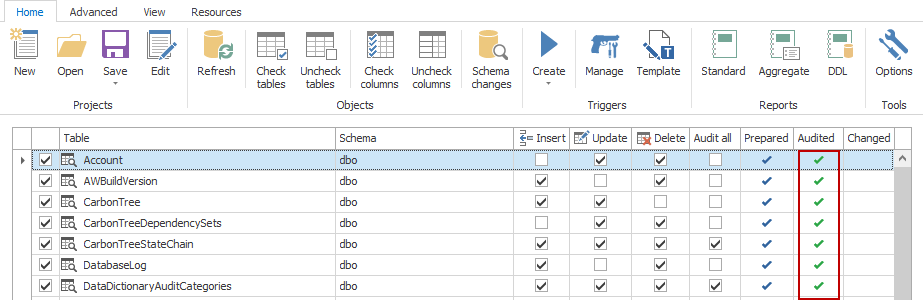
When that is done all tables from the selected database will be displayed in the main grid of ApexSQL Trigger.
Now select the desired table(s) and choose which triggers need to be created for each table.
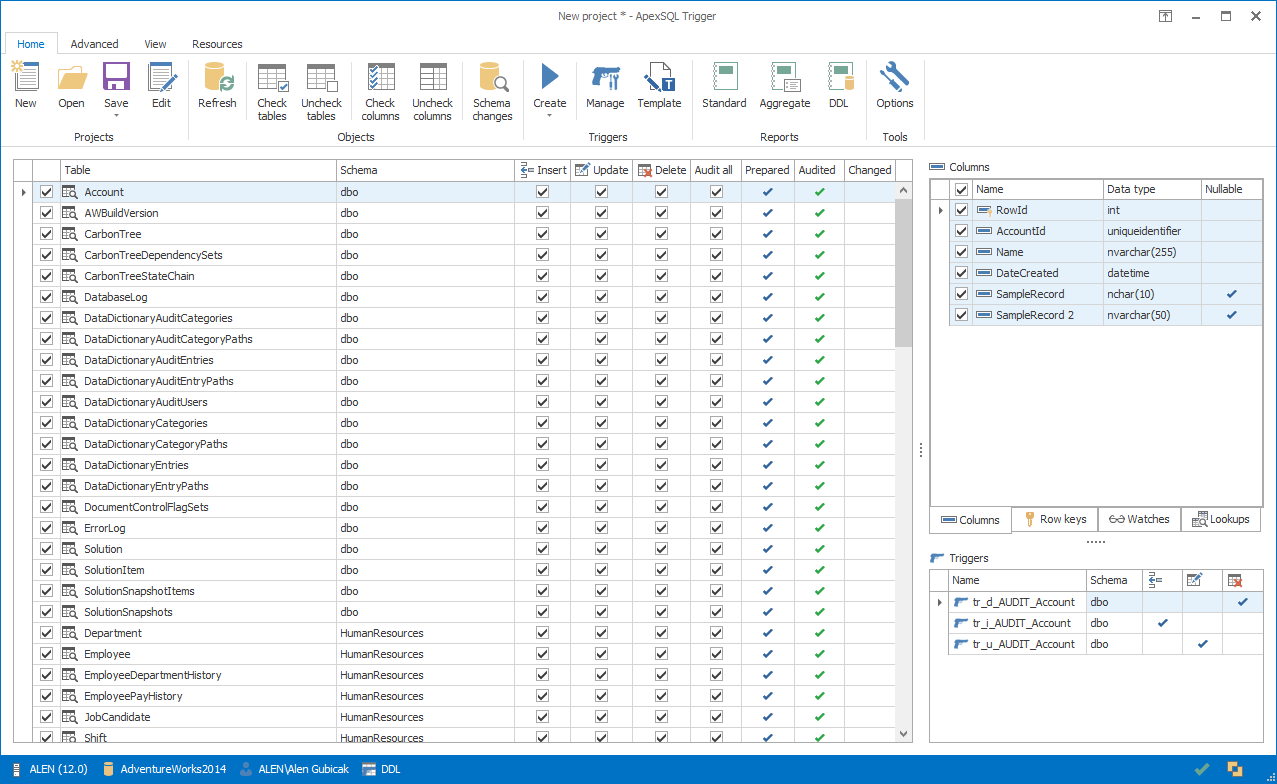
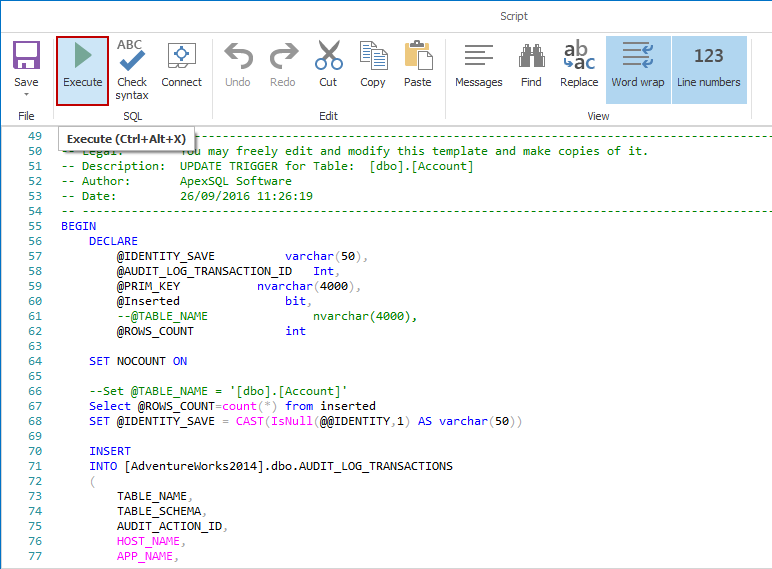
When the desired auditing triggers are selected click the Create button. Once clicked, an additional menu will appear where you will see the whole script which will be used to set the desired auditing triggers to the selected tables. Now click Execute and the auditing triggers will be placed on the selected tables.
Once the triggers are created and the selected tables are audited, those tables will be marked as audited in the main grid of ApexSQL Trigger.
To verify that our triggers are indeed working, let’s add a couple rows to the database
INSERT INTO [HumanResources].[Department] (
	[Name]
	,[GroupName]
	,[ModifiedDate]
	)
VALUES (
	'Chief Engineer'
	,'Research and Development'
	,SYSDATETIME()
	)

INSERT INTO [HumanResources].[Department] (
	[Name]
	,[GroupName]
	,[ModifiedDate]
	)
VALUES (
	'Developer'
	,'Research and Development'
	,SYSDATETIME()
	)
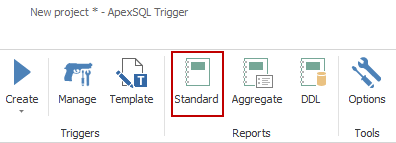
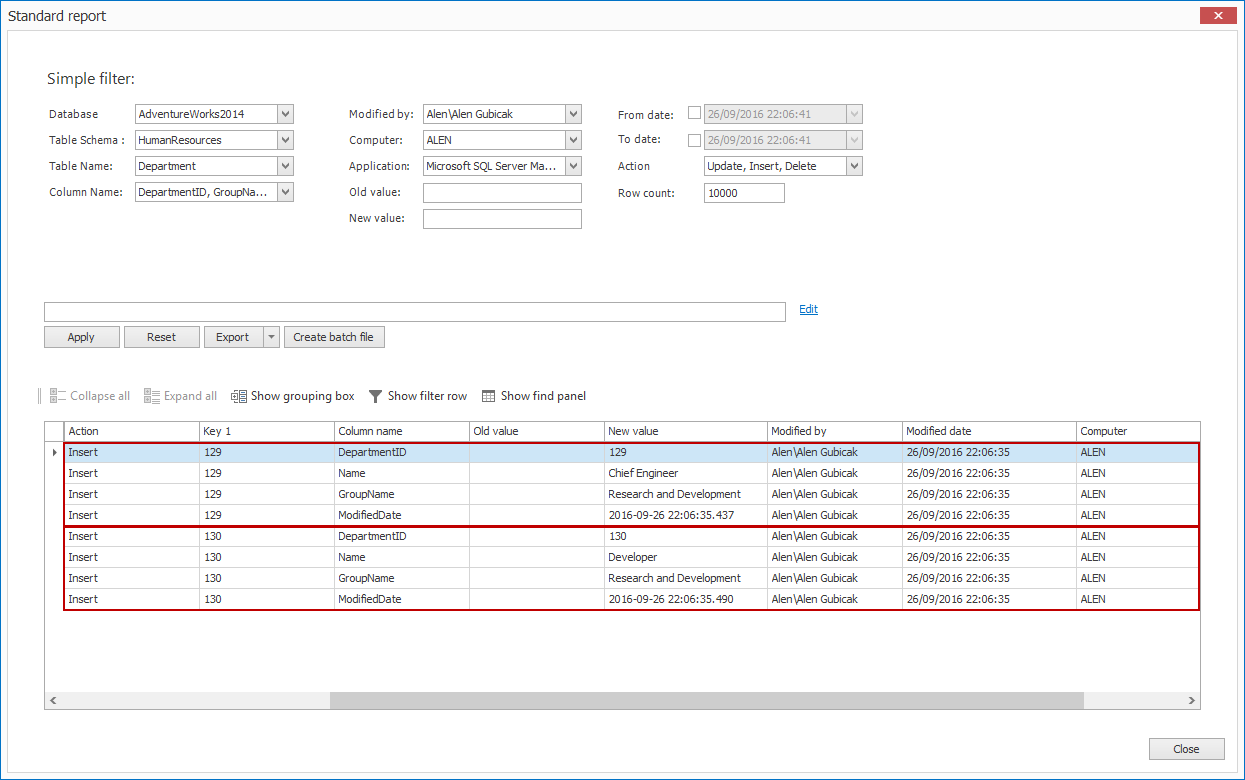
Now let’s run a report and verify that the new audit records were created. Click the Standard report button to open up the report filter menu and let’s see if the changes are recorded well.
Now that we have created an audit plan and verified it is working, it’s time to automate the auditing triggers creation process.
The next step is to save the project file. This is important, as the easiest way to execute ApexSQL Trigger unattended, is to provide a project file to the ApexSQL Trigger command line interface (CLI). The project contains everything that is needed including.
- All of the selections for what tables, column and fields will be audited
- What operations will be audited; insert, update and/or delete
- Any particular option settings that may be needed for the automated task
- and even database credentials, stored in encrypted format, that will allow you to run the job unattended
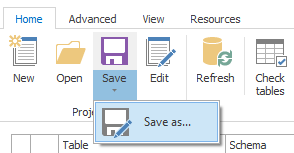
Now save the project file with the save settings and continue to the next part of the process.
Once the project file is saved, it’s time to automate the process of creating auditing triggers via the CLI.
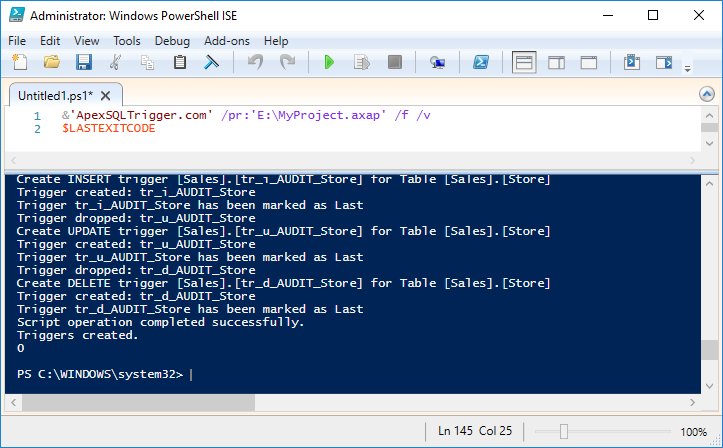
For this we recommend using a PowerShell script. In this script we will use the previously created project file and specify additional optional switches. For making this script we suggest you take a look and follow the written example of script shown below.
& 'ApexSQLTrigger' /

pr: 'E:\MyProject.axap' / f / v $LASTEXITCODE
‘ApexSQLTrigger’ – is the console application of ApexSQL Trigger and assumes that the application directory is the current directory. If not, specify the full path explicitly
/pr:’E:\MyProject.axap’ – specify to location of the saved project file
/f – the force switch, which is used to override any existing files with the same file name, which will allow ApexSQL Trigger to overwrite any existing triggers, of the same name, that may exist on file. In our case, the triggers written to file will just be used for auditing purposes, since we will be executing them directly against the target database
/v – the verbose switch, which is used to display messages about the trigger creation process in the console
$LASTEXITCODE – a variable used for displaying return error codes about the process
For a full list of CLI switches please see this article: “Using ApexSQL Trigger Command Line Interface (CLI) switches”
Tip: In our example we used Windows Authentication (aka Integrated Security), which will allow this job to be run unattended. For other options for handling database credentials read this article: “4 ways of handling database/login credentials during automated execution via the CLI”
When this is created, save the file with a .ps1 extension so you can use it as an executable PowerShell script. Now let’s execute the script and see what happens.
|
Quick tip: The trigger create statements contain Delete if exists statements, so that the old triggers will be automatically removed before new ones are added. Therefore, there is no need to run a pre-execution script, to delete all of the existing triggers. |
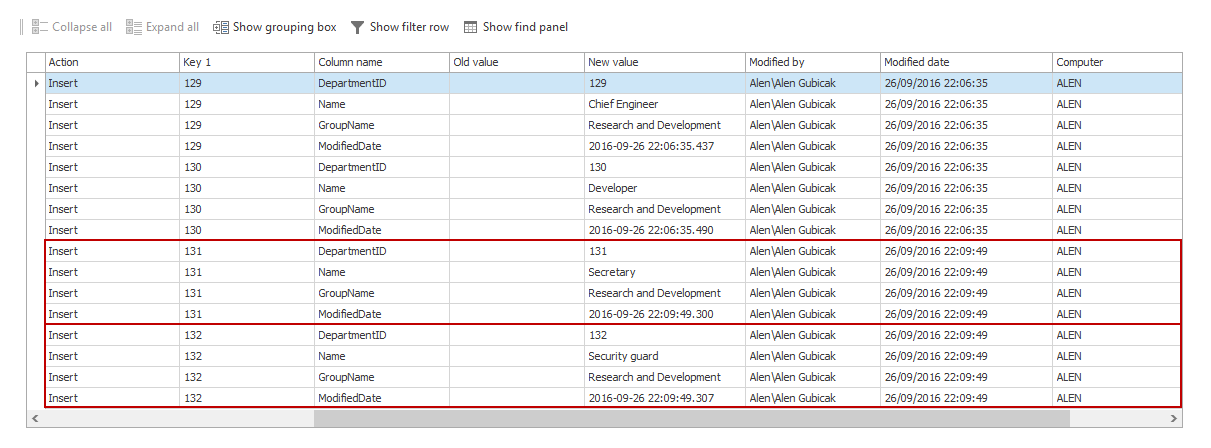
Let’s run a script that will add 2 more rows to an audited table.
INSERT INTO [HumanResources].[Department] (
	[Name]
	,[GroupName]
	,[ModifiedDate]
	)
VALUES (
	'Secretary'
	,'Research and Development'
	,SYSDATETIME()
	)

INSERT INTO [HumanResources].[Department] (
	[Name]
	,[GroupName]
	,[ModifiedDate]
	)
VALUES (
	'Security guard'
	,'Research and Development'
	,SYSDATETIME()
	)
Now let’s run the same reporting process, against the repository database, and we should have 2 more rows in this table, 4 in total, confirming that auditing has been successfully recreated.
To verify this will work repetitively, as either a recurring job e.g. nightly or as part of a continuous integration process, let’s run the PowerShell script again. All triggers should be dropped and recreated. Then we’ll run our data insertion script again by adding two more rows for a Vice president and General manager. Finally, let’s check results one more time.
INSERT INTO [HumanResources].[Department] (
	[Name]
	,[GroupName]
	,[ModifiedDate]
	)
VALUES (
	'Vice President'
	,'Research and Development'
	,SYSDATETIME()
	)

INSERT INTO [HumanResources].[Department] (
	[Name]
	,[GroupName]
	,[ModifiedDate]
	)
VALUES (
	'General Manager'
	,'Research and Development'
	,SYSDATETIME()
	)
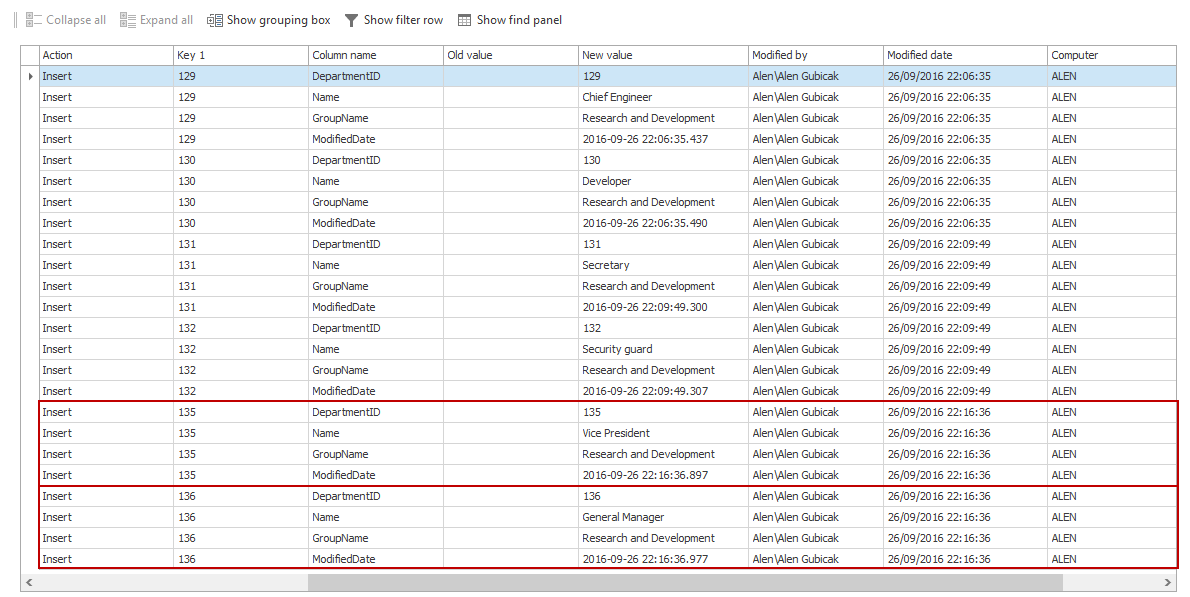
Sure enough, we see 2 more rows added to the audit data repository and 6 in total. This ensures us that this process is indeed repeatable, and save to load into a larger job as part of continuous integration, or to simply schedule to run unattended each night, to automatically rebuild the trigger auditing layer.
Useful links
- Auditing triggers in SQL Server databases
- How to manage triggers in ApexSQL Trigger
- Installing audit tables on another database
- Using ApexSQL Trigger Command Line Interface (CLI) switches
- 4 ways of handling database/login credentials during automated execution via the CLI
September 28, 2016


