


Why running DBCC CHECKDB?
DBCC CHECKDB checks the logical and physical integrity of all the objects in a database and provides information of any corruption.
As performing DBCC CHECKDB is a resource exhaustive task it is recommended to run it on a production server when there is as less traffic as possible, or even better, as one of the ways to speed up the DBCC CHECKDB process, is to transfer the work to a different server by automating a process and run CHECKDB after a database restore. As a backup process is a copy of a database and a restored database will be exactly the same as an online database therefore if there were any inconsistencies or issues they will be in the backup, and found in a restore. By using this approach both restores will be tested and backups verified without any impact on a production database.
Running DBCC CHECKDB after a restore can also be a good practice if a backup’s quality is unknown.
In this article, we will describe how to automate a DBCC CHECKDB after a database restore by automating DBCC CHECKDB after a database restore by using a SQL Server Agent job and Maintenance Plans.
How to automate DBCC CHECKDB after a database restore by using a SQL Server Agent job
To automate DBCC CHECKDB after a database restore by using SQL Server Agent:
- Select a New Job from the SQL Server Agent node ➜ Jobs
-
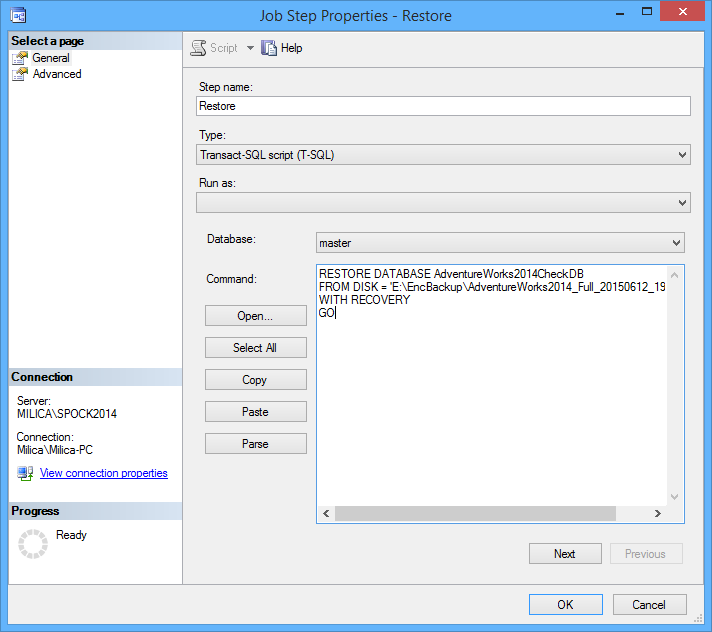
Create a first step and specify a database backup to restore by using the following script:
RESTORE DATABASE AdventureWorks2014CheckDB
FROM DISK = 'E:\EncBackup\AdventureWorks2014_Full_20150612_1916.bak'
WITH RECOVERY
GO
-
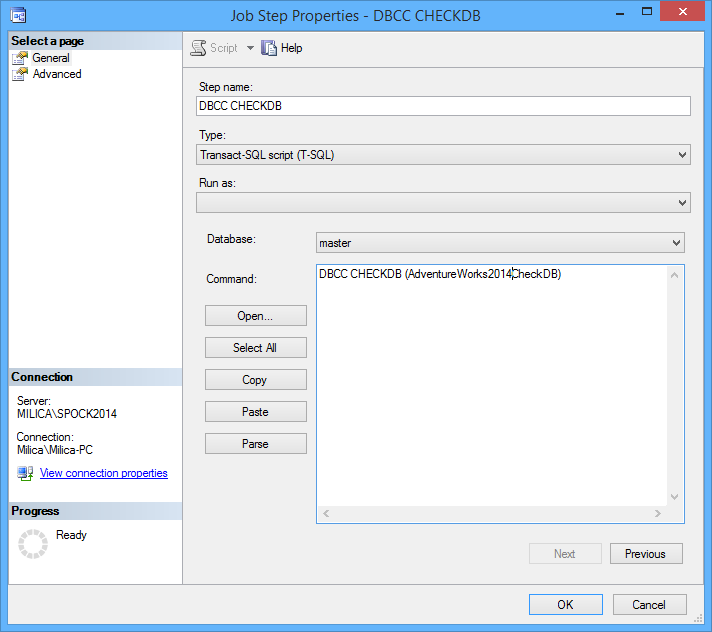
Add a second step to perform DBCC CHECKDB on a restored database by adding the following T-SQL script:
DBCC CHECKDB (AdventureWorks2014CheckDB)
To use different DBCC CHECKDB options use the following T-SQL scripts:
To check column values and to check are there column values that are out of range:
DBCC CHECKDB (AdventureWorks2014CheckDB) WITH DATA_PURITY
To subdue unnecessary informational messages:
DBCC CHECKDB (AdventureWorks2014CheckDB) WITH NO_INFOMSGS
To check indexed views, spatial, and XML indexes:
DBCC CHECKDB (AdventureWorks2014CheckDB) WITH EXTENDED_LOGICAL_CHECKS
To check only the physical structure of a database:
DBCC CHECKDB (AdventureWorks2014CheckDB) WITH PHYSICAL_ONLY
To enforce table-shared locking:
DBCC CHECKDB (AdventureWorks2014CheckDB) WITH TABLOCK
These options can be combined except the WITH PHYSICAL_ONLY option that cannot be combined with some of the options, which will be explained later in this article.
- Schedule a job to a desired frequency of executing.
Although relatively easy to set up using a SQL Server Agent job for these operations requires writing T-SQL scripts and a knowledge of DBCC CHECKDB options syntax as well as a knowledge of each option functionality and possibilities of combining.
How to automate DBCC CHECKDB after a database restore by using Maintenance Plan
Maintenance Plans can also be used to perform this action. Although the Maintenance Plans toolbar doesn’t contain a restore task the T-SQL task can be used.
To automate DBCC CHECKDB after a database restore by using Maintenance Plans:
- From the Management node in the Object Explorer pane, under Maintenance Plans select the New Maintenance Plan
- In the New Maintenance Plan name a new plan
-
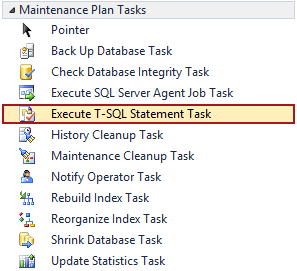
From the Maintenance Plan Tasks toolbar select Execute T-SQL Statement Task
-
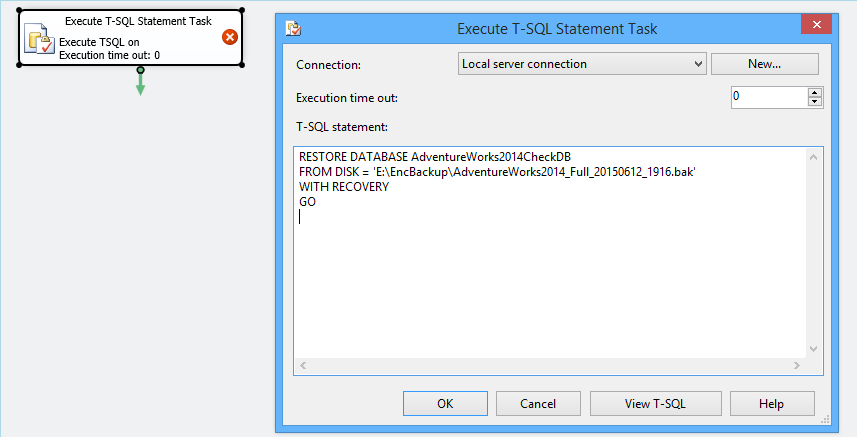
Double slick the task and paste a T-SQL script:
-
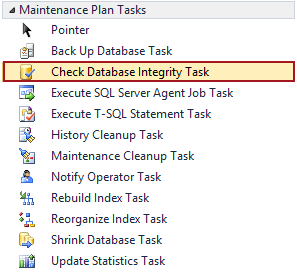
Add Check Database Integrity Task from the Maintenance Plan Tasks toolbar:
-
Double click on a task and select a database to run the task against:

-
When a maintenance plan is set up schedule it as a SQL Server Agent job:
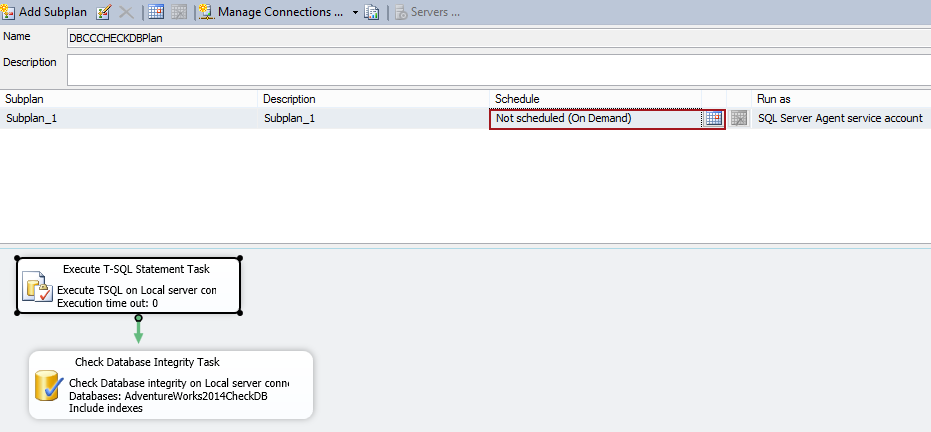
The downside of this approach besides being more complicated to set up is that currently, Check Database Integrity Task offers only indexes check as an additional option and performs a full DBCC CHECKDB check.
More options will be added in a SQL Server 2016 version.
June 22, 2015


