


More often than not, a top level requirement for all SQL Server DBAs is to have mechanisms to capture who changed what and when and to have stored audit information available for further investigation. In order to achieve this, database auditing needs to be set up using various mechanisms. One of those mechanisms is a trigger-based auditing.
Trigger-based SQL Server auditing involves a database object – trigger, which is “fired” as soon as a specific action is performed. When the trigger is fired, another specific action is executed – e.g. information on the trigger event is inserted into a repository database.
With this in mind, it is easy to understand trigger-based auditing on SQL Server – when a specific operation is executed on audited tables/columns, trigger is fired, and information on this operation is captured and stored for future inspection or other usage.
In this article, we are going to show how to setup trigger-based SQL auditing with ApexSQL Trigger, and how to automate the maintenance process, to ensure continuous auditing is being performed on SQL Server, even after database schema changes have been made.
This article will cover two different use cases.
In the first, a project will be set up in ApexSQL Trigger with the necessary tables selected. That project can be re-run manually. How to manage schema changes (e.g. new fields in audited tables) and compensate for them in the auditing plan will be reviewed
Next, leveraging our project to create a windows shell script that can be run automatically as a .bat file will be demonstrated.
How to setup ApexSQL Trigger
-
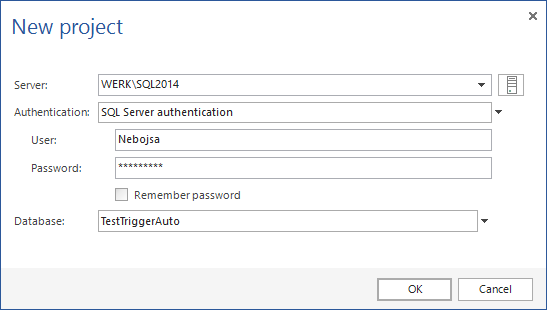
Start the ApexSQL Trigger and click on the New button to initiate fresh project

-
Select SQL Server instance and database, and provide authentication information/credentials
-
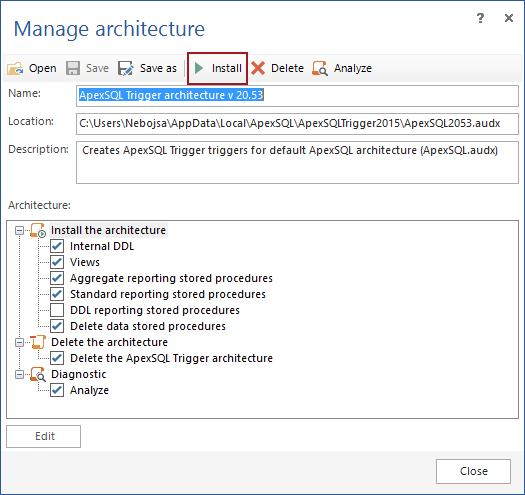
If the database was not audited with ApexSQL Trigger so far, the ApexSQL Trigger architecture needs to be installed. This creates ApexSQL Trigger triggers for default ApexSQL architecture file (.audx) which is an XML file that contains all infrastructure required to set up database auditing. To do this, click on the Install button in the Manage architecture dialog
-
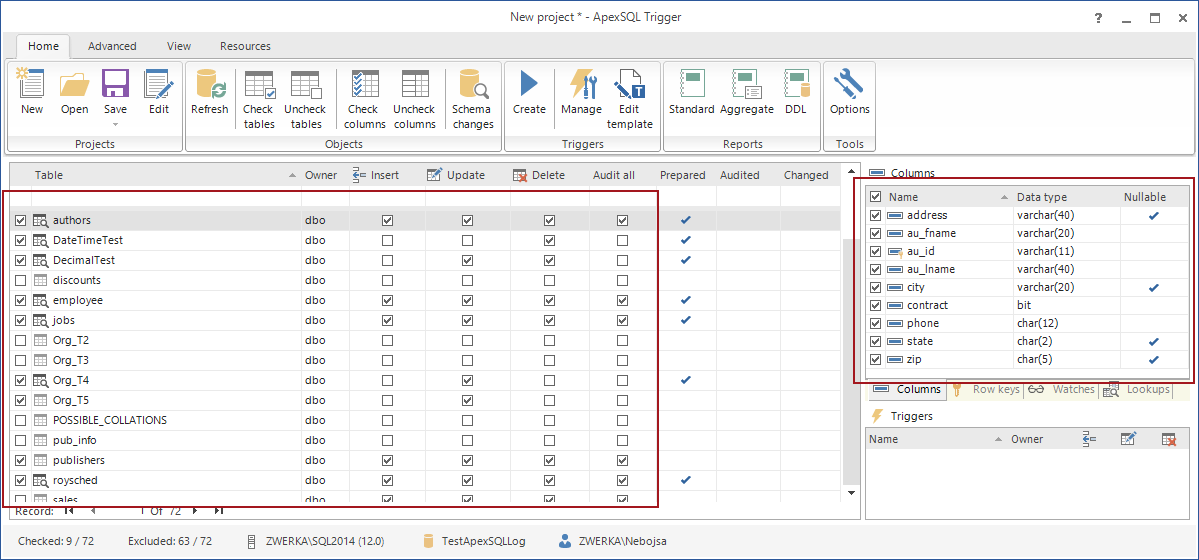
At this point, all database tables will be shown in GUI and user needs to check tables, columns and specific operations he wants to audit. In this example, we have selected only certain tables that we want to audit
-
To finalize the process and create appropriate triggers, click on the Create button in the main ribbon

-
At this point, ApexSQL Trigger will create a SQL script which should be executed to create the specified triggers in the database. It can be executed directly from the internal editor, or from other media such as SQL Server Management Studio.
-
With this, triggers have been created in the database, and auditing will commence immediately. Additionally, at this point, we can save our project for future usage by clicking on the Save button in the main ribbon.

Auditing database after the schema changes
Now that the process of initial setup is complete, it is important to keep in mind that audited database may be subject to occasional or regular schema changes, and that none of the changes are automatically detected or handled through ApexSQL Trigger, by default. With this in mind, it is generally advised to perform regular checks on schema changes so that the SQL auditing triggers can be promptly and adequately updated to match the schema changes and add or exclude new tables and/or columns from auditing and to update triggers every time database schema is changed.
At this point, let’s consider that some after some time of running auditing jobs, some changes have occurred on the tables we are auditing and that there are some additional field which user wants to add to the auditing job. In order to add those, following steps should be performed:
-
Start application and open the project file for our database which we’ve previously saved in the end of initial auditing setup by clicking on the ‘Open’ button in the main ribbon and selecting the appropriate project

-
Confirm the connection details for audited database and load project to the grid
-
Connect to the database and click on the Schema changes button in the main ribbon

-
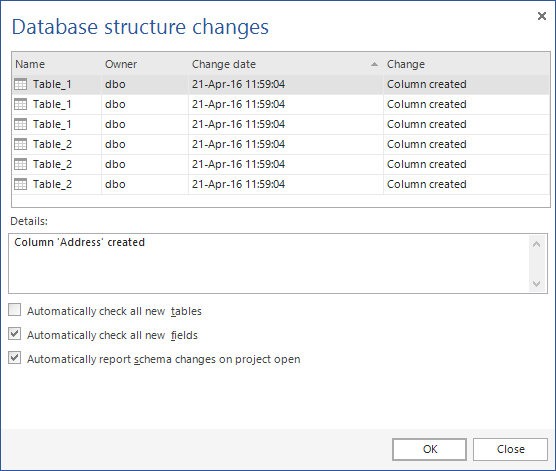
ApexSQL Trigger will report all database structure changes and appropriate actions can be then taken manually or automatically. The ‘Change’ column will indicate which type of schema change has occurred in comparison to the previous project save
-
The user can choose to automatically check all new fields which have been added, or perform this manually in the grid. In this case, the recommended option is to automatically check all fields for audited tables, as in theory, for tables that were selected for audit, most likely new fields would be required as well. But for new tables, it is recommended to let the user explicitly decide to audit these or not, to avoid a situation of over-auditing, which could create excessive auditing data, performance impact.
-
Once everything has been set up and updated, clicking on the Create button in the main ribbon will re-create all auditing triggers. An alternate way to full re-creation of all auditing triggers would be to specify (check) only those tables with detected schema changes and then to re-create triggers on them only, instead on all audited tables
-
Once this is done, it is recommended to save the project we’ve used, so it can be used as a starting point for the next schema check/update job.
Setup and maintain triggers unattended
Now that we’ve shown how to manually setup trigger-based auditing on SQL Server database, let’s consider simplifying the process of trigger implementation and maintenance. For this purpose, we’ll use ApexSQL Trigger CLI commands to re-create filters on changed tables specified in the project file.
In order to implement this, we simply need to specify which triggers need to be added on specific tables. To specify exact/specific triggers, tables and columns, the /at switch can be fine-tuned with the following.
To choose only specific tables, simply add table name after the /at switch. The same goes for columns – after the table name, add specific columns to include for auditing.
To choose only specific triggers (insert, update and/or delete), add the :i.u.d after specific table(s)
e.g.
| ApexSQL Trigger.com | |
| /s:WERK\SQL2014 | # Server ‘werk\SQL2014’ |
| /d:TestApexSQLLog | # Database ‘TestApexSQLLog’ |
| /at:Table_1:i.u Table_2:d Table_3:i.u.d | # Add triggers to specified tables |
The above example adds insert and update triggers to Table_1, delete trigger to Table_2 and all 3 available triggers (insert, update, delete) to the Table_3.
Using this switch all fields, including new, will automatically be added to the tables listed.
Automatically creating a .BAT file via the interface
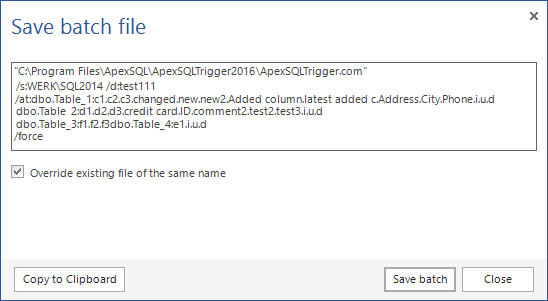
An alternate way of creating a CLI command (batch file) would be to automatically generate it via GUI. To do this, specify triggers to be created as shown above in the initial setup guide for GUI and click on the Create batch file button in the main ribbon, and application will automatically create CLI command in the batch script form as per specified settings which can be saved as a batch file or copied directly to command line for further editing or execution.

Created batch file will be displayed like this:
Auditing maintenance
As before, in case of setting up SQL Server trigger-based auditing with ApexSQL Trigger GUI, this concludes the initial auditing setup. As in the previous case, let’s assume that audited tables will be subject to some DDL changes in time and that some additional fields which user will want to add to the auditing job will be created in the time to come.
To add those new fields, user simply needs to re-run created batch file at any given point. Existing triggers will be automatically dropped and recreated as per the batch file information. Batch file can be run manually, or this job can be fully automated by scheduling execution of the batch via Windows scheduler or similar tool to be run on a regular basis. Detailed guide on how to setup automation of batch file in a described manner can be found in this article.
FAQ
Q: Do I need to recreate all triggers when there are schema changes on audited SQL Server database in order to update auditing?
A: No, only triggers on the tables affected with schema changes need to be recreated to update the auditing, this can be done by selecting only specific tables to re-add triggers in GUI or CLI.
Q: Do I need to remove triggers first before re-creating them?
A: No, the triggers are removed automatically during the re-creation if they already exist on the ‘added’ table (if exist they are deleted first).
Q: What happens if a field is deleted?
A: Trigger re-creation will affect all deleted fields in the same way as it treats newly added ones. While new fields are added to triggers, deleted once are removed when the maintenance is performed. This will be detected with the schema change check and automatically ‘fixed’ when triggers are re-created as described above.
April 27, 2016


