


Challenge
It’s often needed to have a way of synchronizing data between SQL databases in real time, e.g. when a certain data is changed/added in one place (database) to be synchronized with another database. Changes need to be detected, automatically, on a schedule, and automatically synchronized with another database. This process should be fully automated and run totally unattended.
Solution
ApexSQL Data Diff is a third-party tool for comparing data between SQL databases, database backups, script folders and source control projects. It can be scheduled to run at a specific time/date to keep databases in sync in nearly real-time. For example, let’s schedule it to run the comparison every 15 minutes and if there are some differences between databases, a synchronization will be executed. In this way, we’ll keep the databases in sync, almost in real time
In order to set up this process, follow these steps:
-
Run ApexSQL Data Diff
-
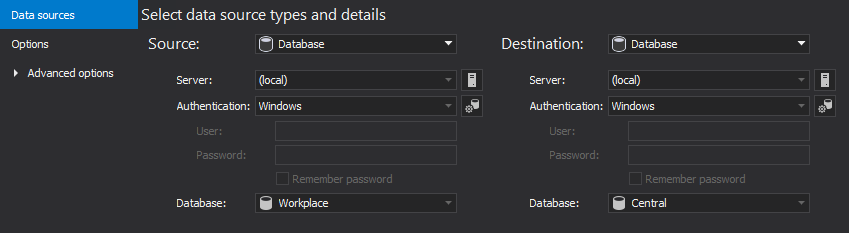
In the New project window, under the Data sources tab, set the source and destination database:
-
Go to the Options tab if there is a need to set a specific comparison or synchronization option
-
Click the Compare button in bottom-right corner to initiate the comparison process
-
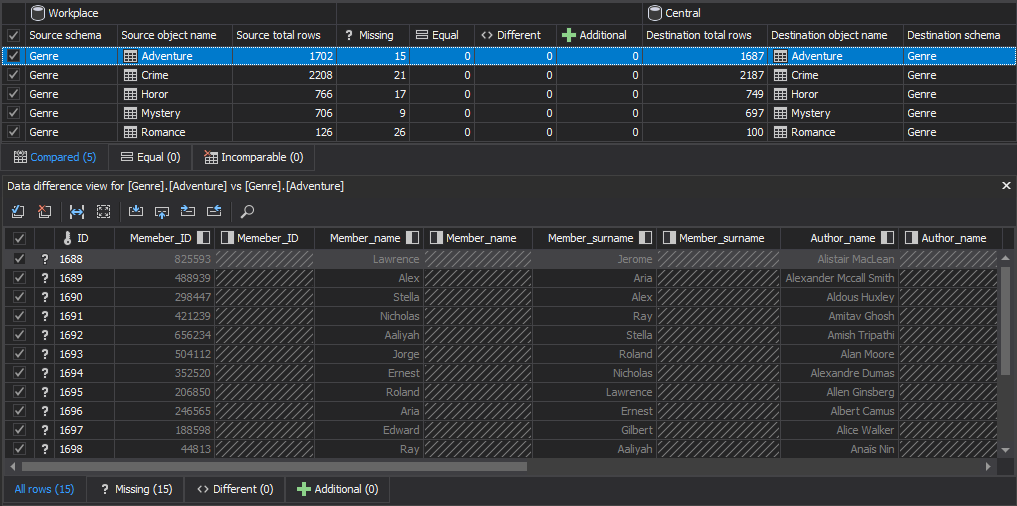
Once the comparison process is finished, the comparison results will be shown in the Results grid:
-
Check all objects with corresponding rows and click the Save button from the Home tab:

The saved project file contains all selected options and objects/rows that will be used for scheduling data synchronization.
-
Once the project is saved, click the Synchronize button from the Home tab to initiate the Synchronization wizard
-
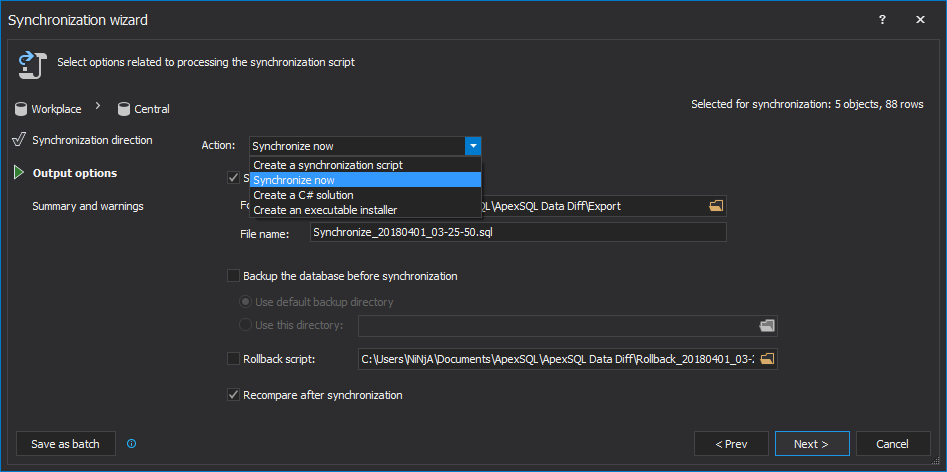
Choose the Synchronize now action, so that synchronization is performed directly on the destination database (Central):
-
In the last step of the Synchronization wizard, click the Synchronize button in the bottom-right corner
-
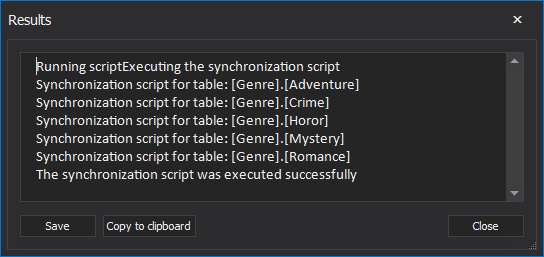
Once the synchronization process is finished, the Results window will be shown with information if the synchronization was successful or not:
Automating the process
Now when the initial synchronization was performed with ApexSQL Data Diff and the project file was saved, we can easily automate the process by creating a PowerShell script.
Setup and house keeping
The first thing is to create a function that will check for existence of the Output folder, where the data stamped output summary will be saved. We want to make sure we keep an easy to find (date stamped) application log of every synchronization, in case we ever have to troubleshoot:
#checks the existence of Outputs folder and creates it if it is not created
 and returns the path
function CheckAndCreateFolder($rootFolder, [switch]$Outputs)
{
    $location = $rootFolder

    #set the location based on the used switch
    if($Outputs -eq $true)
    {
        $location += "\Outputs"
    }
    #create the folder if it doesn't exist and return its path
    if(-not (Test-Path $location))
    { mkdir $location -Force:$true -Confirm:$false | Out-Null }

    return $location
}
Next, let’s define a root folder and location for the data stamped output summary:
#root folder for the whole process
$rootFolder = "DataSync"

#location for the output files
$outputsLocation   = CheckAndCreateFolder $rootFolder -Outputs
Variable and switches
In this section, the application location is defined, along with the data stamp variable, and the variable for application’s parameters that contain a saved project file, the /sync switch (for direct synchronization on destination database), the /rece switch to return 102 – No differences detected (when data sources are equal), and a date stamped output summary:
#provide tool’s location, define date stamp variable, and tool’s parameters
$toolLocation   = "ApexSQLDataDiff"
$dateStamp = (Get-Date -Format "MMddyyyy_HHMMss")
$toolParameters = "/pr:""MyProject.axdd""
 /out:""$outputsLocation\DataOutput_$dateStamp.txt"" /sync /v /f /rece"
Execution
The next part of the PowerShell script will call ApexSQL Data Diff from its location, along with its parameters, and the variable for the return code is defined:
#initiate the comparison of data sources
(Invoke-Expression ("& `"" + $toolLocation +"`" " +$toolParameters))
$returnCode = $LASTEXITCODE
The last part is to define the three potential outcomes:
- There are differences, e.g. return code 0 – Success
- There are no differences, e.g. return code 102 – No differences detected
- An error occurred and the output summary will be opened. Check the list of potential return error codes here
#write output to file
"$outputsLocation\DataOutput_$dateStamp.txt"


#differences detected
if($returnCode -eq 0)
{
"`r`n $LASTEXITCODE - Changes were successfully synchronized" >>

}
else
{
    #no changes were detected
    if($returnCode -ne 102)
    {
"`r`n $LASTEXITCODE - No changes were detected. Job aborted" >>
    }
    #an error occurred
    else
    {
    "`r`n $LASTEXITCODE - An error occurred" >>

    #opens output file at the end of application execution on error
    Invoke-Item "$outputsLocation\DataOutput_$stamp.txt"
    }

}
Scheduling
Now that the job has been automated, it can be scheduled in one of the four different ways. Learn more from the article about ways of scheduling ApexSQL tools.
Reviewing results
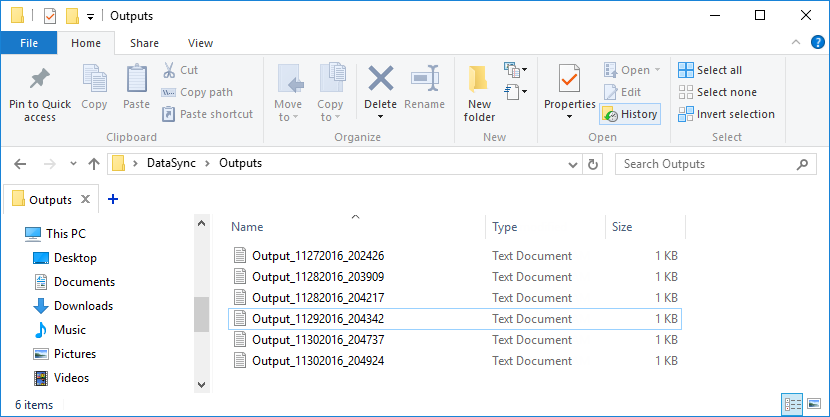
Once everything is up and running, an output summary can be reviewed anytime. In this example, output files are defined by the $outputsLocation variable defined here and output files will be saved to $rootFolder\$outputsLocation, e.g. in this case DataSync\Outputs:
If an error occurred, for example, if the /f switch was omitted, along with the synchronization script path and name, the following will be shown in the output summary:
Connecting:
        Loading project
        Connecting to [(local)].[Workspace]
        Connection successful
        Connecting to [(local)].[Central]
        Connection successful
The file sync.sql already exists. Use the '/f' switch to overwrite it

ApexSQL Data Diff return code: 16
A quick check to article on this link provides the information about the return error code 16 which represents the IO error, and it means the application tried to write to a file (synchronization script in this case), but it already exists and in order to overwrite it, the /f switch needs to be used.
Download the complete PowerShell script here.
December 9, 2016


