


A new SQL database is created, everything is set, but it needs some data source so it can be tested. The question would be, what data source to use in order to populate the SQL Server database with a random test data?
A commonly available data source is the CSV (comma-separated values) formatted file that is widely supported. Among its most common uses is moving tabular data between programs that natively operate on incompatible (often proprietary and/or undocumented) formats. This works because so many programs support some variation of CSV at least as an alternative import/export format.
A CSV file containing the sample data is chosen, and now it needs to be mapped and its data inserted. What are our options?
Importing CSV formatted file using SQL Server Management Studio
One option is to use SQL Server Management Studio, and import a CSV formatted file directly into your database using the Import data option. This can be done in the following way:
-
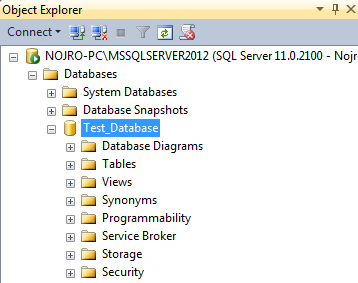
Log into your database using SQL Server Management Studio
-
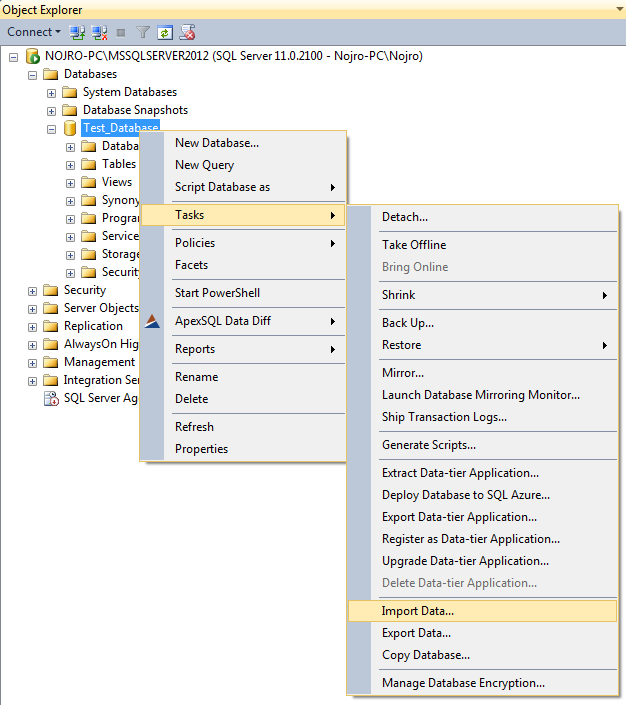
Right click on your database and select Tasks ➜ Import Data, and click the Next button
-
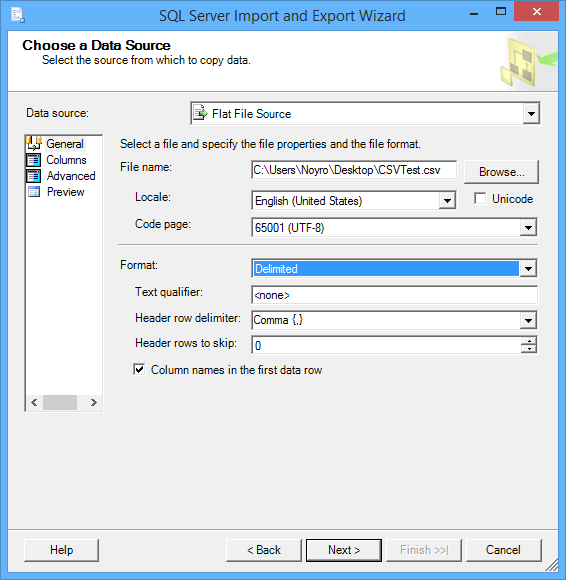
For the Data Source, select Flat File Source. Then use the Browse button to select the CSV file. How the data is to be imported can be configured before the Next button is clicked
-
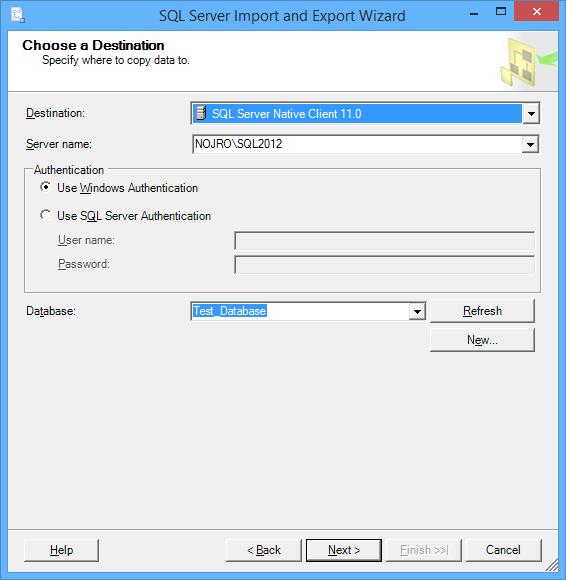
For the Destination, select the correct database provider (e.g. for SQL Server 2012, you can use SQL Server Native Client 11.0). Enter the Server name; check Use SQL Server Authentication, enter the User name, Password, and Database before the Next button is clicked.
-
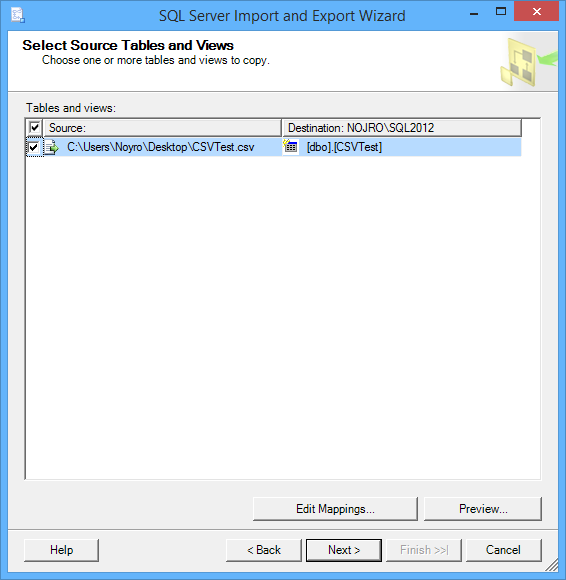
On the Select Source Tables and Views window, Edit Mappings can be set before continuing
-
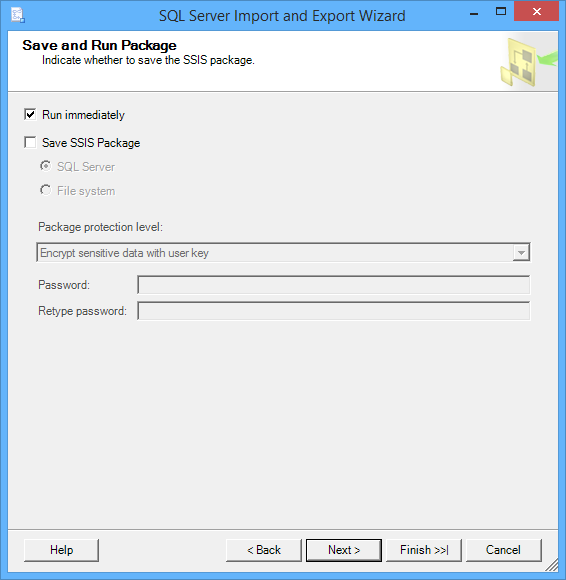
Check Run immediately and click on the Next button
-
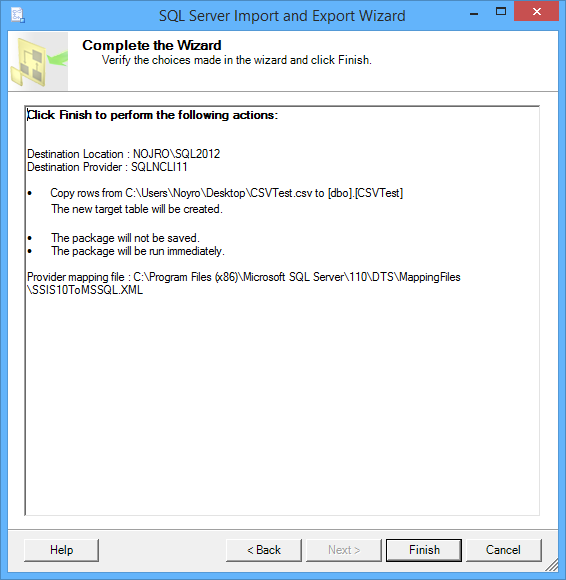
Click on the Finish button to run the package
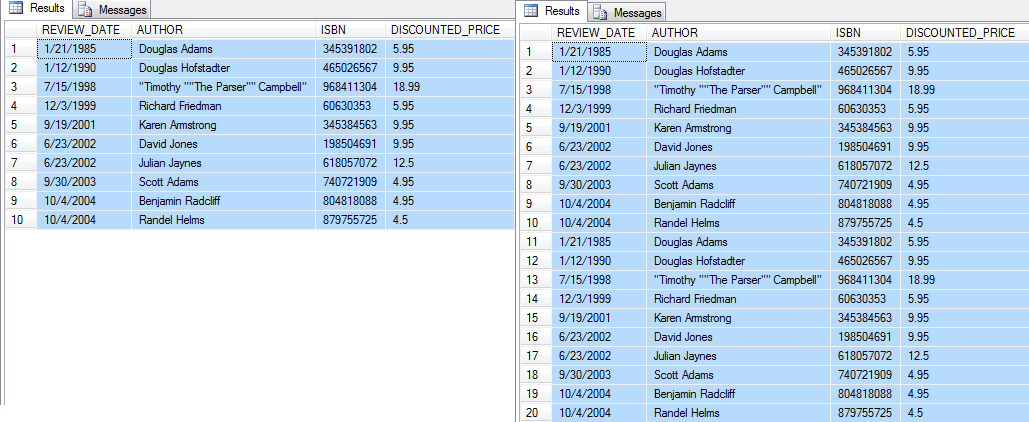
This is easier than creating a SQL inserts manually, but it has its limitations too. If there is a need for thousands of rows to be populated, and the CSV file contains few hundred rows of data it is just not enough. This could be overcome by reimporting the same CSV file over and over until needed. The drawback to this method is that it will insert large blocks of rows with the same data, without randomizing them. Re-importing can also be tedious, and could only be mitigated by creating a job to automate it.
Custom SQL import scripts, programs
Another option would be to create SQL insert statement. The example CSV data is below:
REVIEW_DATE,AUTHOR,ISBN,DISCOUNTED_PRICE
1/21/1985,Douglas Adams,345391802,5.95
1/12/1990,Douglas Hofstadter,465026567,9.95
12/3/1999,Richard Friedman,60630353,5.95
9/19/2001,Karen Armstrong,345384563,9.95
6/23/2002,David Jones,198504691,9.95
The SQL to insert this data into the table would look like this:
INSERT INTO Sales (REVIEW_DATE,AUTHOR,ISBN,DISCOUNTED_PRICE)
VALUES ('1/21/1985','Douglas Adams','345391802','5.95');
INSERT INTO Sales (REVIEW_DATE,AUTHOR,ISBN,DISCOUNTED_PRICE)
VALUES ('1/12/1990','Douglas Hofstadter','465026567','9.95');
INSERT INTO Sales (REVIEW_DATE,AUTHOR,ISBN,DISCOUNTED_PRICE)
VALUES ('12/3/1999','Richard Friedman','60630353','5.95');
INSERT INTO Sales (REVIEW_DATE,AUTHOR,ISBN,DISCOUNTED_PRICE)
VALUES ('9/19/2001','Karen Armstrong','345384563','9.95');
INSERT INTO Sales (REVIEW_DATE,AUTHOR,ISBN,DISCOUNTED_PRICE)
VALUES ('6/23/2002','David Jones','198504691','9.95');
One of the easiest ways to do this is to import the CSV into Excel and with some formulas that concatenated the data elements with SQL fragments, full insert statements could be created for each row. Simply copy the formula to process all of the rows. Then copy the resulting insert statements directly into SSMS to execute. This is a simple and effective method for small numbers of rows but a worksheet must be created for each table, and re-importing data would need to be done manually. This does require a fairly good knowledge of Excel formulas.
Another simple, but more extensible method is to use a script language like PERL or VBScript to programmatically open the CSV file, then loop through the data in memory and construct individual SQL strings to output to file. With some enhancements, such scripts could be made generic enough to open any table and even include some customization and options.
This does require some decent programming knowledge to begin with. To create a robust script that is useful in most/all situations and wouldn’t have to be frequently tweaked would take some additional programming effort, which could easy turn into hours of effort. A better alternative, to provide a full featured, out of the box, approach to this problem, would be to import the data into a database table and use a commercial tool for SQL data scripting like ApexSQL Script to create the inserts. Once the CSV data was all imported, a project could be created in ApexSQL Script to script all of the data out, repeatedly, with a single mousse click.
Even so, rote scripting of database data, isn’t an ideal approach to generating test data, where the goal is randomizing and expanding the data set, not just cloning it
Modern databases operate with the large quantities of data, and that makes these options inefficient in populating such databases with data if the purpose is to simulate a real world environment for testing.
Another solution to populate the database with large quantities of randomized data using the CSV file is a 3rd party tool, specifically designed to create test data in SQL Server, ApexSQL Generate.
Importing a CSV file using ApexSQL Generate
ApexSQL Generate is the SQL data generator tool, which has the ability to quickly generate millions of rows, using various data sources, with a variety of data generators.
One of its features is to generate large amounts of randomized data from the imported CSV formatted file. The starting point is to import a CSV file with a test data and populate columns with it. This can be done in the following way:
-
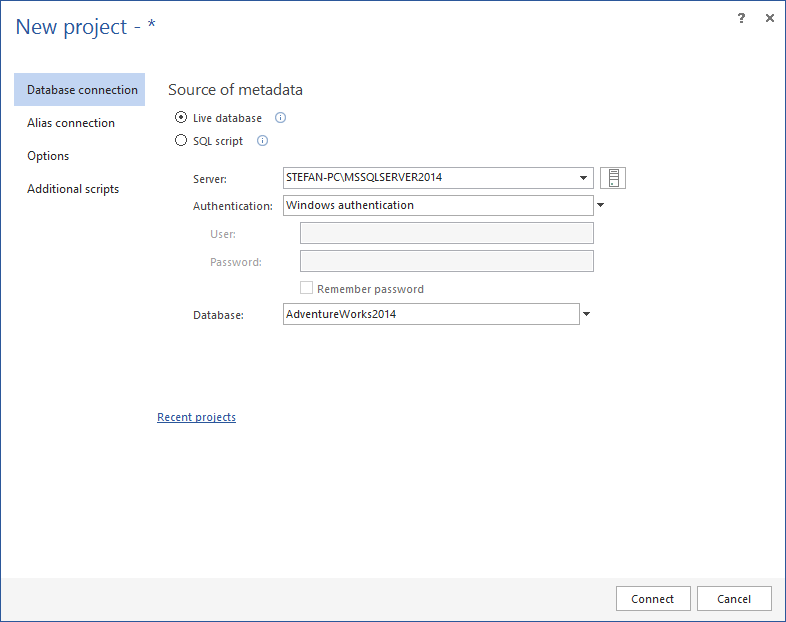
Connect to a database using the Database connection or the Alias connection
-
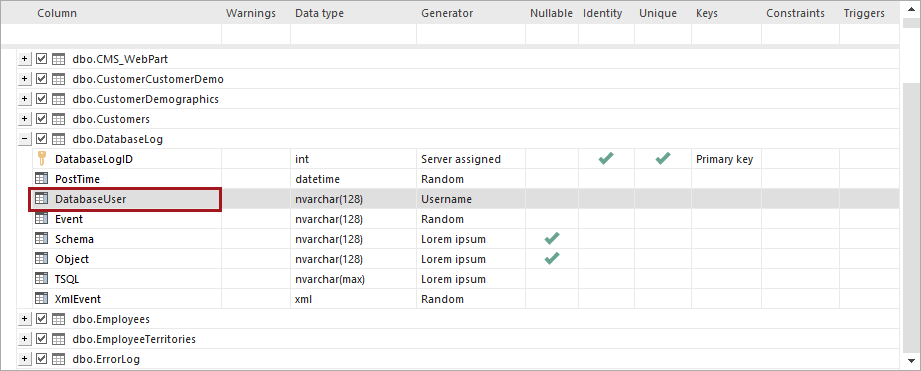
In the main grid select the table for which the test data is to be generated, and in the Generation options set the number of rows to be generated
-
Then select the column which is to be populated with the data
-
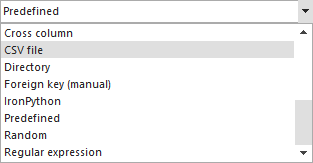
From the Generator list select the From CSV file generator
-
Browse and select the CSV file to be imported using the folder icon, set the delimiter used in the CSV file by entering it in the Delimiter box, and select which column with data from the CSV file will be used by entering the index of the column in the Column index box, or by using selection arrow buttons. If first row of data in a CSV document represents column’s header, it can be excluded by checking Skip first row option
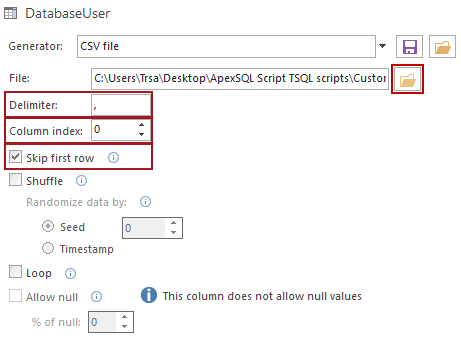
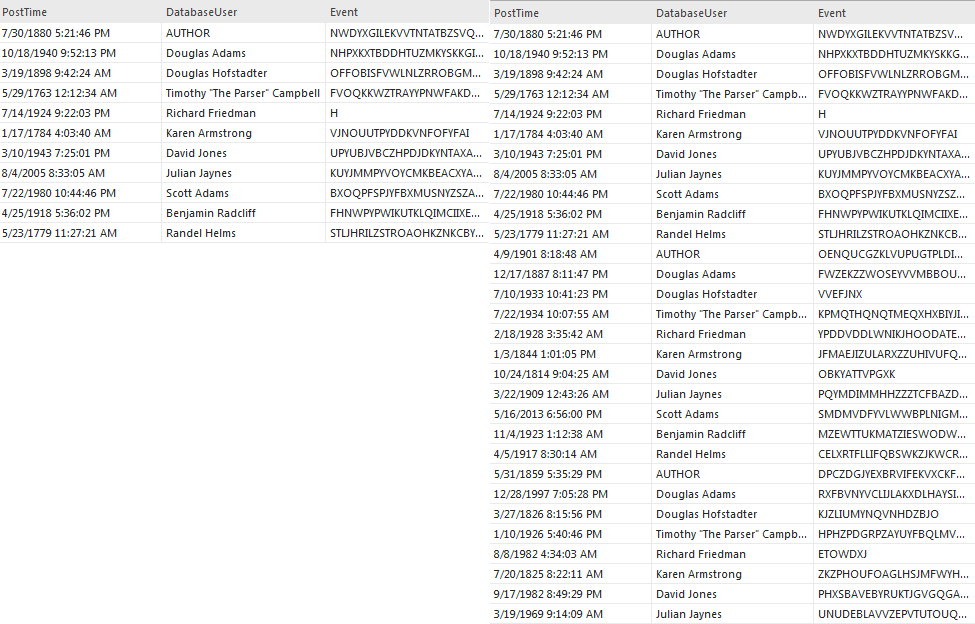
This process can be repeated for each column, if needed, using the same CSV file as the data source, or a new CSV file can be imported for each column. But this just imports a limited number of rows available in the CSV file, and usually the goal is to populate thousands of rows, using hundreds of rows, with randomized data. So, another feature is needed to accomplish this.
To achieve this goal the Loop option is used. This option automatically copies the imported data in succession until all the rows set to be generated are populated with data. With the Loop option checked, large blocks of the same data are created to populate rows set for the test data generation. This allows smaller subsets of data to be expanded but the problem of static, predictable blocks of data remains. Ideally, test data will be randomized.
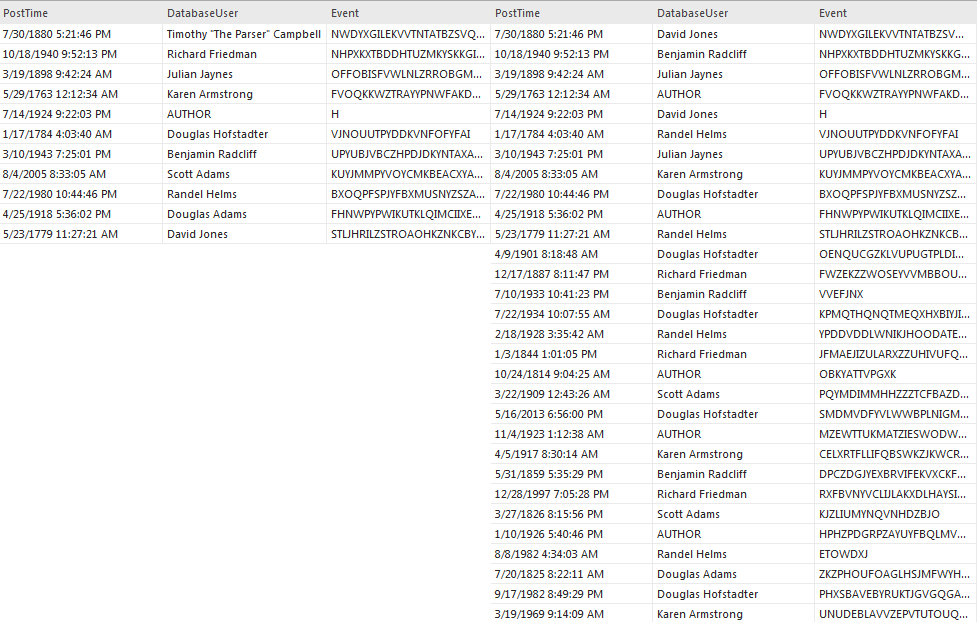
Randomization is achieved by utilizing the Shuffle option. Existing rows with generated test data are randomly reordered after checking this option. The randomization effect will be more pronounced as the number of rows increases.
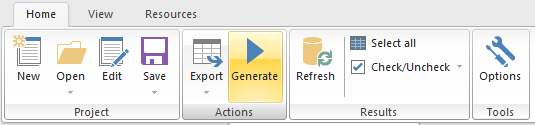
After setting all the options, the data generation process can be executed by the Generate button in the main window.
Saving and repeating the project
If there is a need for repeating the generation process, or the data needs to be refreshed, selection and settings can be saved to a project file to be used later.
After selecting the tables for which the test data is to be generated, setting the number of rows to be generated, and map the columns with data from the CSV file, those choices can be saved with the Save as button from the main window.
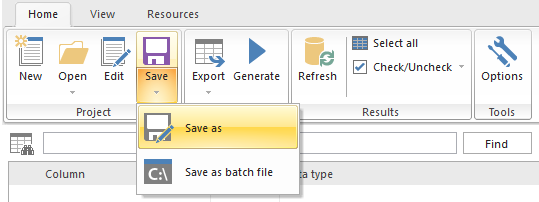
Restoring the saved project can be done either by selecting the project from the recent project list in the New project window, or by the Open button in the main window.
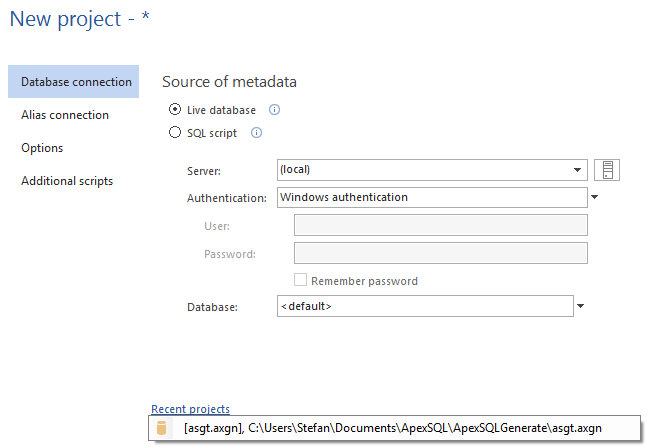
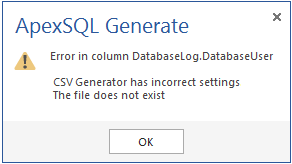
After the project file is selected, the application will reconnect to the database restoring all settings involving the test data generation process, which have been set for tables, and data generators for columns. Links leading to the external data sources used in test data generation will also be restored, pointing to their locations at the moment of saving the project file. If the location of the CSV file is changed after restoring the project file, the application won’t allow the data generation showing the following warning.
If a different set of data is exported to the CSV file, using the same file name, the application will automatically import that data, according to the settings in the saved project. This is based on validity of the link to the CSV file used.
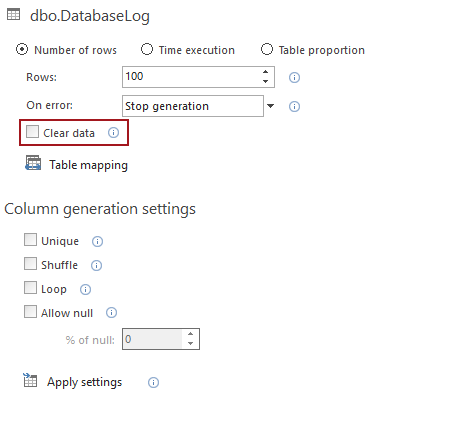
But to ensure that the new data will be generated without traces of the old generated test data, the Clear data option in Generation options must be used. This option deletes all the data prior to the new data being generated. It can be set to delete the data for whole database, or for the specific tables chosen, the selection is made in appropriate Generation options.
Useful resources:
Generate test data using SQL
Populating a SQL server test database with random data
Generating SQL server test data with Visual Studio
March 20, 2015


