


Having a good recovery plan that ensures database backups are being taken on a regular basis and safely stored on specific or multiple storage drives greatly increases database safety and recovery options when a disaster or accident occurs. Nevertheless, creating regular full database backups doesn’t provide full point-in-time recovery, since restoring the latest full backup will restore a database to a proper state at the time a backup was created, but all changes, both schema and data, which have occurred after the last full backup will be practically lost.
Regardless of our prevention and safety measures, some DBAs still find themselves in the situation where prevention measures do not stop the disaster, nor it is possible to directly recover the database with usual tools. Such is the case of the disaster which completely destroys our database, and the only salvageable parts are the old database backup and the .ldf file of the database. Luckily, there is a solution for this case, a database backup combined with a .ldf file are all that is needed to completely recover the database without losing any schema or data of the original database.
In order to recover a SQL Server database completely, and to ensure that changes that have occurred can be re-executed after the full backup which will be restored, requires using the .ldf file from the database, reading the information from it, and finally replaying the changes against the database. This can be achieved with ApexSQL Log – a transaction log reader which allows in-depth insight into transaction log files and backups, and provides some powerful recovery capabilities to undo any unwanted changes, or to replay specific changes read from the transaction log files.
Another tool which shares these recovery capabilities/mechanisms with ApexSQL Log is ApexSQL Recover, a SQL Server recovery tool which uses information from ldf and mdf files to recover lost data or rollback or roll forward database changes.
Let’s assume the following scenario:
Regular full database backups are being taken on Sunday mornings, and automatically copied to some storage for safe-keeping. Mid-week (e.g. Thursday), a disaster occurs, and MDF file of our database is rendered practically useless and database shows great signs of corruption. Even though it seems that the only remaining solution is to restore the database to last full backup, and lose all of the data from afterwards, this is not the case. In order to recover a database from a disaster of these proportions, the database needs to be restored last (Sunday) full backup first, and then changes which have occurred from that point in time, all the way to the moment of disaster/corruption need to be replayed against the restored database with ApexSQL Log.
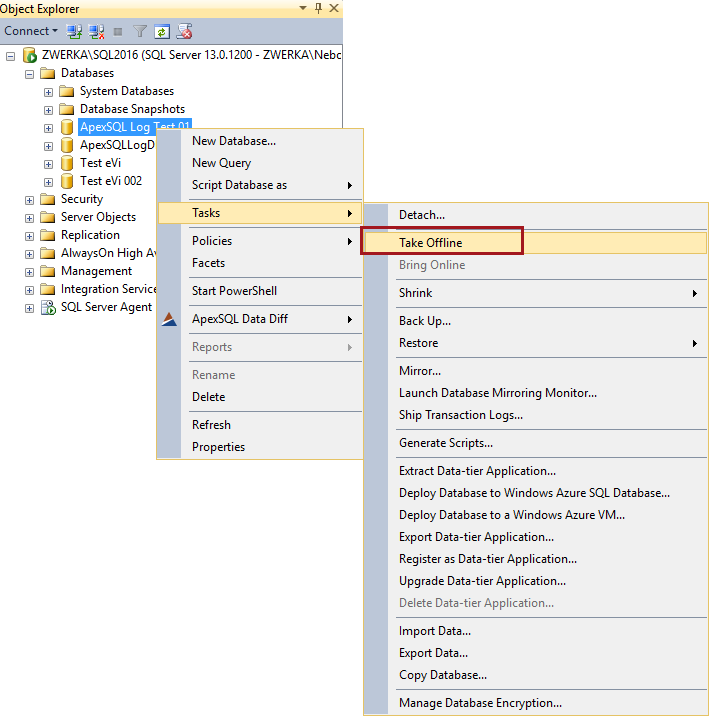
The first step of the process is to take the database offline so current .ldf file which contains latest database changes can be copied so the information inside is not lost when the last database backup is restored. Since the .ldf file is locked by SQL Server while the database is online, and it cannot be copied without taking the database offline first, it needs to be done first. To do this, following steps must be performed:
- Connect to the SQL Server via SQL Server Management Studio
- Navigate to the database in question in the Object Explorer pane on the left side
-
Bring up the context menu with right mouse click on the database and navigate to Tasks and choose the option Take offline
With this, a copy of a database ldf file can be created (windows explorer or similar), and database can be taken back online by following the same procedure shown above, and choosing the Bring online option from the same context menu.
Now that the .ldf file is secured, recovery process can be initiated by focusing on the second step – database restore.
The simplest way to perform this is to again use SQL Server Management Studio.
-
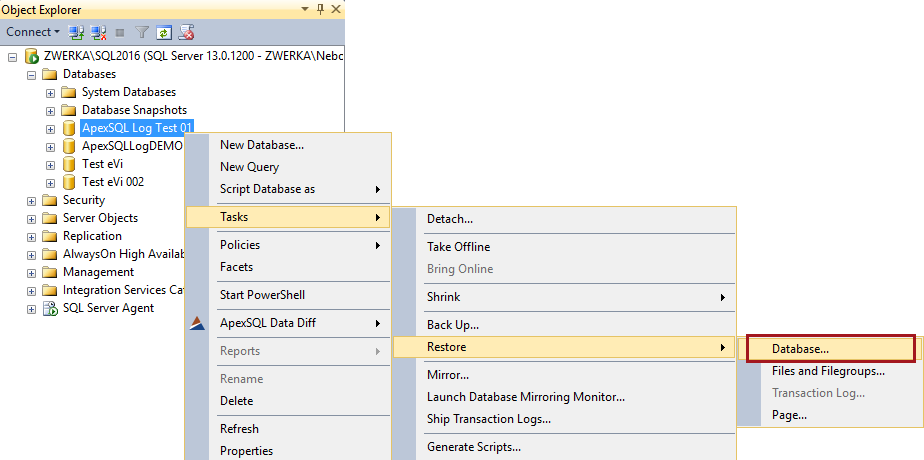
As before, bring up the context for your database, and navigate to Tasks > Restore and choose the Database… option
-
In the Restore database dialog, choose an appropriate backup to be restored (in our case this is the last backup taken) and click on the OK button to perform the restore
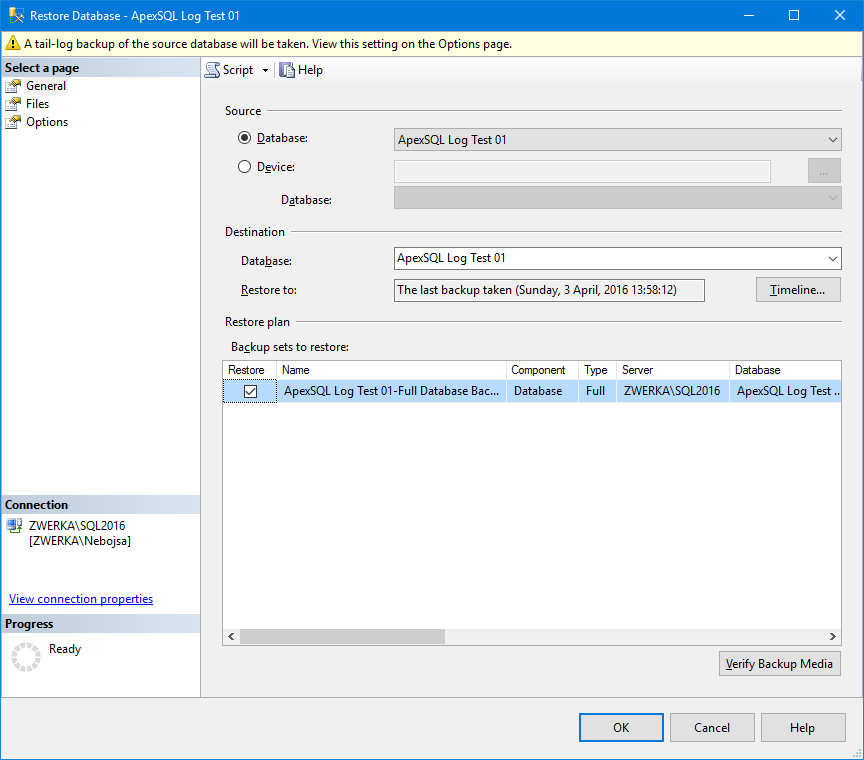
Note: various restore-related options can be specified in the Restore database dialog, spread throughout General, Files and Options tabs of the mentioned dialog which enable users to fine-tune the restore process to suit their needs and situation
-
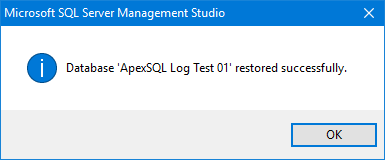
After performing the database restore, SQL Server Management Studio will display an information message on the process success
Now that the database has been restored to the last backup, the only remaining thing is to feed it the changes which have occurred after the backup was taken to completely recover the database to its initial pre-disaster state. As mentioned above, ApexSQL Log is the tool for the job to read the salvaged .ldf file and replay the changes into restored database.
-
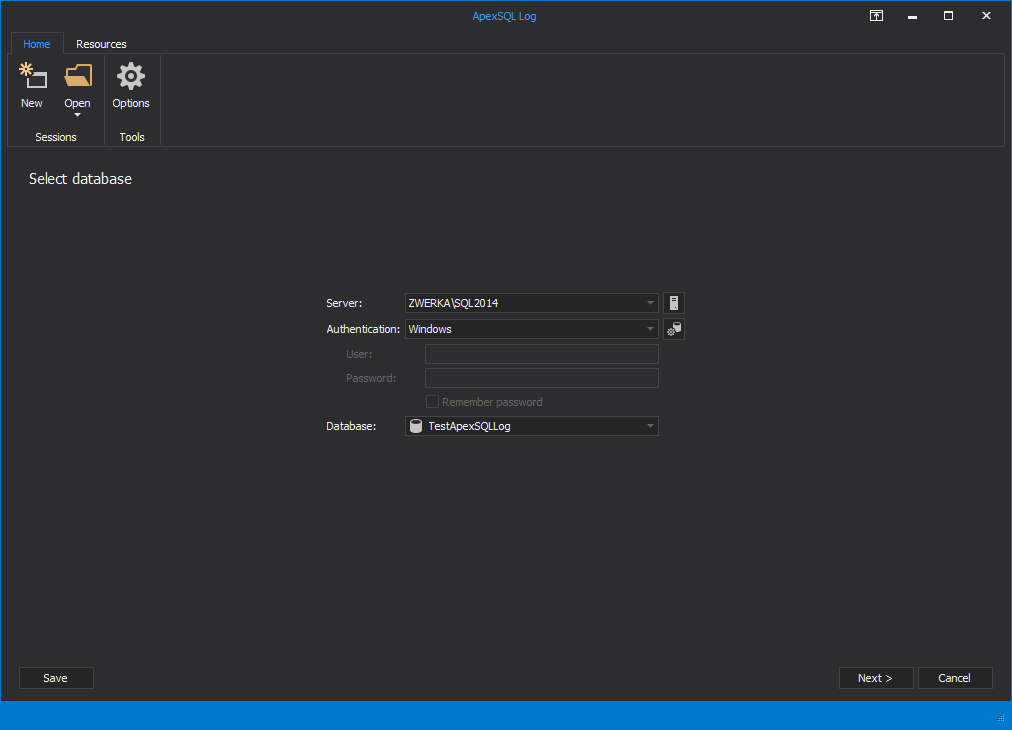
Start ApexSQL Log or ApexSQL Recover and provide connection credentials to your SQL Server and select the appropriate database, and click Next to advance through the wizard shared by the both tools
-
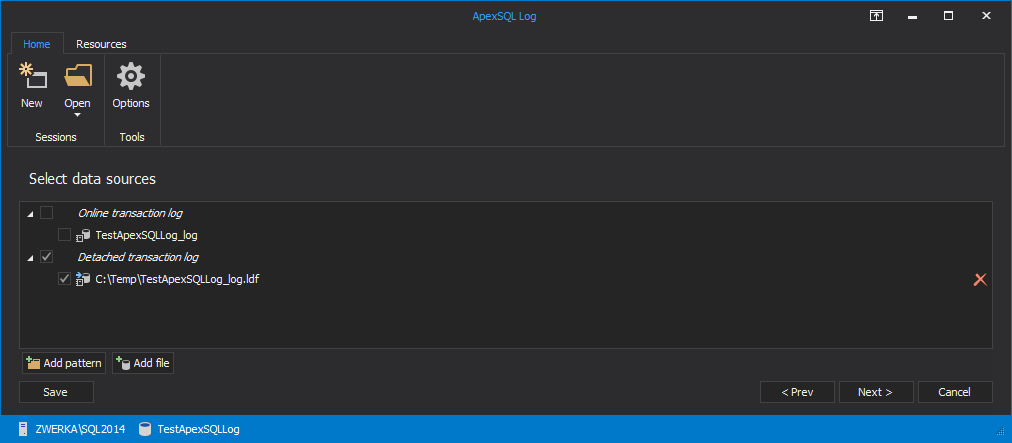
In the Select data sources step of the wizard, uncheck online transaction log file and add the ldf file copy which was previously created. To do this, click on the Add file button, and navigate to the ldf file. Ensure that the added ldf file is checked, and click on the Next button to proceed
-
In the Select output step of the wizard, select the Undo/Redo option
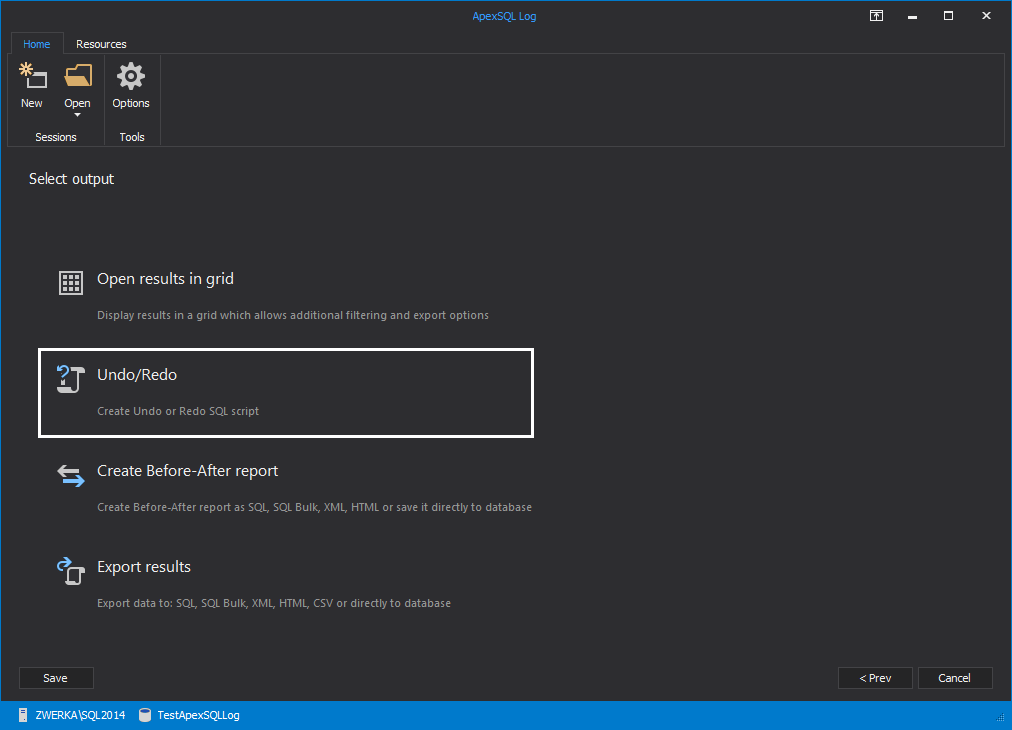
Note: selected Undo/Redo option allows direct creation of a redo script to replay the changes as per assigned filters. If the user desires to inspect the changes and perform an in-depth analysis of database changes in the ldf file prior to creating and executing redo script, the Open results in grid option may be a valid choice here, since it allows grid-view of the results, and creation of redo script after fine-tuning the auditing results
-
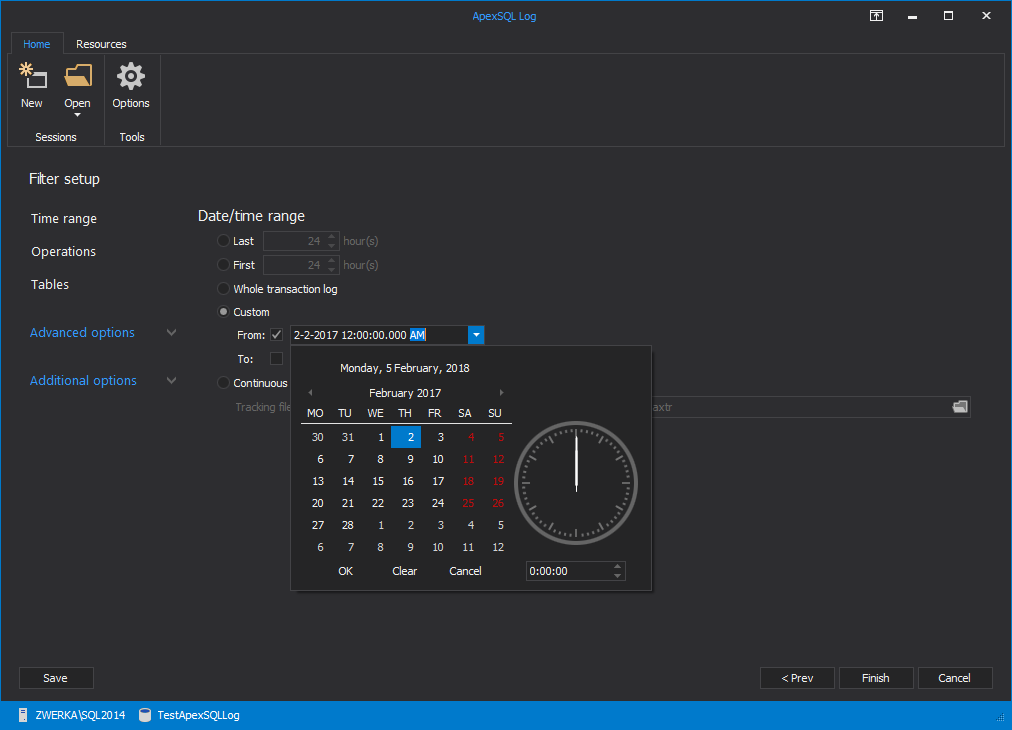
Once an output has been selected, the Filter setup step of the wizard offers various filters and fine-tuning of the auditing. For the example above, choosing to audit a portion of the .ldf file from the last full backup, until the disastrous Thursday is a way to go. To do this, check the Custom date/time range and input appropriate time/date values.
-
In addition to date/time filters, we should ensure that DDL changes are also included in the auditing process, since these are excluded by default in favor of performance gain. Simply click on the Operations tab in the Filter setup pane, and check DDL operations to include
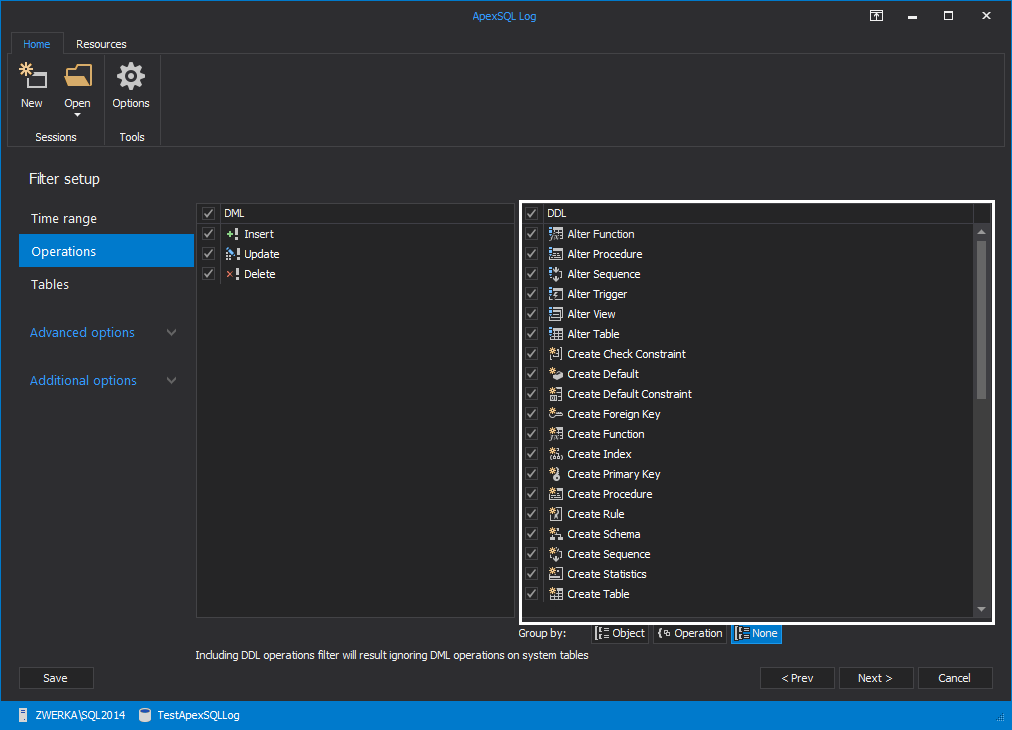
- Additional filters and advanced options can be used in the Filter setup pane to fine-tune the results, but for this case, it is recommended to skip this and proceed by clicking on the Next button.
-
In the final step of the wizard, choose the Redo (Reconstruct) script output option, and specify the name and location for the created .sql file.

-
Click on the Finish button and ApexSQL Log (AlexSQL Recover) will generate a redo script
-
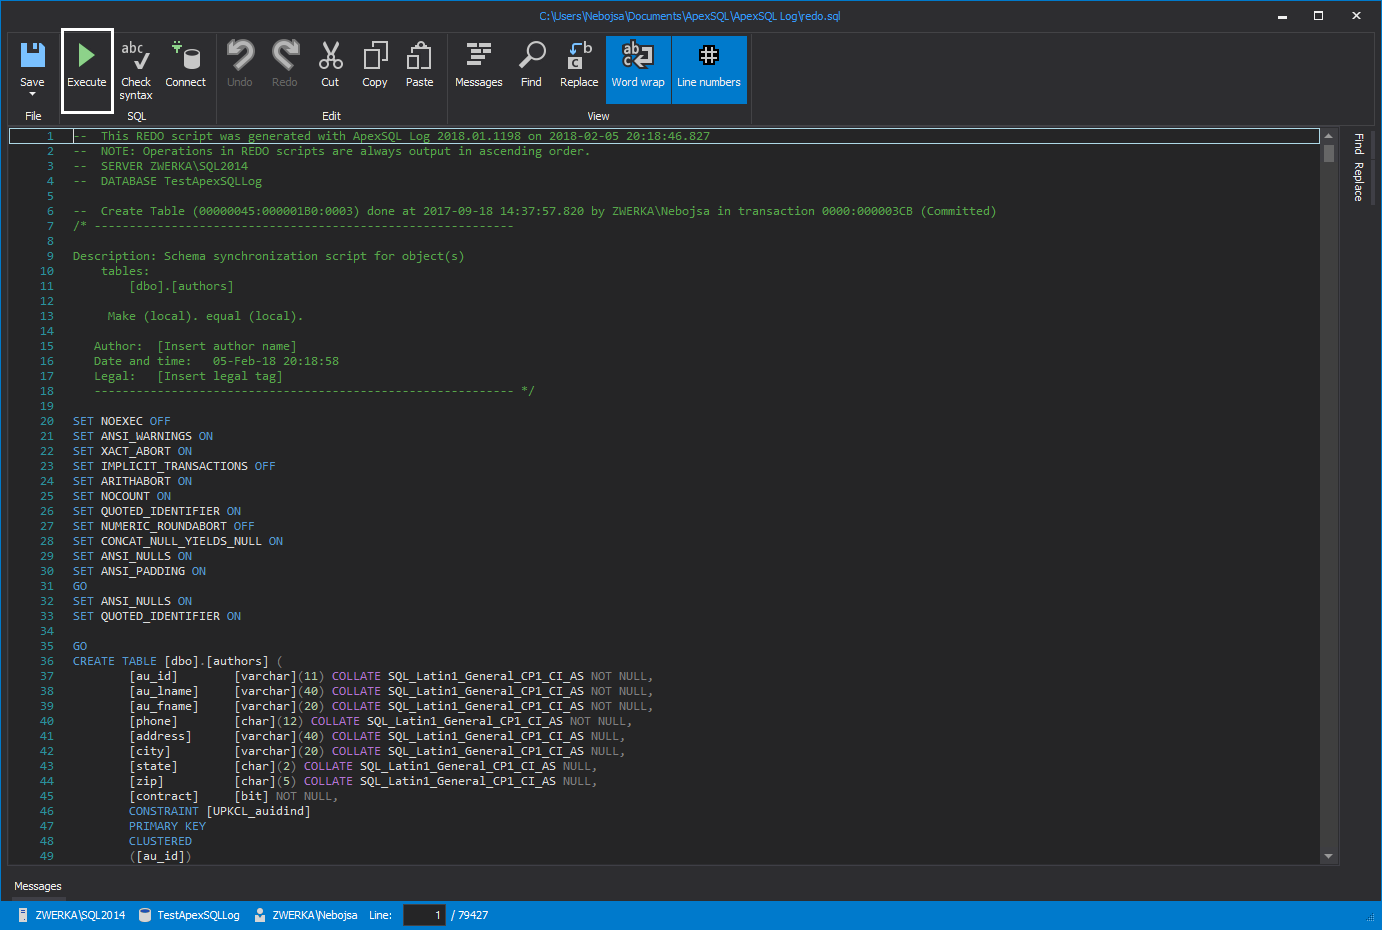
Once the processing is completed and the redo script created, information on the auditing can be found in the right side of the window under the Auditing statistics, and the redo script can be opened in the internal editor

-
From the internal editor, created redo script can be inspected, altered if required and executed directly against the database. Once the execution completes, all changes following the last backup, all the way to the moment of disaster are back inside the database, as if the disaster never happened, and the database can be utilized as nothing ever happened, without further ado
April 5, 2016


