


If there is a need to quickly revert an inadvertent change such as an Update without a Where clause, to recover missing or corrupt data, to move data across development, test, integration and production environments or even just to avoid generating a report using a busy production SQL Server database as a data source, it brings the question if there is a way just to restore specific rows instead of restoring the whole database backup.
Luckily, there is a way to do just that.
To restore only specific data from a backup do the following in SQL Server Management Studio:
- Restore a backup to a database with named differently than the database the backup was taken from in order to avoid any conflicts
- Start the SQL Server import and export wizard
- In the Choose a data source step of the wizard specify:
- The SQL instance where the newly restored database resides
- The authentication method for that SQL instance (and a valid set of credentials if SQL Server authentication is chosen)
- The name of the newly restored database
- Click the Next button
- In the Choose a destination step of the wizard specify:
- The SQL instance where the database where to restore the data to resides
- The authentication method for that SQL instance (and a valid set of credentials if SQL Server authentication is chosen)
- The name of the database where to restore the data to
- Click the Next button
- In the Specify table copy or query step of the wizard select the Write a query to specify the data to transfer option
- Click the Next button
- Provide the query which will return the rows in question and click the Next button
- In the Select source tables and views step of the wizard, select the table the data will be recovered to
- Click the Edit mappings button
- In the Column mappings window that will appear:
- Map the columns returned by the query to the destination table’s columns
- Select the Append rows to the destination table option
- Select the Enable identity insert option as needed
- Click the OK button
- Click the Finish button
- In the Complete the wizard step of the wizard, review the actions which will be taken and click the Finish button
- If there is a need to restore data to more than one table repeat the entire process, once for each table
Although the steps listed above are better than having to overwrite an existing database and introduce downtime; and that’s without taking into account the worst-case scenario (also known as the usual scenario) – the database has changed since the last backup was taken or in other words, restoring a backup to get the lost data means the valid changes will be lost as well – this is by no means an ideal solution – and in many cases is no solution at all.
For instance, what if there is a need to restore updated rows whose primary key value hasn’t been touched? SQL Server will treat the original rows as duplicates and the insertion with fail.
And that’s just the tip of the iceberg. Namely, the entire process is usually slower that simply restoring With replace, since the restore of the backup file needs to be done (albeit to a different database) and then to move the actual data which can take up to 2 times more than the restore itself.
This is where ApexSQL Data Diff comes into play.
ApexSQL Data Diff is a SQL Server data comparison and synchronization tool which detects data differences and resolves them without errors. It can compare and sync live databases and native or natively compressed database backups, script folders, snapshots, source control projects and generate comprehensive reports on the detected differences.
To recover specific rows from backups with ApexSQL Data Diff, they don’t need to be restored; simply perform the following steps:
-
Start ApexSQL Data Diff
-
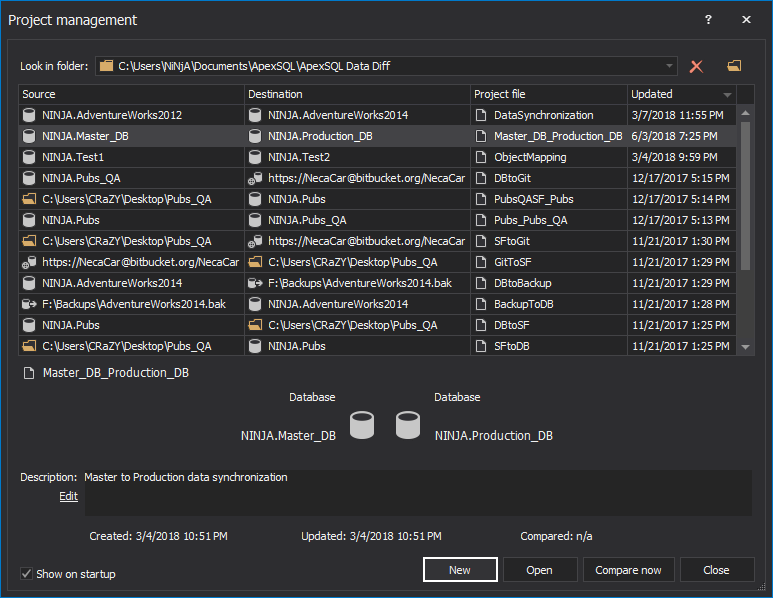
Click the New button in the Project management window:
-
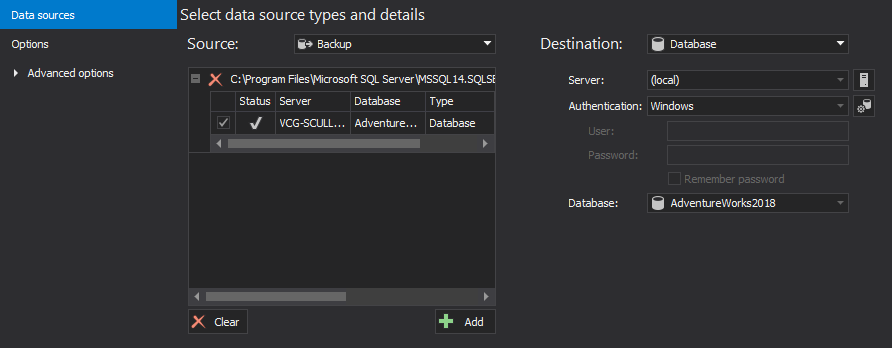
In the Source panel:
- Select Backup from the Source drop-down list
- Click the Add button and navigate to the folder where the backup file resides
-
Select the backup and click the Open button
-
In the Destination panel:
- Select Database from the Destination drop-down list
- Specify the SQL Server instance where the database resides to recover the data, from the Server drop-down list
- Specify the authentication method for that SQL instance (and a valid set of credentials if SQL Server authentication is chosen)
- Specify the name of the database where to recover the data from the Database drop-down list:
-
Click the Compare button from the bottom-right corner of the New project window
-
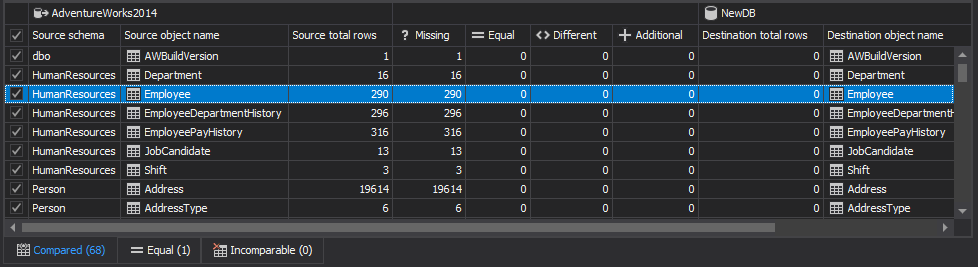
In the Results grid, select the database tables where the data is to be recovered to:
-
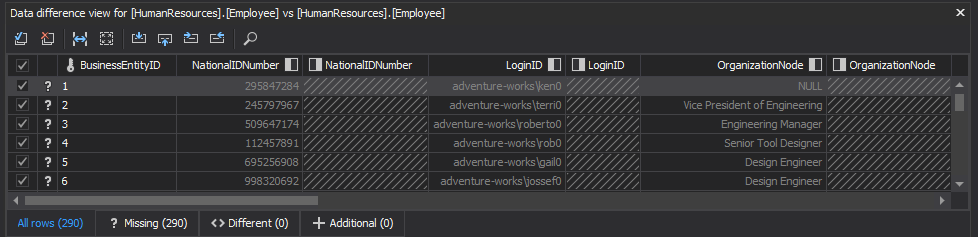
In the Data difference view panel, select the rows to be recovered:
-
Click the Synchronize button in the Actions region of the ribbon’s Home tab:

-
Click the Next button in the Synchronization direction step of the Synchronization wizard
-
In the Output options step of the Synchronization wizard, select the Synchronize now action:
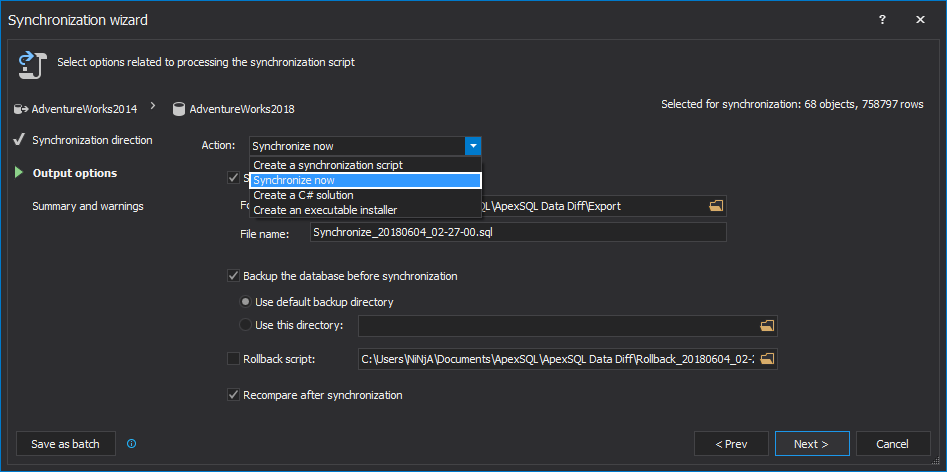
-
Click the Next button
-
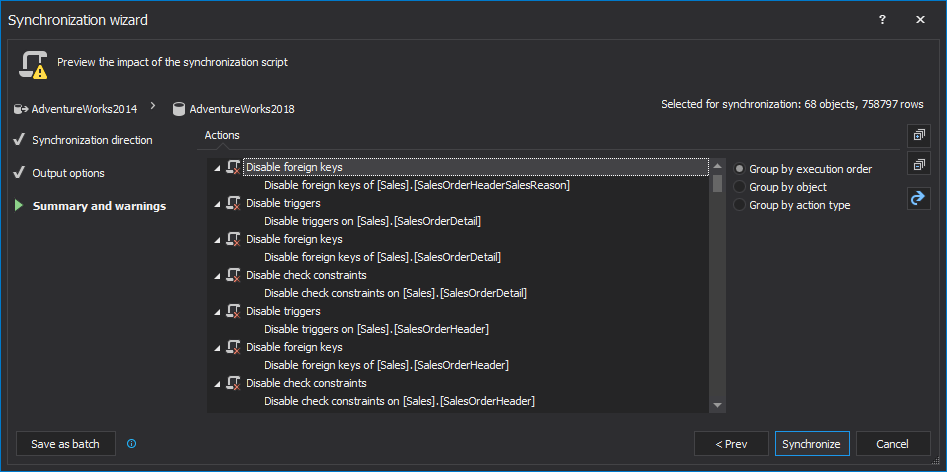
Review the synchronization summary and warnings if any and click the Synchronize button:
-
Once the synchronization process is finished, the Results window will be shown:
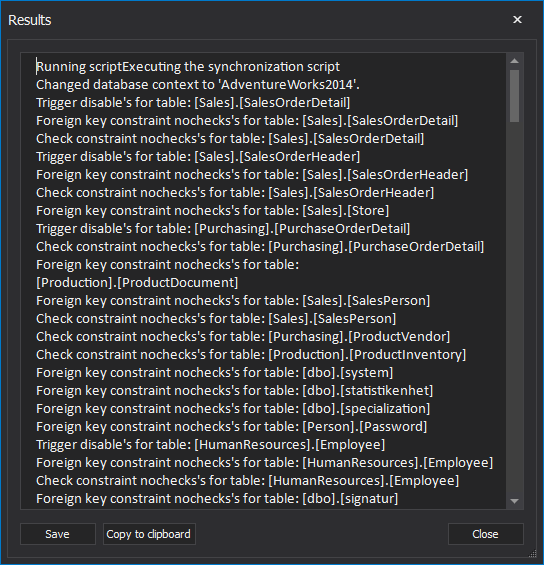
And that’s literally all that’s to it.
If there is a need to restore only specific data and not waste time on long restores, as well as be able to restore regardless of the scenario, ApexSQL Data Diff is the right tool for the job.
April 4, 2013


