


Prelude
As described in the article Understanding SQL Server database static data and how it fits into Database lifecycle management, the reasons for version controlling static data were reviewed.
Static data can be linked and committed to source control using various tools and approaches. The goal for this article is to cover deploying database static data from SQL source control to database using ApexSQL Build.
Challenge
In this article, deploying of database static data from SQL source control and how to use it to update a database will be descried.
Solution
For the purpose of deploying database static data from SQL source control and updating a database, a 3rd party tool ApexSQL Build will be used. This is a tool for building a new SQL database using various inputs as a source, such as SQL script file or a folder with multiple SQL scripts. In addition to this, ApexSQL Build can connect to a source control repository and pull SQL database schema as well as any static data that is previously linked. Besides building a new database, ApexSQL Build can update an existing SQL database, consolidate scripts, and create C# solution or executable installer.
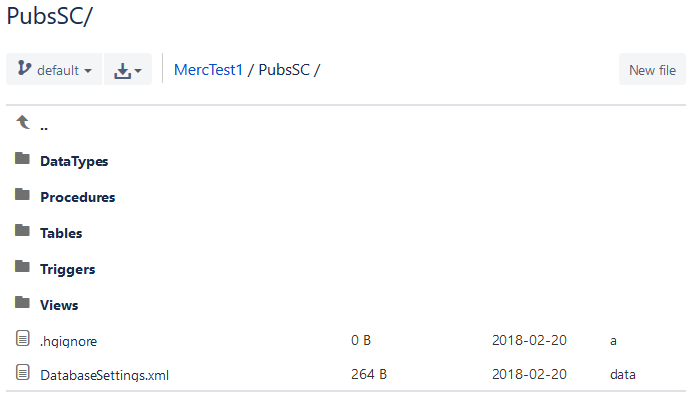
For the purpose of this article, a Mercurial repository hosted on Bitbucket will be used, assuming that a SQL database schema is already pushed to source control, as well as data from tables that are classified as static data. An overview of the repository is as follows:
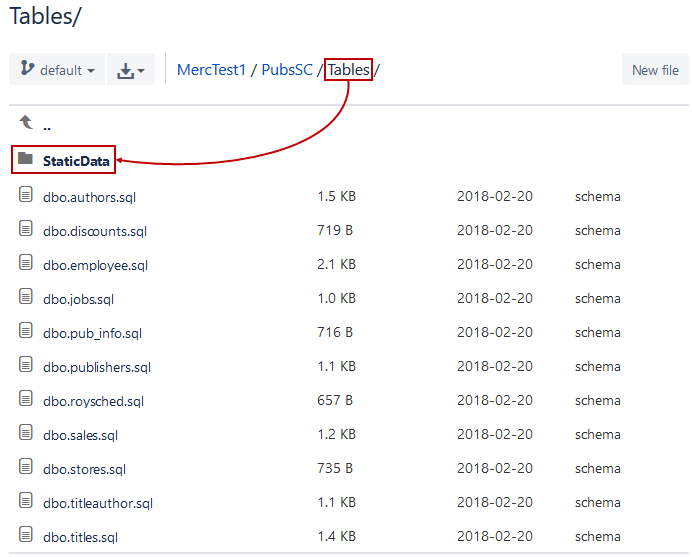
By checking the Tables folder, confirm that the Static data folder exists:
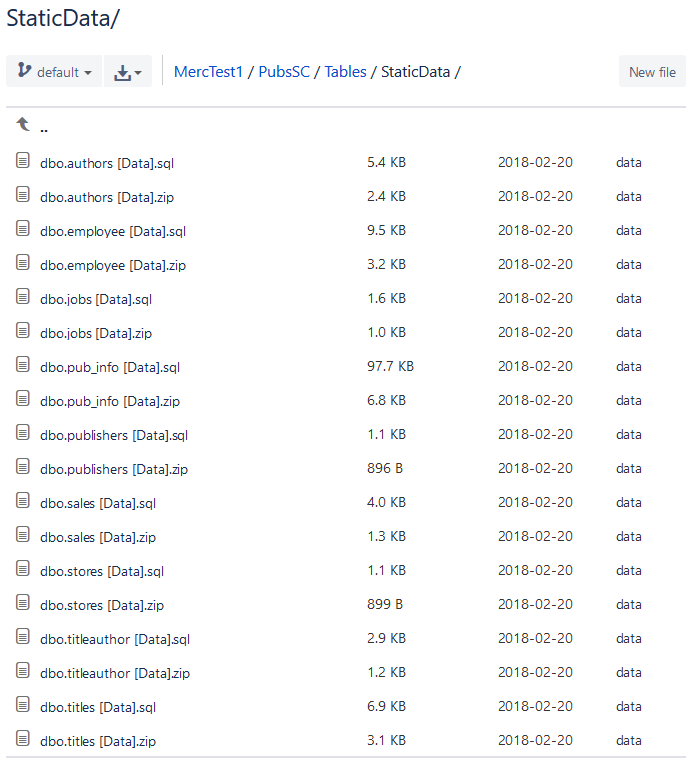
By checking the content of the Static data folder, confirm that the static data is properly committed to the repository, and that it can be pulled and applied against a database:
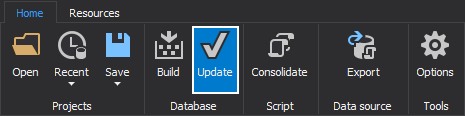
In order to deploy database static data from SQL source control using ApexSQL Build, follow these steps:
-
Click the Update button, from the Home tab to start the wizard:
-
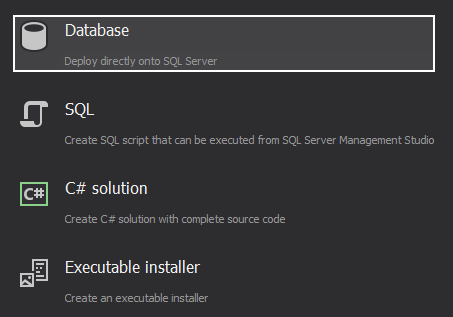
Select Database as an output type:
-
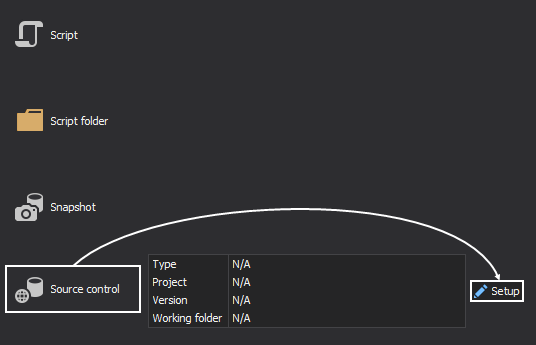
In the Input source step, select the Source control option, and click the Setup button to configure it:
-
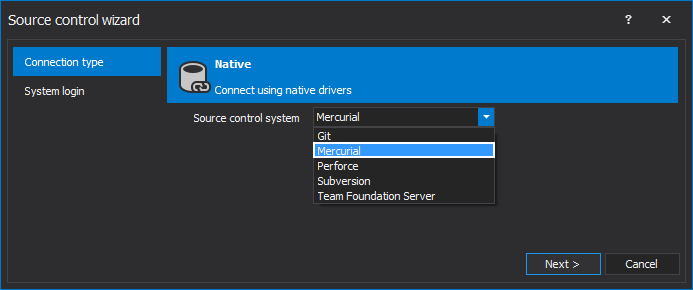
In the Source control wizard, choose Mercurial from the list, and click the Next button:
-
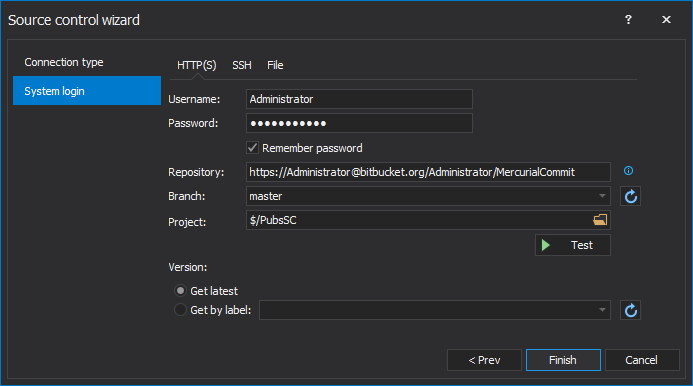
In the System login step, specify credentials for the Mercurial repository, and click the Finish button:
-
Once source control setup is finished, click the Next button in the Input source step, to advance to the next step:

-
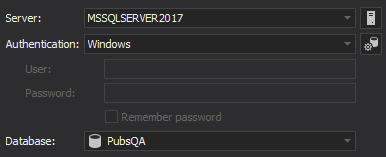
In the next step, specify SQL Server instance and a database to be updated. In this example, PubsQA database is selected to be updated with the static data, as it is a database previously built from source control and it has identical structure as Pubs database:
-
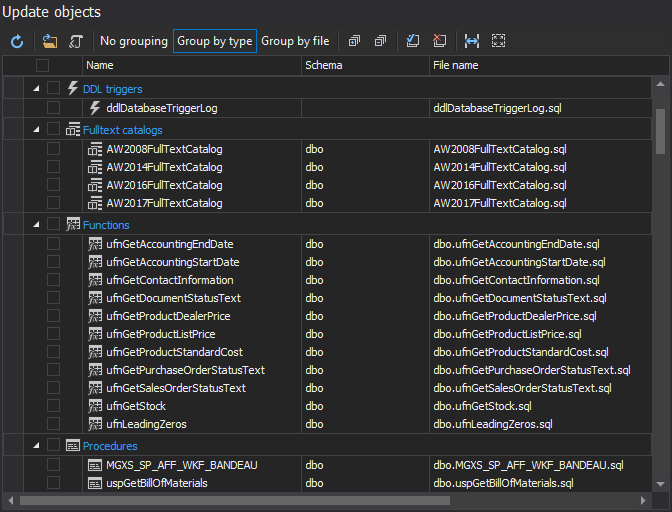
In the Update objects step, all objects should be unckecked, since there is no need to perform any DDL updates, but only to pull the static data from the repository and apply it against a database:
-
The Preview step won’t contain any summaries as objects won’t be created
-
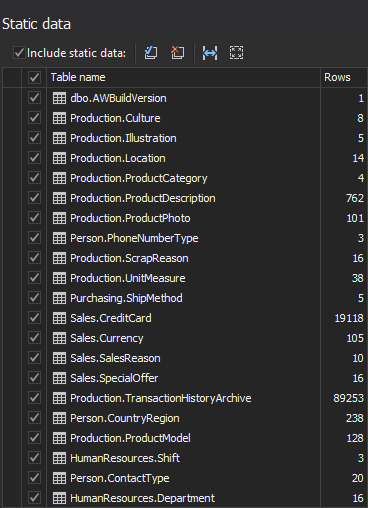
By default, all tables containing static data will be checked in the Static data step:
-
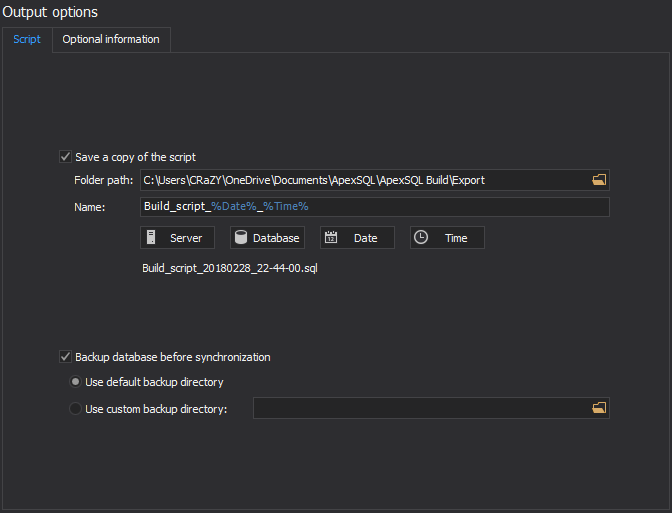
After this is set, advance through the wizard to the latest step, in order to choose if the script, that will be executed against a database, will be saved as a SQL file, or if a SQL database backup should be created before executing the script:
-
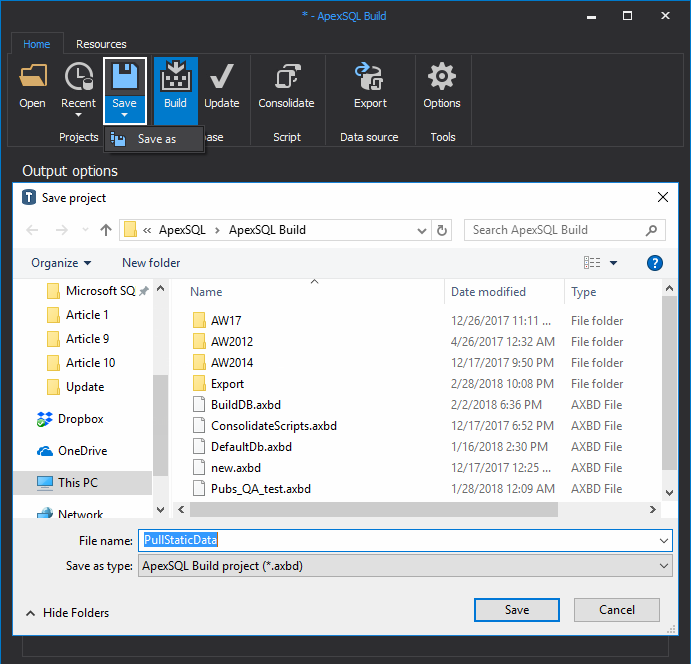
For the purpose of repeating and later automating the process, use the Save/Save as button from the Home tab, to save all the above described steps in the project file. For the purposes of the automation script, let’s call this project file as PullStaticData.axbd:
-
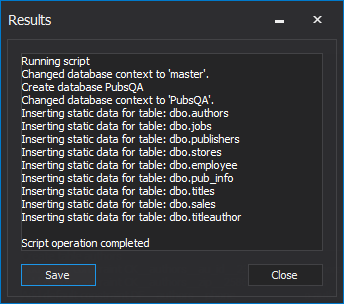
After the project file is saved, click the Finish button in order to initiate the process of pulling the static data from source control and once done, the Results window will be shown:
-
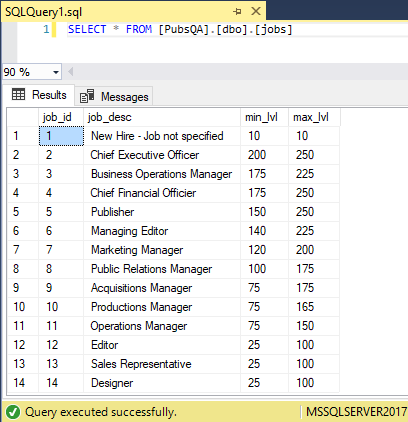
After the project is done, let’s check any table previously selected as the one that contains the static data. For instance, by performing the Select statement against the jobs table, let’s confirm that the static data has been applied against the PubsQA database:
Using the above described steps, deploying database static data from SQL source control can be performed and static data applied against a database.
Automation
To automate the process, let’s create a PowerShell script that contains ApexSQL Build CLI command, along with additional switches in order to automate the process. PowerShell script includes the output summary with a date/time stamp:
| $appLocation = “ApexSQLBuild” | #Variable that stores the path to ApexSQL Build CLI executable file |
| $timeStamp = (Get-Date -Format “MMddyyyy_HHmmss”) | #Variable that stores the value for the date/time stamp. This value is used as part of the name for the output file |
| $appCLIcommand = “/pr:””PullStaticData.axdd”” /v /f /out:””Output_$timeStamp.txt””” | #Variable that keeps the CLI command to call the previously created project file. In addition to this, date stamped file which includes the execution summary will be created |
| (Invoke-Expression (“& `”” + $appLocation +”`” ” +$appCLICommand)) | #A command used to call the CLI executable along with the additional switches |
| “ApexSQL Build return code: $LASTEXITCODE” >> “Output_$timeStamp.txt” | #This will include the return code in the above-mentioned execution summary |
When the script is ready, save it as PullStaticData.ps1.
In the PullStaticData.ps1 script, the previously saved project file contains encrypted credentials for the Mercurial repository and for SQL Server login credentials.
Once the PowerShell script is executed, it will return code at the end of the output file:
Generating the build script
The script was generated successfully and saved to C:\UpdateData.sql
Executing the build script
Script operation completed
ApexSQL Build return code: 0
For the purpose of handling credentials in various ways, here are 4 ways of handling database/login credentials during automated execution via the CLI.
For scheduling the PowerShell script, refer the Four ways of scheduling ApexSQL tools article.
For a full list of common return codes including a description for each one, check the Common return error code section part of the General usage and common CLI switches article.
February 8, 2017


