


“I’ve mistakenly deleted/updated important records in a SQL Server table. Is there any way to get these records back?”
This is a frequently asked question, and very often a headache for DBAs. If they are careful and make regular database backups, they can recover the lost database data even where the SIMPLE recovery database model is used.
If that is the case, then database backups are the only solution to recover the lost database data. The deleted data has to be from the period prior to the database backup creation.
So, how to recover the lost database data?
Restoring the database backup and using it instead of the original database would work fine if there weren’t any data changes after the last database backup creation.
Probably, the best solution would be to:
- Restore the backup on the same server as the original database using a different database name
- Locate the relevant rows in the recovered database
- Update the broken rows using the ones from the recovered database
SQL Server doesn’t offer “neat and easy” ways to do this. The following solutions can be tried:
But they’re time-demanding, require a lot of work and above all, these processes are prone to errors. In such situations, the best choice would be the reliable and fast SQL comparison tool, capable of comparing and synchronizing selected database data.
ApexSQL Data Diff is an SQL comparison tool that allows comparing and synchronizing table or view data for both databases and database backups.
Recovering of the individual rows from database backups can be performed in a few easy steps:
- Start ApexSQL Data Diff
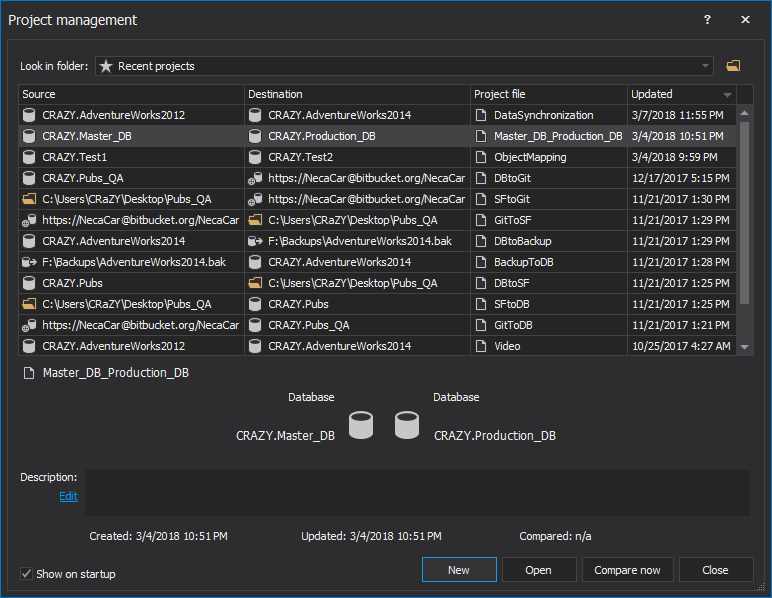
- In the Project management window, click the New button:
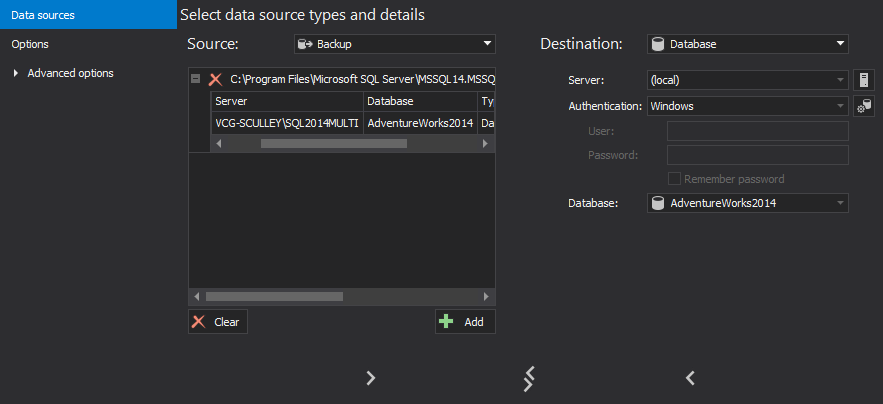
- To select database backups as the data source:
- In the source drop down menu, select Backup
- Click Add file(s) to load database backups into the Backup sets list
- Select the backup or backups that need to be used
- To select a database as the data destination
- In the destination drop down menu, select Database
- Connect to the SQL server
- Select the database
-
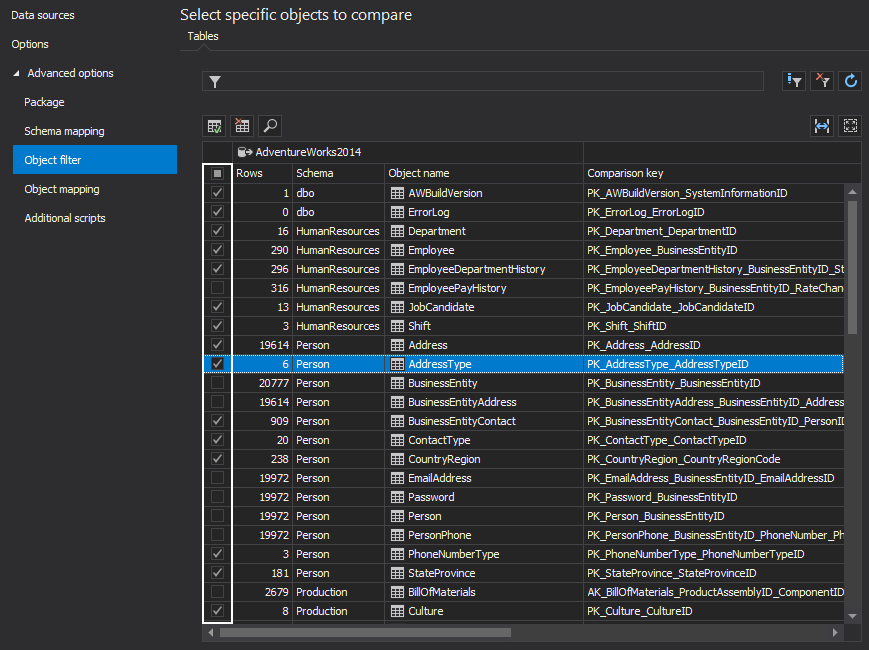
Expand the Advanced options and select the Object filter tab
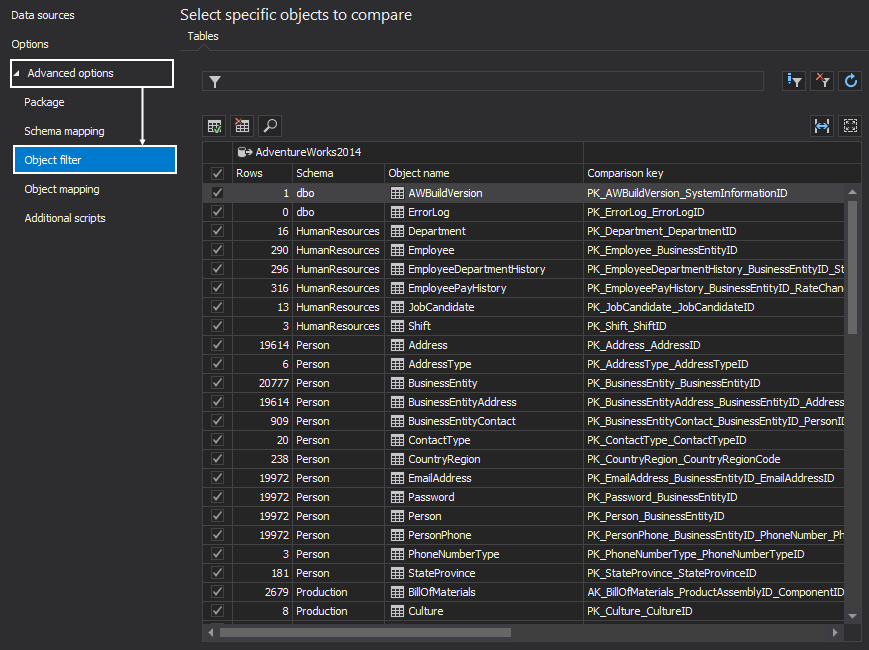
- In the list of objects in the Object filter tab, exclude individual objects from the comparison by deselecting them:
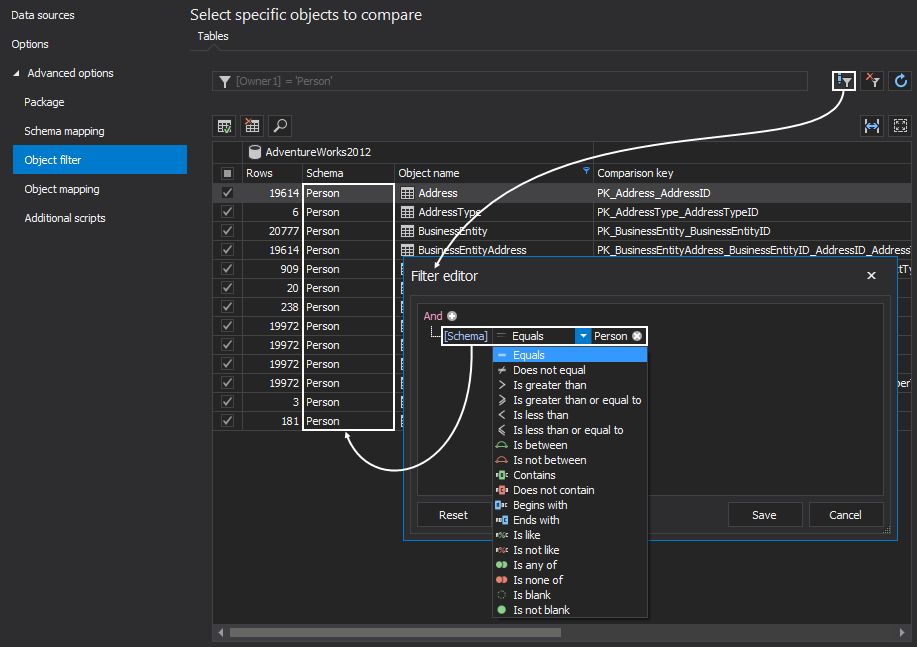
- Additionally, it is possible to set up a more advanced, granular filter:
- Click the Edit filter button, from the top-right corner of the object list, to choose the specific tables by specifying condition:
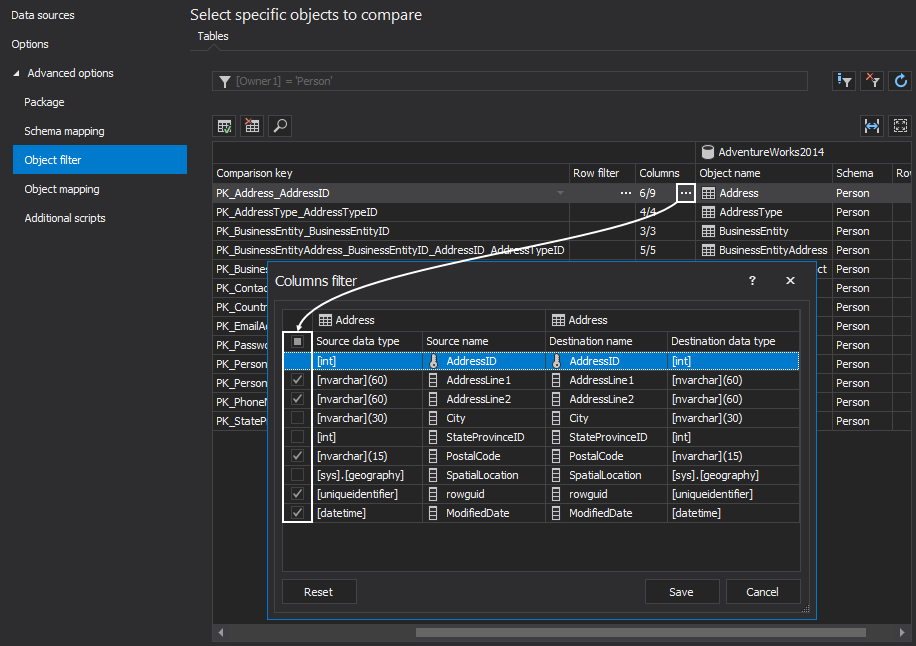
- Select columns to analyze and compare by selecting a specific object and opening the Columns filter window with a click on the ellipse button:
- Click the Compare button
-
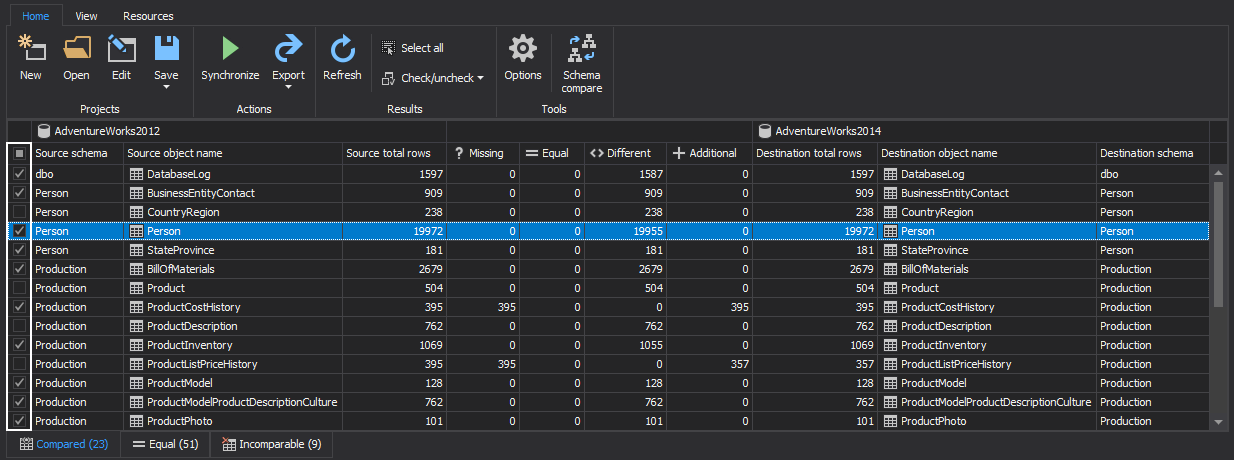
Analyzed objects and differences results will be listed in the application’s Results grid. It will show each compared object, along with basic information about the number of differences between the two objects.
- Choose the objects for synchronization:
- Select individual rows for synchronization. Select those rows in the Data difference view panel, at the bottom of the main screen:

-
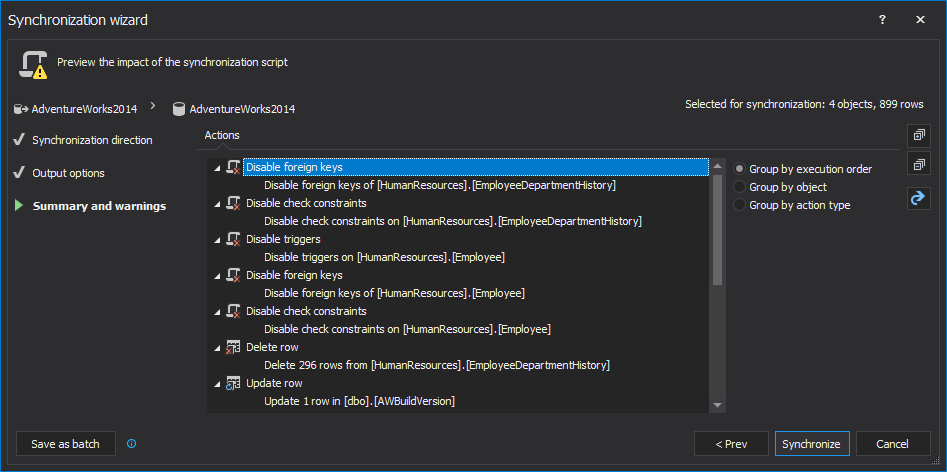
Once the project is set up and the objects for synchronization are selected, start the synchronization wizard with a click on the Synchronize button from the Home tab:

-
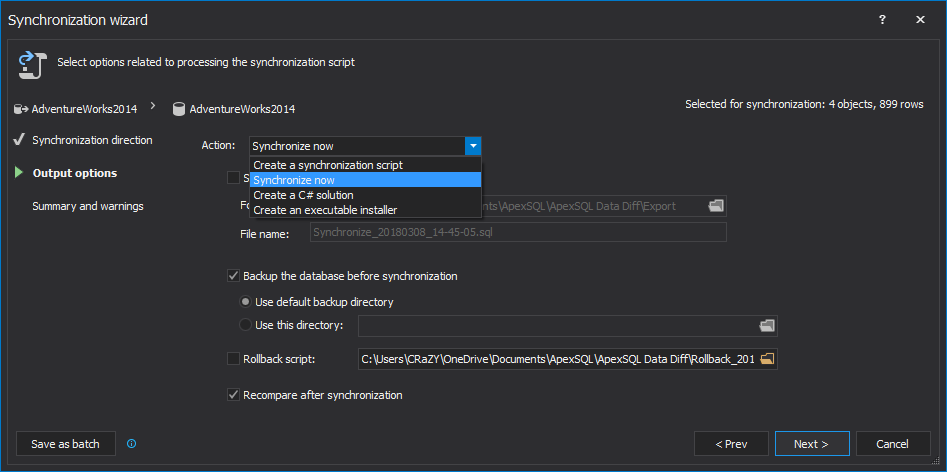
During the synchronization process, the Output options step offers user a choice whether to: Create a synchronization script, Synchronize now, or to create a C# solution or an executable installer:
-
The Summary and warnings step provides a detailed list of the actions that will be taken to synchronize the destination data source, along with any potential problems that might occur during synchronization:
After a successful synchronization, the recovery of the lost database data is completed.
If the important records are unintentionally deleted/updated and database backups have the lost database data, then ApexSQL Data Diff is a reliable and fast solution, capable of solving this problem without disrupting any work.
April 4, 2013


