


No matter how well managed your systems are, accidents may still occur, and potentially lead to disastrous consequences. In order to ensure that there is a disaster recovery solution available, it is always good to have a standby copy of a primary database on another SQL Server instance.
The first way to achieve this is to utilize the SQL Server Log shipping.
SQL Server Log shipping allows you to automatically send transaction log backups from an original database located on a primary server instance to another database(s) on a different server instance(s). The transaction log backups need to be applied to each of the secondary databases individually.
How does this work:
- Backup of transaction log on the primary server instance is created
- Backup file is copied to another server instance
- Transaction log backup is restored on a second server instance
Prerequisites:
- The primary database must use the full or bulk-logged recovery model (if a database recovery model is switched to simple, SQL Server log shipping will stop functioning)
- Before you can configure log shipping in SQL Server, the transaction log backups must be made available to a secondary server by creating a share of the directory where the transaction log backups are generated into.
To configure the SQL Server log shipping:
-
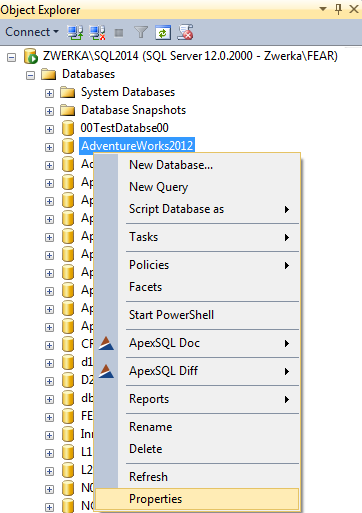
Navigate to a database you want to use as your primary database in SSMS object explorer, right click on it in and select Properties
-
In the Select a page panel, click “Transaction Log Shipping” and check the “Enable this as a primary database in a log shipping configuration” check box
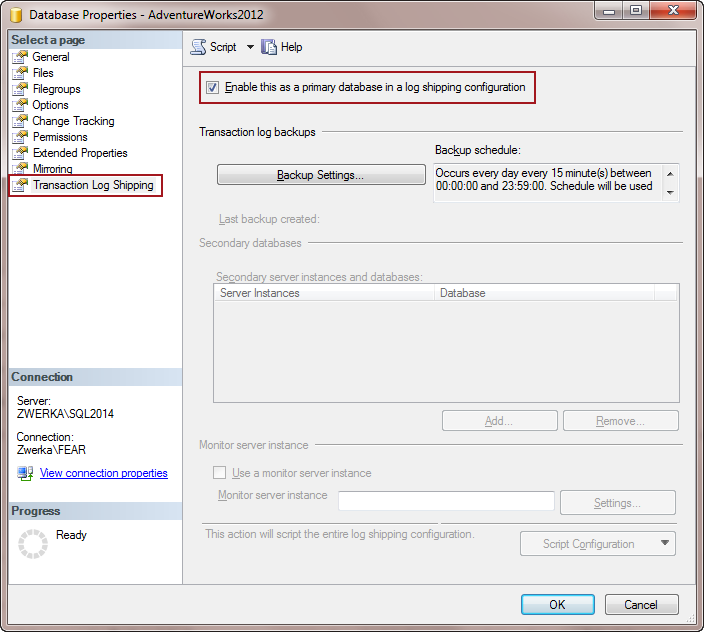
- Click “Backup Settings”
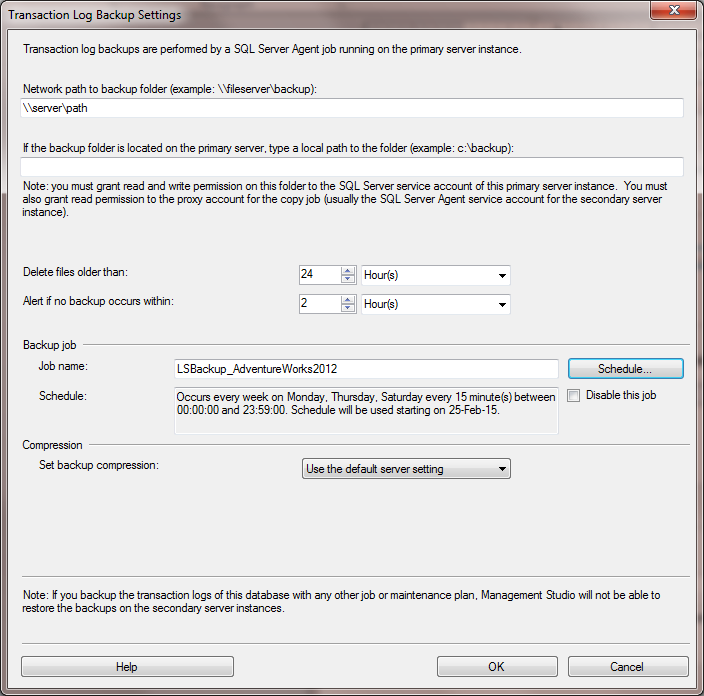
- In the Transaction Log Backup Settings dialog:
- Specify the network path to the shared transaction log backup folder
- If the backup folder is on the primary server, specify the local path to the backup folder in the “If the backup folder is located on the primary server, type a local path to the folder” field. If the backup folder is not on the primary server, this field should remain empty
- Specify parameters for the “Delete files older than” and “Alert if no backup occurs within” options
- Click on the “Schedule” button and customize parameters in the backup schedule, and provide name for the job in the “Job name” field
- In the “Set backup compression” drop menu, select one of the compression settings: Use the default server setting, Compress backup, or Do not compress backup
-
After all options in the “Transaction Log Backup” Settings dialog have been set, click the OK button to close the dialog
- Back in the Database properties dialog, in the “Secondary server instances and databases” dialog, click the “Add” button to bring up the “Secondary Database Settings” dialog, and do the following:
- Click “Connect” and connect to the instance of SQL Server that will be used as a secondary server
- In the “Secondary Database field” dialog, specify the name of the database that will be created, or choose existing database from the drop-menu list
- In the “Initialize Secondary database”, “Copy files”, and “Restore” tabs, choose the appropriate options/settings for the secondary database and click “OK”
- To monitor this log shipping configuration in SQL Server, the monitor server must be added at this point (it cannot be added later without replacing the whole configuration. Monitor server instance can be added by checking the “Use a monitor server instance” checkbox, and specifying server parameters in the “Log shipping monitor settings” dialog, accessed via the “Settings” button
- Click OK to finalize the process
This ensures that there is a copy of the primary database on other SQL Server instance which can be used as a safety precaution in case of a disaster, or used for any other purpose.
Even so, there are several cons to this method:
- It is not possible to choose only part of the database, and exclude parts of the data from the transaction log
- It is not possible to use SQL Server log shipping to a database with lower compatibility level, even when features of a newer level are not utilized
- It is not possible to view the transactions that have occurred prior to shipping them, or after they’ve been applied
The second way to achieve this that will avoid the previously described cons is to use ApexSQL Log a SQL Server transaction log reader.
Ensuring that there is a standby copy of the primary database on other SQL Server instance can be achieved with ApexSQL Log by creating a “Redo script” which will replay the exact changes that have occurred:
- Start ApexSQL Log
-
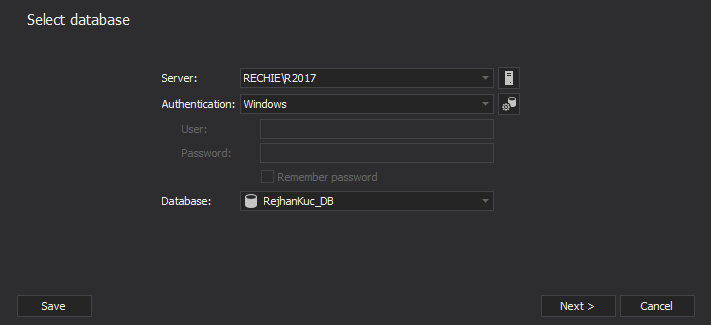
Connect to the SQL Server and choose the ‘original’ database from the database drop-list
- Click “Next” to advance
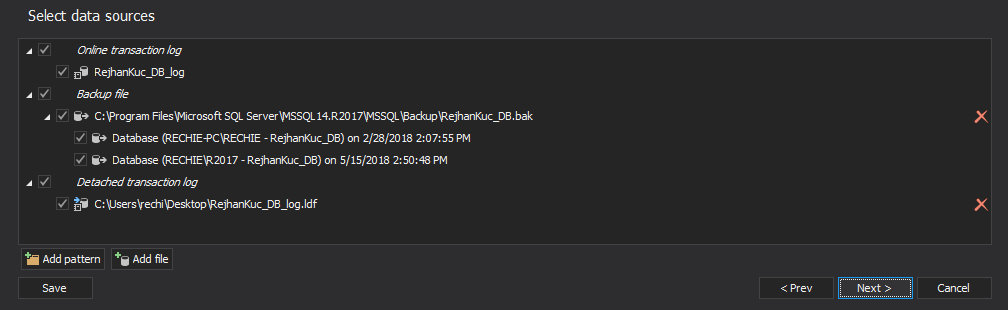
-
The online transaction log for the selected database will be automatically selected. Add all transaction log backups to ensure that full chain of transaction log backups exists by clicking on the “Add” button and selecting appropriate backups from the “Open” dialog
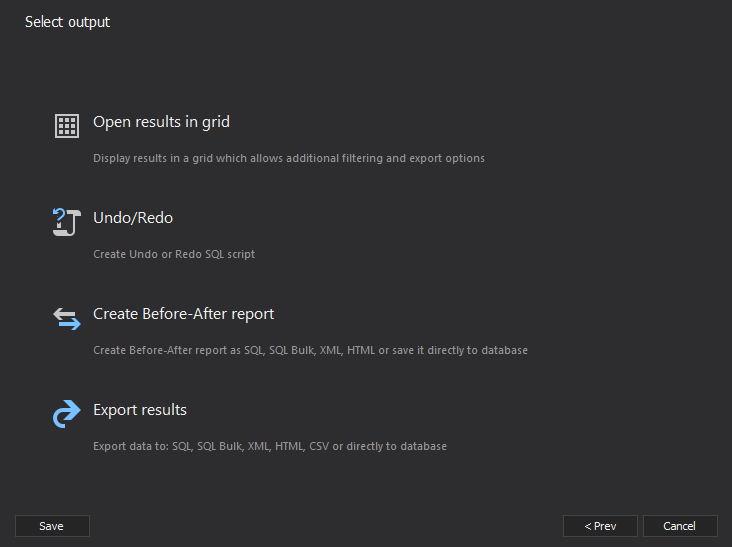
-
In the next step of the wizard, choose the “Undo/Redo” option
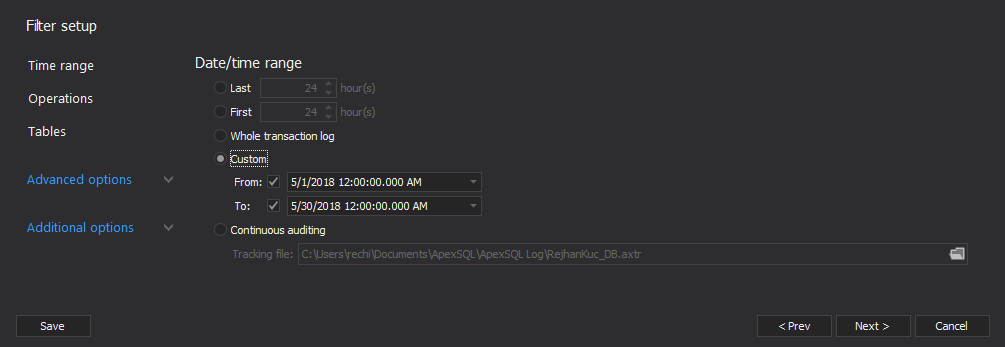
-
In the “Filter setup” feature specify time/date filters, Operations filters, Tables filters, or appropriate advanced options for your case. i.e. if a time between two synchronizations was one week, use the “Custom filter” to specify the time/date range
-
In the “Undo/Redo” dialog, choose the “Redo (Reconstruct)” Script option
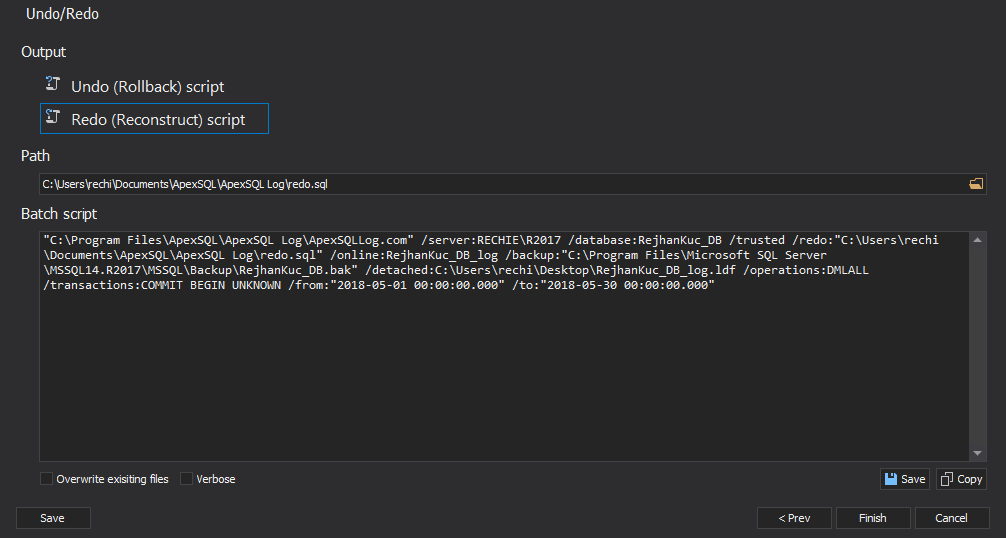
- Click “Save batch script” and specify the output path to create the .bat file containing the redo script
- The only remaining job is to automate this process. For this purpose, you can use the Windows Task Scheduler (Windows Scheduler). Here is a detailed solution on How to automate daily reports with ApexSQL Log
March 4, 2015


