


Backups are the starting point for any serious disaster recovery strategy. Creating SQL database backups on a regular basis is just the first step. Equally important is to make sure they are also reliable and restorable. This is the only way to avoid unpleasant surprises in case of a disaster
The following SQL database backup verification methods can be used:
- RESTORE VERIFYONLY command – checks whether a SQL database backup can be read and restored
To test a SQL database backup, execute the following
RESTORE VERIFYONLY
FROM DISK = 'E:\Test\AdventureWorks2012_Full.bak'
If the backup is valid, the SQL Server Database Engine returns:
The backup set on file 1 is valid
Note, however, that data structure and reliability cannot be verified this way
- To verify data structure and reliability in a SQL Server backup, the backup must be created using WITH CHECKSUMS (validates page checksums and generates a backup one). When added to RESTORE VERIFYONLY, the statement checks data integrity in a backup
If you execute
RESTORE VERIFYONLY
FROM DISK = 'E:\Test\AdventureWorks2012_Full.bak'
WITH CHECKSUM
against a database backup not created using WITH CHECKSUM, you’ll get the following error message:
Msg 3187, Level 16, State 1, Line 1
RESTORE WITH CHECKSUM cannot be specified because the backup set does
not contain checksum information.
Msg 3013, Level 16, State 1, Line 1
VERIFY DATABASE is terminating abnormally.
If the database backup is created using WITH CHECKSUM and the data integrity is verified, the following message is shown:
The backup set on file 1 is valid
Keep in mind, however, that WITH CHECKSUM adds overhead, makes backups bigger and increases the backup creation time (significant for large databases)
Since RESTORE VERIFYONLY doesn’t check all header information in a backup, there is a chance that the backup is invalid and impossible to restore, even if the statement is executed successfully
- A foolproof way to verify a database backup is to restore it. You can also run DBCC CHECKDB immediately against the restored database, to confirm everything is OK. If both actions are successful, the backup is fine. Unlike the RESTORE VERIFYONLY backup verification (where only backups created using WITH CHECKSUM are verified), this method can be used on backups created without WITH CHECKSUM
Use SQL Server Management Studio to restore backups
To automatically create a SQL Server database backup, restore and verify it, use T-SQL and schedule a SQL job:
-
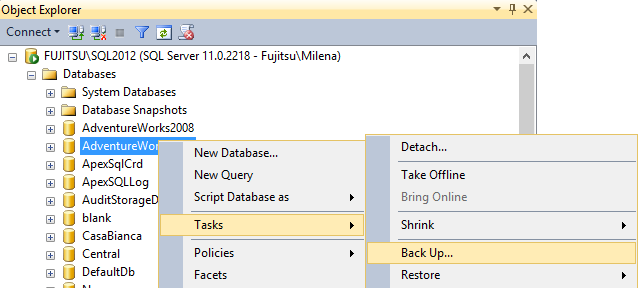
To create a database backup, right-click the database in Object Explorer and select Tasks | Back Up
-
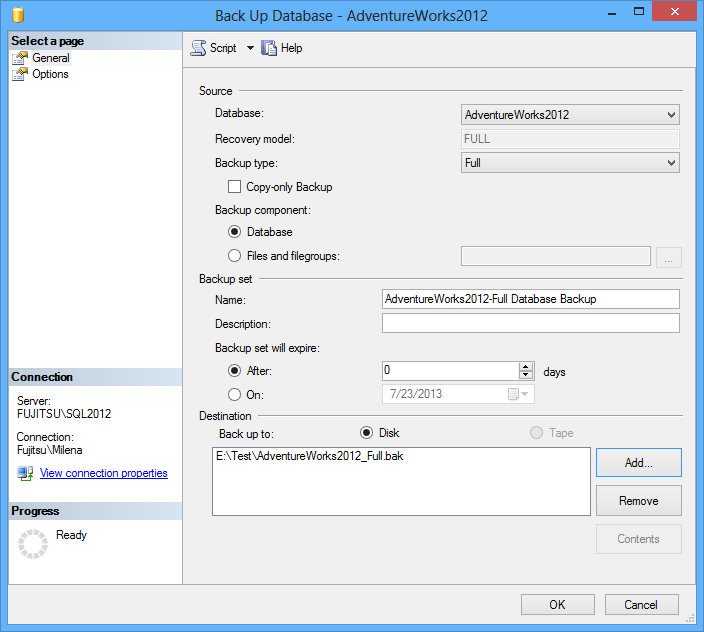
Specify the backup type and location
-
Open the Script drop-down menu and select Script Action to Job

- A new job is automatically created (create database backup task is the first step)
-
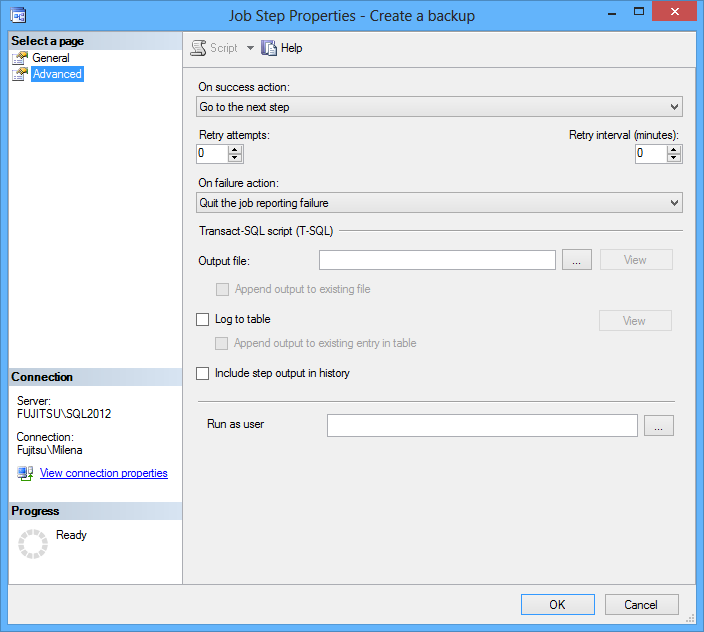
Make sure the On success action option for the step is Go to the next step, and click OK
-
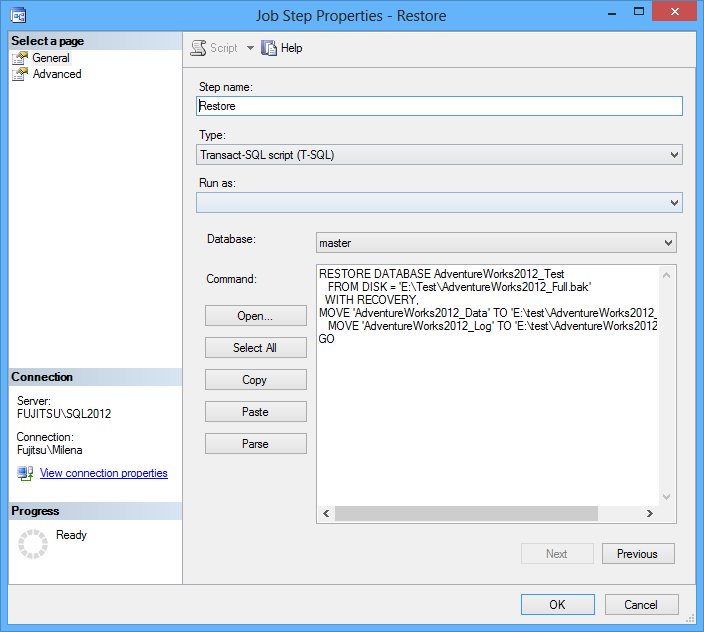
Click New to add a new step that restores the SQL database backup created in step 1. The command must contain MOVE, as the database with the same path and file names already exists on the SQL Server instance
RESTORE DATABASE AdventureWorks2012_Test
   FROM DISK = 'E:\Test\AdventureWorks2012_Full.bak'
  WITH RECOVERY,
MOVE 'AdventureWorks2012_Data' TO 'E:\test\AdventureWorks2012_Data.mdf',
MOVE 'AdventureWorks2012_Log' TO 'E:\test\AdventureWorks2012_Log.ldf'
GO
- Click OK
-
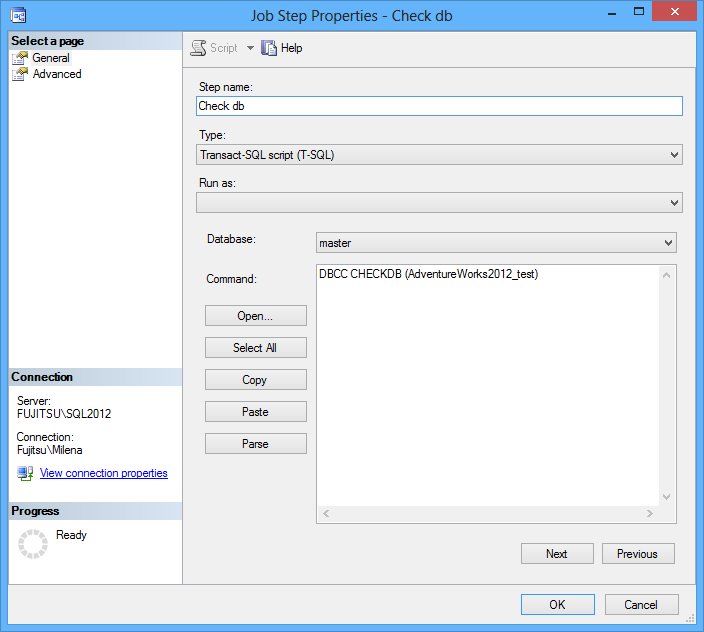
Add the third step to check logical and physical integrity of all objects in the restored database. The step type is Transact-SQL and the command:
DBCC CHECKDB (AdventureWorks2012_Test)
- In the Job dialog go to the Schedules tab
-
Specify the job name, execution time and frequency

- Click OK
-
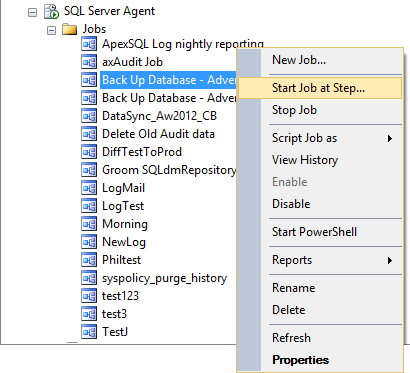
To verify that the SQL job is created successfully, right-click it in Object Explorer and select Start Job at Step
-
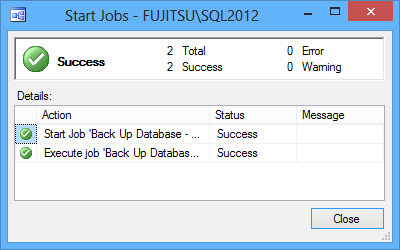
Select the first step. If all steps are executed successfully, the job status will be ‘Success’
-
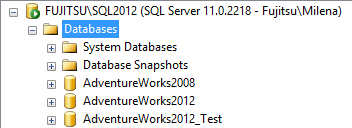
The restored database will be listed among other databases in Object Explorer
The main disadvantage of this method is that considerable time and space are required when restoring a large database
Use ApexSQL Restore to restore backups
ApexSQL Restore is a SQL Server restore tool that attaches native and natively-compressed SQL database backups (full and differential), and transaction log backups as live databases. Once attached, the backups will be accessible via SQL Server Management Studio, Visual Studio or any third party tool. ApexSQL Restore Command Line Interface enables backup restoration scheduling via SQL jobs
- Create a batch file (e.g. named RestoreBatch.bat) using the statement in this format:
“<ApexSQL Restore installation path>\ApexSQLRestore.com” /server:<server name> /user:<user name> /password:<SQL Server password> /database:<database name> /backup:<backup file path and name> /restorepath: <path for restored database files> / database: <restored database name> /attach
For example, to restore the AdventureWorks2012_Full.bak backup stored in the E:\Test folder to the Fujitsu\SQL2012 instance as the database named AdventureWorks2012_Restored, and to store the new MDF and LDF files in the E:\Test folder, save the following
“C:\Program Files (x86)\ApexSQL\ApexSQLRestore2012\ApexSQLRestore.com” /server:Fujitsu\SQL2012 /user:sa /password:sqladmin /backup: E:\Test\AdventureWorks2012_Full.bak /restorepath: E:\Test /database:AdventureWorks2012_Restored /attach
- In SQL Server Management Studio, create a job for SQL database backup creation, using the steps 1 to 5 given in the Use SQL Server Management Studio to restore backups section
- In the Steps tab of the Job dialog, click New
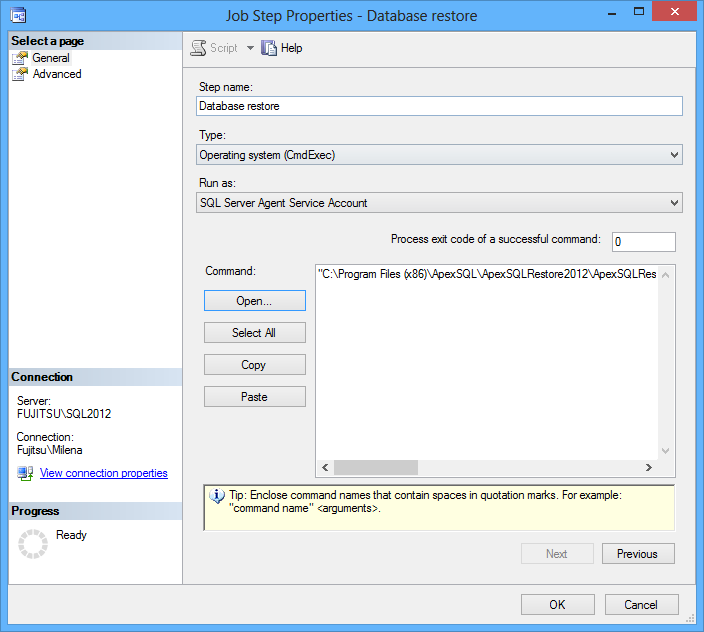
- Specify the step name and select Operating system (CmdExec) as a type
-
Click Open, then navigate to the RestoreBatch.bat file
-
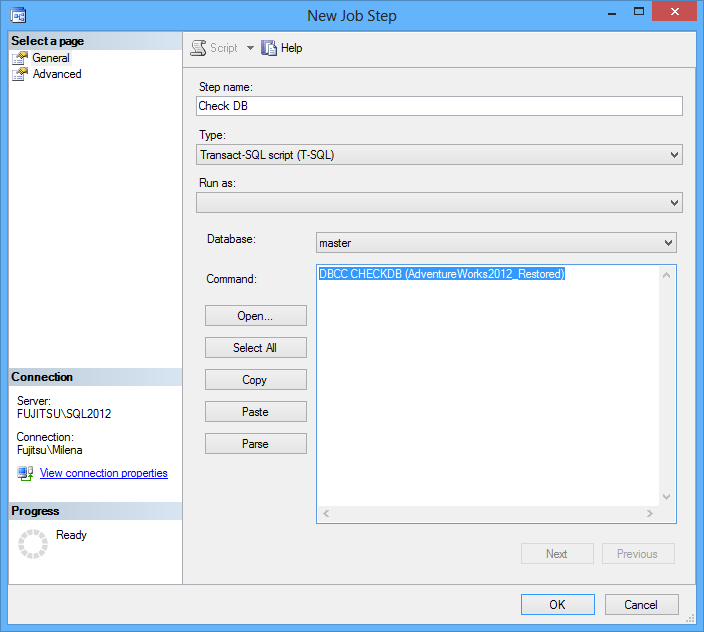
Create a new step to check the restored database’s integrity using
DBCC CHECKDB (AdventureWorks2012_Restored)
-
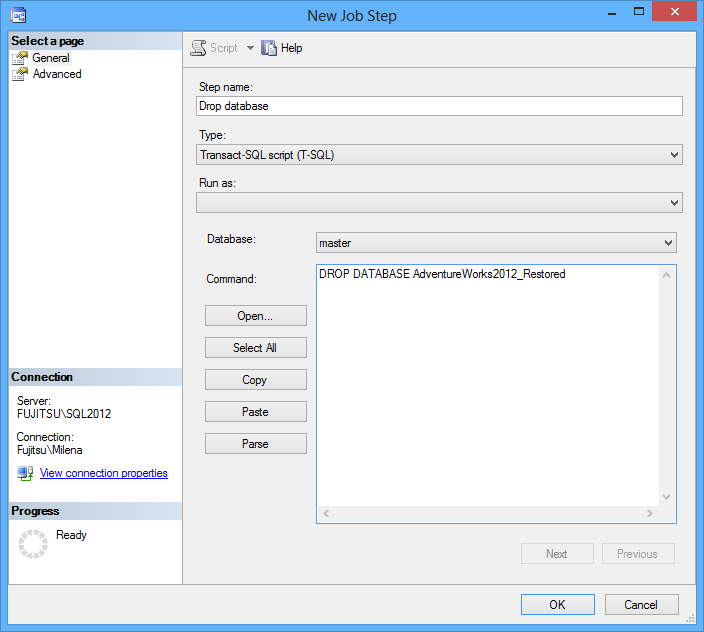
If you want to drop the database after the verification, add a new step that will execute:
DROP DATABASE AdventureWorks2012_Restored
-
Once all 4 steps are created, schedule the job execution, as described in step 10 in the Use SQL Server Management Studio to restore backups section

As shown, ApexSQL Restore also leverages SQL Server jobs to automate database verification. The advantages of ApexSQL Restore backup verification are quicker restoration and less hard disk space usage. The space saved is up to 99%
Once you set automatic SQL database backups verification, you’re one step closer to a successful disaster recovery
August 2, 2013


