


Wouldn’t it be a neat trick if you could document a database with a double click? With this article, we’ll demonstrate a few simple steps to allow you to make a script file which will run a process that generates documentation for your database. After that you can just execute it to repeat the process with just two mouse clicks or even set up a job to run it automatically every night. In this article you will learn how to create this automated process of database documentation by using ApexSQL Doc.
ApexSQL Doc, is a SQL database documenting tool that documents SQL Server databases, SSIS packages, SSAS cubes, Tableau sites and SharePoint farms.
ApexSQL Doc generates documentation in CHM, HTML, Word, and PDF formats and you can fully customize the documentation with different styles, custom text, and graphics.
In this example, we are going to create documentation of a database first by using the application through then GUI and then we will make an automated solution via the CLI.
Description
-
To set up the SQL database documentation process, click the New project button and connect to SQL server:
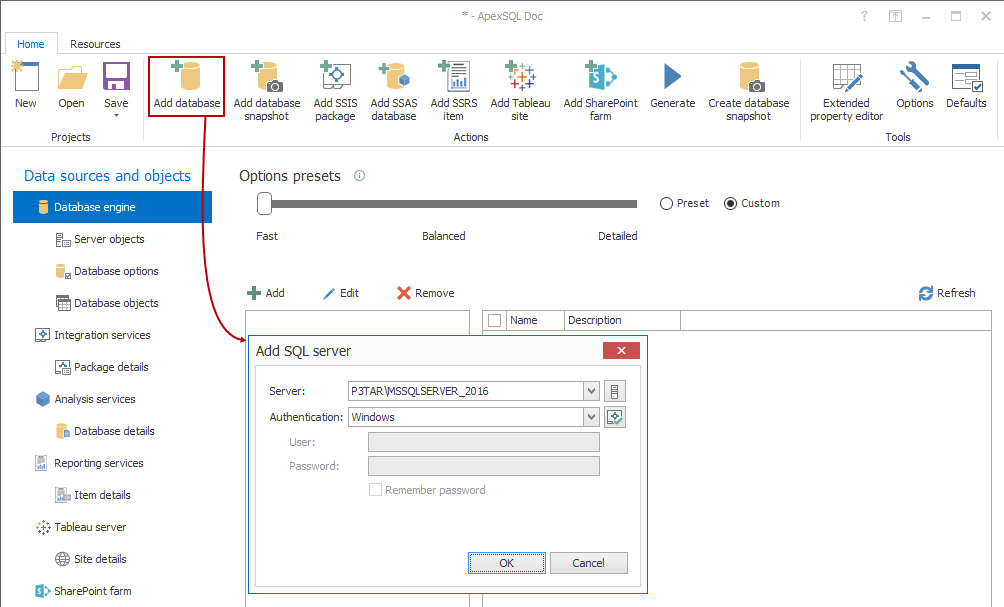
Clicking the option selected above, the Add SQL Server dialog will appear. Choose the server and click OK.
-
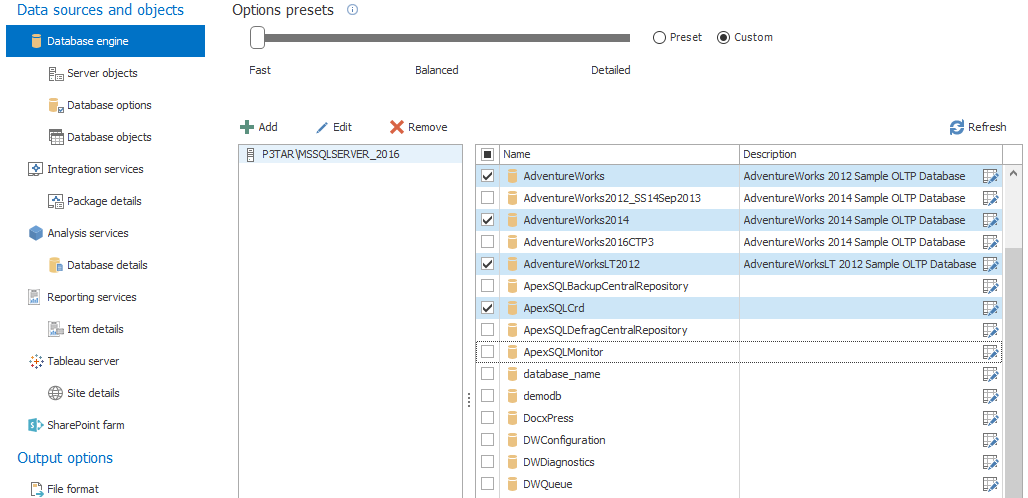
When you have established a connection with SQL Server you will see a list of connected SQL Servers in the SQL Servers section, and all databases which are connected to the selected server will be visible in the Databases section to the right.
Note:
You must select at least one database if you want to continue to the documentation setup process. In this example, we will generate the documentation for Test database. This database will be documented in compiled HTML help file by default, but it can be changed into HTML, Word, and PDF. -
Set up your database with the desired options. Objects can be filtered using the Object filter option. You can set up additional documentation settings by clicking the Database options tab. In Database objects tab, you can include/exclude objects for the documentation. You can also include the documentation about SQL server.

Set up the output location, where you want your documentation to be generated. This can be done by clicking the Options button in the Home tab.
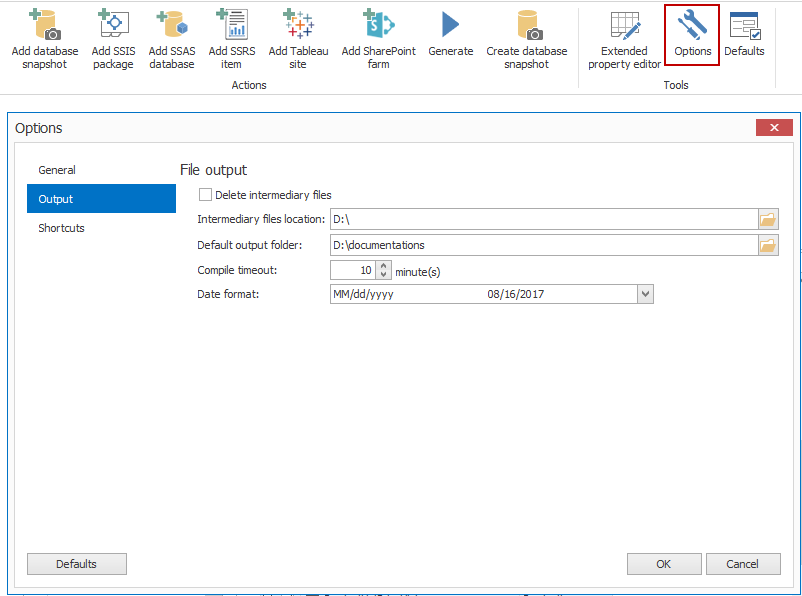
Enter the location where you want to generate the documentation or use the Browse button. When this is complete click the OK button.
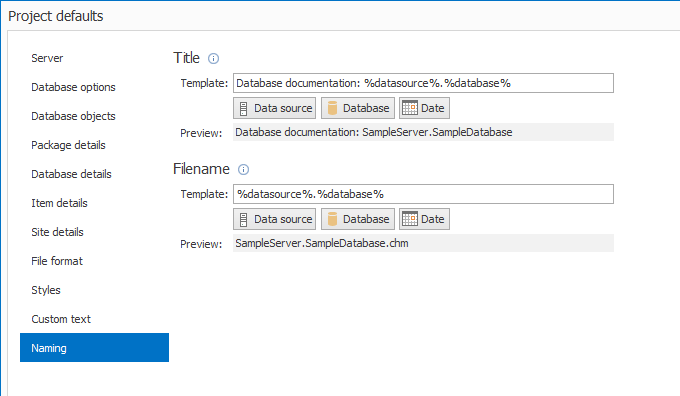
To set up the format of the documentation by click the Defaults button. In the Project defaults menu click on the File format tab, select the wanted output format and click OK.
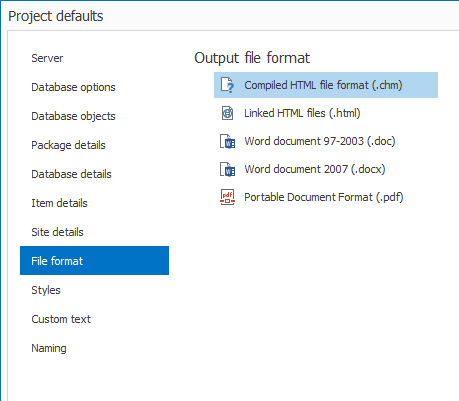
If you want to add a date stamp to your documentation, it can be easily done by selecting the Naming tab in Project Defaults menu and clicking the Date button in the Filename section. You can also add Datasource name and Database name to your filename.
-
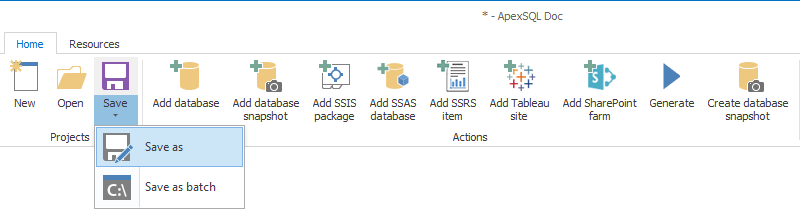
When you have set up all options it’s time to save the project. Click the Save project button and the project will be saved to a default location. You can also save the project to a custom by clicking the Save as button under the Save button.
-
After the database selection and options setup, the documenting process can be started by clicking the Generate button from the Home tab.
When the process is complete you will get the documentation of the database in the wanted format.
Using the command line interface
The next step is to automate the process. This can be done by creating a .BAT file using windows shell script against the ApexSQL Doc command line interface (CLI).
If you’re not sure how to make an executable file which will automate your process documentation, follow the example bellow.
-
First, create a new Text Document and include these lines in your file:
@echo off “ApexSQLDoc.com” /pr:Project.axdp #loading a project file /od:ApexSQLDoc #specifies the output directory /of:html #specifies the output type /f # force switch, overwrites existing files /v #verbose console output echo “error code: ” %errorlevel% pause Definition:
First enter the path of ApexSQLDoc.com file, after that you define the path of your saved project file with the /pr switch.With the /od switch you must define the output directory.
The /of switch specifies the output file format. If you don’t specify the /of switch, the documentation will be generated in the Compiled HTML (.chm) format by default.
The /force (or the /f) switch overwrites existing files of the same name. If the /force switch is not provided, any attempt to overwrite an already existing file, will raise a warning.
The /verbose (or the /v) switch shows meaningful messages, warnings, etc. during processing. With this switch specified, the application outputs full operation information to a console.
-
When that is done, save the file by adding the .bat extension after the file name and run the created file. After running the previously created .BAT file, you will get a result like this:
Creating the table of contents…
Creating the index file …
Creating the documentation file…
The documentation has been written to C:\User\Documents\ApexSQL\ApexSQLDoc\(local).TestDB_03_25_2016.chm
“error code: ” 0
Press any key to continue…
If everything is ok you will get an error code 0. Now you have a file which makes documentation when you just simply execute it and you got a complete documentation.
If you manage to get an error and you can’t document your file check these error codes to see where the problem occurred.
error code 1 – General error
Not valid/accessible Database(s) are specified for Server (local).
“error code: ” 1
Press any key to continue…
error code 2 – Invalid switch combination. You will get this code if:
The required switch is missing, switches have been duplicated, incompatible switches have been used (e.g. a non-existing switch is written).
Switch ‘prx’ is not recognized.
“error code: ” 2
Press any key to continue…
error code 16 – IO error. You will get this error if you already have a file with the same filename. In this case you must use a /f switch to overwrite the existing file.
The directory (local).Test already exists. Specify the /force switch to overwrite it
“error code: ” 16
Press any key to continue…
error code 21 – Insufficient permissions. This code is displayed if the user doesn’t have the permissions which are required for this action.
March 28, 2016


