


SSAS is a powerful and popular feature in the SQL Server ecosystem. That’s why ApexSQL Doc has implemented support for automating SSAS cube documentation so you can have full documentation of your database in no time. We have created this article so you can see how easy it is to create an automated process which will generate documentation with ApexSQL Doc.
ApexSQL Doc, is an application which is used to document SQL Server databases, SSIS packages, SSRS reports, Tableau sites, SharePoint farms and it fully supports documentation of SSAS cubes.
With ApexSQL Doc you can generate documentation in various formats like CHM, Word, PDF, and HTML, with custom styles, graphics and text formats.
To start the process of automatization we will show you an example of how to document a database using the GUI and later we’ll show you how to do the same thing through the Command Line Interface.
Description
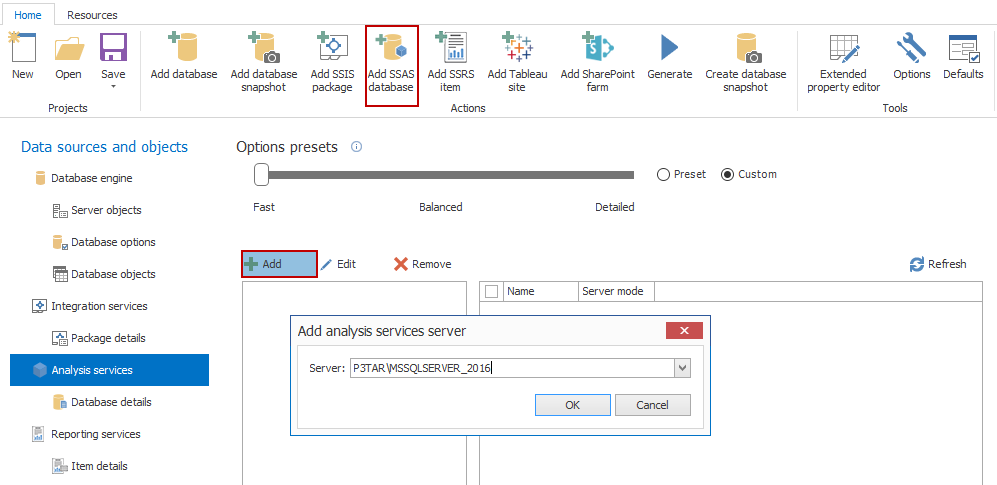
To begin the documenting process, you need to create a new project. That can be done by clicking New project. After that click on the Analysis services tab than connect to Analysis services Server.
Note:
If you click on any button that is selected in the picture above, the Add analysis services Server menu will appear. After that you have to choose a server that you want and click the OK button.
When the connection is established you will get a full list with Analysis services Servers in Servers section, and all of the databases will be displayed in the Database section.
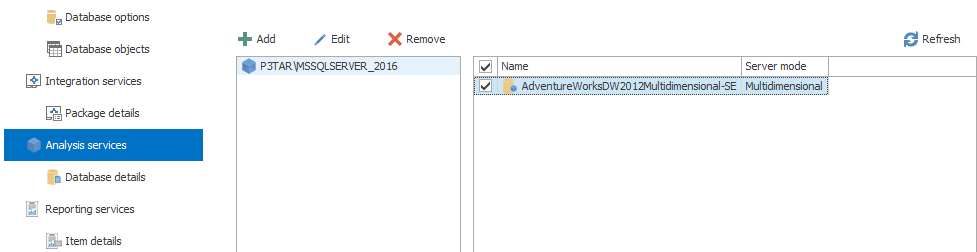
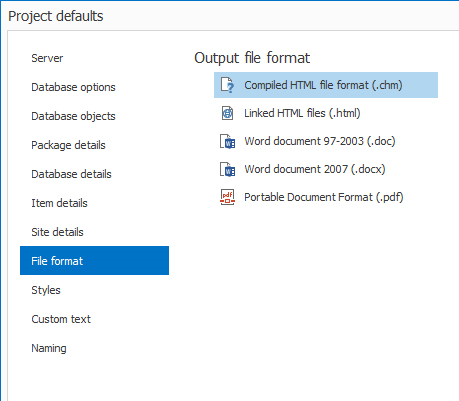
In order to continue, select a database from the Database section. For this article, we will use AdventureWorks2014 database for documenting. The documentation will be generated in the complied HTML file at first, because of the default settings, but you can easily change the output format into PDF, Word or HTML.
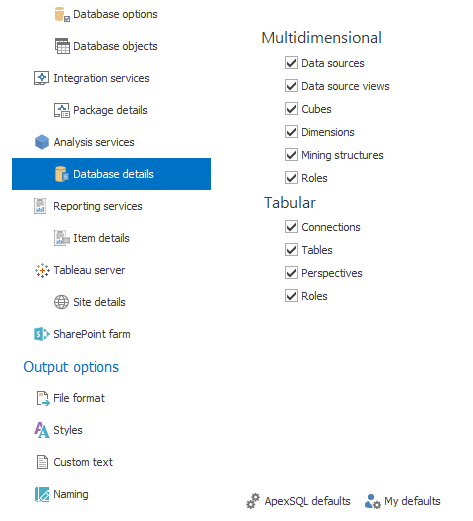
The next thing you need to do is setting up the options for your database. To do this, you just need to click on the Database details under Analysis services tab and select which Tabular and Multidimensional details you want to include/exclude in your documentation.
Select your output file location. This is the location where your database documentation will be saved after the documentation process is complete. You can do that by clicking Options in Home tab.
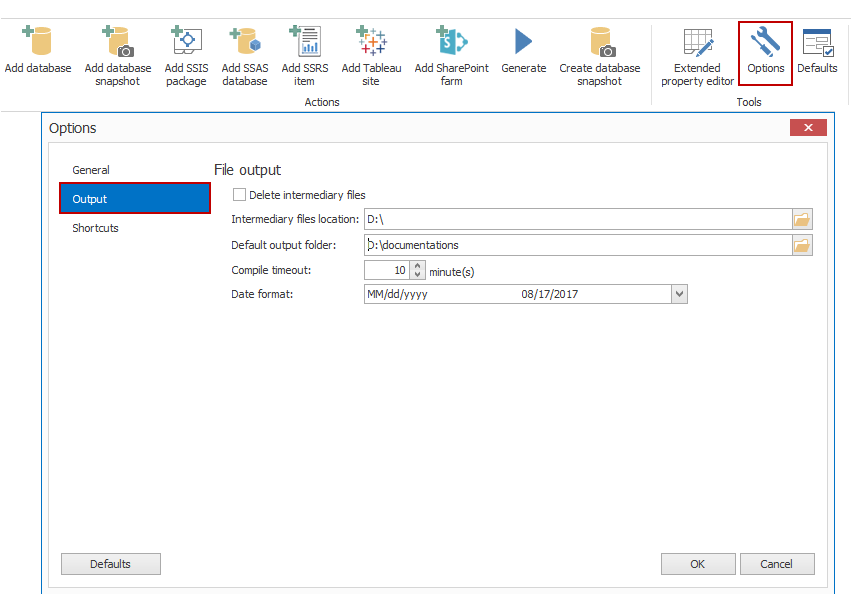
Type your output folder location, or you can use Browse to select the location. When you have done this click OK.
Set up project options and the documentation format by clicking on Defaults in the Home tab.
Sometimes when you need information like a date, it’s useful to have a date stamp in your documentation. To add a date stamp, select the Naming tab and click the wanted button under the Filename section. In this case the selected Date button. Information like Datasource and Database names can also be included.

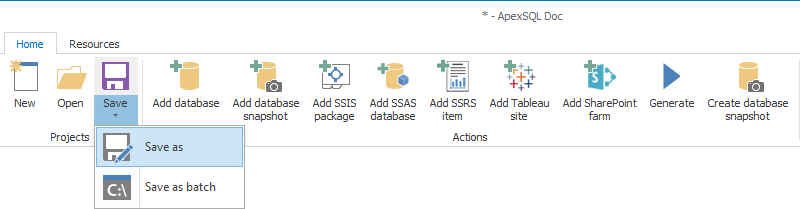
Once you set up the options mentioned above you must save your project. Saving your project can be done by clicking the Save button and the app will save the project to the default project location. If you want to save your project to a desired location, click Save as.
When the options are set up and the project is saved, it’s time to generate the documentation. To start the documentation process, click Generate.

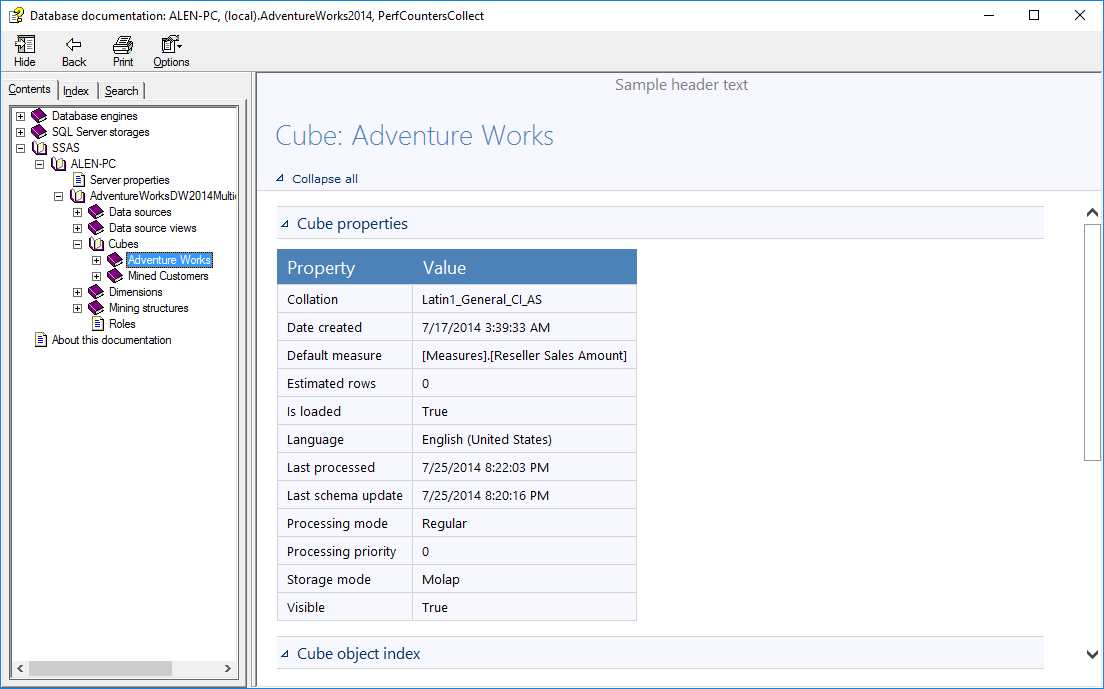
After the documentation has finished, you will have documentation with SSAS cube databases in the selected format. An example is shown in the picture below:
Automating SSAS cube documentation with the CLI
To speed up the process of SSAS cube documenting you can use the CLI of ApexSQL Doc. The first thing you need to do is to create the .BAT script file. For making this document we suggest you take a look and follow the written example of script written bellow.
First, you need to make a Text Document, then input the following lines:
| @echo off | |
| “ApexSQLDoc.com” | |
| /pr:DBProject.axdp | Select the project file you saved |
| /od:C:\Documents\ApexSQL\ApexSQLDoc | Set your output location |
| /on:SampleDB | Specify the filename for .chm format or directory name for .html format |
| /of:pdf | Specify the output type (chm, doc, docx, html, pdf). If no switch is omitted, the documentation will be generated in .chm format |
| /ifl:Intermediary | Specify the Intermediary files location. If no switch is omitted, the Intermediary files will be placed to the default directory |
| /f | The force switch, for overwriting previous files |
| /v | The verbose switch for displaying output actions |
Definition:
-
Open the new Text Document and enter the path the file ApexSQLDoc.com, then use the “/pr” switch to specify the location of your saved (.axdp) project file.
-
Specify the output directory by using the “/od” switch.
-
Use the “/of” switch to define the output format of your documentation. If you do not use this switch, your documentation will be generated in .CHM format.
-
With the “/f“ switch you can overwrite any existing files with the same file name. We recommend using this switch because If you don’t provide the “/f“ switch, you will get a warning if the file already exists.
-
The “/v“ switch displays warnings, meaningful messages, etc. during the documentation processing. If you use this switch, you will see the information messages of the complete operation in the console.
-
When you have specified all needed switches, put the .bat file extension at the end and save the file. After that execute the .BAT file and you should get similar results:
“Creating the table of contents…”
“Creating the index file…”
“Creating the documentation file…”
“The documentation has been written to C:\Your_User\Documents\ApexSQL\ApexSQLDoc\(local).SampleDB_03_31_2016.pdf”
“error code: ” 0
“Press any key to continue . . .”
If the process is complete successfully you will see an “error code 0”. If you somehow got an error, and your documentation is not successfully created check the error codes bellow to see some information that may lead you to the problem
“error code 1” – General error
“Not valid/accessible Database(s) are specified for Server (local).”
“error code: ” 1
“error code 2” – Unsuitable switch. This error message is displayed when:
When the “/pr” switch was misspelled, this error is thrown.
“Switch ‘pra’ is not recognized.”
“error code: ” 2
“error code 16” – This error code is usually returned when you have two files with the same name. To prevent this error, you use the ”/f“ switch to overwrite the previous file.
“The directory (local).SampleDB_03_31_2016.pdf already exists. Specify the /force switch to overwrite it”
“error code: ” 16
Or,
“The project file DBProject.axdp was not found”
“error code: ” 4
“error code 21” – Insufficient permissions. You will get this message if you don’t have the adequate permission to execute the action.
April 5, 2016


