


SQL developers are increasingly required to include tracking data changes into their custom applications. The information about what change was made – insert, update or delete – who made it, when, and also which computer and application was used, is very useful and can be essential for troubleshooting.
One of the ways to acquire this information is by mining database transaction logs. To be able to do this, the database has to be in the full recovery model and regular transaction log backups need to be created. This way, there will be enough information about the transactions and the online database transaction log will not grow too much in size. One of the downsides of this method is that the transaction info is not available “instantly” – you have to read the transaction logs first, and that takes time and requires a tool designed for reading transaction log files as they cannot be simply opened and read otherwise.
Another way to get this information is by using triggers. They can be fired every time a column changes its value or is either inserted or deleted. Now… all you have to do is create all the triggers you need to audit the changes!
For a small database with a small number of columns, this isn’t such a demanding job. However, if your database has many tables, it’s better to use a tool that can create all of these needed triggers for you. If there is a schema change, it will be reported and you will have no table/column untracked.
ApexSQL Trigger is a database auditing tool for SQL Server, which allows you to monitor when and how the data or schema was changed and by whom. Best of all, it stores all captured changes in three tables, so you can easily create reports exactly the way you want and add them to your custom application. This also means that you can get the captured information instantly just by reading it from the tables:
-
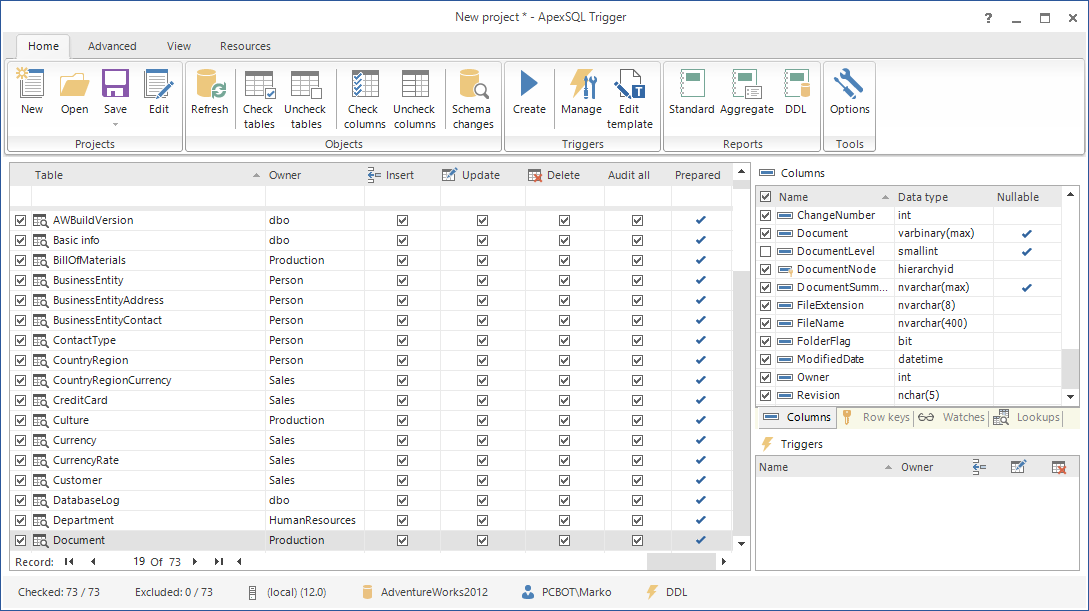
Start ApexSQL Trigger
-
Create a new project – on the Home tab in the Projects group, click the New button
-
Connect to the database where you want to track changes
-
Select the table that you want to audit:
-
In the Columns pane, check the columns that you want to audit
-
Specify the change type to audit: inserts, deletes and updates, by selecting the corresponding checkboxes
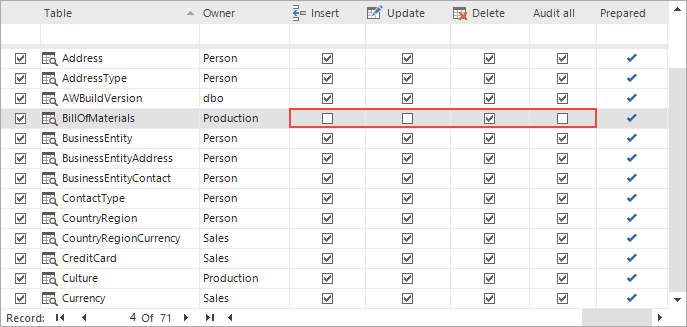
When everything is configured correctly, the table will be marked as Prepared.
-
Repeat the steps 4 through 6 for all of the tables that you want to audit
-
When those tables are configured for auditing, on the Home tab, in the Triggers group, click the Create button:

-
The generated script will create the triggers that will track the selected transactions on your database:
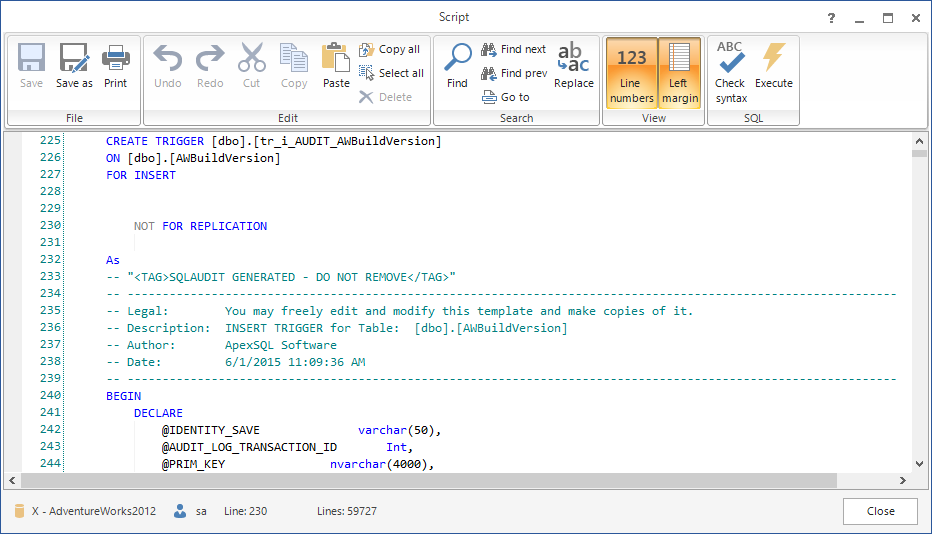
- Review it, modify if necessary, and execute against the database by clicking Execute button from the menu The tables with created triggers will be clearly marked as audited, and a list of those triggers will be shown in the Triggers pane
-
It’s all set now, and all you have to do is save the project for future reference
- The information about all captured transactions is stored within the audited database in three SQL Server database tables – two for data changes: dbo.AUDIT_LOG_DATA and dbo.AUDIT_LOG_TRANSACTIONS, and one for schema changes: dbo.AUDIT_LOG_DDL. Use them to add this information to your custom application
You don’t have to mine transaction log backups to see what happened, nor manually create triggers for all of your tables, have ApexSQL Trigger do that for you.
April 4, 2013


