


This article will describe a quick, no-coding approach to automating SQL Server database synchronization via a continuous integration.
Most of the ways to automate database synchronization usually come down to writing a PowerShell or batch script solution then configuring SQL Server Agent job or the Task scheduler. That requires some scripting skills and some additional actions to set the automated database sync.
How about using a continuous integration solution to do the work? The first thing that crosses anyone’s mind would be – Why would someone set up a robust CICD solution, configure it and troubleshoot it to make work just to perform a simple task like daily database synchronization? Well, the answer is – No, it doesn’t have to be like that.
The truth is most of the CICD build servers are expensive and complicated.
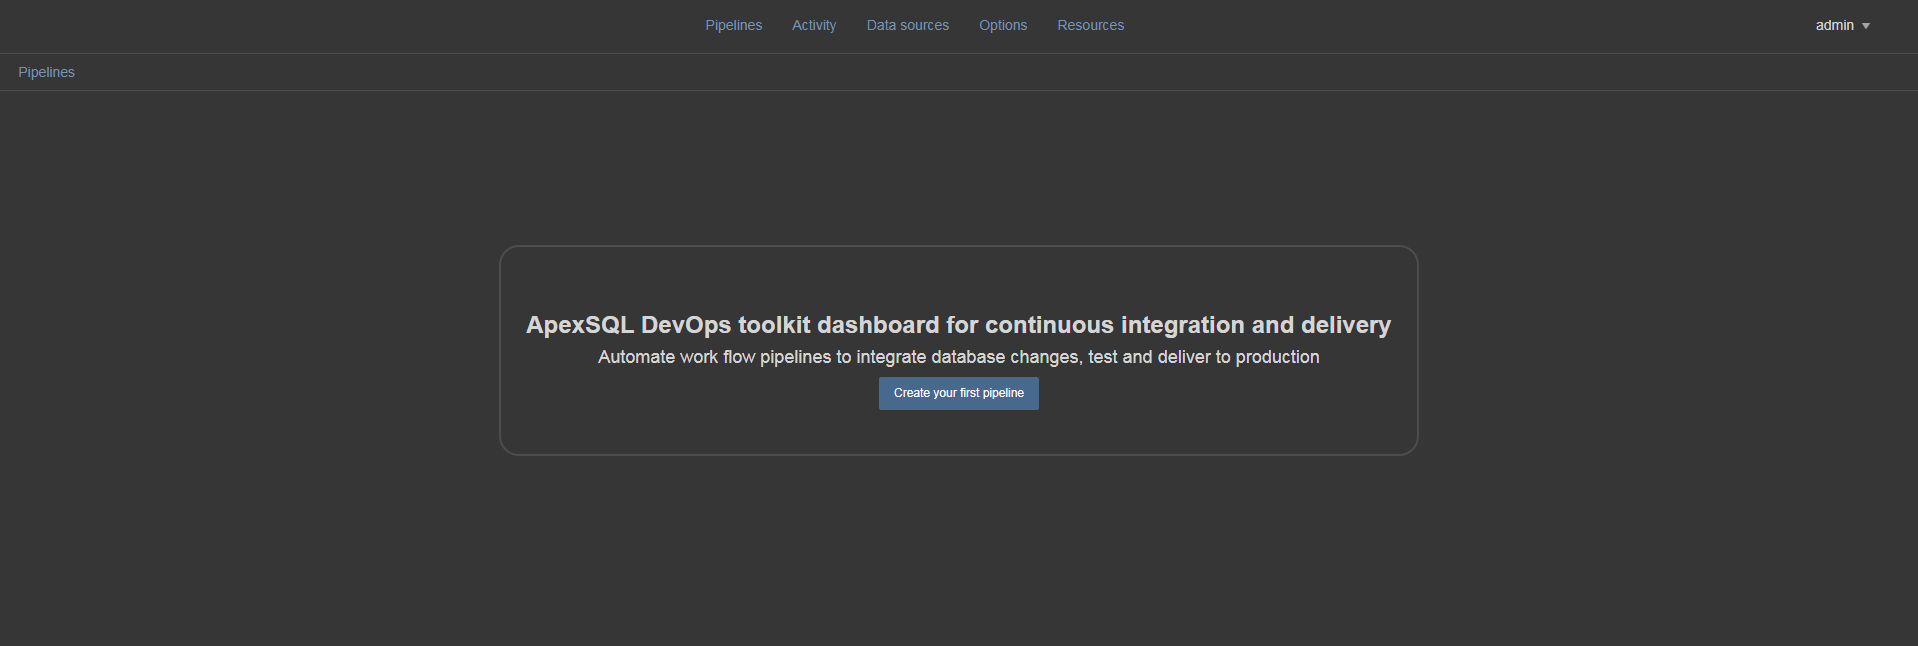
An alternative is using some lightweight install-and-run type of continuous integration solution. ApexSQL DevOps toolkit – Web dashboard is one very light, web based solution basically intended for continuous integration and continuous delivery but it is so flexible that can be used for very complicated CICD workflows down to simple database synchronization operation. What is needed here for database synchronization are some tools that have capability to perform database comparison – the ApexSQL Diff for schema comparison and ApexSQL Data Diff for data comparison so that web dashboard can trigger them for synchronization action.
Installation and main configuration of ApexSQL DevOps toolkit – Web dashboard requires literally two steps where port access number and user access needs to be defined. It installs as windows service and is ready to be used at any time by accessing the configured port via any web browser.
Step one, provide credentials for service startup

Step two, select connection type and access port and create the initial account for application login:
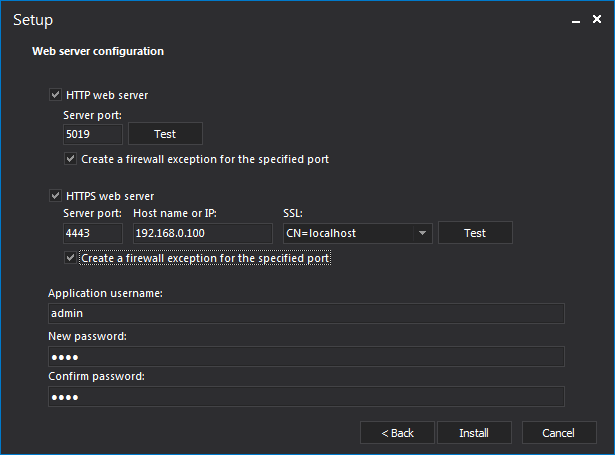
And wait for install to finish. That’s all, no detailed and advanced configuration like with other continuous integration systems.
Note that creating an HTTPS connection type will give one functional advantage that will be mentioned later.
The initial setup for our synchronization task requires creating a pipeline which would be the same as creating any continuous integration or continuous delivery (CICD) tasks. When creating a new pipeline its name and description should be provided and the build counter options can be ignored as it is typically used for CI builds.
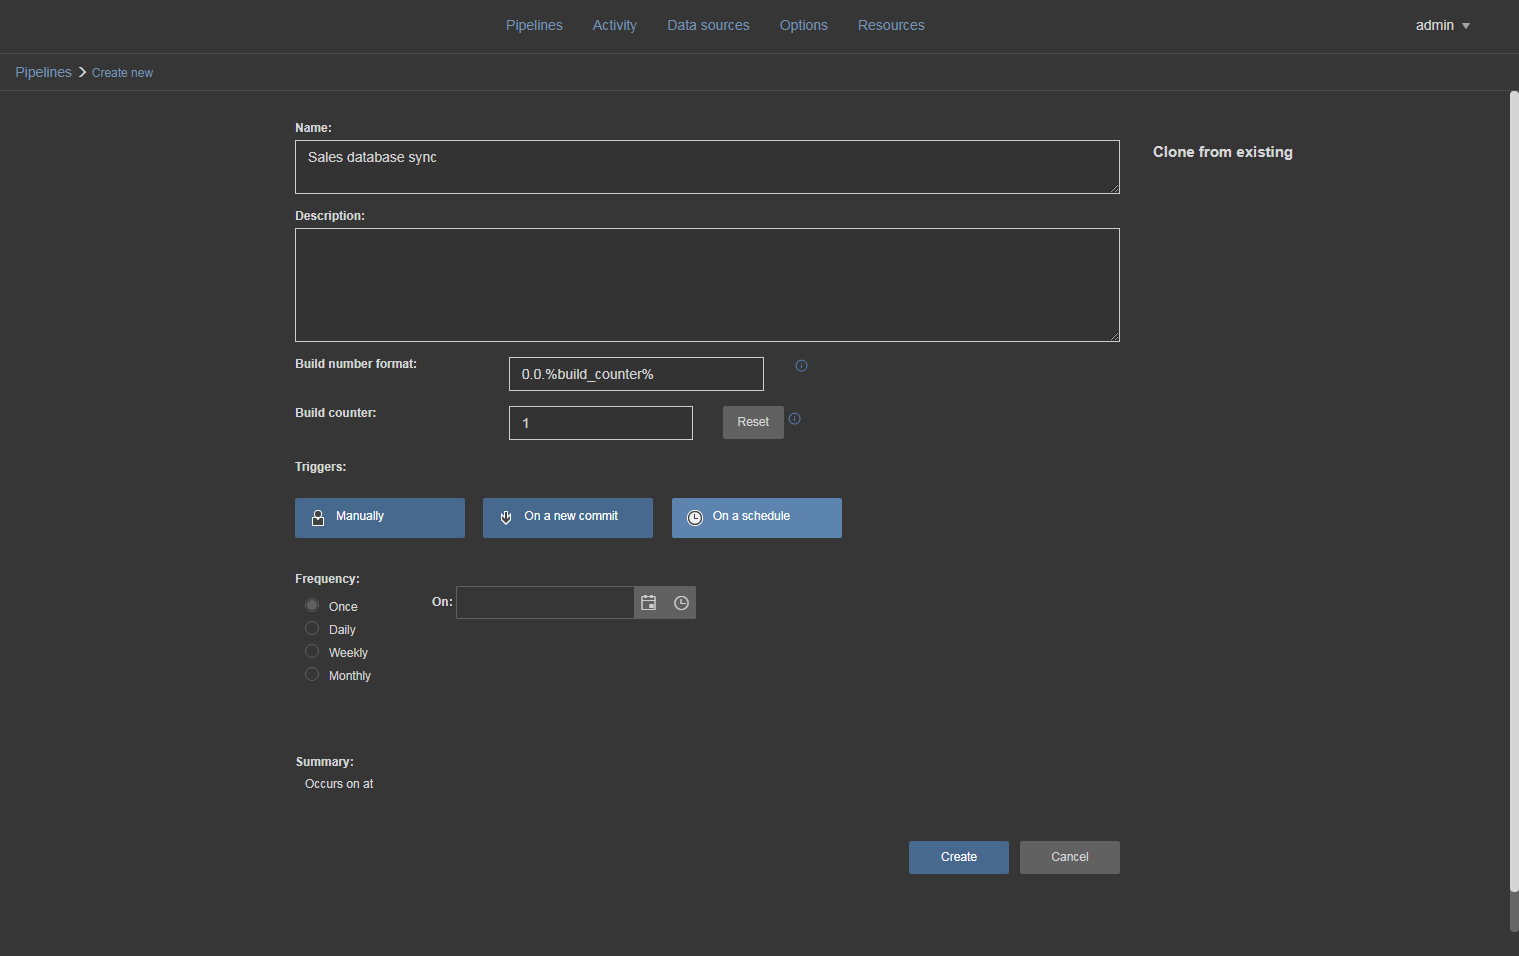
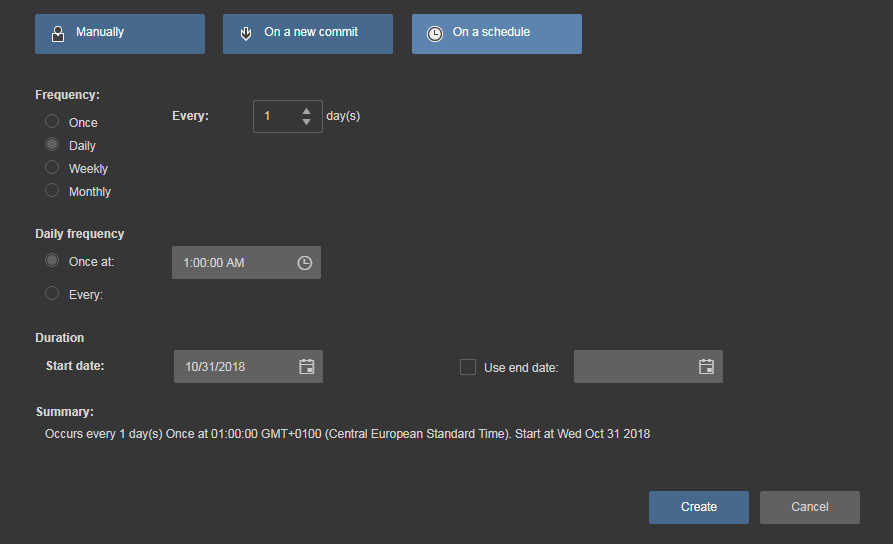
On the same screen next comes the scheduling setup. ApexSQL DevOps toolkit – Web dashboard has built in scheduler so there is no need for additional setup later trough SQL Agent or task scheduler. Confirming the pipeline configuration will switch view to the continuous integration steps configuration.
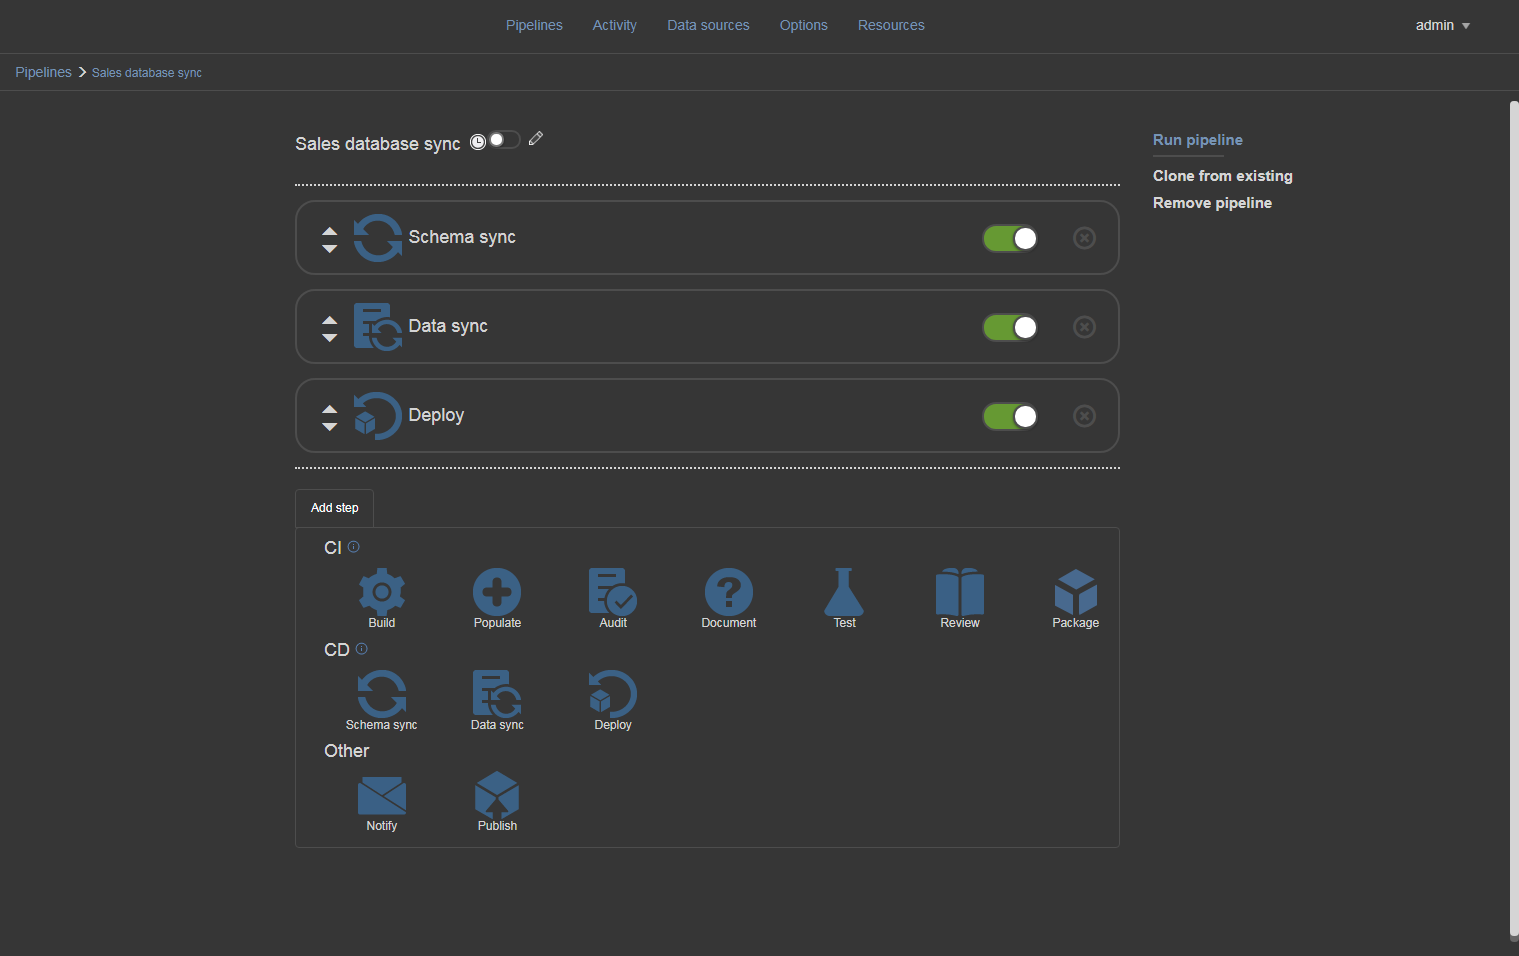
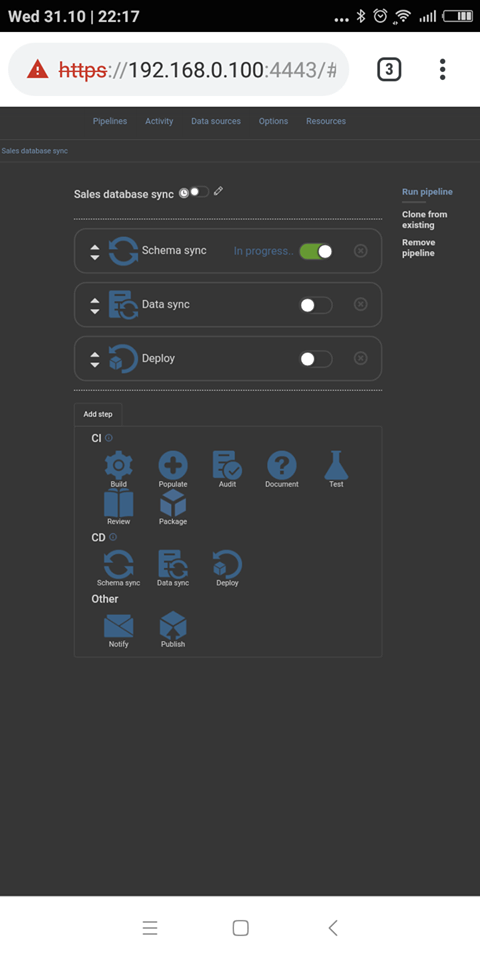
As Web dashboard is designed for continuous integration and continuous delivery tasks there is a selection of steps for both processes but for automating database synchronization the needed steps are Schema sync, Data sync, and Deploy steps grouped in the continuous delivery section (CD). Depending on what type of database synchronization is needed the appropriate step should be used. Let’s say that we have both daily schema and data changes that require scheduled synchronization.
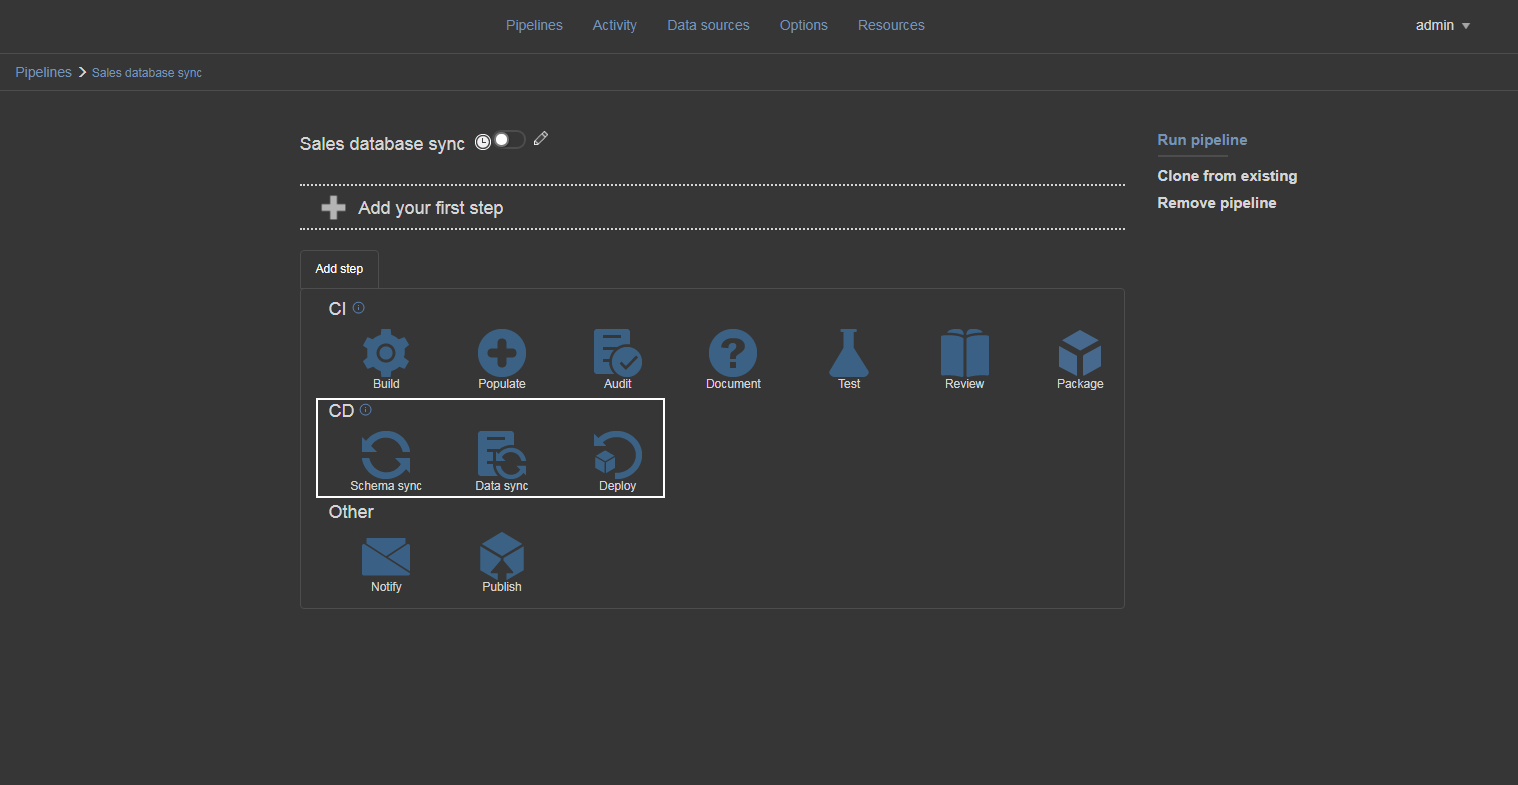
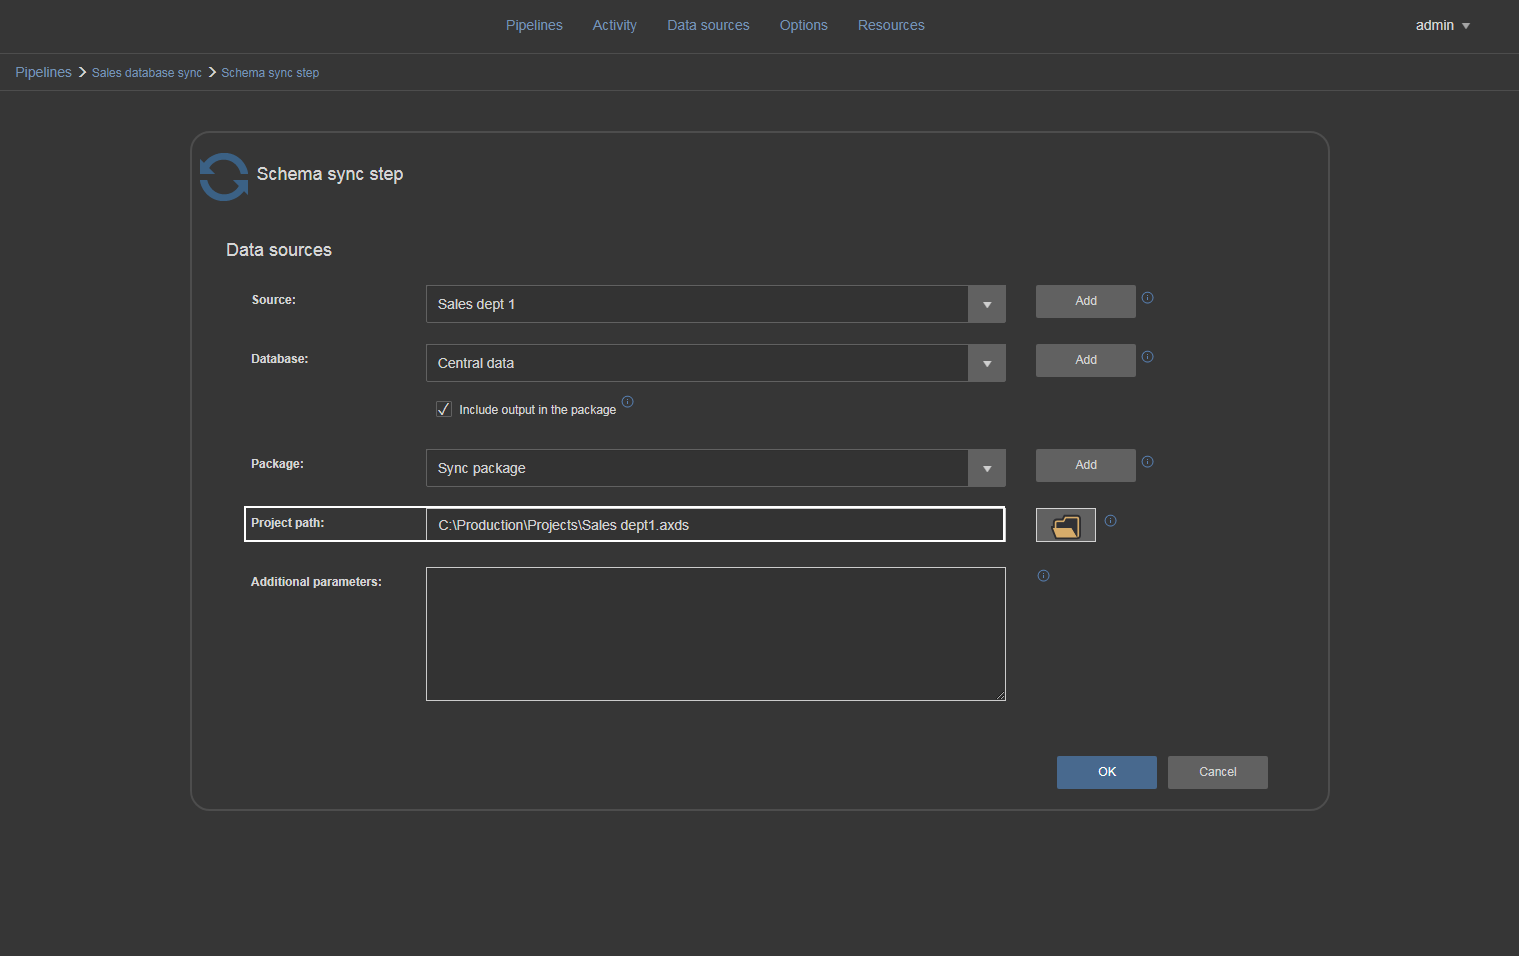
For this case first use Schema sync step for the schema synchronization by clicking on step’s icon or using drag-drop action toward the upper section. The Schema sync configuration options will appear. Here we can see options for the source and target database selection.
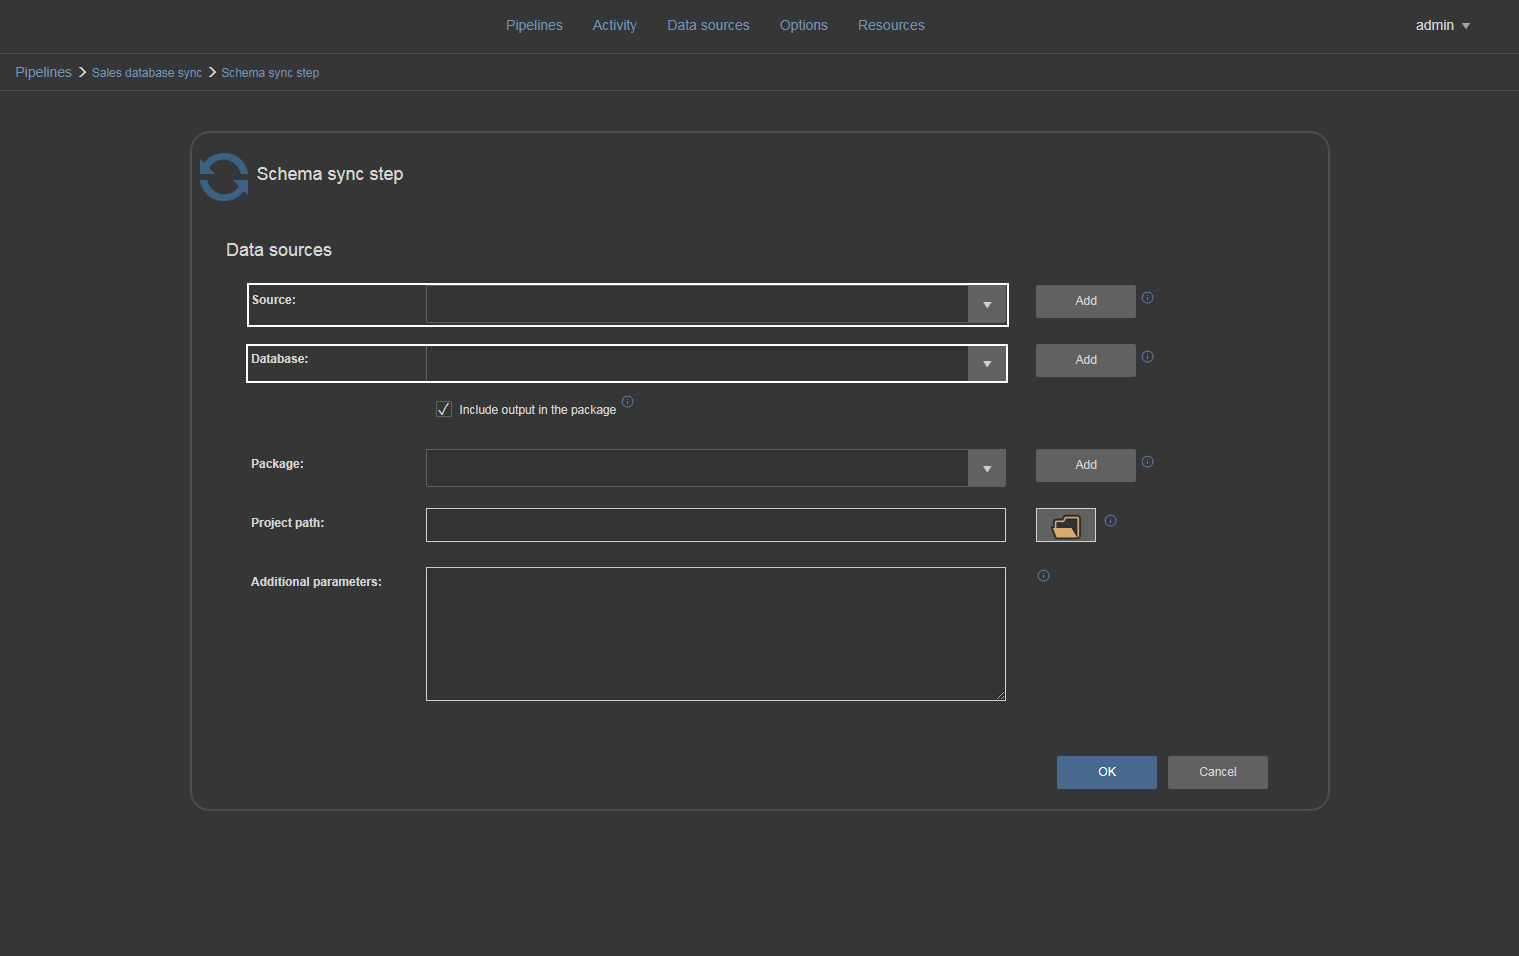
These options require a database data source type to be created. To do that use the Add button and the view for creating a data source will appear. In this view choose the database source type then populate the data source name field and desired database connection settings.
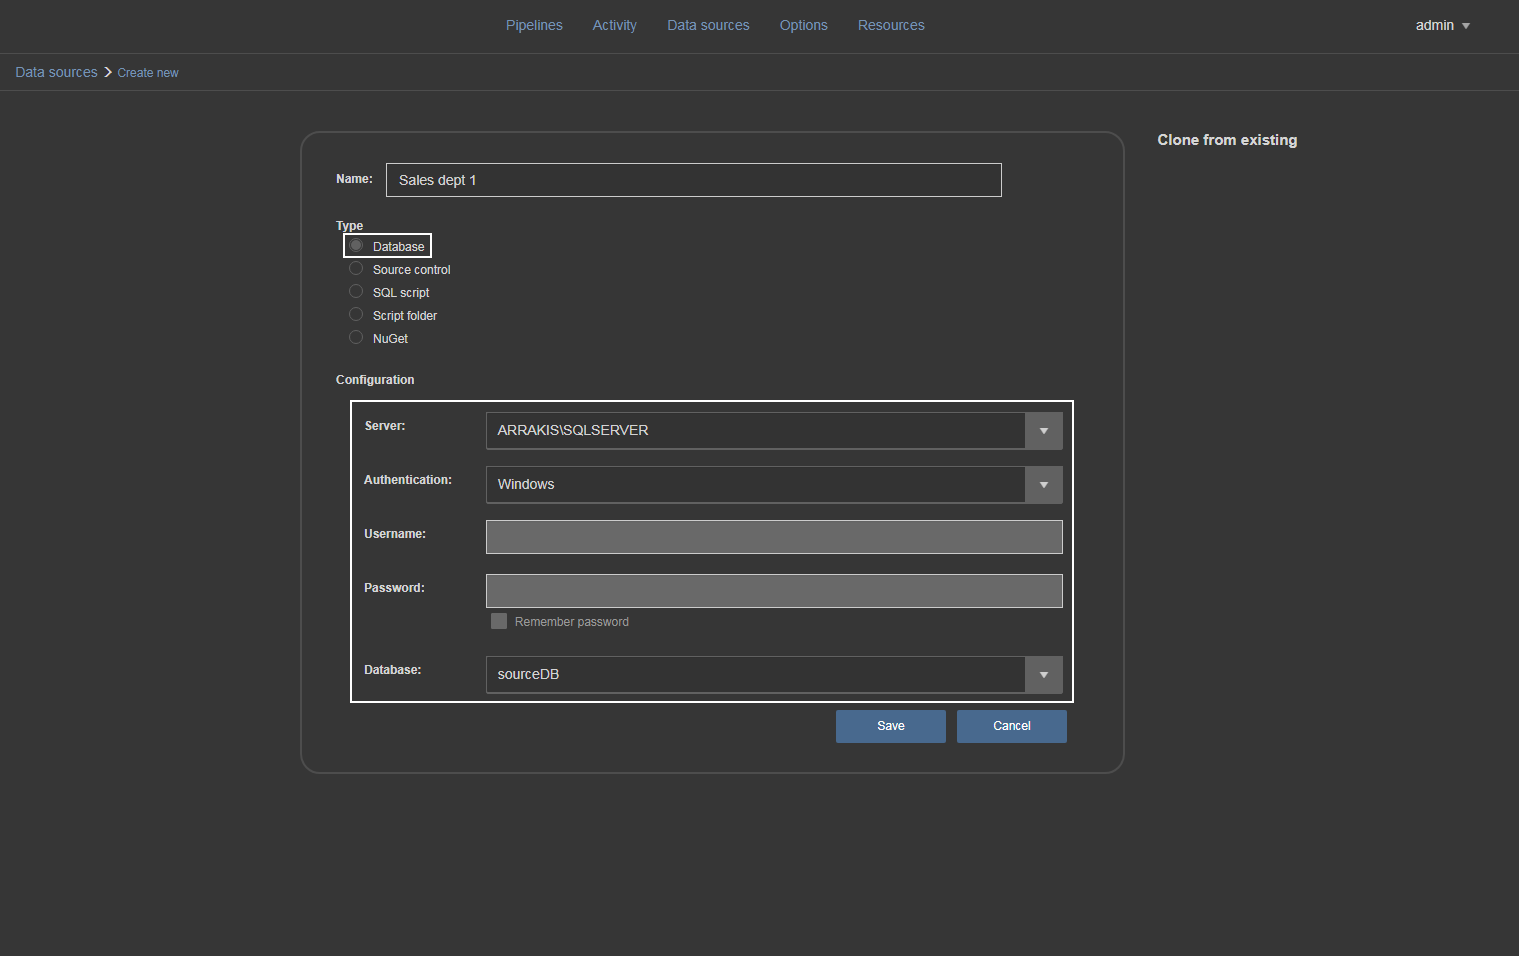
Confirm the settings and the data source will be ready for Schema sync step and also will be saved permanently for later use. Repeat the same procedure for the target database.

Following option to include output in package requires some additional explanation. This option will create a NuGet package file to store outputs of the Schema sync step.

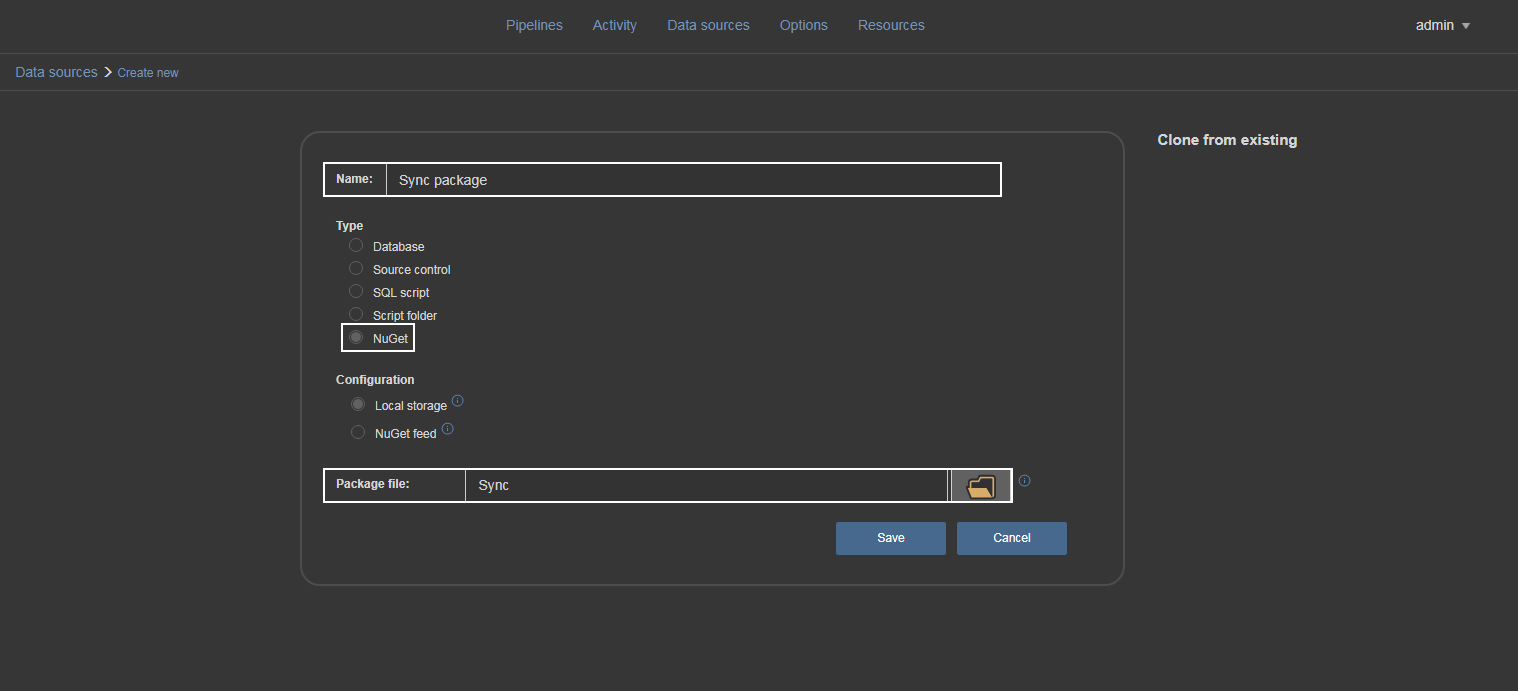
These packages are commonly used for continuous integration and continuous delivery workflows so the option to create them is present here. The outputs will be a database comparison summary and report and the schema synchronization script, all automatically created by the ApexSQL Diff tool. In case Include output in package option is not used, those outputs will be created but not stored in the package. There is one advantage of using a NuGet package for the database synchronization task and that is to easily use stored sync scripts for Deploy step which will execute them instead of providing paths manually to those scripts which will be explained later. Creating NuGet package data source is as easy as those database type data sources. Just type in the data source name and the NuGet package file name then confirm with save.
Note that the chosen name will be automatically gain a suffix part from the build counter.
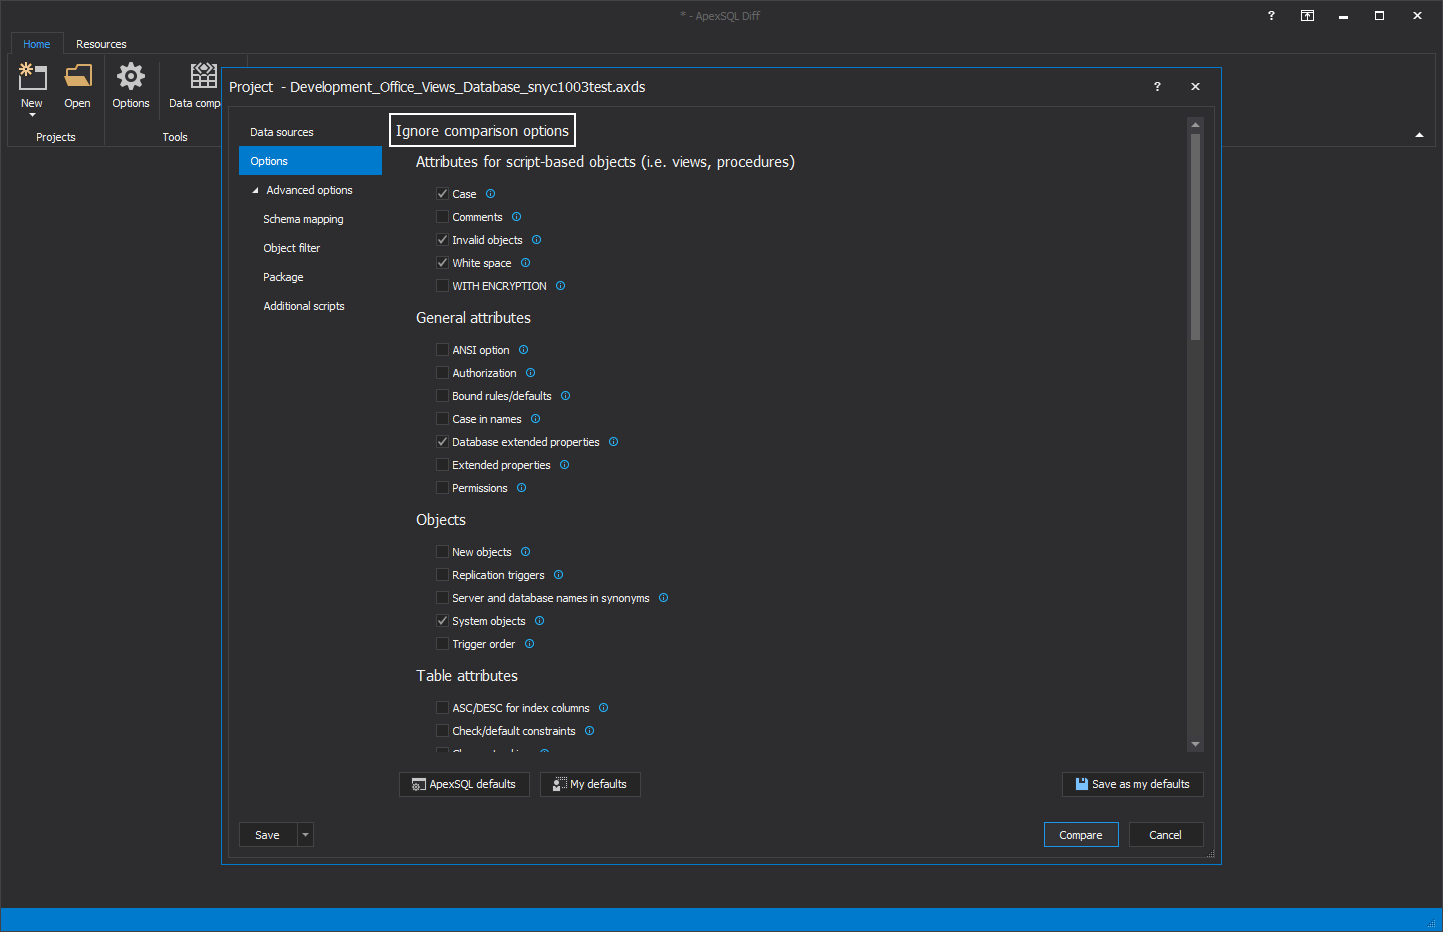
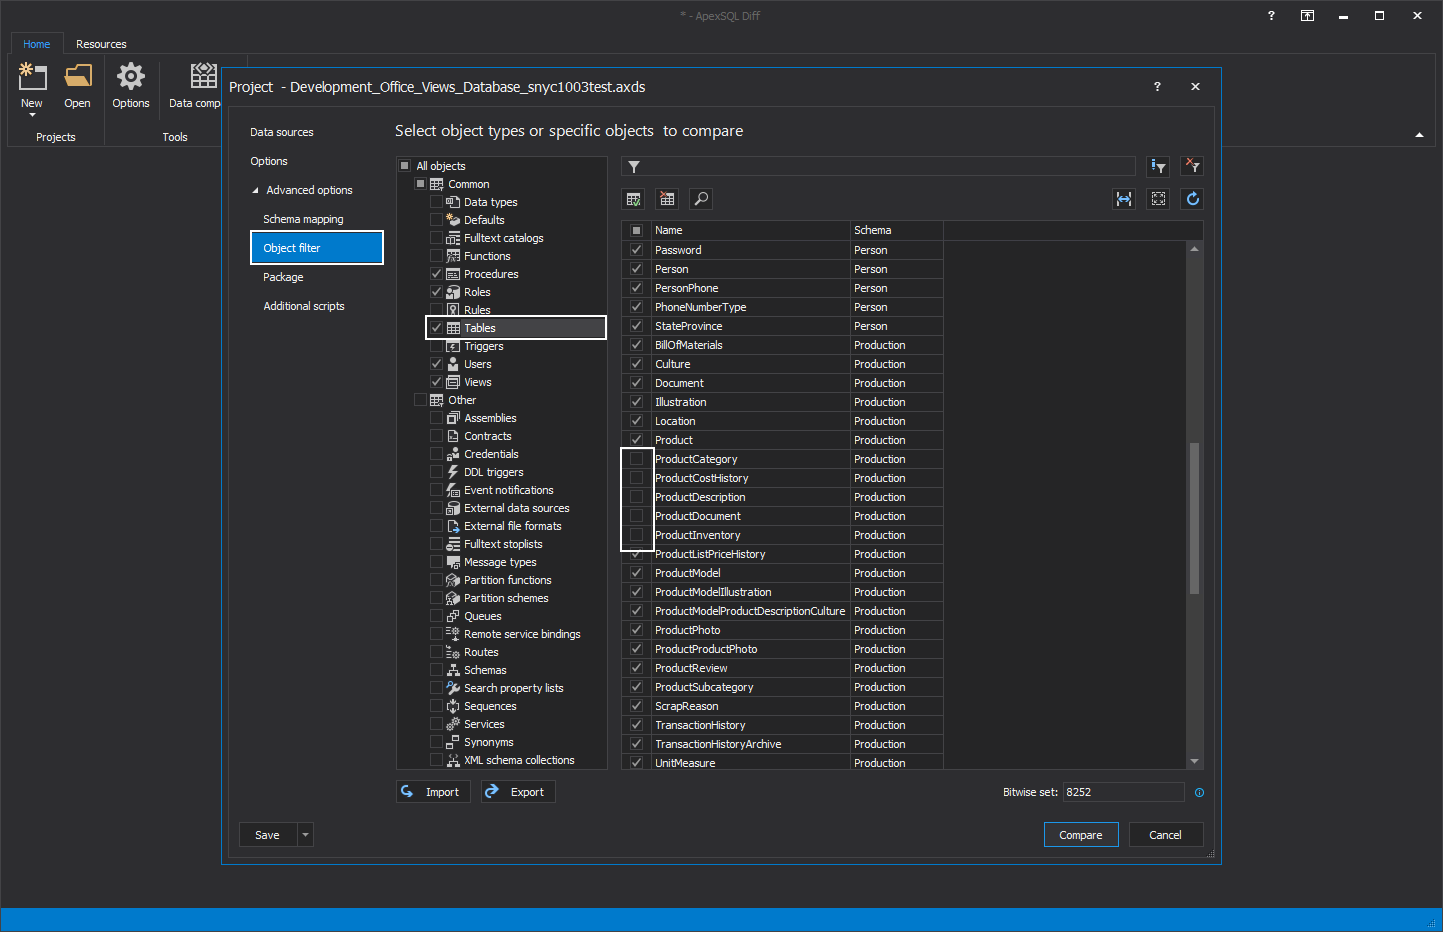
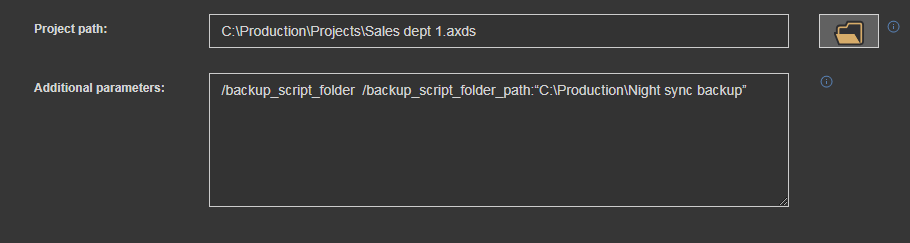
Now, when database synchronization source and destination are set, the natural question would be: “There aren’t any options, I want to synchronize only a few items, not an entire database?” – Oh, but there are options, abundance of options. As the tool was designed for simplification of continuous integration setup these options can be set as template in the ApexSQL Diff project file and imported by providing the project file path in the designated field.
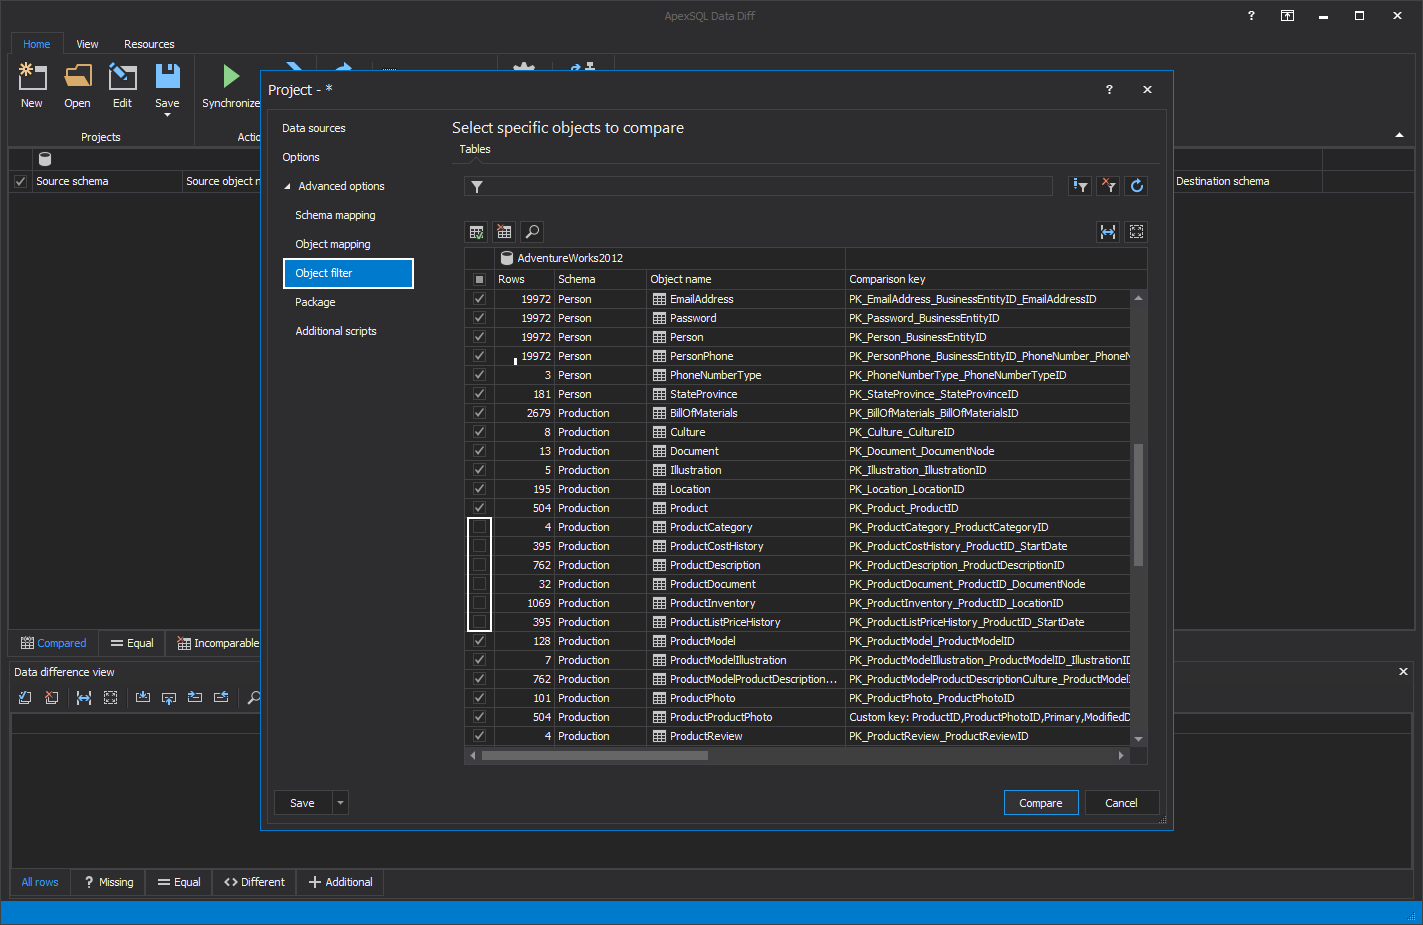
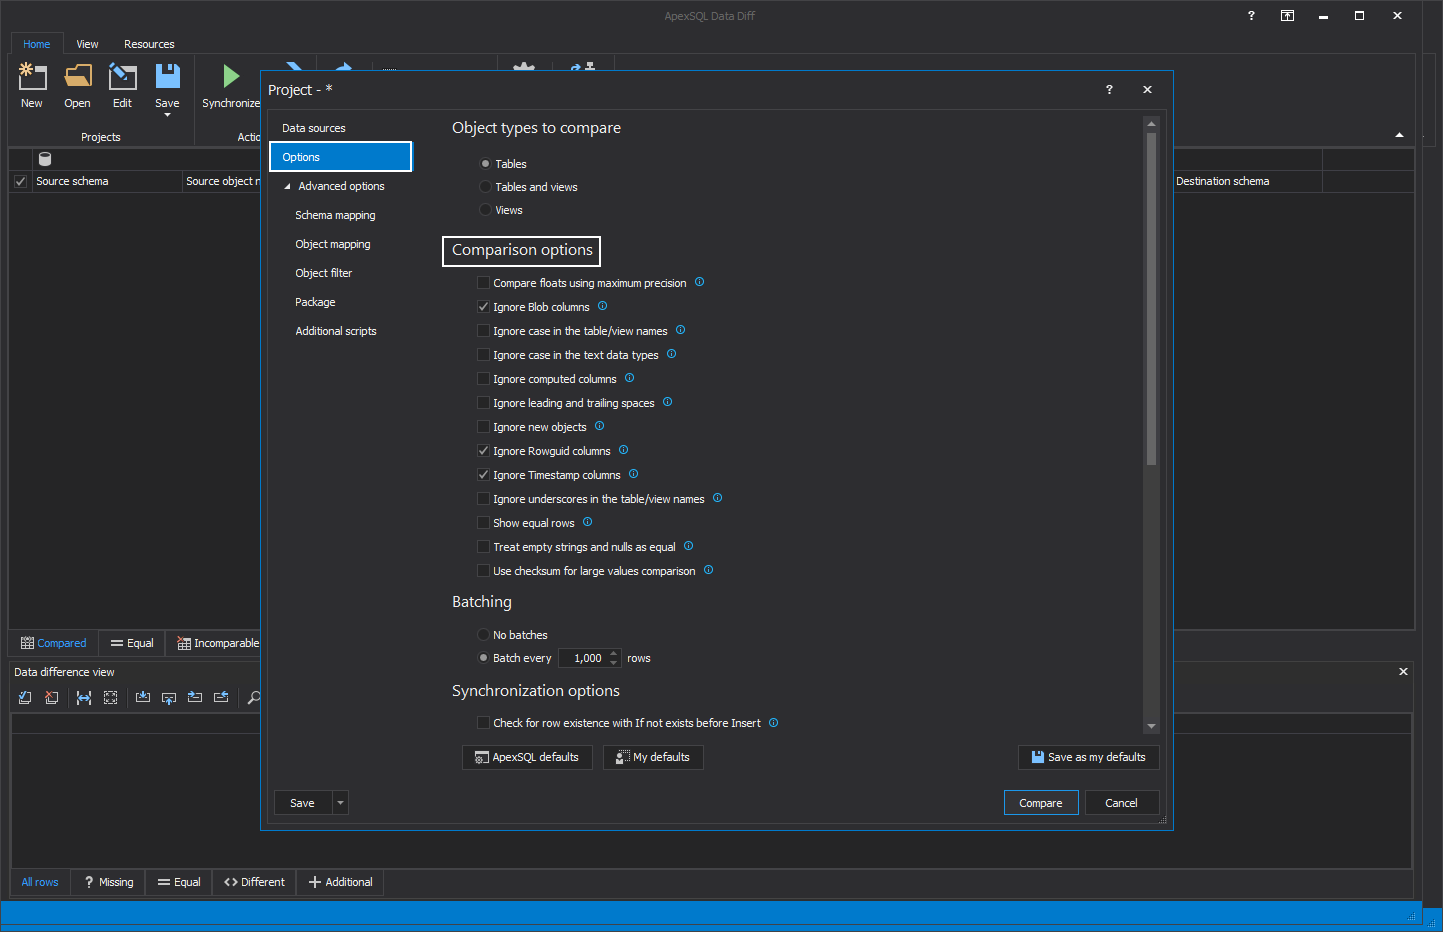
With the ApexSQL Diff project, there are options to ignore certain differences when doing comparison which means that objects will be compared but ignored differences will not be considered for synchronization.
There are also options to filter out certain objects or object types and do not include them in comparison at all.
Sometimes it is convenient to have available options on the spot for continuous integration configuration so apart from the project file imported options there is the field to use a set of CLI interface option associated with the database synchronization tool which can update the project file options by overriding them or supplement them.
The Data sync step works exactly like the Schema sync step was explained only for synchronizing table and/or view objects data. It requires Source and target databases but in case the Schema sync was previously used as explained the database data sources will already be available for choosing.
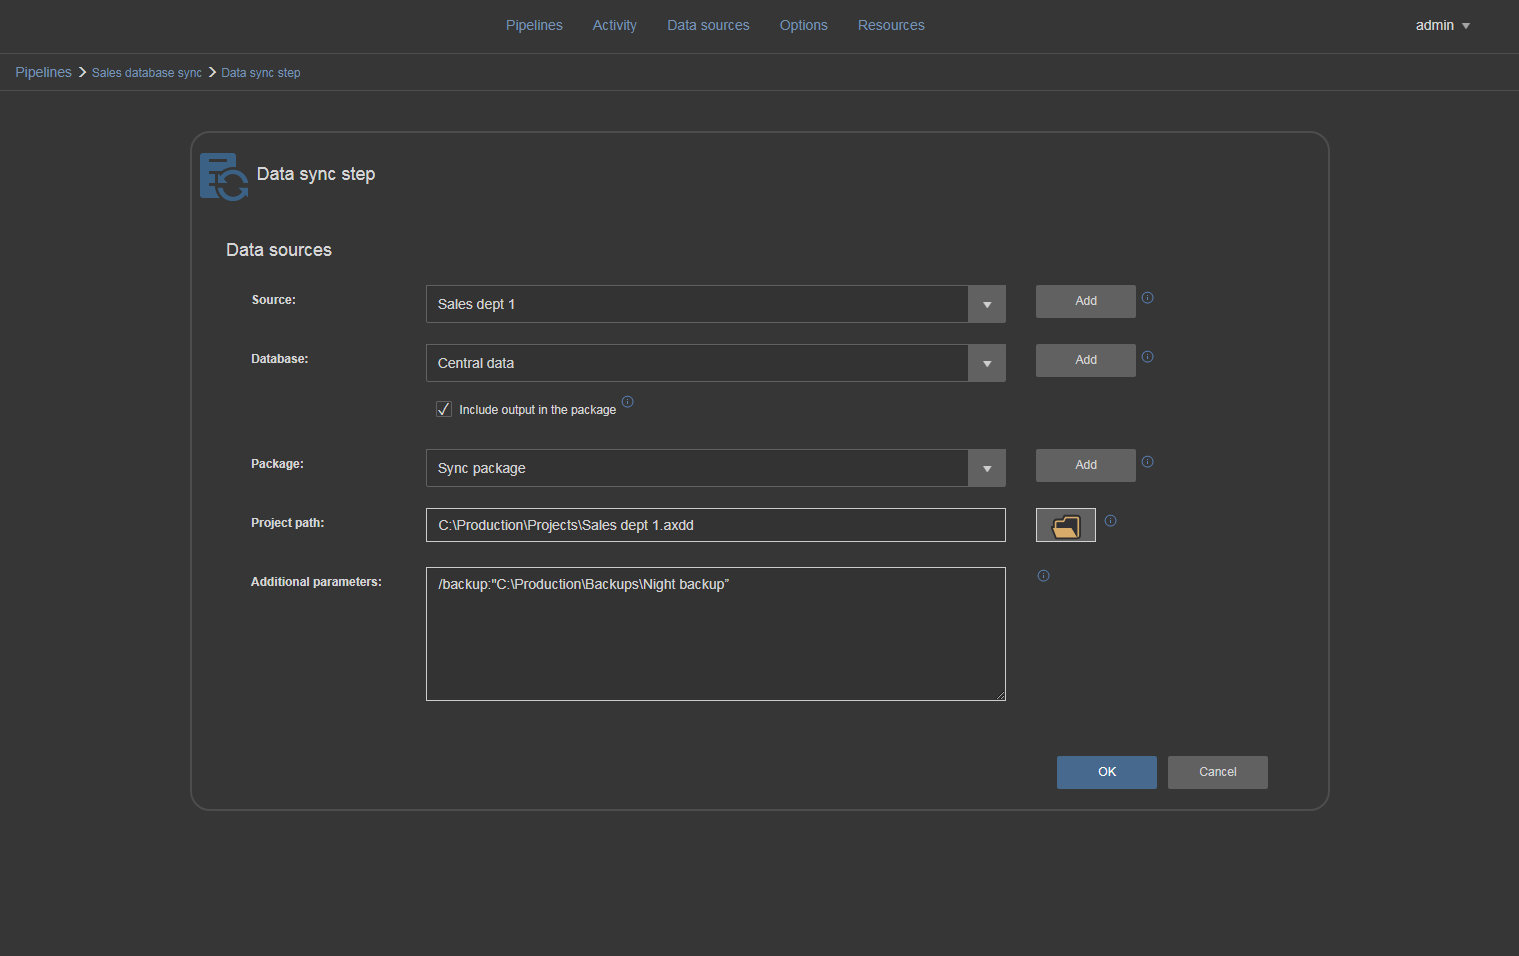
Synchronization options can be imported with ApexSQL Data Diff project file where there can be set some row filtering
and data comparison options.
Data sync will create a data comparison summary and data synchronization script which can be stored in a NuGet package along with Schema sync outputs.
The Deploy step is usually used in continuous integration/delivery process for final control of the database synchronization and it has two configuration variants.
The first variant is using the NuGet package created with Schema/Data sync steps. In that case, the From the package option should be selected and then as Source the NuGet package data source used in previous steps. As a target, the data source with a defined destination database should be selected. Deploy step will extract synchronization scripts from the package and execute them.
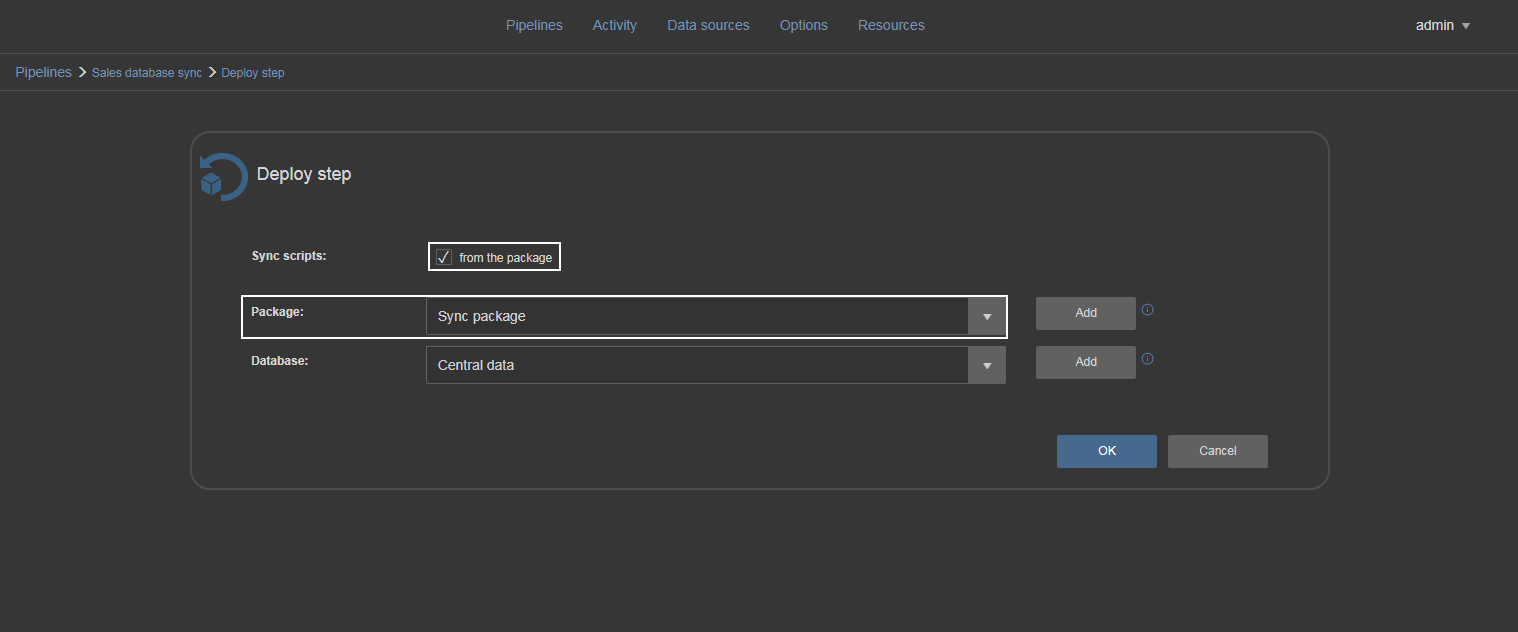
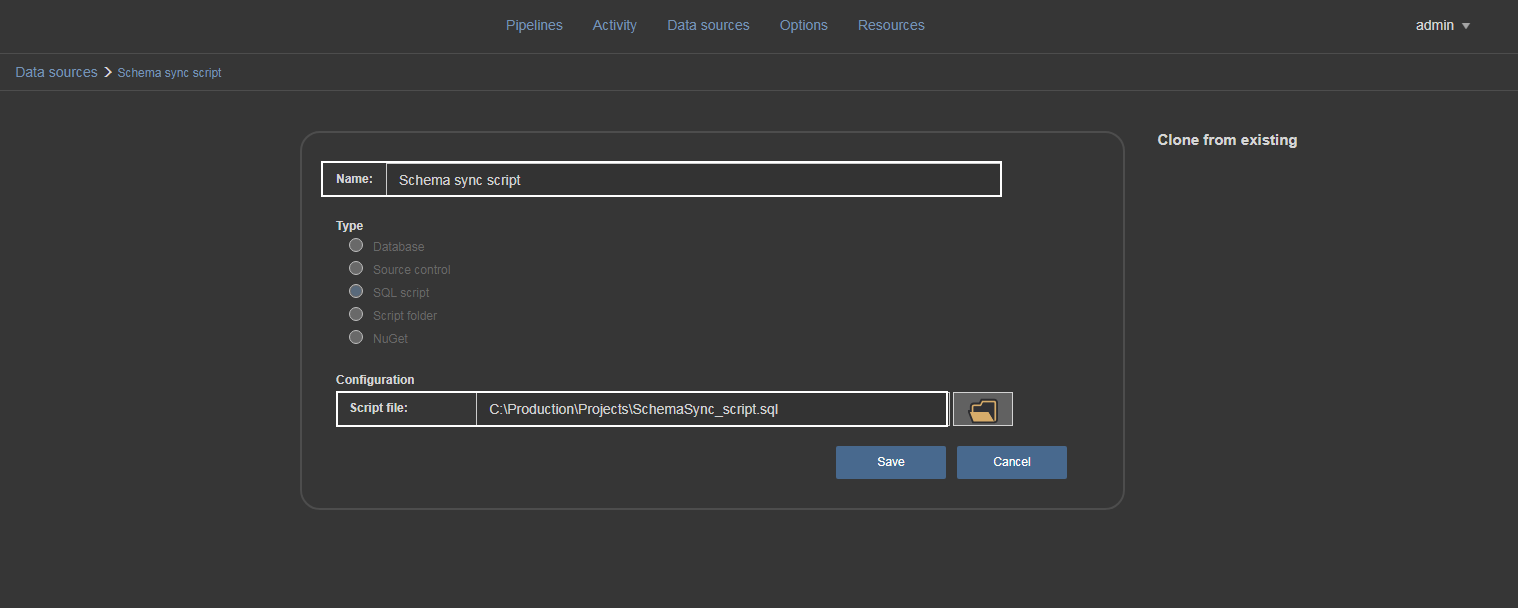
The second variant is available when From the package option is not selected. In that case, a SQL script data source type should be provided.
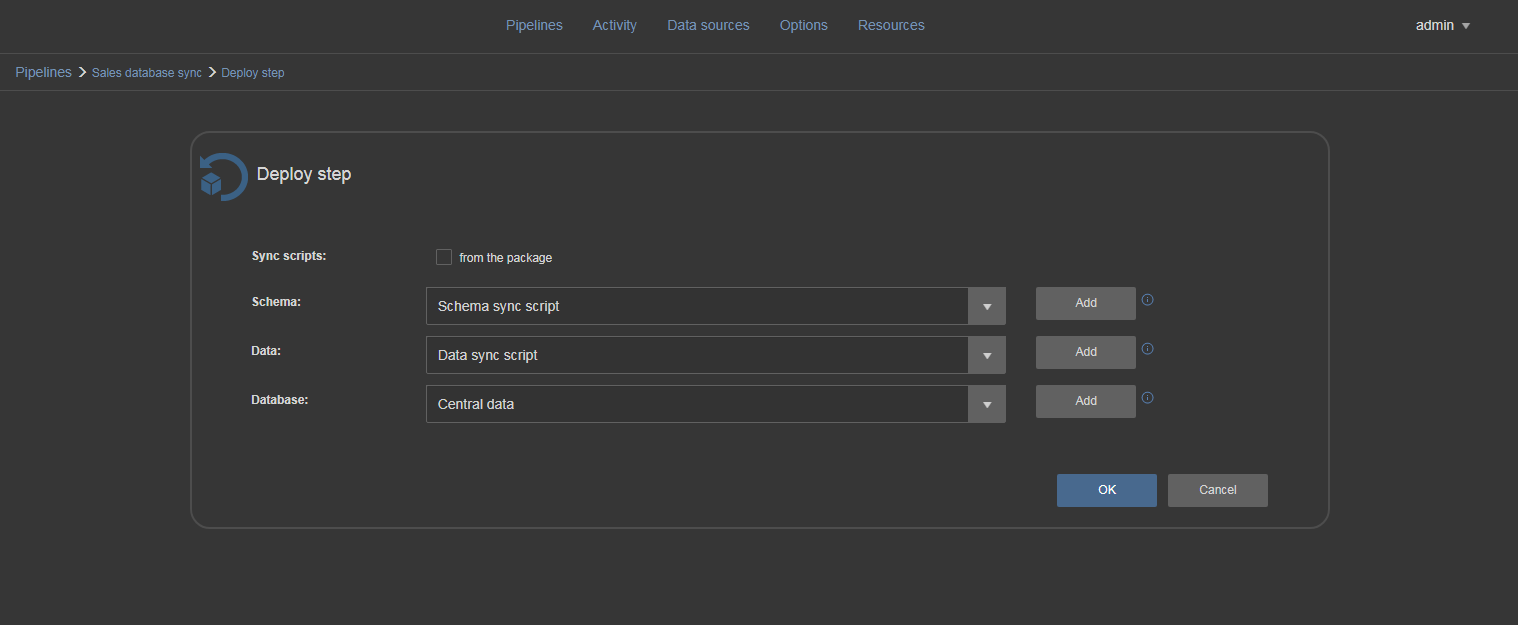
It is created the same way as the rest of the data source types. Click on Add button and in the opened form enter data source name and path to appropriate sync script (created previously by Schema and Data sync steps)
When synchronization scripts are provided as input, the Deploy step is prepared to execute synchronization when scheduler activates it.
With Schema/Data sync and Deploy steps combined together the pipeline will look like usual continuous delivery pipeline except fact that direct comparison between two databases was used instead of using the source from development.
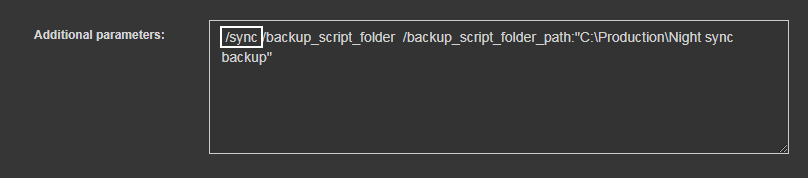
There is a way to simplify this task even more. When configuring Schema/Data sync steps, use the “/sync” switch as an additional parameter and the step will perform the comparison, create sync script and execute it immediately. This option eliminates the need for Deploy step but reduces control of the process.
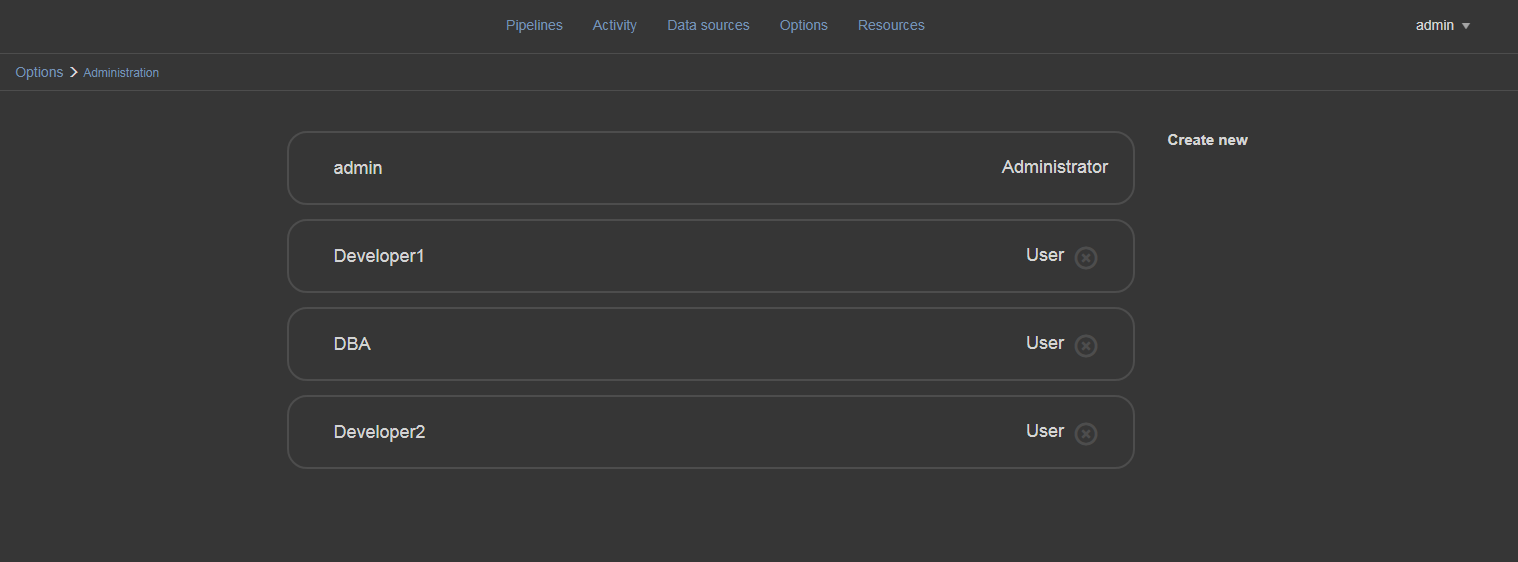
One of the greatest perks of the ApexSQL DevOps toolkit – Web dashboard CI solution is that it can be configured for database synchronization and continuous integration tasks at the same time. The pipeline management concept allows that. Additionally, since the tool allows multiple users, the CI and CD pipelines can be completely isolated from those synchronization tasks because users manage their own pipeline configurations.
At the end comes one very handy option. If the HTTPS connection is configured as mentioned earlier during installation, the secure port, with some port forwarding router configuration, can be used to access, reconfigure or monitor the synchronization via any mobile device with internet browser and internet connection.
In conclusion, low/no code database synchronization has never been easier with a continuous integration solution.
November 29, 2018


