


If there was need to restore a SQL Server database backup to an older version of SQL Server there was “greeting” with error messages along the lines of:
Msg 3169, Level 16, State 1, Line 1

Msg 3013, Level 16, State 1, Line 1
RESTORE DATABASE is terminating abnormally.
or
Msg 3241, Level 16, State 7, Line 1

Msg 3013, Level 16, State 1, Line 1
RESTORE DATABASE is terminating abnormally.
and the attempted backup restore would fail.
The reason for this behavior is that by default SQL Server doesn’t allow restoring a database backup to an older version of SQL Server, regardless of the compatibility level of the database the backup was taken from.
However, there is a way to restore a database to a newer SQL Server version.
If there is access to the live database backup was taken from:
- Start SQL Server Management Studio and connect to the instance where the database resides
- In the database context menu, navigate to Tasks | Generate Scripts…. This will invoke the Generate and Publish Scripts wizard
- In the Introduction step of the wizard click the Next button
- In the Choose Objects step of the wizard make sure that the Script entire database and all database objects option is selected and click the Next button
- In the Set Scripting options step of the wizard:
- Select the Save scripts to a specific location option
- Specify whether the database objects and data will be scripted to a single file, multiple files, as well as the path and encoding of the generated scripts
- Click Advanced
- In the Advanced Scripting Options window that will appear:
- Specify the version of the SQL Server you need the database restored to in the Script for Server Version option
- In the Script for Server Version option, specify Schema and data
- Set the following options to True:
- Script Logins
- Script Full-Text Indexes
- Script Triggers
- Click the OK button
- Click the Next button
- In the Summary step of the wizard, click the Next button
- In the Save or Publish Scripts step of the wizard click the Finish button
- Execute the generated SQL script(s) against the older SQL instance
Although the procedure listed above should work:
- It doesn’t migrate all of the database objects (e.g. sequences or queues)
- It might fail if your database contains dependencies which SQL Server fails to recognize (e.g. dependencies to databases residing on linked servers)
To top it all, if there is no access to the original database for any reason (e.g. migrating the database to an off-site location with no network connectivity), the above procedure is inapplicable in that scenario.
Does that mean a backup cannot be restored to an earlier SQL Server version? No, far from it – this is where ApexSQL Diff and ApexSQL Data Diff come into play.
ApexSQL Diff is a SQL Server database schema comparison and synchronization tool which detects differences between database objects and resolves them without errors. It generates comprehensive reports on the found differences and can automate the synchronization process between live and versioned databases, backups, snapshots, script folders and source control projects.
ApexSQL Data Diff is a SQL Server data comparison and synchronization tool which detects data differences and resolves them without errors. It can compare and sync live databases and native or natively compressed database backups, script folders and source control projects, and it generates comprehensive reports on the detected differences.
To restore the backup to and older SQL Server version
- On the target SQL instance, create an empty database to hold the data and objects restored from the backup
- Start ApexSQL Diff
-
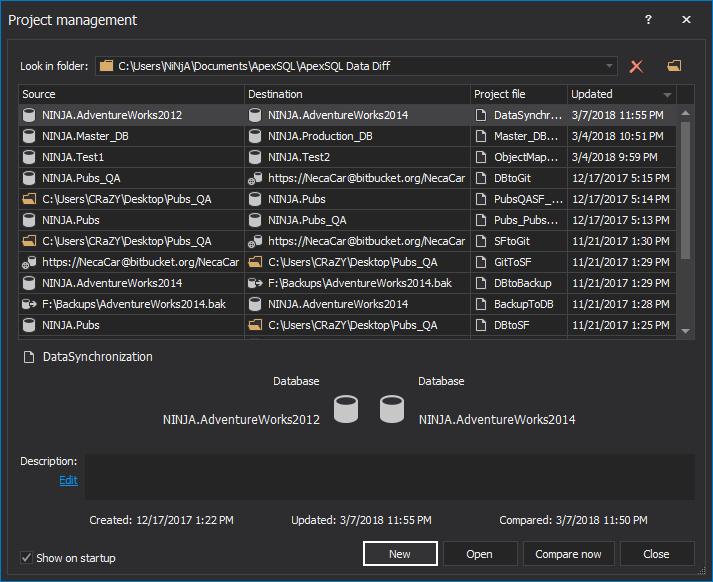
Click the New button in the Project management window:

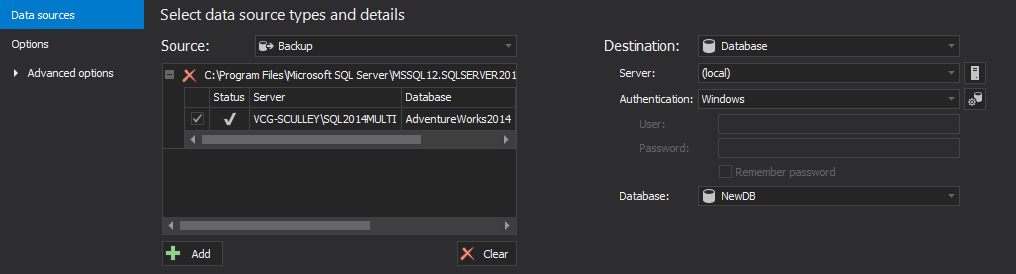
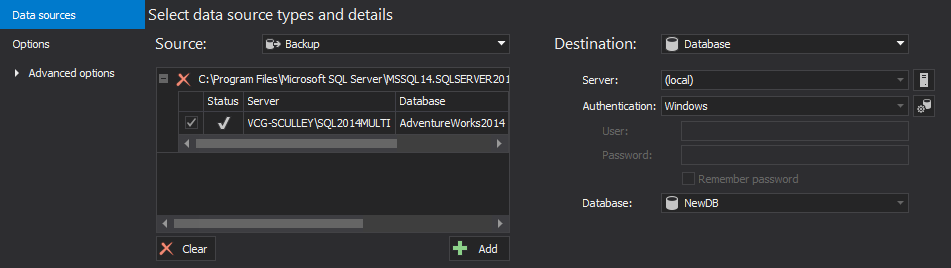
- In the Source panel:
- Select Backup from the Source drop-down list
- Click the Add button and navigate to the folder where the backup file resides
- Select the backup and click the Open button
- In the Destination panel:
- Select Database from the Destination drop-down list
- Specify the SQL instance where the database to which to recover the objects reside from the Server drop-down list
- Specify the authentication method for that SQL instance (and a valid set of credentials if you chose SQL Server authentication)
- Specify the name of the database to which to recover the objects in the Database drop-down list
- Click the Compare button in the bottom-right corner of the New project window
-
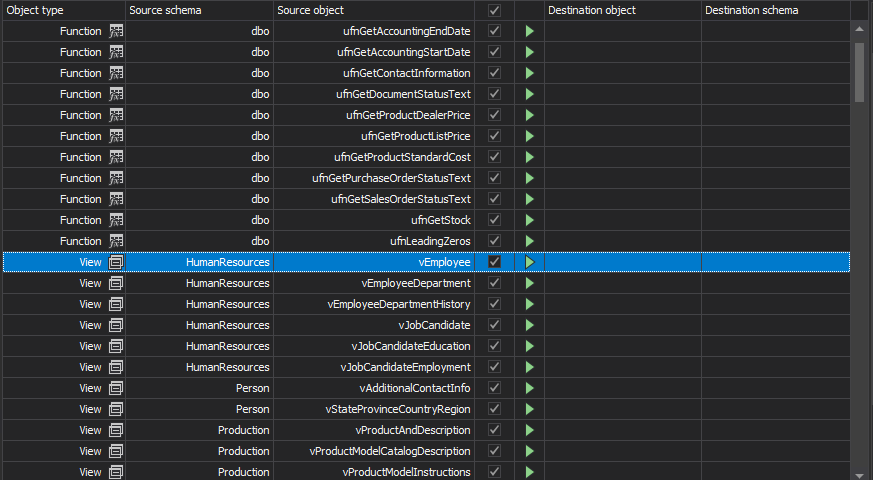
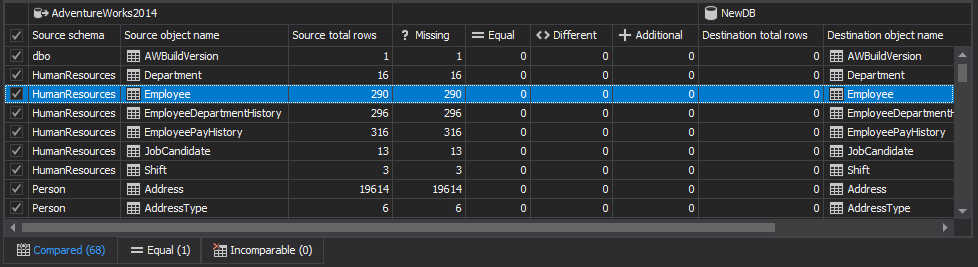
Select all the objects listed in the Main grid:
- Click the Synchronize button in the Actions region of the ribbon’s Home tab:

- Click the Next button in the Synchronization direction step of the Synchronization wizard
-
Click the Next button in the Dependencies step of the Synchronization wizard, since all objects will be synchronized all depended objects are included and this list will be empty
-
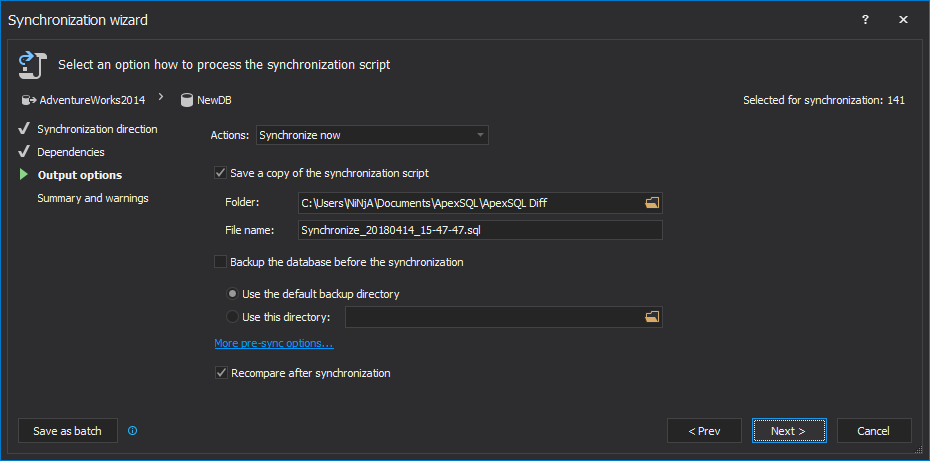
In the Output options step of the Synchronization wizard, choose the Synchronize now action and click the Next button:
-
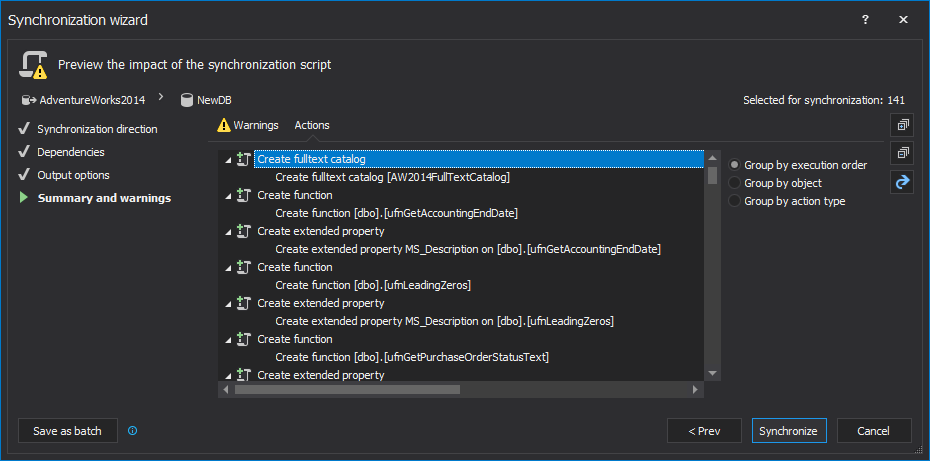
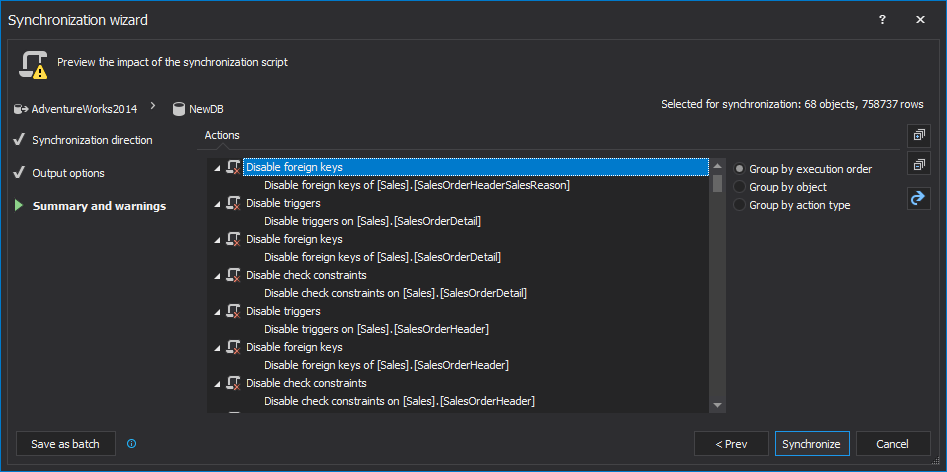
Review the synchronization summary and warnings, if any, and click the Synchronize button:
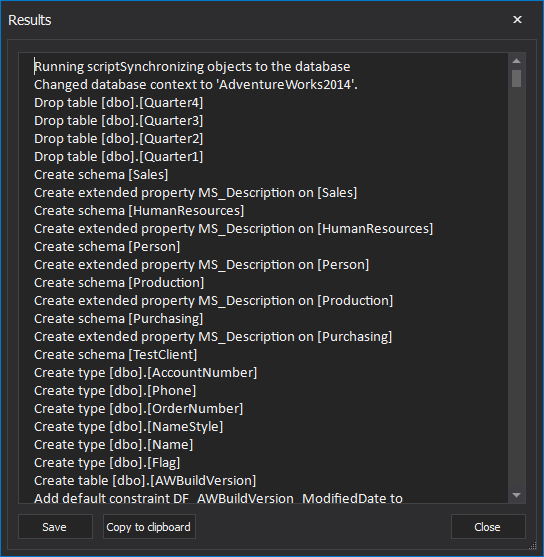
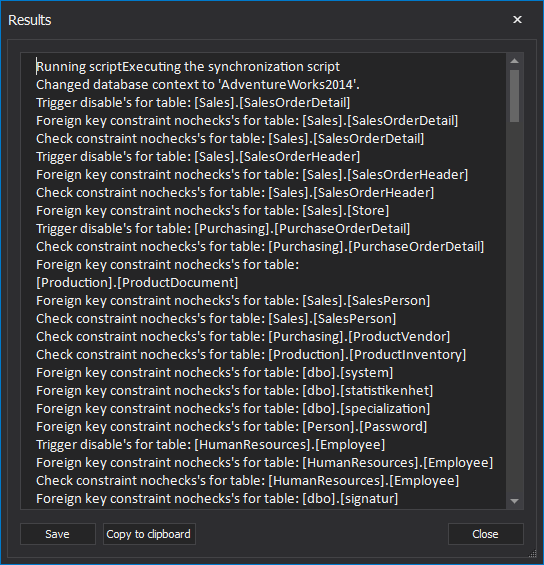
- The Results window will be shown upon finished synchronization process:
- Start ApexSQL Data Diff
-
Click the New button in the Project management window:
- In the Source panel:
- Select Backup from the Source drop-down list
- Click the Add button and navigate to the folder where the backup file resides
- Select the backup and click the Open button
- In the Destination panel:
- Select Database from the Destination drop-down list
- Specify the SQL instance where the database to which to recover the data reside from the Server drop-down list
- Specify the authentication method for that SQL instance (and a valid set of credentials if you chose SQL Server authentication)
- Specify the name of the database you want to recover the data to in the Database drop-down list
- Click the Compare button in the bottom-right corner of the New project window
-
In the Main grid, select the database tables the data is to be recovered to:
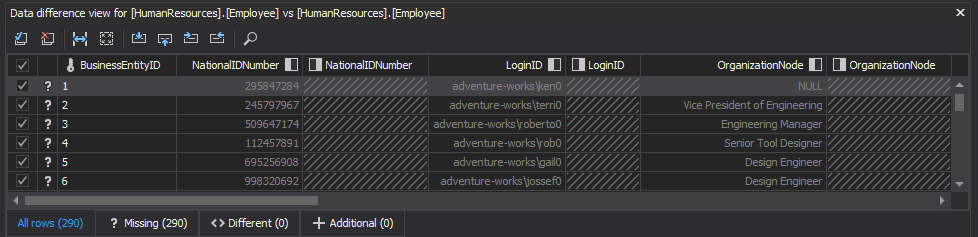
- Select the rows to be recovered from in the Data difference view panel:
- Click the Synchronize button in the Actions region of the ribbon’s Home tab:

- Click the Next button in the Synchronization direction step of the Synchronization wizard
- In the Output options step, of the Synchronization wizard, choose the Synchronize now action and click the Next button:

- Review the synchronization summary and warnings if any and click the Synchronize button:
- The Results window will be shown upon finished synchronization process:
And that’s literally all that’s to it.
April 4, 2013


