


An accidentally dropped table may be recovered in several ways. The choice of technique depends on the resources available for the recovery. The first choice is usually a database backup. But, even if the one doesn’t exist, the dropped table may still be recovered (in some cases even quicker than with a backup).
Let’s see how this can be done:
Use SQL Server Management Studio
If there is a full database backup or a chain of differential backups containing the dropped table:
-
Restore the database on a test server
-
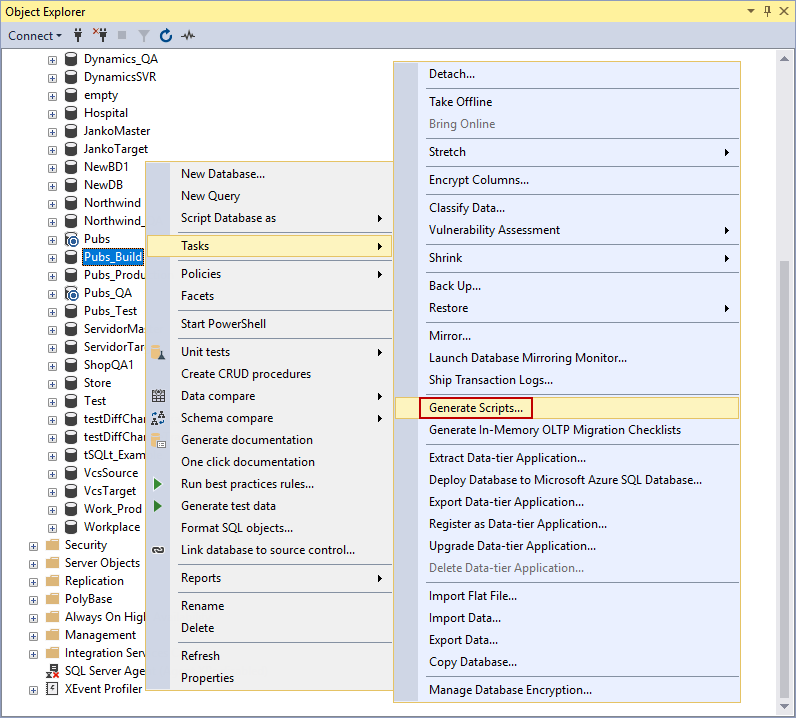
In SQL Server Management Studio, right-click the database, select the Tasks sub-menu and then the Generate scripts command:
-
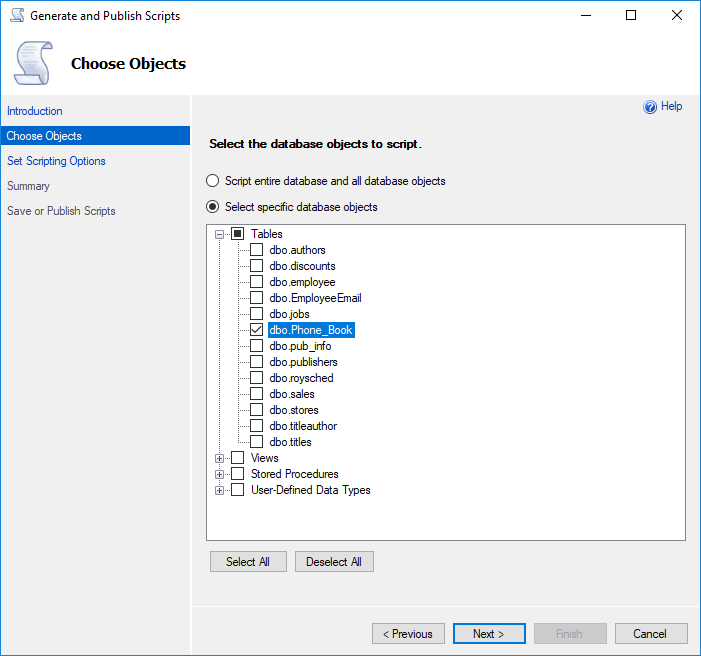
In the Choose objects tab, switch to the Select specific database objects option and select the dropped table:
-
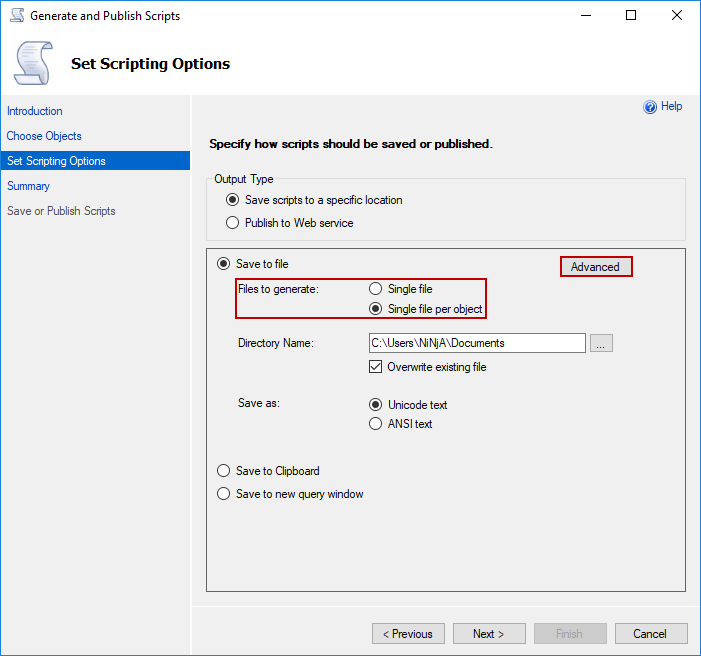
In the Set scripting options tab, choose between the Single file or Single file per object files to generate options, and specify the file path and name:
-
Click the Advanced button and check:
- Generate script for dependent objects – to script the objects that depend on the dropped table. Note that a table cannot be dropped without removing the referencing constraint or the table first
- Types of data to script – select Schema and data, if there is a need to recover the lost records, too:

-
Once the script has been generated, it can be opened, reviewed and modified. The script creates the dropped table first, and then inserts the dropped records:
CREATE TABLE [dbo].[Orders](
	[Id] [int] NOT NULL,
	[OrderNo] [int] NOT NULL,
	[CustomerId] [int] NULL,
	[OrderDate] [date] NULL
) ON [PRIMARY]

GO
INSERT [dbo].[Orders] ([Id], [OrderNo], [CustomerId], [OrderDate])
VALUES (1, 1000, 35, CAST(0x2A370B00 AS Date))
ALTER TABLE [dbo].[Orders] ADD  DEFAULT (getdate()) FOR [OrderDate]
GO
- Run the script against the original database
This method is simple and straightforward, the only setback being that it is not applicable if there’s no database backup. Also, if the database is large, backup restoration can be time-consuming.
Use ApexSQL Diff
This is another method where a database backup is necessary, but it doesn’t have to be restored to recover lost tables due to Drop table operation.
ApexSQL Diff is a SQL server comparison and synchronization tool for SQL Server databases. It detects differences between database objects, generates comprehensive reports and synchronizes databases, database backups, snapshots, script folders and source control projects.
In order to recover lost table with ApexSQL Diff, follow these steps:
-
Start ApexSQL Diff
-
In the Project Management window, click the New button to create a new project:

-
On the Source side of the Data source tab:
- Select Backup from the Source drop-down list
- Click the Add button, add a full database backup, or a full database backup and a chain of differential database backups, and check them
-
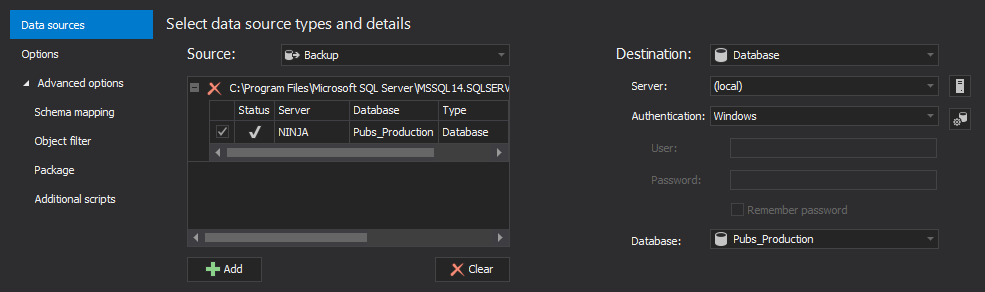
On the Destination side of the Data source tab:
- Select Database from the Destination drop-down list
- Specify the SQL instance with the production database from the Server drop-down list
- Specify the authentication method for that SQL instance (and a valid set of credentials if SQL Server authentication is chosen)
- Specify the production database name in the Database drop-down list:
-
Expand the Advanced options and four additional tabs will be shown
-
Select the Object filter tab and then select the Tables node in the left tree-view panel:
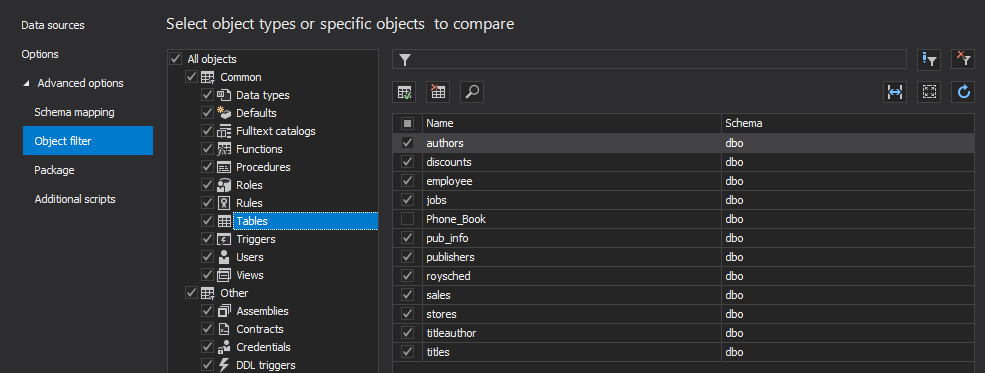

Quick tip:
To have all objects that depend on the dropped table correctly scripted – triggers, tables, etc., leave all object types selected
-
In the Tables object list in the right panel, check only the dropped table:
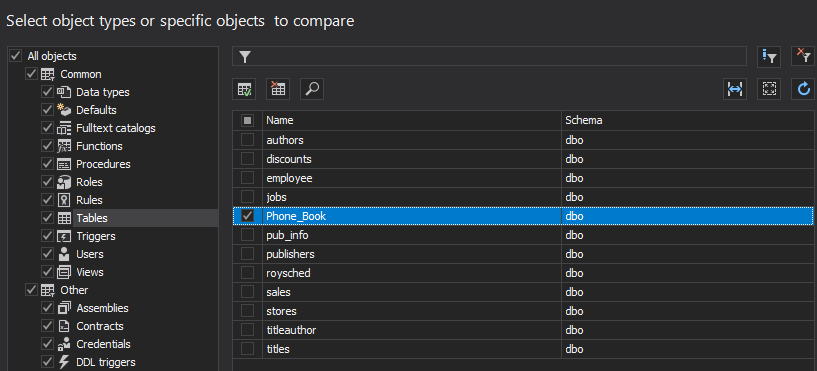
-
Click the Compare button in the bottom-right corner of the New project window
- ApexSQL Diff will show the comparison results in the Results grid. The dropped table and any other objects that differ, if any, will be shown in the Results grid. Check the table that should be recovered:
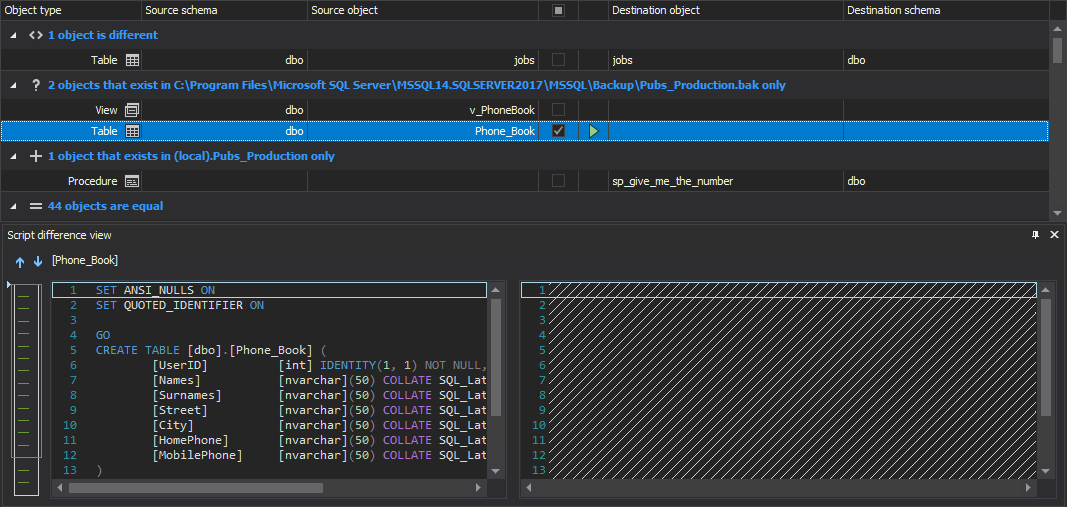
-
Click the Synchronize button from the Home tab:

-
To script the objects the dropped table depends on, select them from the dependent objects list
-
Go through the first two steps of the Synchronization wizard
-
In the Output options step, select the Create a synchronization script as the output action:
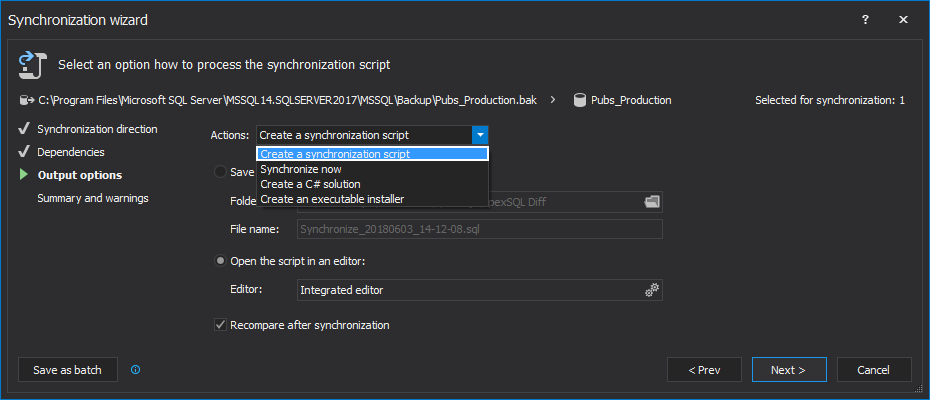
-
Click the Next button and review the Summary and any potential Warnings in the last step of the Synchronization wizard
-
If everything is in order, click the Create script button
-
The generated script will be shown in the ApexSQL Diff’s integrated editor. Review it, modify if needed, and execute:
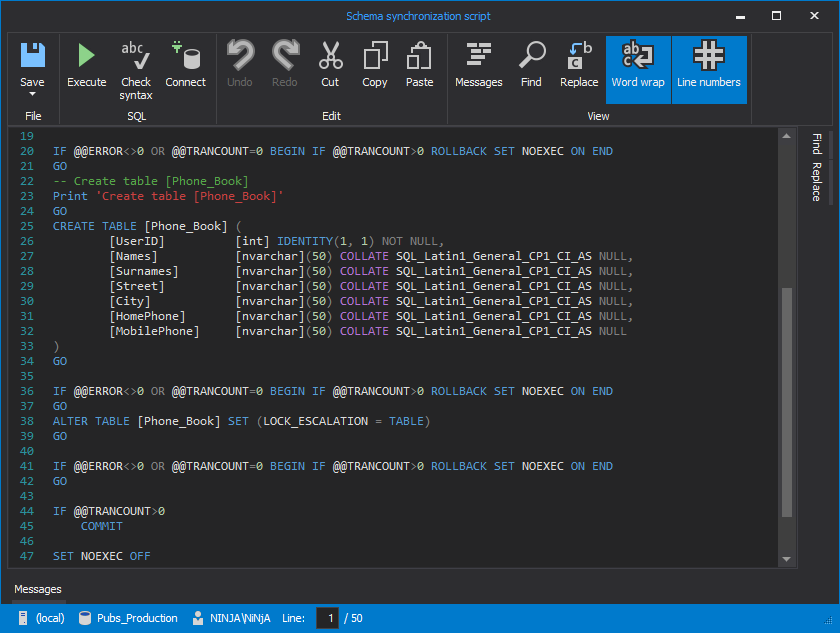
The table and the dependent objects selected will be re-created.
As ApexSQL Diff can read SQL Server database backups, the table recovery is faster as the backups are not being restored first. The objects depending on the dropped table are seamlessly recovered. The main grid shows the script and differences for every object, which provides granularity and helps in deciding which objects to select for synchronization.
If a SQL database backup doesn’t exist, this method is not applicable. Also, only the table structure can be recovered.
Note: ApexSQL Diff will only recover structure of the dropped table (and the dependent objects). In order to recover data, ApexSQL Data Diff needs to be used in the similar way to compare and synchronize data and it can be read from article Recover deleted SQL data from a backup or from online database files.
Use ApexSQL Log
Even if there’s no SQL database backup containing the dropped table, recover of lost tables due to Drop table operation can be done.
ApexSQL Log is a SQL server transaction log viewer that audits, reverts or replays data and object changes. It restores deleted and modified data and objects, capturing information on the user, application and host used to make each change.
In order to recover lost table with ApexSQL Log, follow these steps:
-
Start ApexSQL Log
-
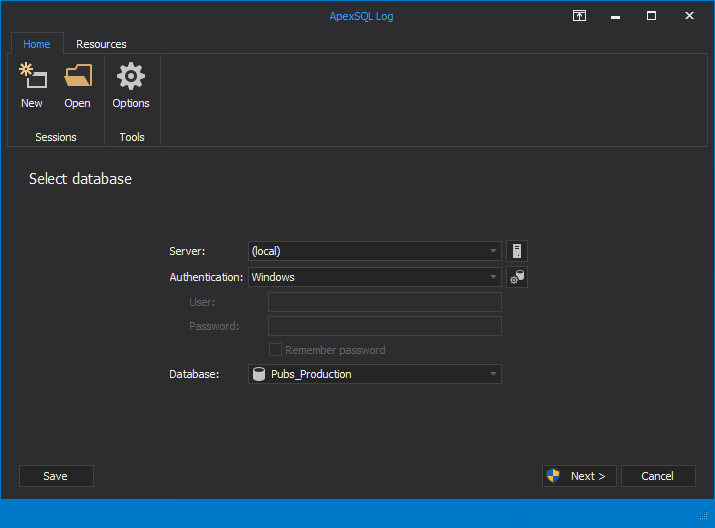
Connect to the live database in which the table has been dropped:
-
In next step, check the database transaction log backups, created after the table was dropped:
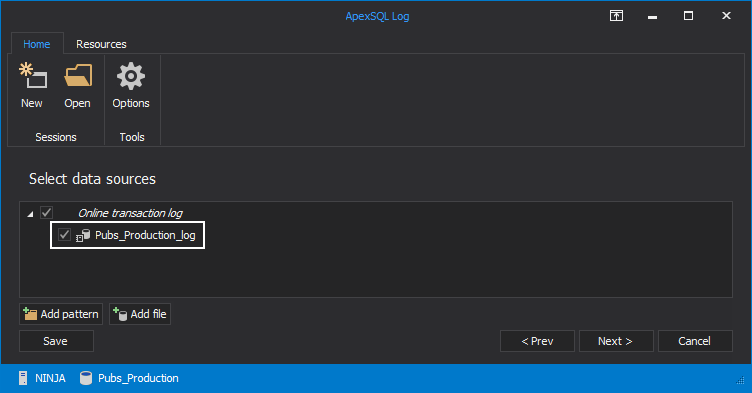
Please note that the transaction logs have to form a full chain.
-
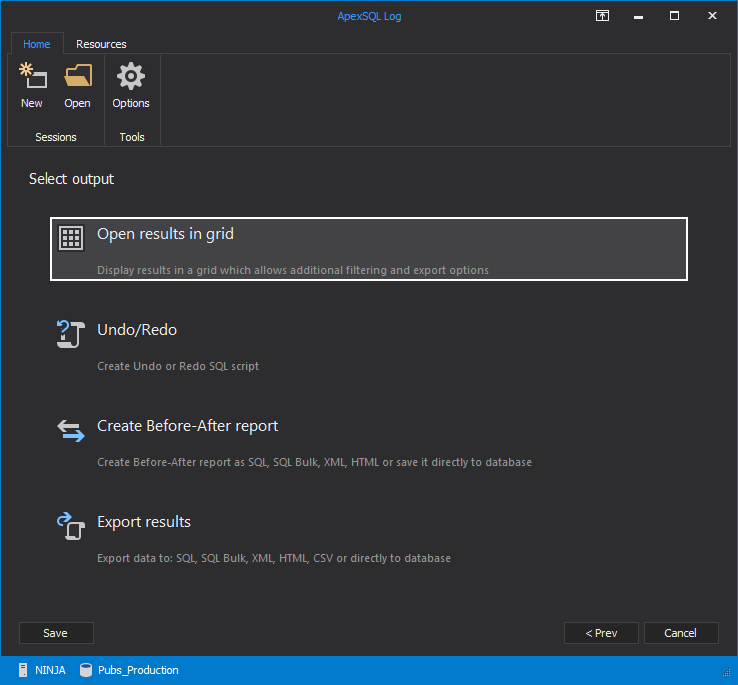
Click the Next button and select the Open results in grid option, in the Select output step:
-
In the Filter setup step, switch to the Operations tab, uncheck all DML (data) and DDL (schema) operations. Check only the Drop table operation in the DDL list:

-
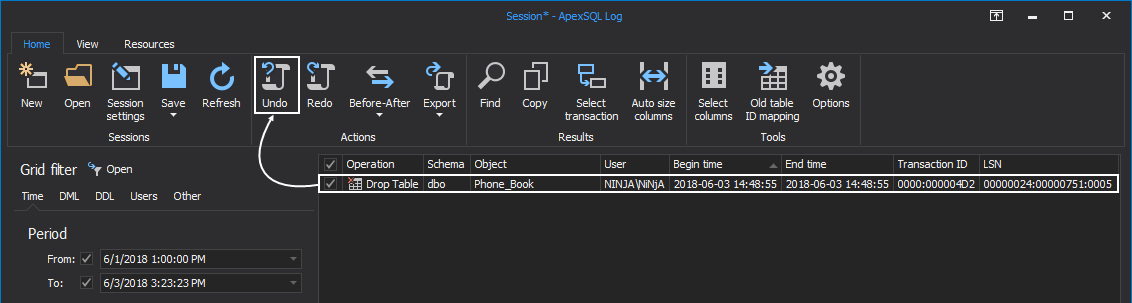
Once the Finish button is clicked, all Drop table operations that exist in the online transaction log and added transaction log backups will be shown in the main grid
-
Select the table that needs to be recovered from the main grid, and click the Create undo script button from the Home tab:
-
Once the undo script has been created, review it and execute:
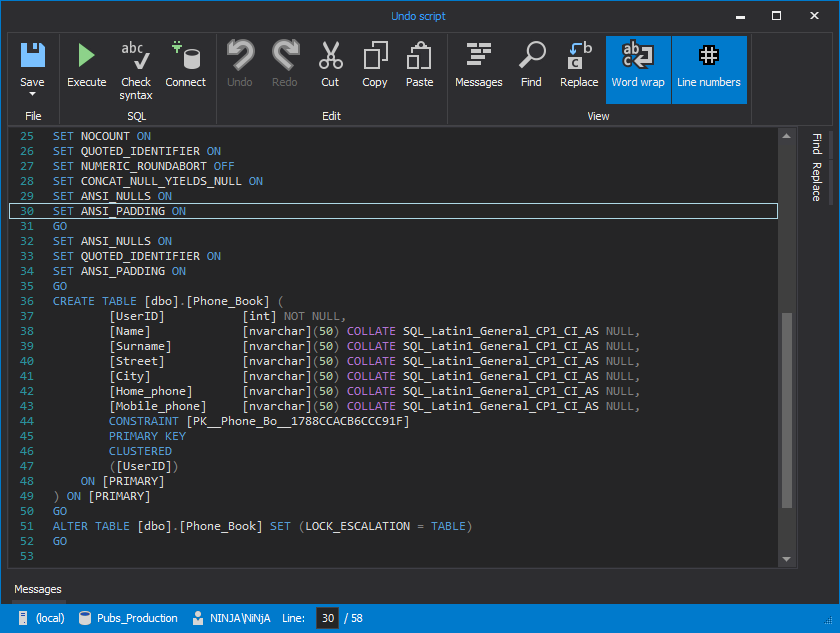
The advantages of this method are that no database backup is needed. As the Drop table statement doesn’t create a log for each deleted table row in the online transaction log, this method can recover only table structure.
Note that if the database is in the Simple recovery model, the transactions might be overwritten. In this case, the sooner that ApexSQL Log is run after the table was dropped, there are more chances for successful recovery.
Note: Performing a table recovery with ApexSQL Log will only recover table structure, the data is not recovered.
Use ApexSQL Recover
As ApexSQL Recover reads both data (MDF) and transaction log (LDF) files, it can recover a dropped table even when the transaction doesn’t exist in the LDF file anymore. Furthermore, ApexSQL Recover recovers both structure and data lost due to Drop table operation.
ApexSQL Recover is a SQL Server recovery tool that recovers deleted, dropped or truncated data. It recovers objects and data lost due to drop operations and restores both deleted and online BLOBs as files.
To recover lost table with ApexSQL Recover, follow these steps:
-
Start ApexSQL Recover
-
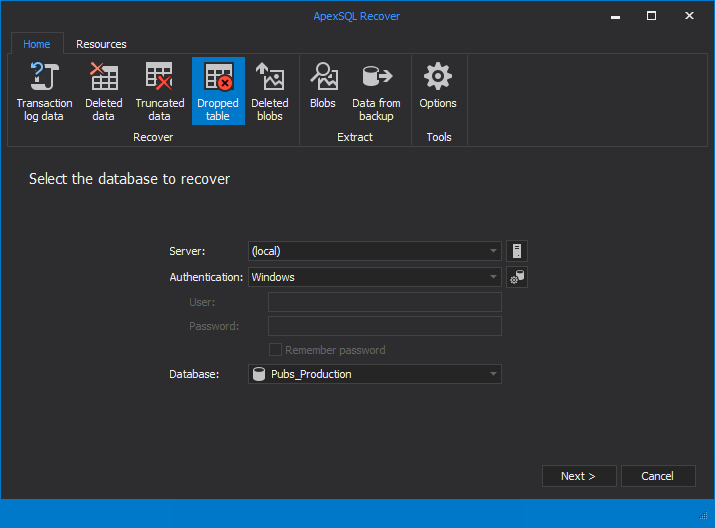
From the Home tab, click the Dropped table button from the Recover group:

-
Connect to the live database from which a table needs to be recovered:
-
Click the Next button
-
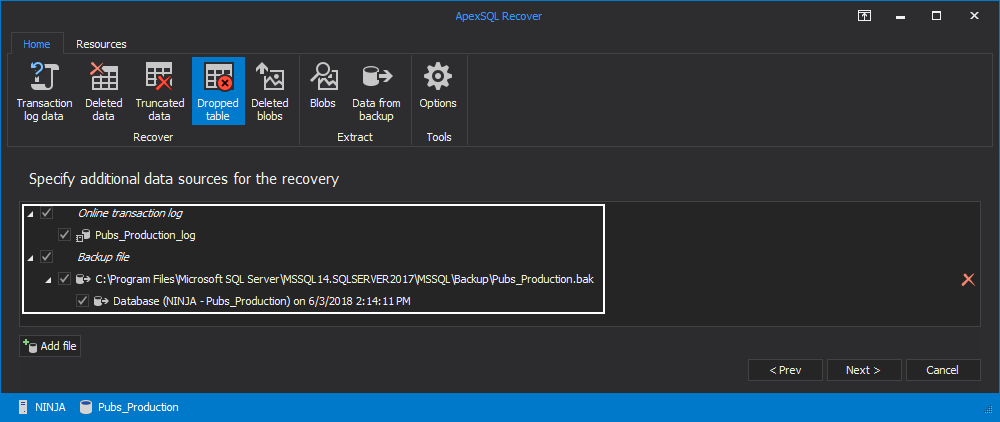
If there are transaction log backups created after the table was dropped, or a detached transaction log containing the very transaction responsible for dropping, click the Add transaction logs option:
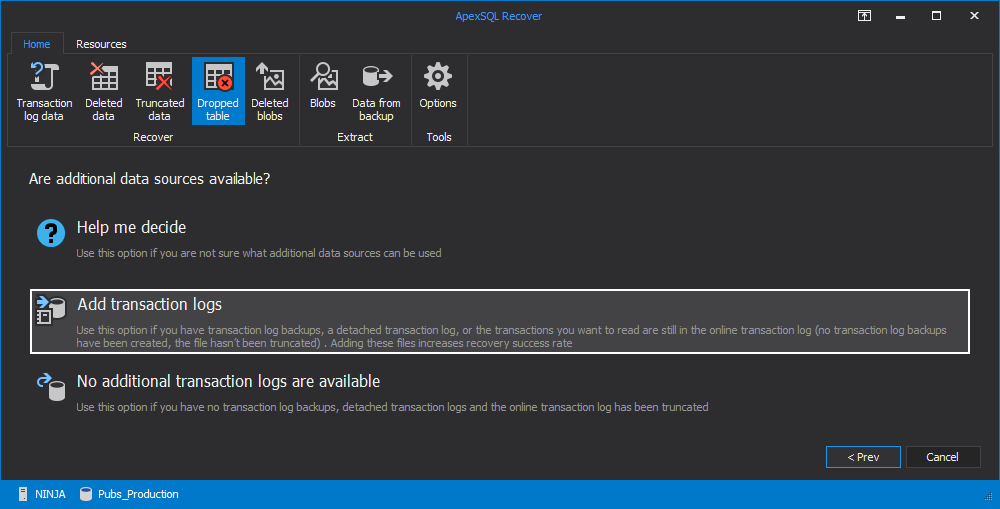
-
In the next step, check the transaction log backups and the detached transaction logs:
-
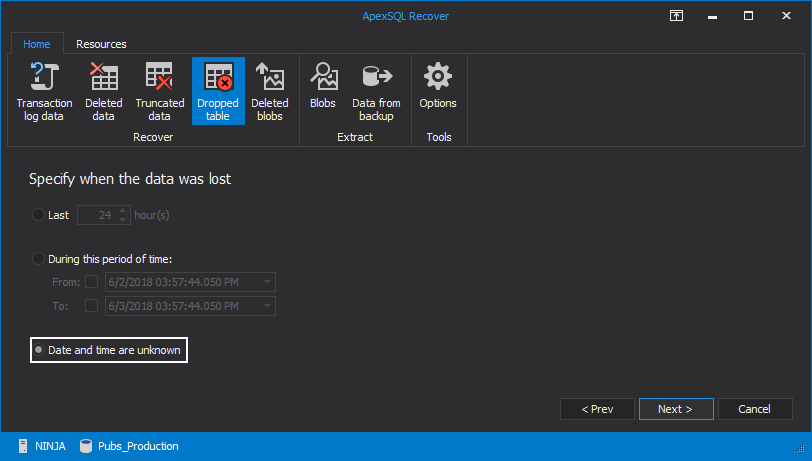
In the Specify when the data was lost step, select the time period when the table was dropped. If not sure when this happened, leave the Date and time are unknown option selected:
-
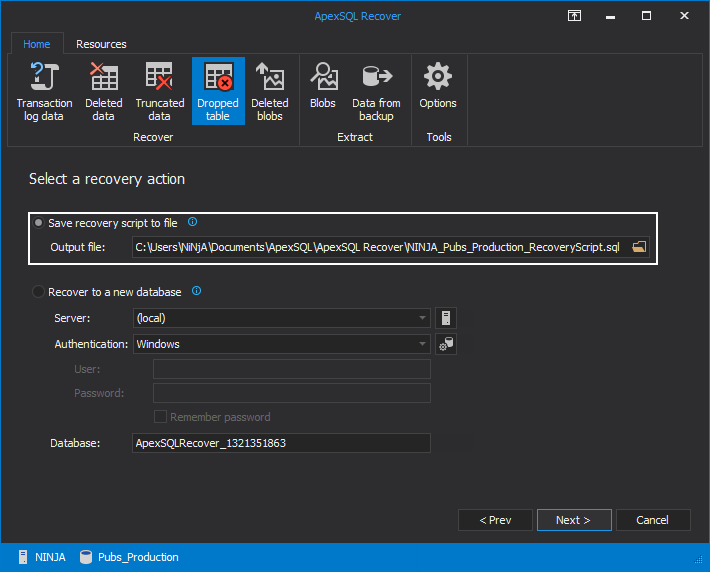
In the Select a recovery action step of the wizard, choose the Save a script to file option, provide the output file location and click the Next button:
-
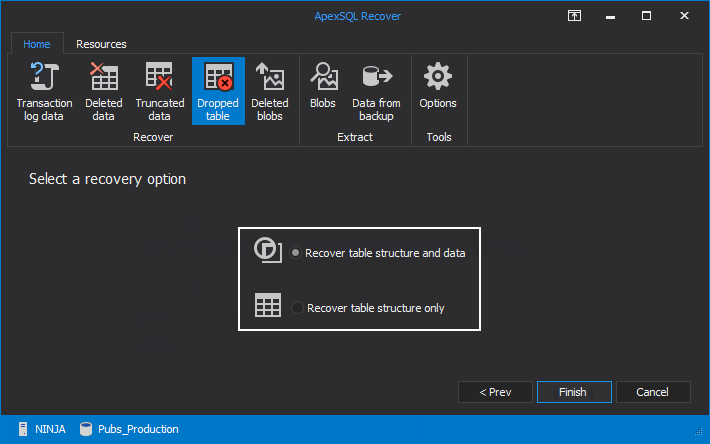
In the final step of the wizard, choose to Recover table structure and data or to Recover table structure only, depending on the particular recovery process and click on the Finish button to finalize recovery:
- Once the recovery script has been generated, review it, find the tables that need to be recovered and execute it
Thanks to reading both MDF and LDF files, ApexSQL Recover has more chance of successful recovery. However, if the information about the dropped table is overwritten in both MDF and LDF files, ApexSQL Recover cannot help.
Having database backups is a good starting point, but it might not be the quickest one. With backups, there are different methods – the ones that require a backup to be restored first, and thus require more time, and the others that can read backups.
If a database backup doesn’t exist, a dropped table can be recovered from SQL database data and transaction log files. When it comes to recovery from a database in the Simple recovery model, it might fail as the Drop table transaction might have been overwritten. Even then, recovery is possible from the MDF file.
August 15, 2013


