


In this article, we will show how to use the ApexSQL Discover tool to list all available SQL Server Engine, SQL Server Reporting Service, SQL Server Integration Service, and SQL Server Analysis Service instances that are installed in the current domain, remote domain or a specific IP addresses or TCP ports range.
Why do we need this list?
Working as a SQL Server database administrator in an international company, you should keep track of all SQL Server instances that are installed in the company machines and servers and have an up-to-date list of these instances. The SQL Server instances list helps in managing and administrating the instances in different ways. For example, the list can help you in making sure that all these instances are installed based on the company baselines, the number of licenses consumed until now and tracking the SQL Server and Windows updates so that you will make sure that the servers are updated properly.
Browse for more…
The simplest way of getting the list of SQL Server instances that are installed locally at your server or remotely in other servers within your local network is the Connect to Server window of the SQL Server Management Studio (SSMS), where you need to choose the <Browse for more…> option in the Server name field. This window provides you with the list of SQL Server Engine, SQL Server Reporting Service, SQL Server Integration Service, and SQL Server Analysis Service instances that are installed locally to your server, from the Local Servers tab, or installed in the servers connected to your local network, from the Network Servers tab, as shown below:
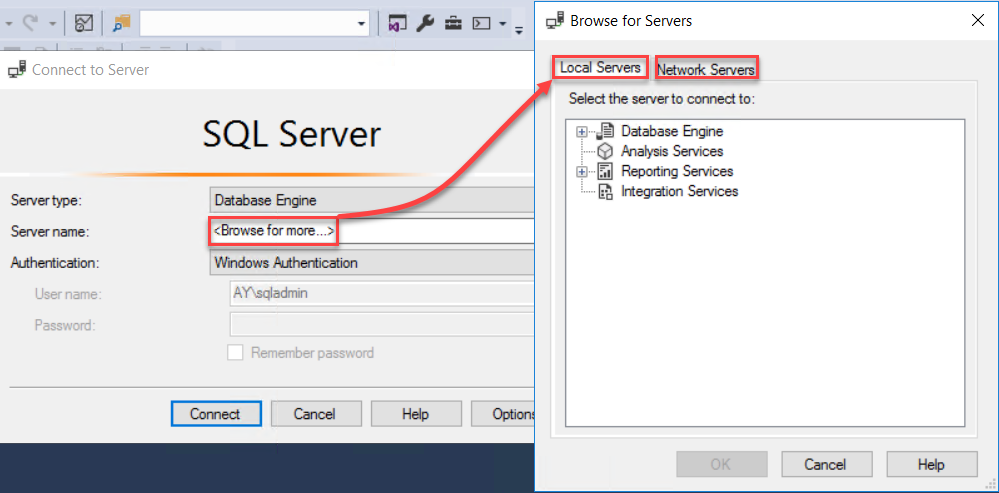
Checking the list of instances installed in your network servers using SSMS is not efficient, as this list is not exportable and will not show the complete list of SQL Server instances most of the time, due to network-related limitations.
Using CMD
The list of the SQL Server instances that are installed in your network servers can be checked using the SQLCMD -L command, as shown below:
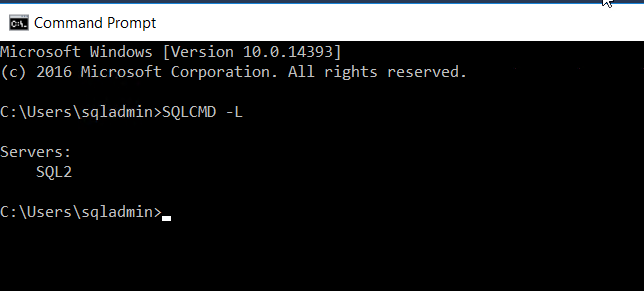
But this command will not list the SQL Server instances that are installed locally to the machine from where we are running this CMD command. Also, it will list only the SQL Server Engine instances without showing the SQL Server Reporting Service, SQL Server Integration Service, and SQL Server Analysis Service instances that are installed in these servers. Another thing to consider here is that you cannot run that command on a machine without having SQL Server installed on it.
From that point, we can see the need for a robust tool that can provide us with an updated list of the different SQL Server instances within the local network.
ApexSQL Discover
Overview
ApexSQL Discover is a lightweight and free instance discovery tool that can be used to discover and analyze any number of SQL Server instances that are installed in all machines and servers connected to your entire network and provide detailed information about the detected servers from a central location.
It can be used to discover all versions of SQL Server instances installed in any machine within your local network, from SQL Server 2005 version and higher, any Express, Standard and Enterprise SQL Server Engine instance, as well as the SQL Server Reporting Service, SQL Server Integration Service, and SQL Server Analysis Service.
ApexSQL Discover can also be used to discover the entire network SQL Servers instances using a predefined schedule with customizable options. It provides detailed information about the detected SQL Server instances includes SQL Server health and statistics information that can be easily exported to different file formats for future check and usage.
This tool can be downloaded from the ApexSQL Download page, and installed easily to your local machine or server, without the need to have a SQL Server instance installed on that machine. Also, ApexSQL Discover will not install any windows service to discover the SQL Server instances.
Installation
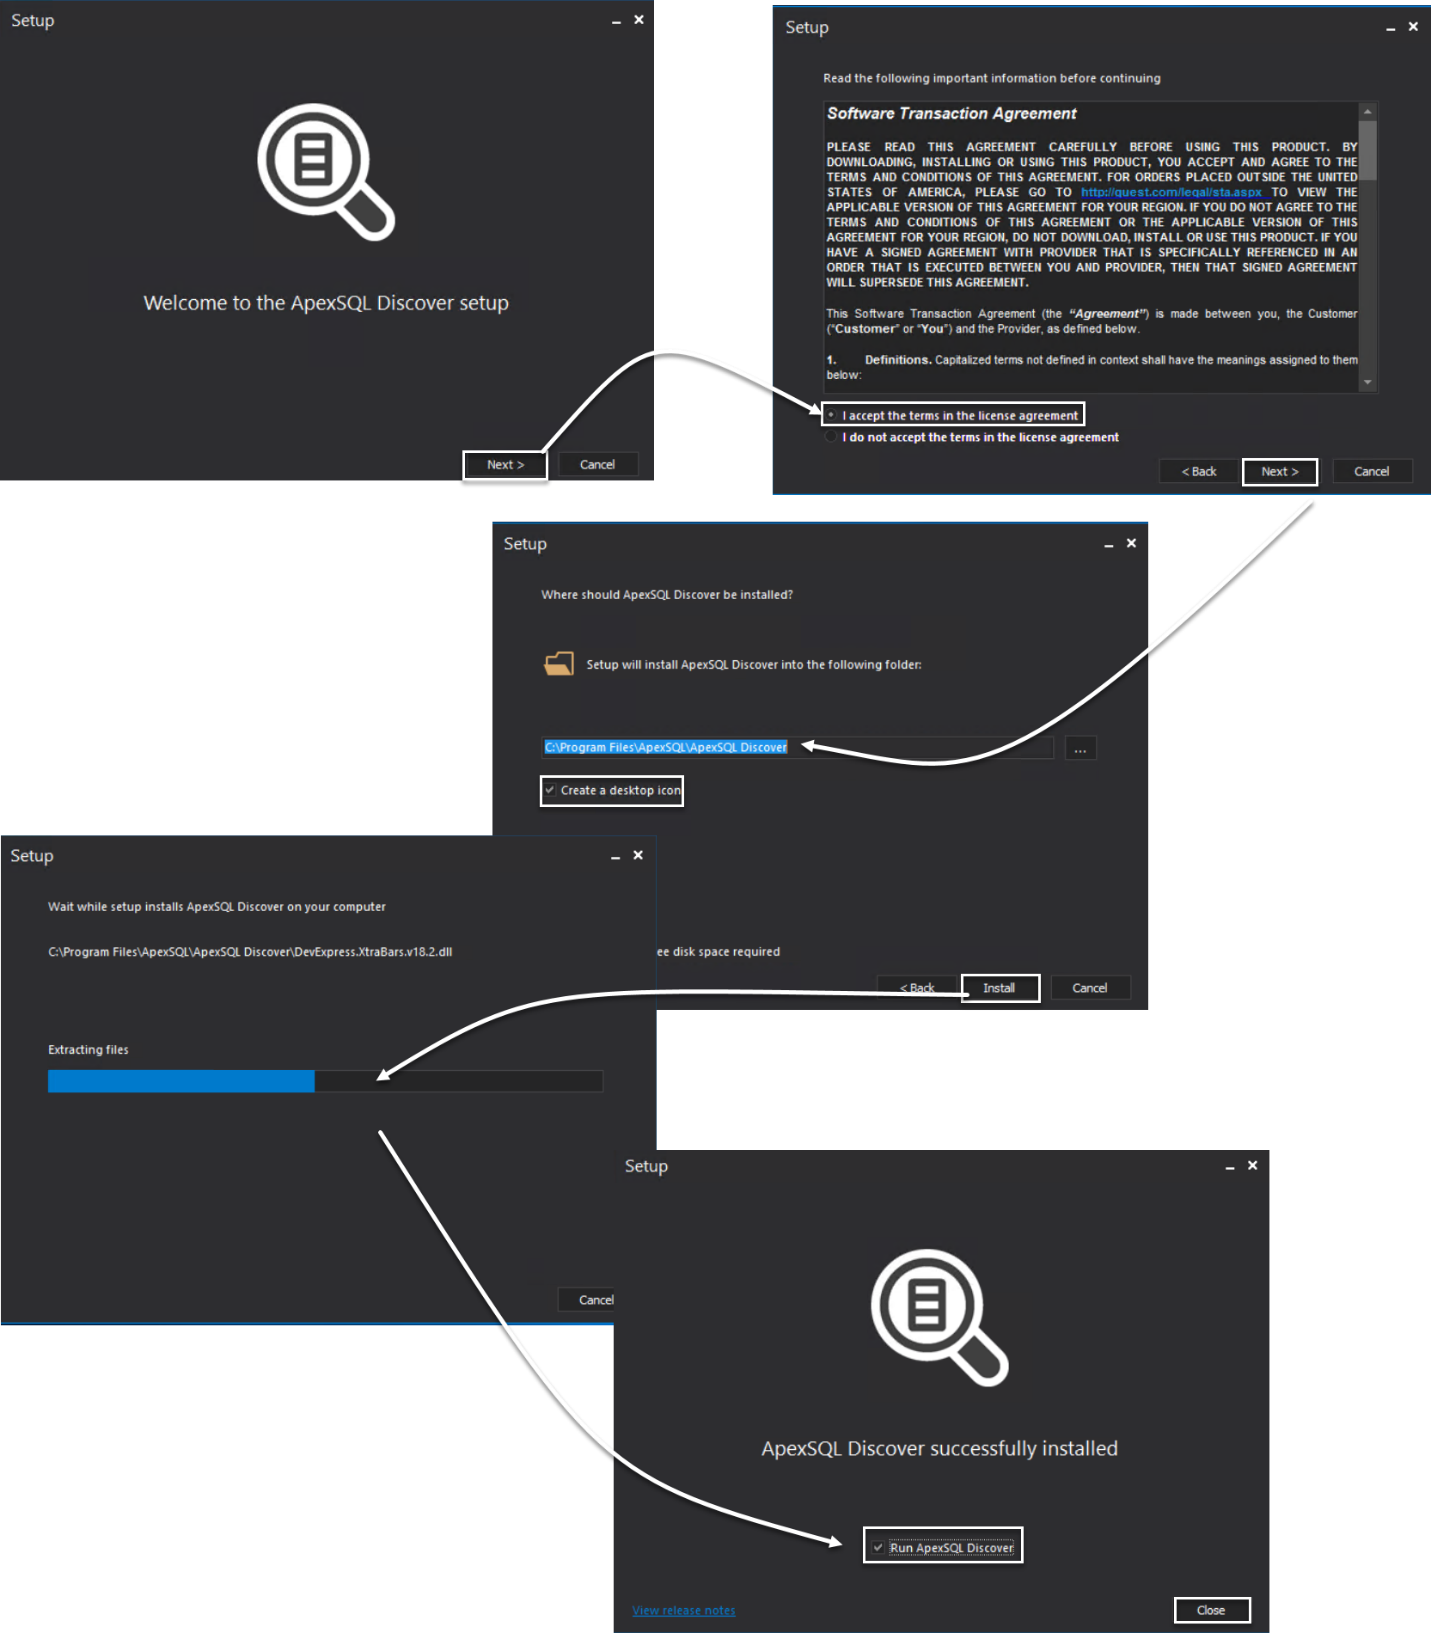
ApexSQL Discover installation wizard is a straight-forward wizard, in which you will be asked to accept the terms of the agreement license and provide the location where you want to install the ApexSQL Discover tool, then the tool will be installed to the machine in few seconds, as shown below:
Change the theme
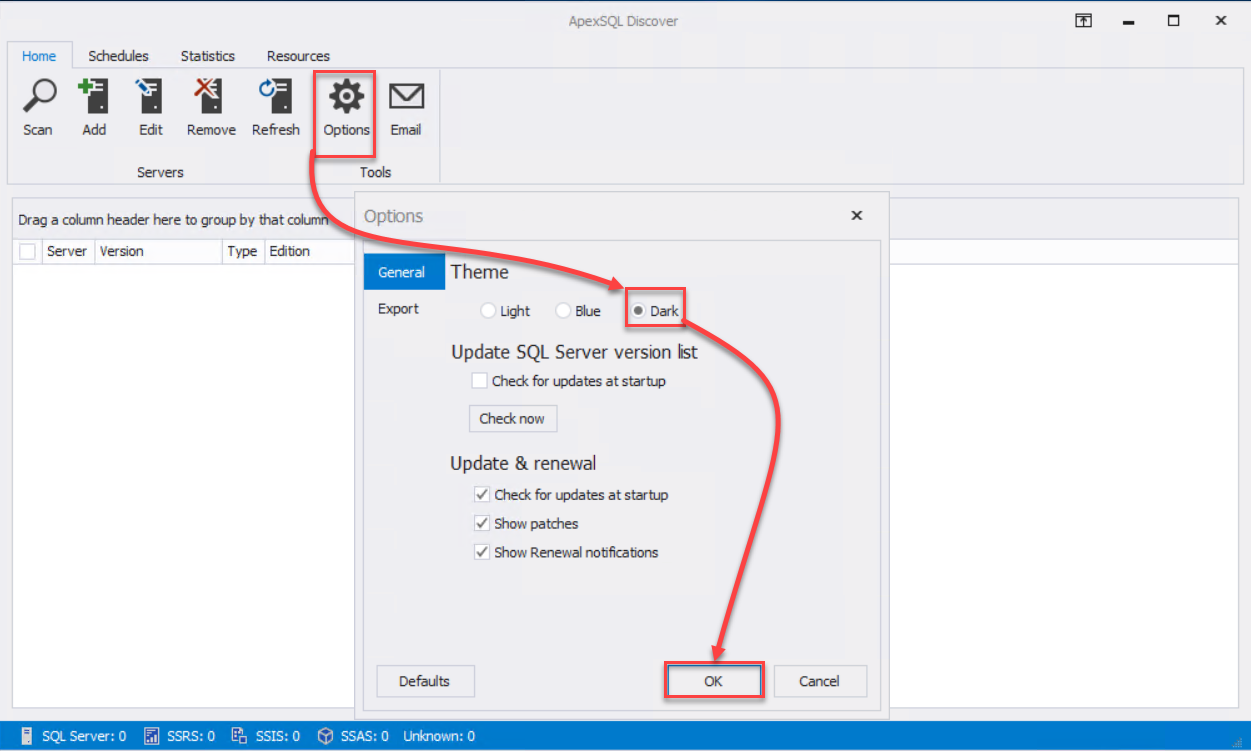
When ApexSQL Discover is installed completely to your machine, it will run with the default light theme. In order to configure it with the dark theme, which I prefer for all ApexSQL tools, click on the Options button, under the Tools options group of the Home tab and choose the Dark Theme, as shown below:
SQL Server Instances Scan
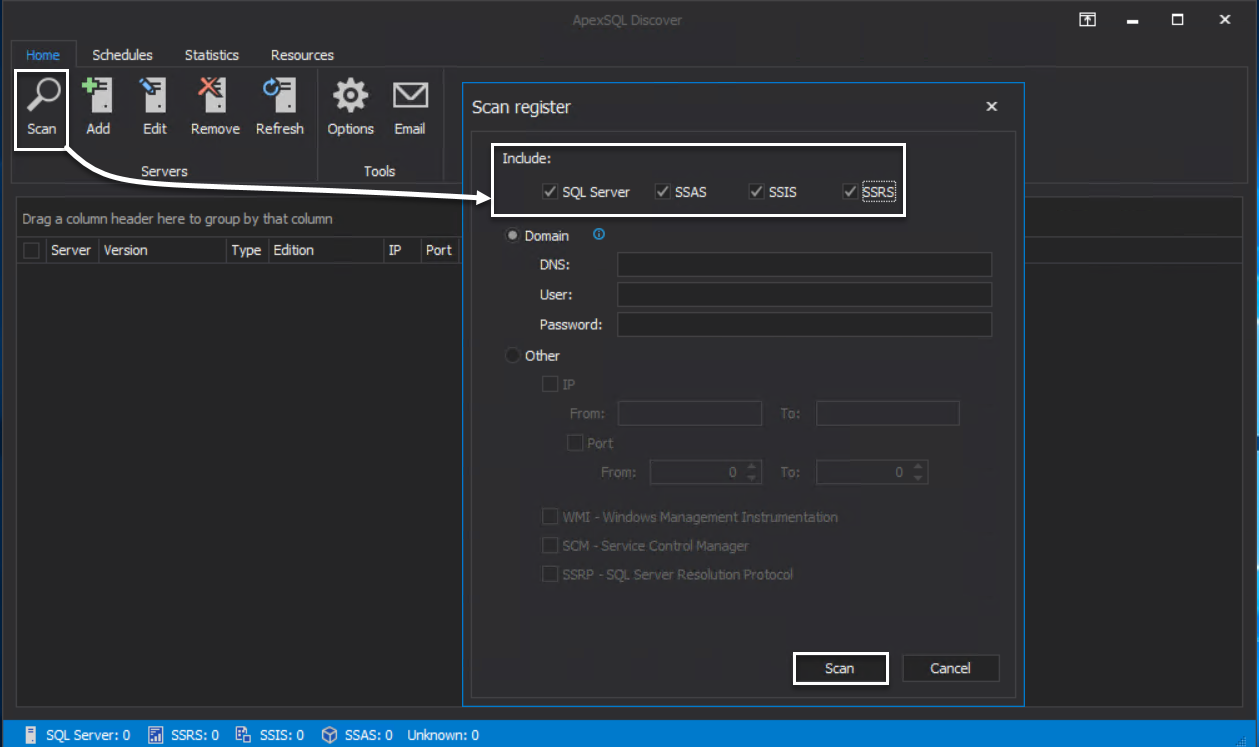
ApexSQL Discover provides us with the ability to perform an automatic scan to check all SQL Server Engine, SQL Server Reporting Service, SQL Server Integration Service, and SQL Server Analysis Service instances that are installed, under the current domain or a specific domain by providing the name of that domain and a username and password for an authorized account on that domain, in order to register these servers in the ApexSQL Discover tool.
To achieve that, click on the Scan option, under the Servers options group of the Home tab, and specify the type of SQL Server services that you are interested in discovering and the scope of the scan process in which you will search for the servers. If you are interested in detecting all SQL Server instances that are installed in the machines joined to the current domain, choose the Domain scope search, as shown below:
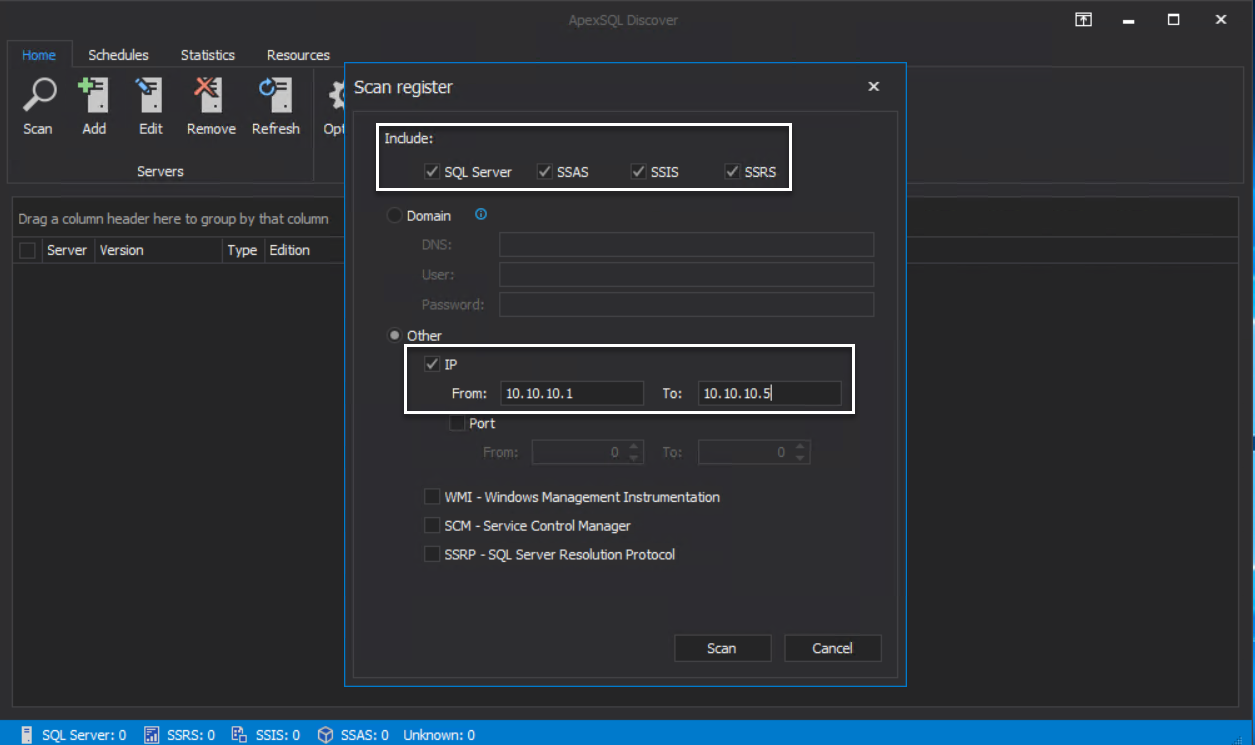
You can also perform the scan based on an IP address range, as well as the port number range for the SQL Server instances you are interested to detect, as shown below:
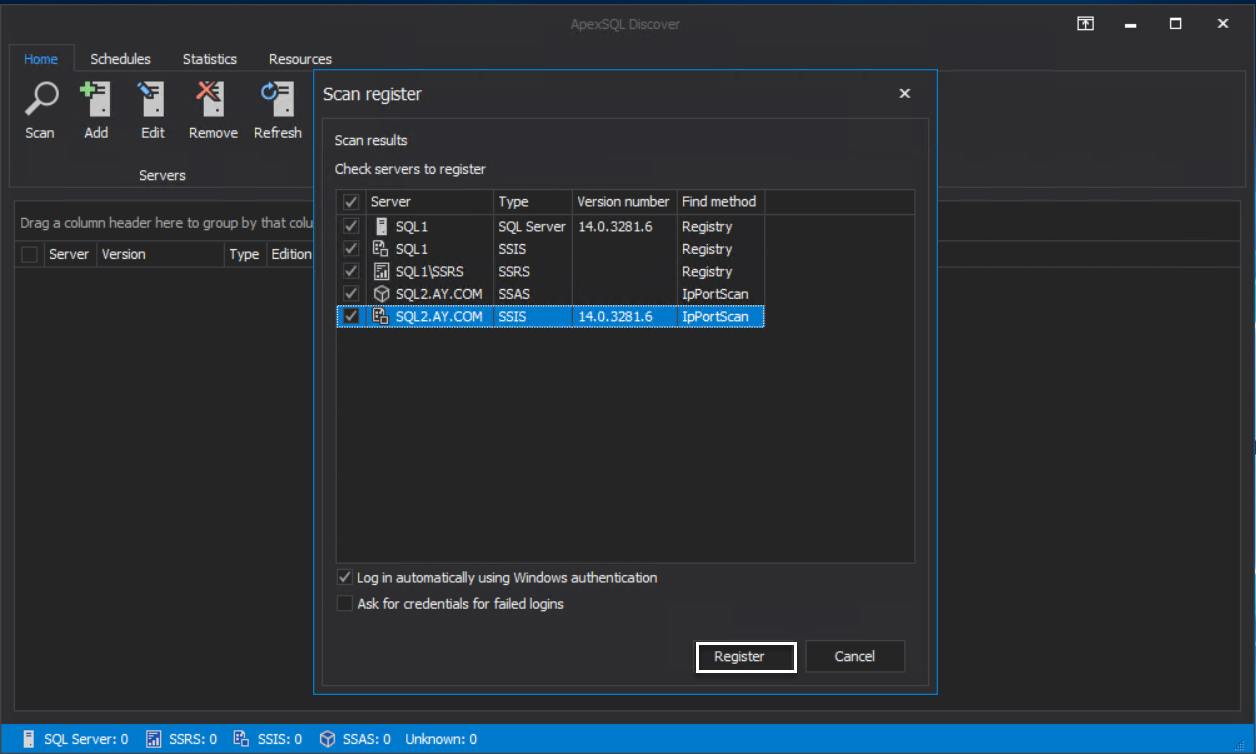
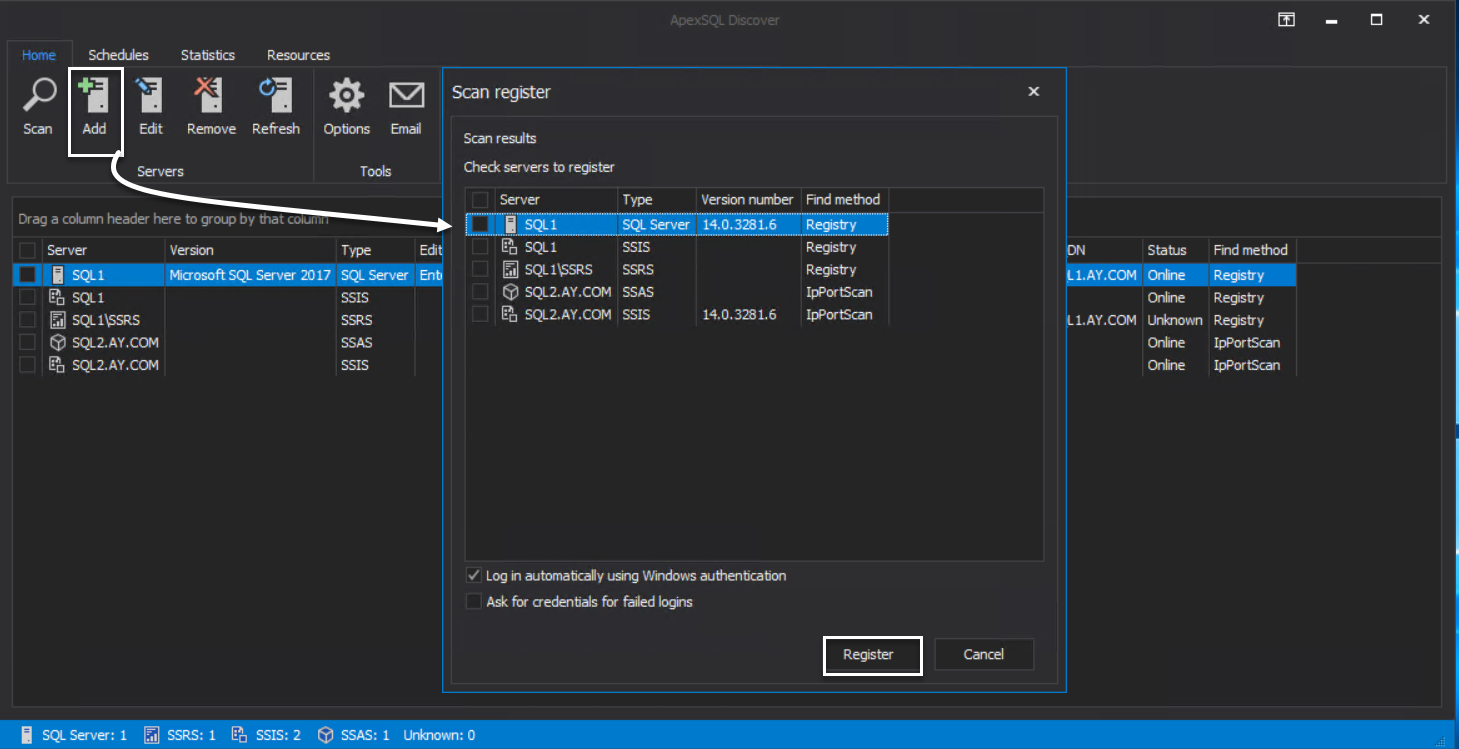
ApexSQL Discover will search for all SQL Server instances based on the scan criteria that you choose; then it will list all the detected instances that are detected under the entire network, in order to select the instances that you are interested to register it in the ApexSQL Discover tool, as below:
Manage Registered Instances
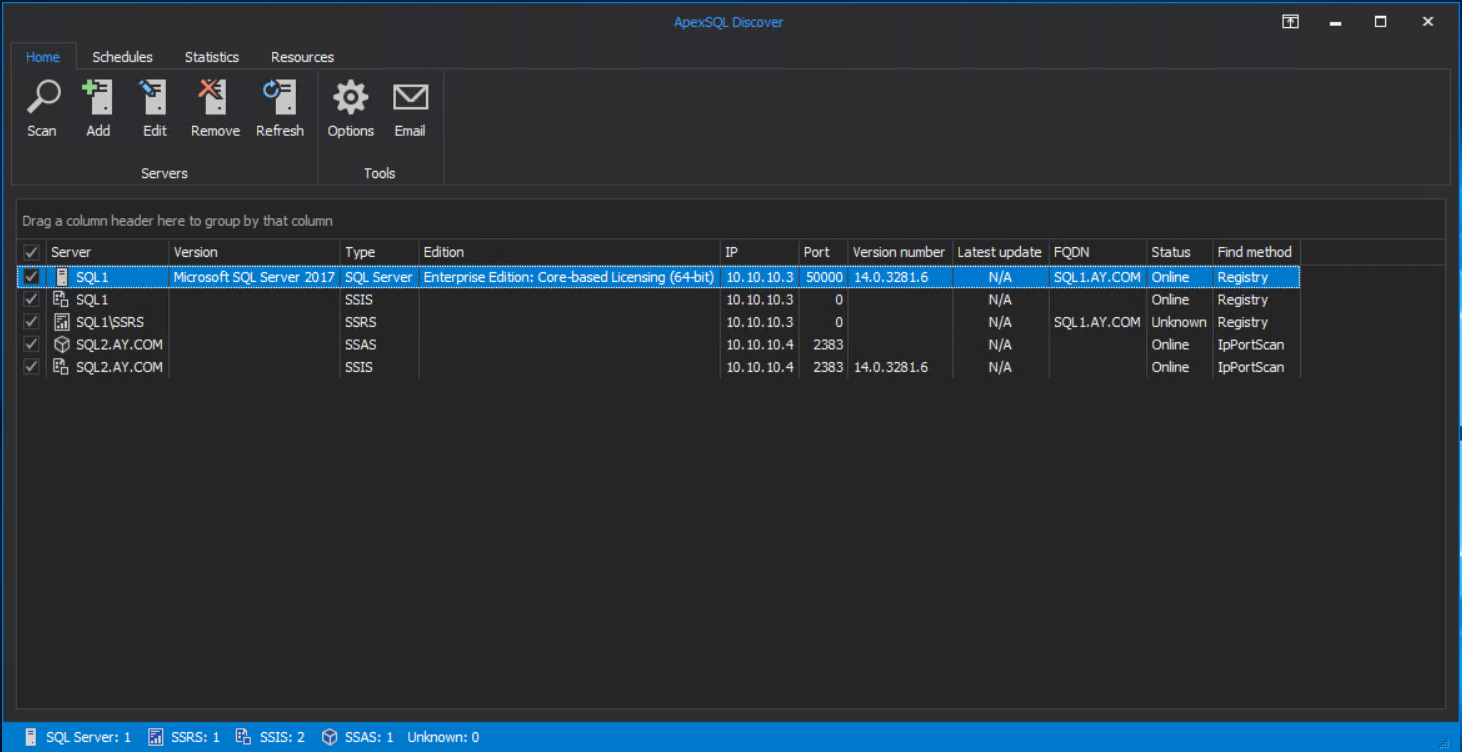
After registering the SQL Server instances that you are interested in, the instances will be listed in the ApexSQL Discover Home page, with useful information about each instance, including the name of the hosting SQL Server, the version of the SQL Server instance, the IP address of the hosting server, the TCP port that the SQL Instance is listening to and the status of that SQL instance.
The status bar, located at the bottom part of the ApexSQL Discover tool, shows the number of registered instances per each service category, such as the number of SQL Server Engine services, SSRS, SSIS and SSAS instances, as shown below:
If you need to register one of the previously scanned server instances, click on the Add button, under the Servers options group of the Home tab, and check the name of the instance to be registered, as shown below:
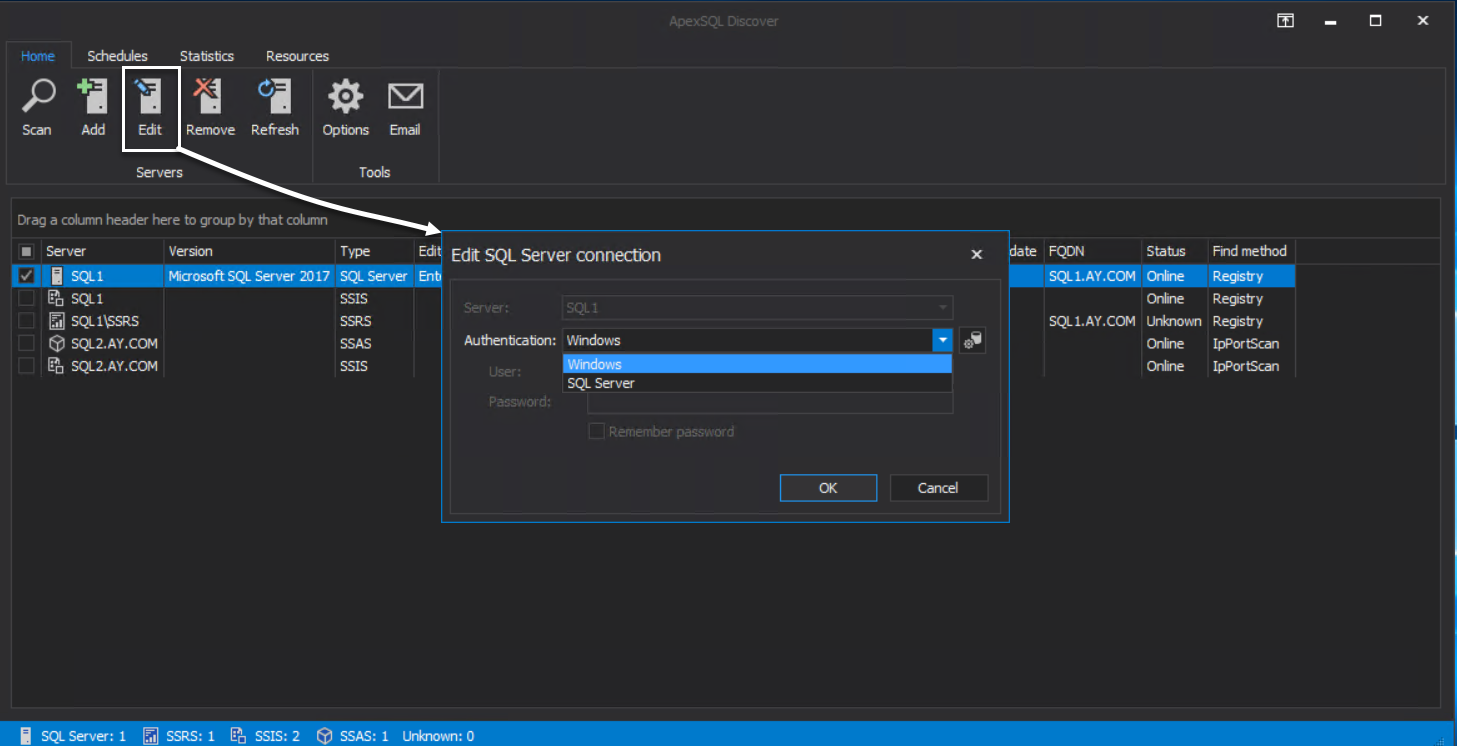
ApexSQL Discover allows you also to edit the connection of the registered instances, by checking the instance name then click on the Edit button, under the Servers options group of the Home tab, and provide the new credentials to connect to that SQL Server instance, as shown below:
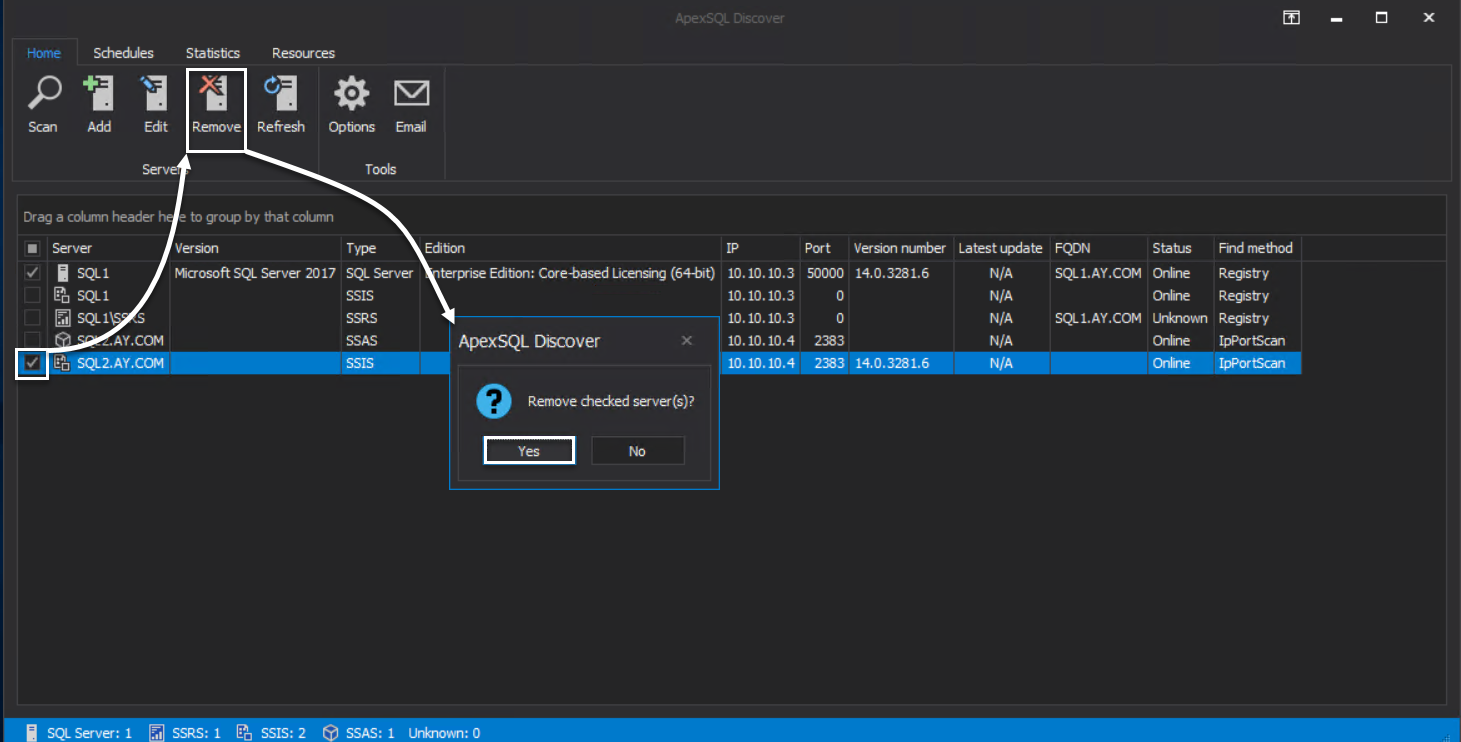
You can also unregister any registered instance by selecting the instance that you want to remove, click on the Remove button, under the Servers options group of the Home tab, then confirm the instance removal, as shown below:
ApexSQL Discover provides us also with the ability to configure a specific email address, by providing the SMTP server information, the Email address and the password, to send notifications to that email account, as shown below:

Scan Scheduling
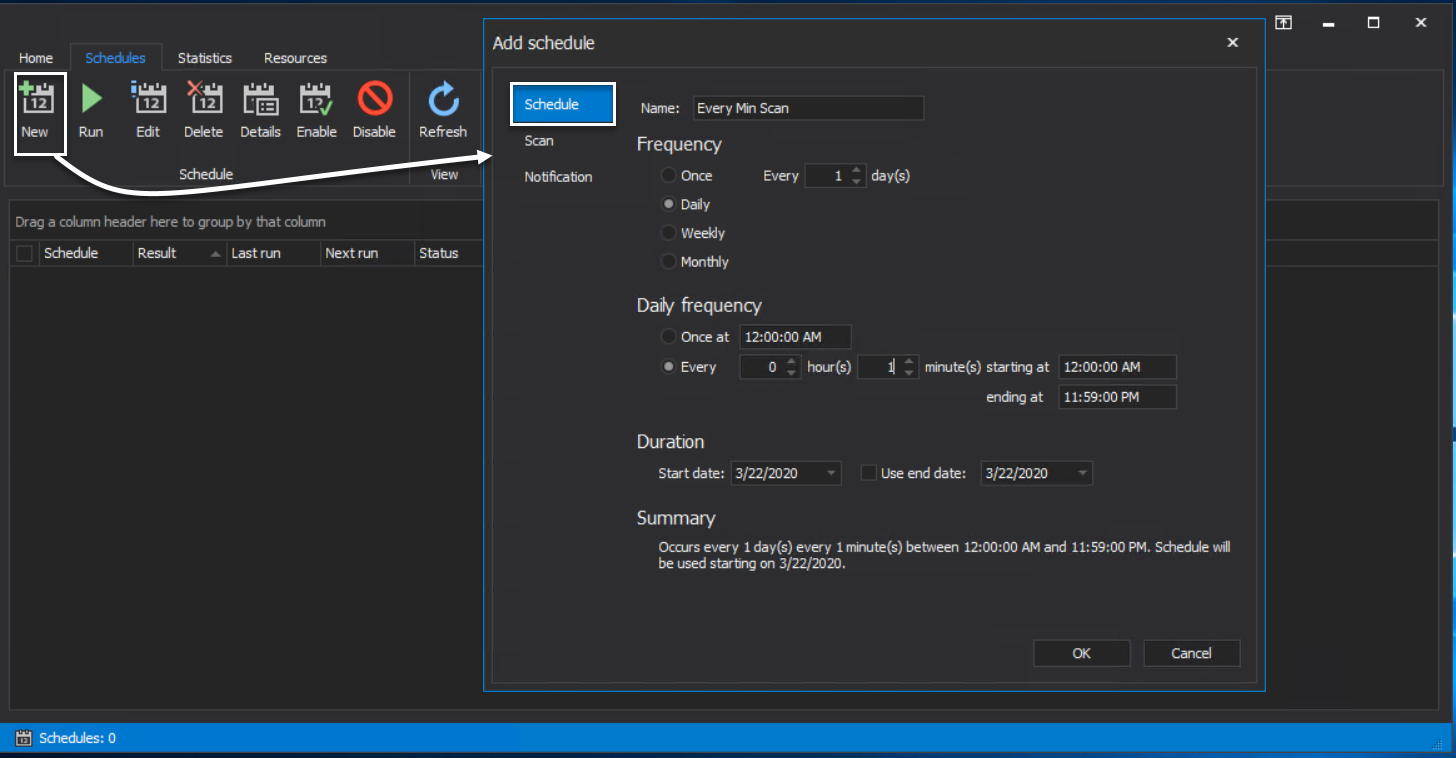
Instead of performing the SQL Server instances scanning process automatically, you can schedule a job in ApexSQL Discover to scan for the new SQL instances periodically.
To add a new schedule, click on the New button from the Schedules tab.
From the Add Schedule window, specify how frequent the job will be executed, under the Schedule tab, where we will schedule it to scan for the new servers every one minute, as shown below:
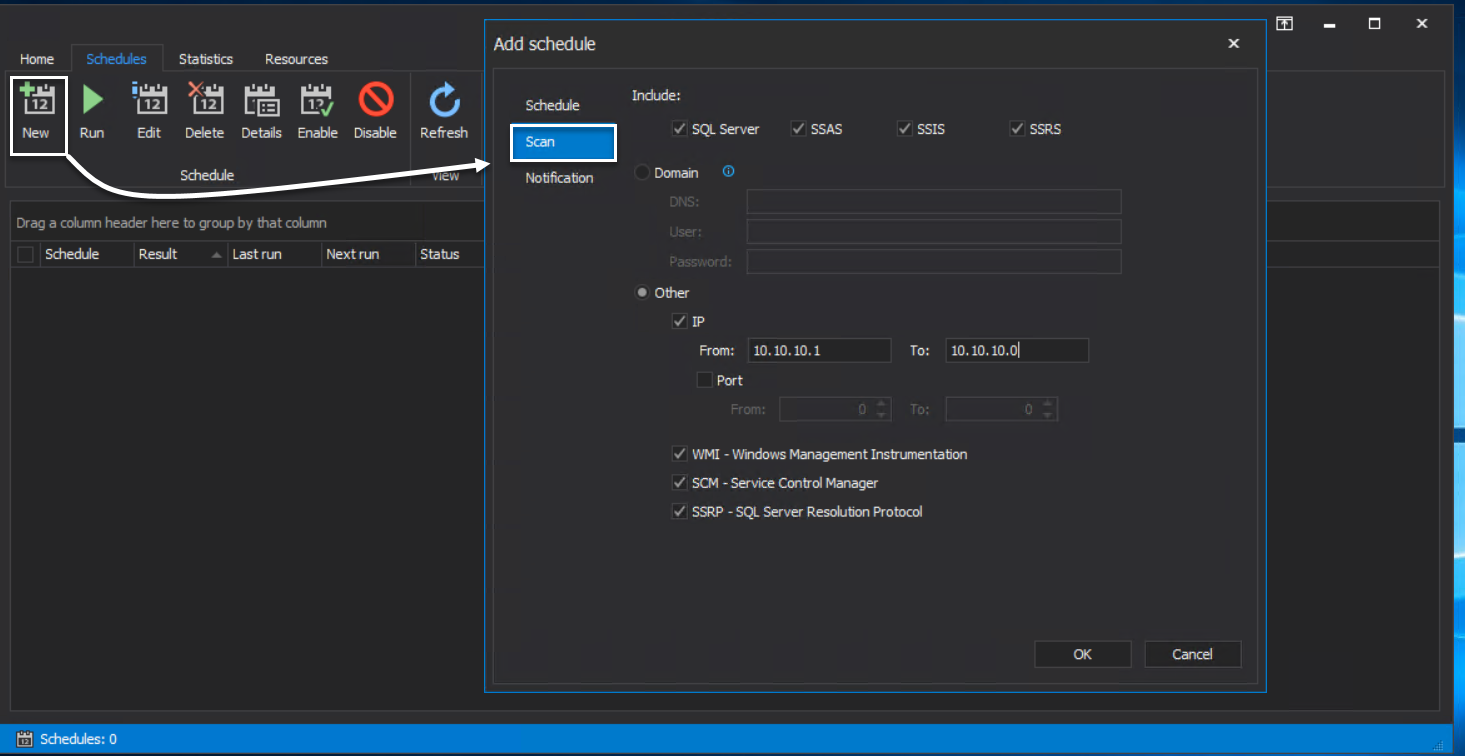
In the Scan page of the Add Schedule window, you will be asked to configure the scan process, such as the type of SQL Server services that are interested to detect, the search process scope, such as the current domain, a remote domain, a specific IP addresses range or TCP ports range, as shown below:
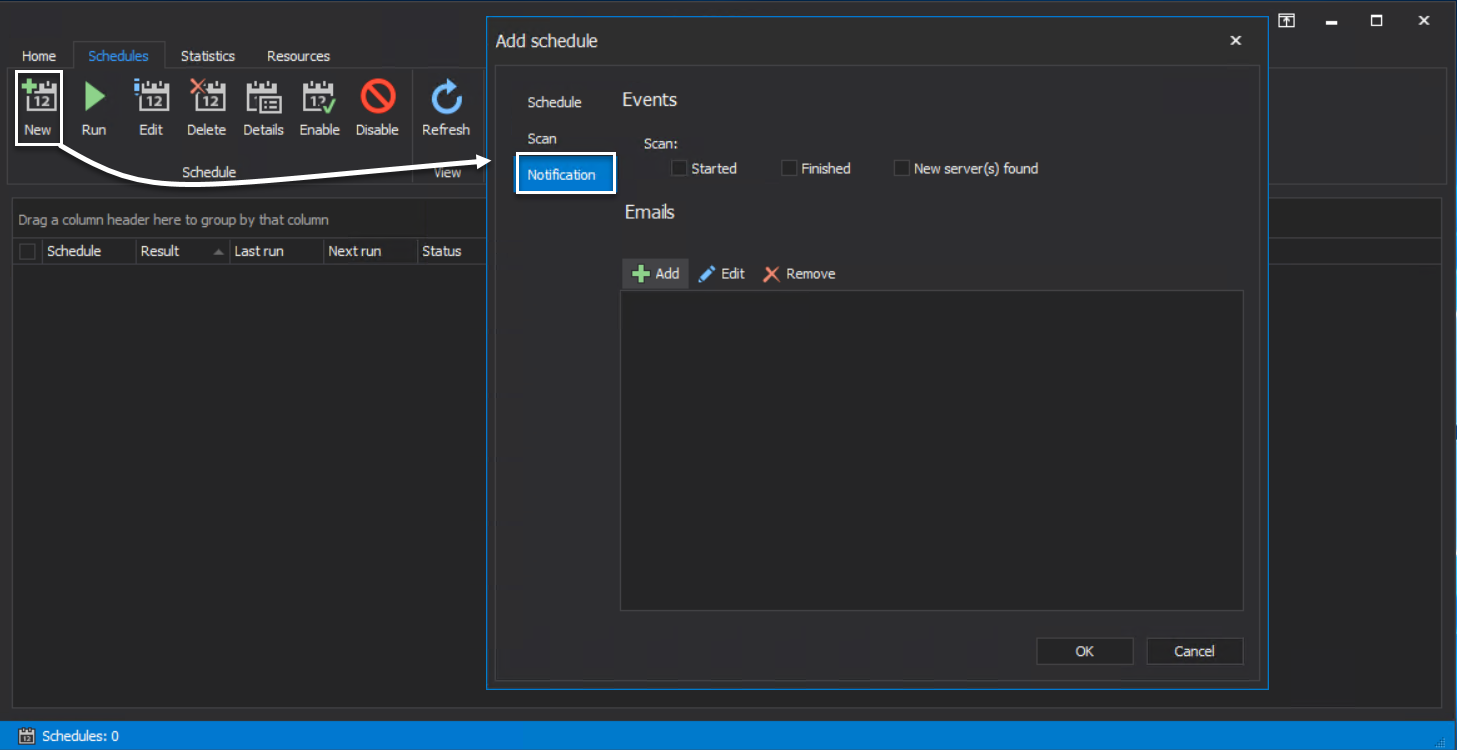
From the notification page, you can configure a notifications mechanism to send valuable information about the scan job to the previously defined email account. This information includes starting and ending time for the discovery job, the list of all discovered SQL Server instances and SSRS, SSIS and SSAS services and the IP addresses for each server and service that is detected in the scan job, as shown below:
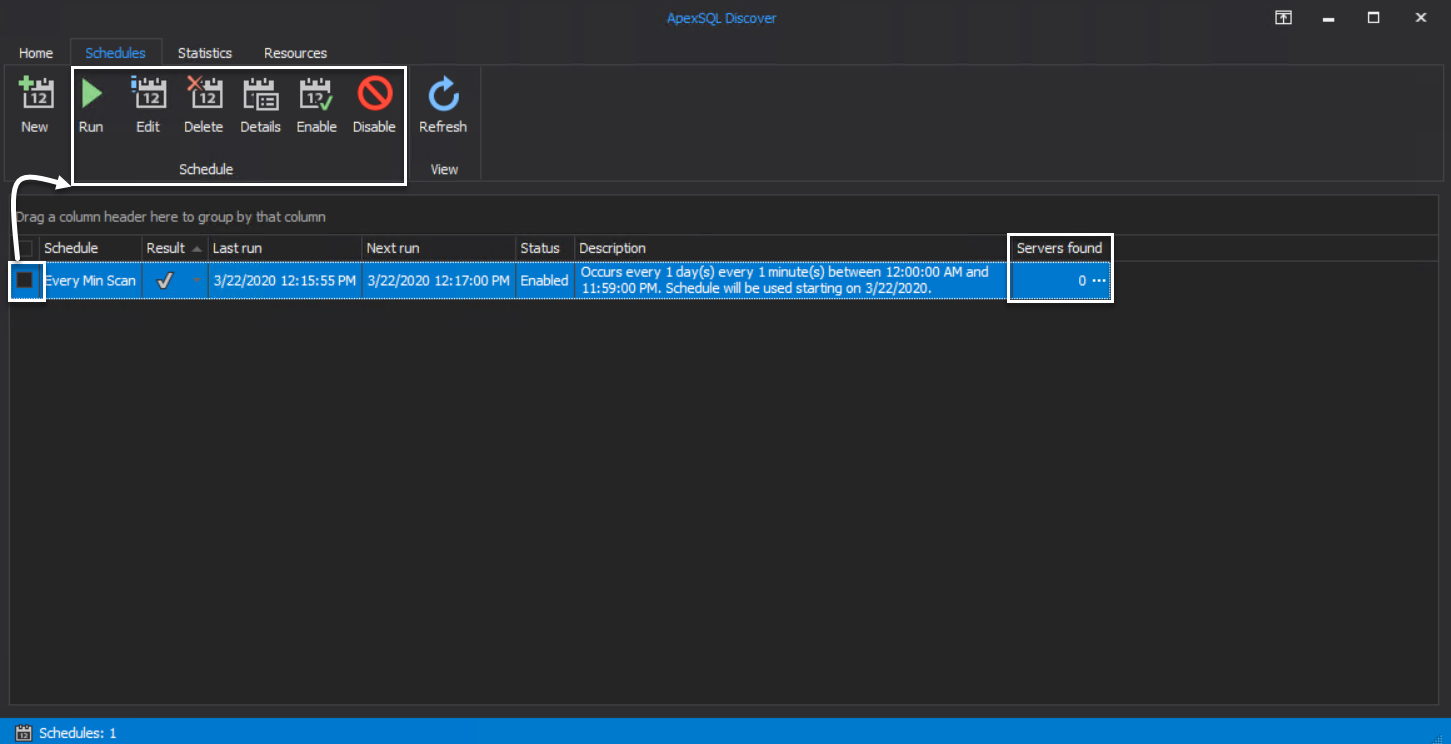
Once the scheduled scan job is created, it will be displayed with all information about the created job, such as the job description, status, and result.
ApexSQL Discover allows us to perform multiple actions on the scheduled scan job, such as running it directly, editing the job configurations, enabling or disabling that scan job, as shown below:
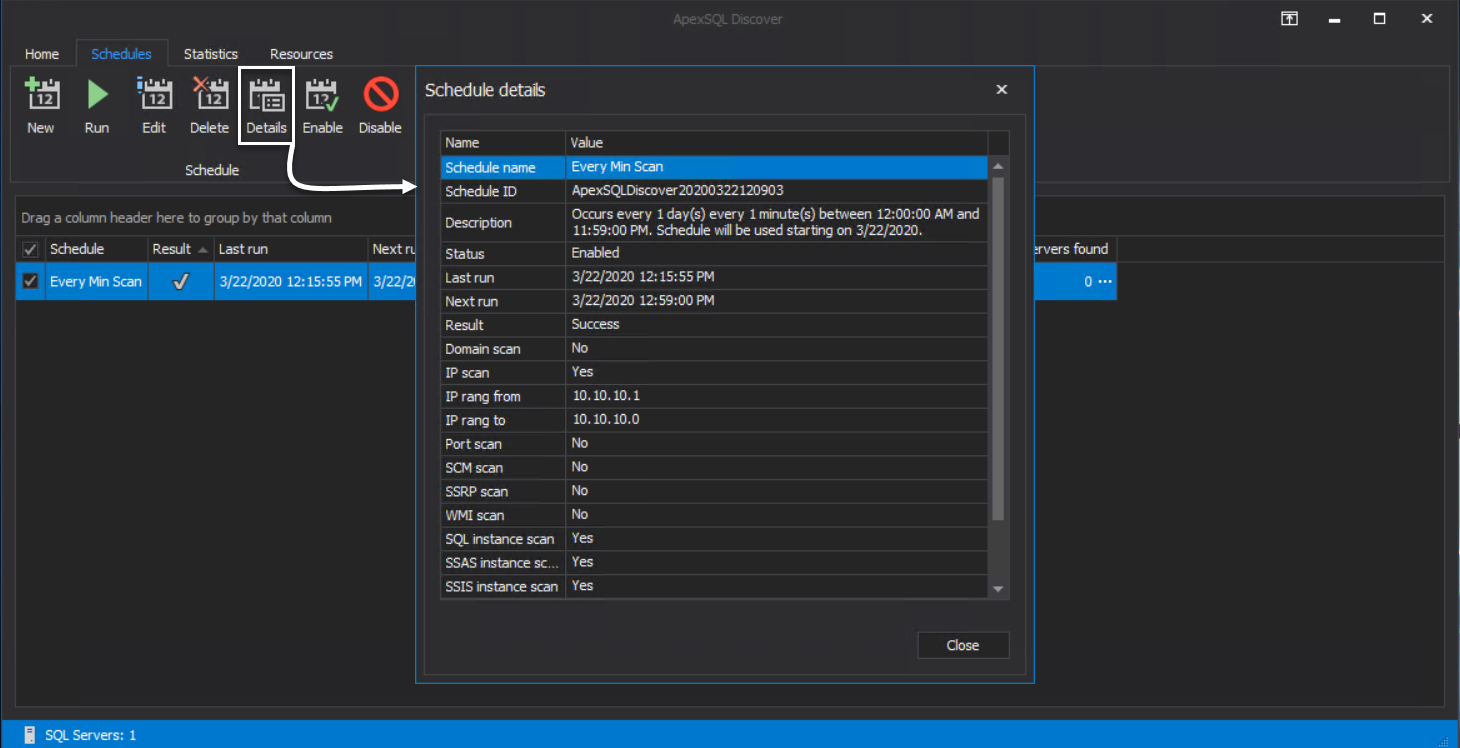
Useful information about the scheduled scan job configuration can be checked using the Details option under the Schedule tab, as shown below:
SQL Instance Health Statistics
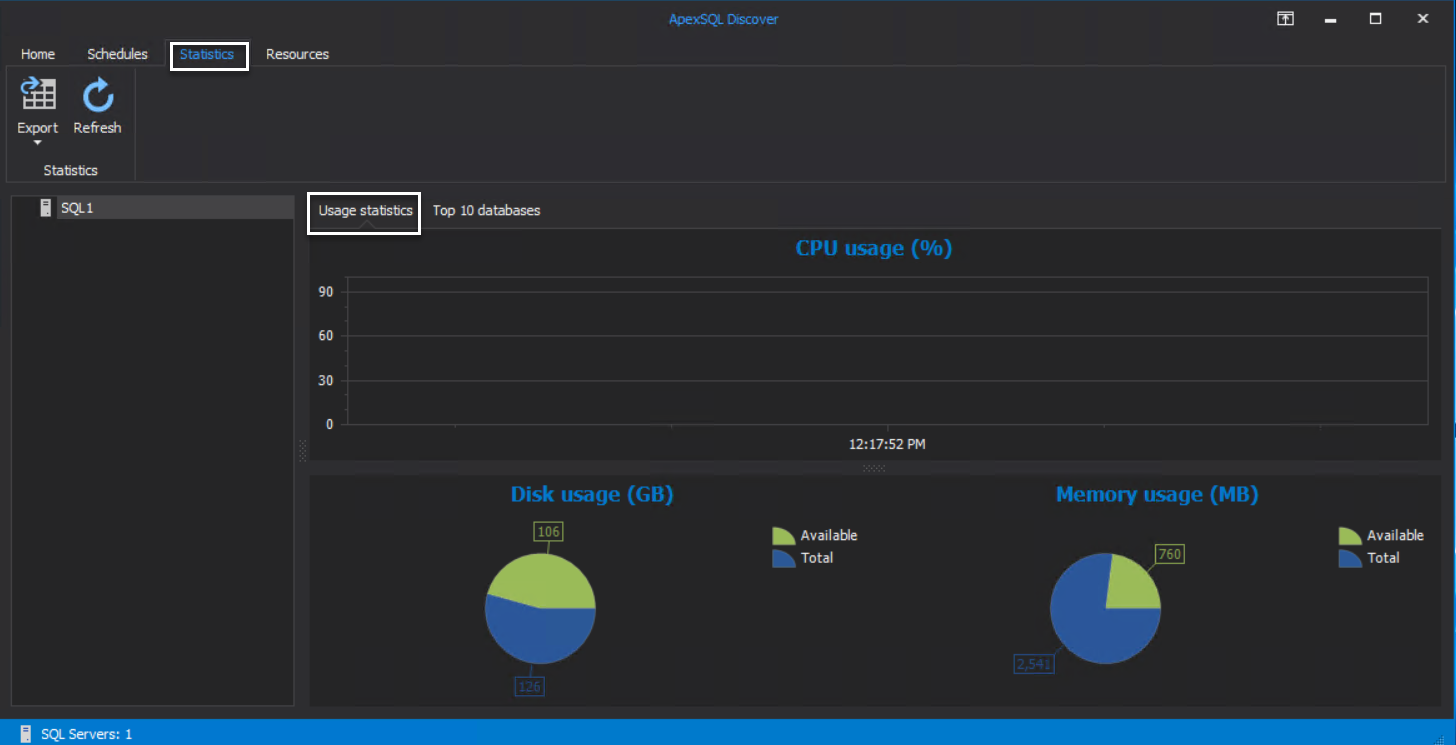
ApexSQL Discover provides us with the ability to monitor CPU, disk and memory usage in real-time on the list of registered computers that host a SQL Server instance, without being able to track the performance history since ApexSQL Discover does not have a central repository database to store the performance historical data.
To check the CPU, disk and memory usage for a registered SQL Server instance, browse to the Statistics tab, select the instance name from the instances list at the left side then click on the Usage Statistics tab to review the graphical representation of the resources consumption, as shown below:
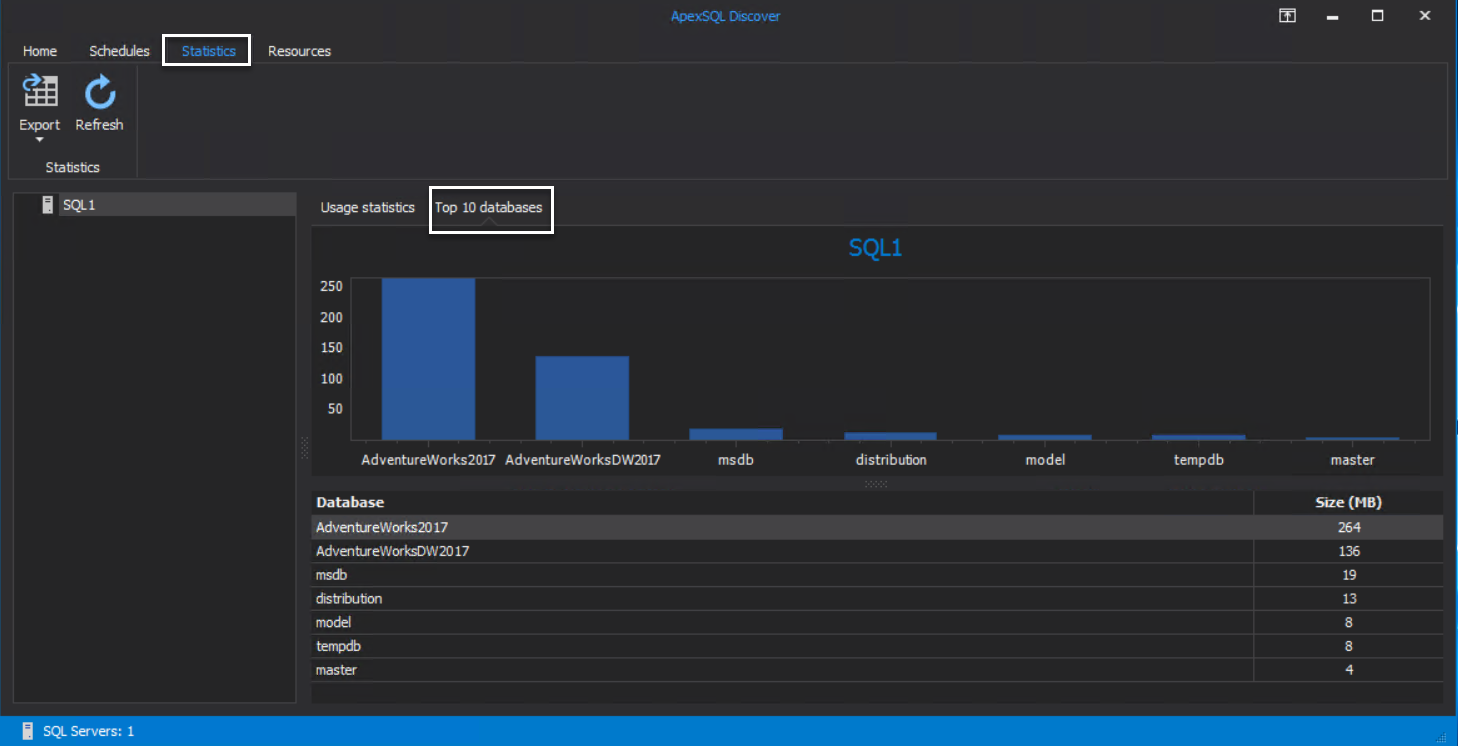
Another useful statistical information provided by ApexSQL Discover, is the top 10 databases consuming the disk drive, presented graphically and in a table with each database size, as shown below:
Export Statistics
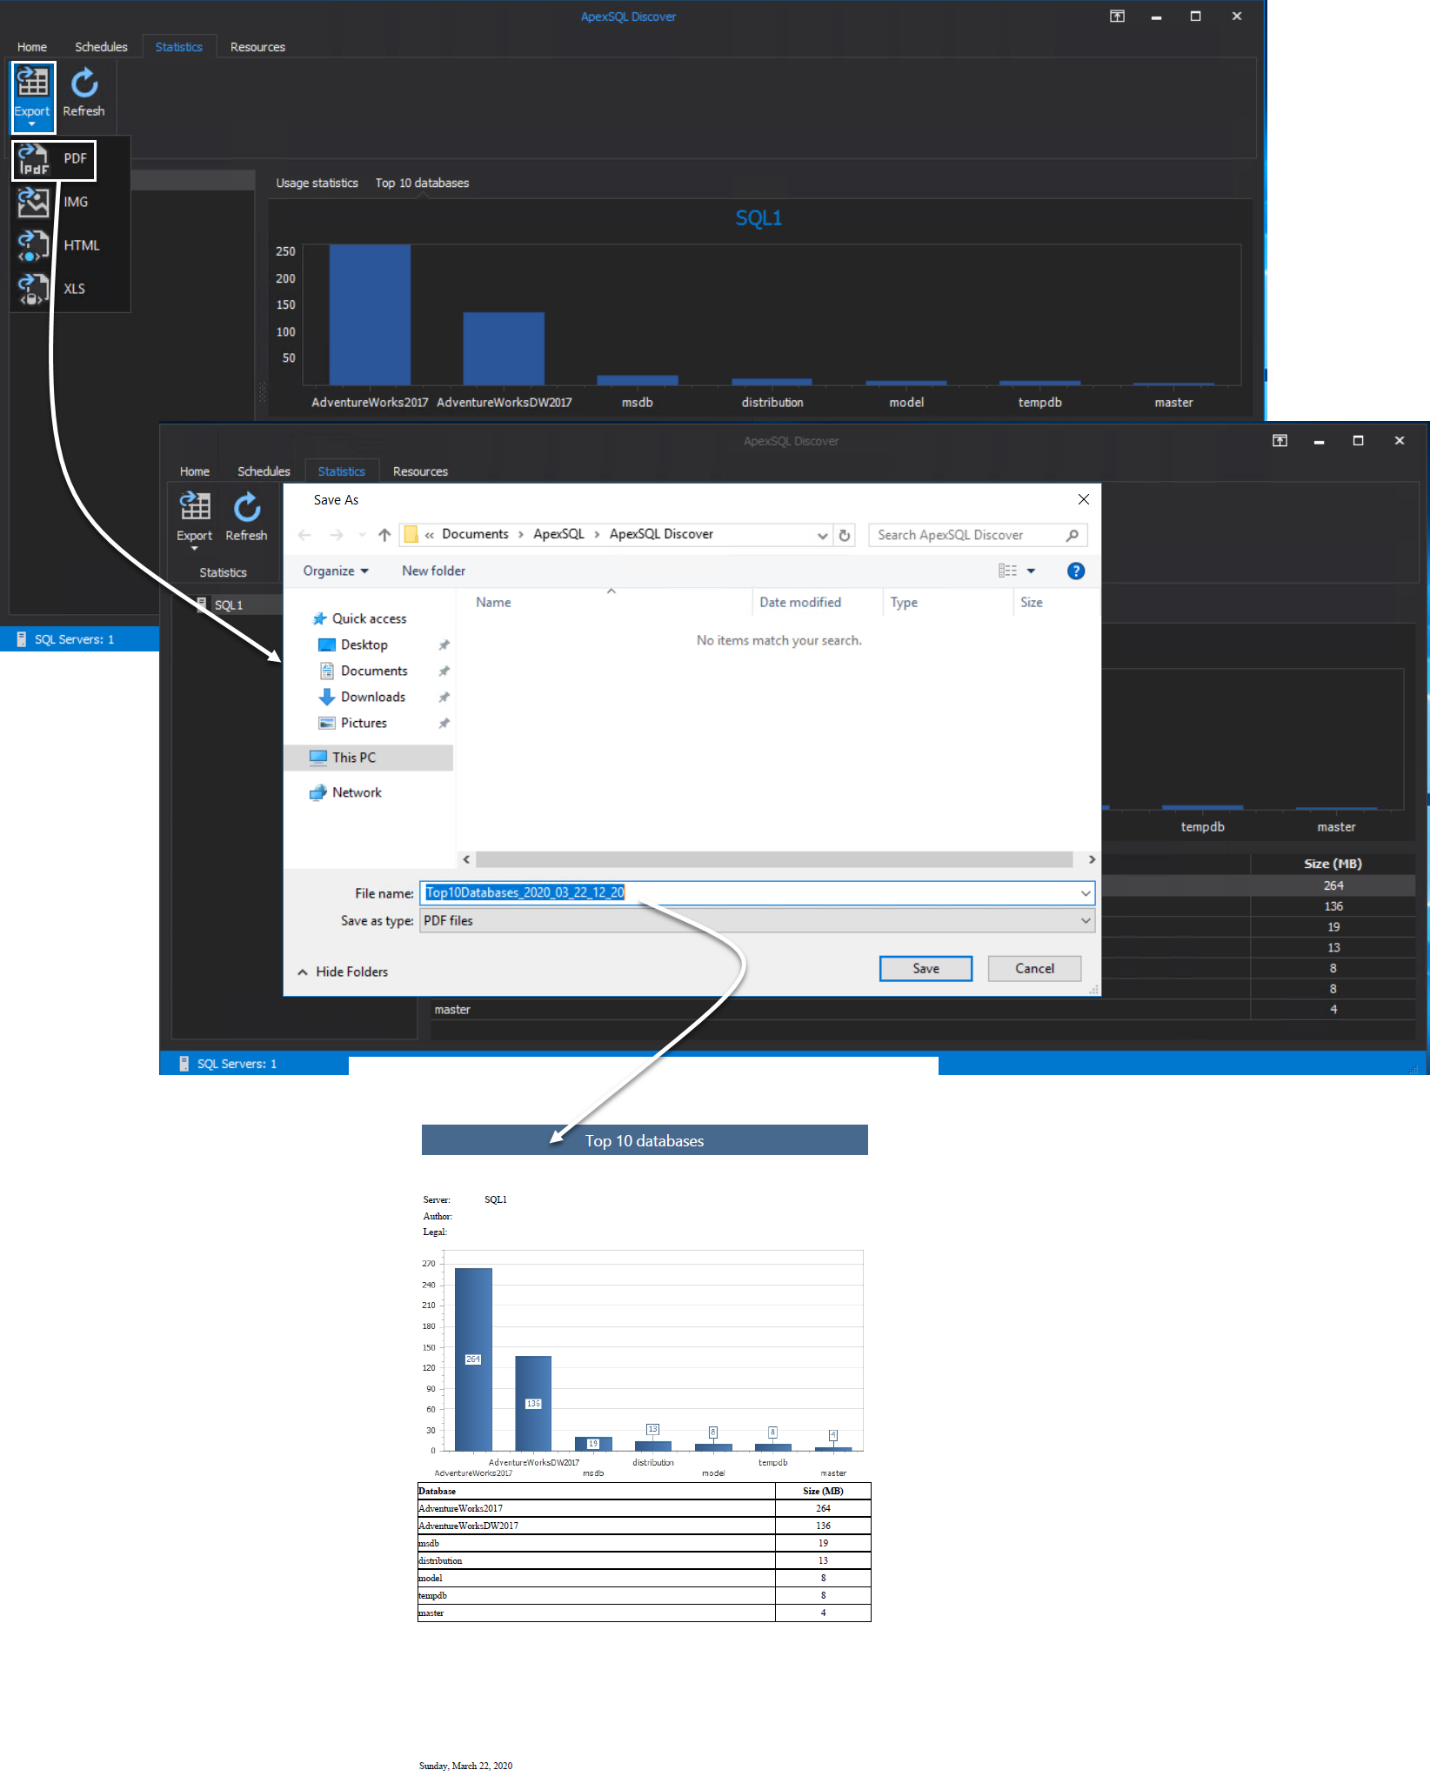
ApexSQL Discover provides us with the ability to export the resources usage statistics report and the top 10 databases report to multiple file formats such as PDF, HTML or Image.
To export the top 10 databases report in the previous image, click on the Export option under the Statistics tab and choose the format of the file to be generated, which is PDF in our example, then specify the location where this report will be saved.
Once the report file is generated, ApexSQL Discover will ask you whether to open the report file directly and review it, as shown below:
Conclusion
We demonstrated the process of obtaining a list of SQL Server instances on the local network using a great tool – ApexSQL Discover in this article. It helps to discover and analyze any number of SQL Server instances installed in all servers across your network and provide detailed information about the detected servers from a central location.
March 27, 2020


