


Installing SharePoint farms can go from “click-click-next” to a full day work depending on the configuration level for the server farm. For administrators that are new to the farm, it can be quite troublesome to learn the farm’s configuration. In those cases, it is important to have a farm documentation with all the setting information. SharePoint documentation is also important for recreating sets of configurations for when failure occur.
This article will create an overview of the process of documenting a SharePoint farm in ApexSQL Doc in the GUI and then the process of setting up a script for automated documentation using ApexSQL Doc command line interfaces switches.
ApexSQL Doc is an all-in-one tool that is used for documenting databases, SSIS packages, SSAS cubes, SSRS reports, Tableau sites and SharePoint farms.
Setting up SharePoint documentation in GUI
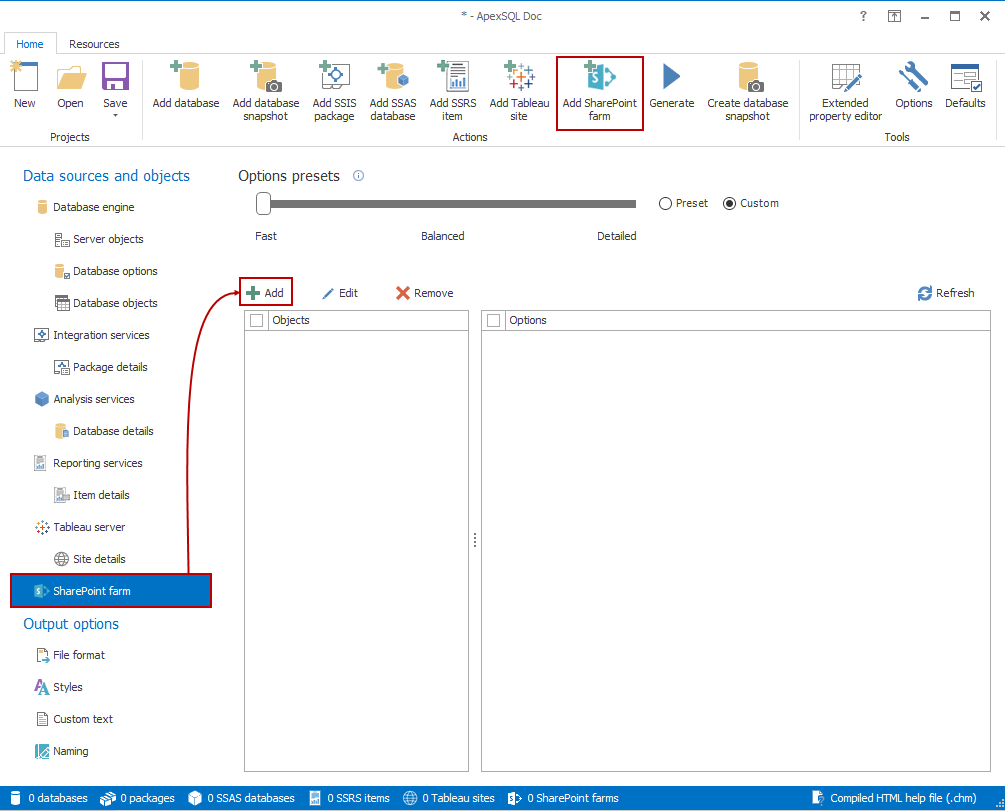
First, create a new project from the Projects section in the Home ribbon menu and click on the Add SharePoint farm button from the Actions section of the Home ribbon menu. The same can be achieved by selecting the SharePoint farm tab in the Data sources and objects pane on the left side and then select the Add button
|
Quick tip: In order to document SharePoint farms, ApexSQL Doc must be installed locally on the SharePoint server. |
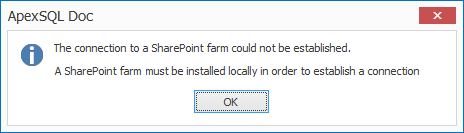
If SharePoint server is not installed locally, the following message appears, notifying that the SharePoint farm has not been configured or installed locally:
|
Quick tip: Since only one SharePoint server farm can be installed on a single machine, ApexSQL Doc automatically connects to a SharePoint farm. No authentication methods or connection credentials are required. |
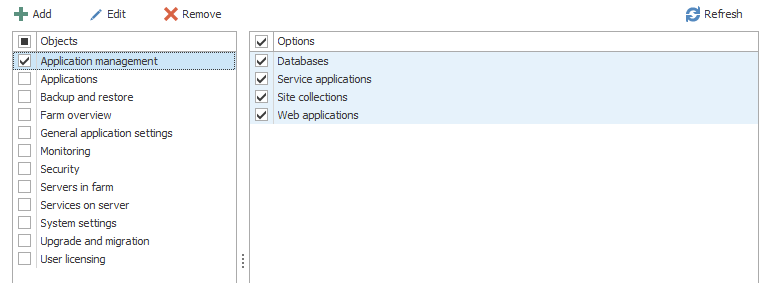
When connected, all SharePoint farm objects and their options are loaded into their respective grid and are selected by default.
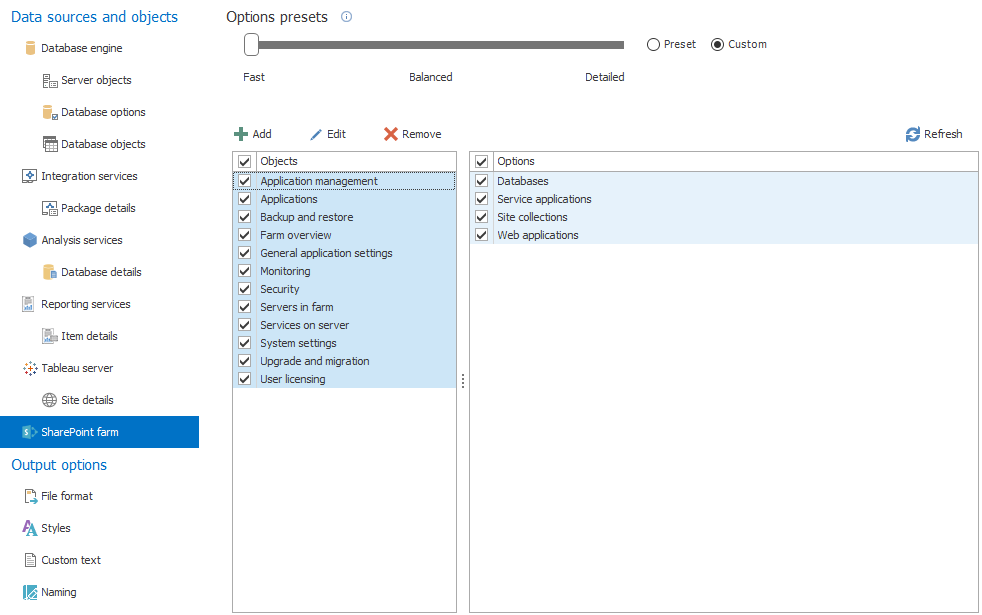
SharePoint objects are presented as the main section of information about the SharePoint farm. Object options are sections of information that can be included or excluded from the SharePoint objects.
The available SharePoint objects with their corresponding options are:
|
|
|
| Application management – lists all available databases and their configurations, service applications, site collections and web applications settings |
Databases Service applications Site collections Web applications |
| Applications – a list of information about available SharePoint applications |
Application URLs Applications licenses Monitored applications |
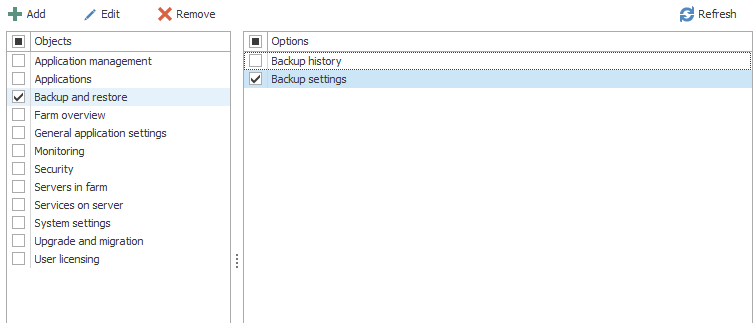
| Backup and restore – lists backup and restore information from the server farm |
Backup history Backup settings |
| Farm overview – an overview of farm servers, web application status and list of content databases |
Content databases Servers in farm Web applications and site collections |
| General applications settings – web application settings, info path form templates, general settings and proxy configurations, content deployment settings and SharePoint designer settings |
Content deployment External service connections Info path services SharePoint designer settings |
| Monitoring – listing health problems, rule definitions, timer job problems, diagnostic settings and event throttling |
Health analyzer Reporting Timer jobs |
| Security – list of farm administrators, password changes, service account, antivirus reports |
General security Users |
| Servers in farm – contains license mapping, processors info, disk lists with statuses, |
Disk info Local admins Processor info Program list |
| Services on server – listing service statuses | Services |
| System settings – list of farm features, cross firewall zones and SMS and email report settings |
Email and text messages Farm management |
| Upgrade and migration – list of installed products and patch versions |
Installed products Patch status |
| User licensing – contains user licensing details and settings | General settings |
To navigate through the information that needs to be documented, select the SharePoint object label on the left object grid and the corresponding options will appear in the right grid. By clicking the checkboxes, the Objects and Options are selected for documentation.
By checking a SharePoint object, all of its options in the right grid are selected by default:
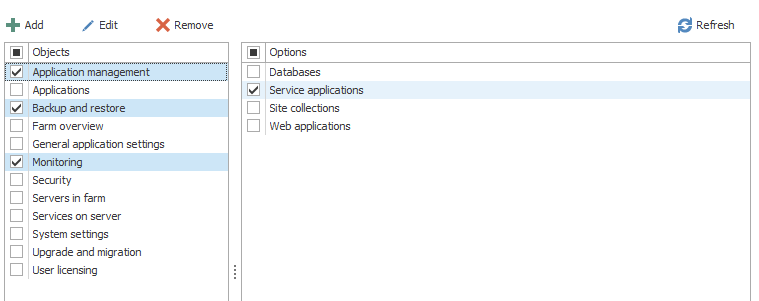
Checking only one SharePoint object option will also check the corresponding object in the left object grid:
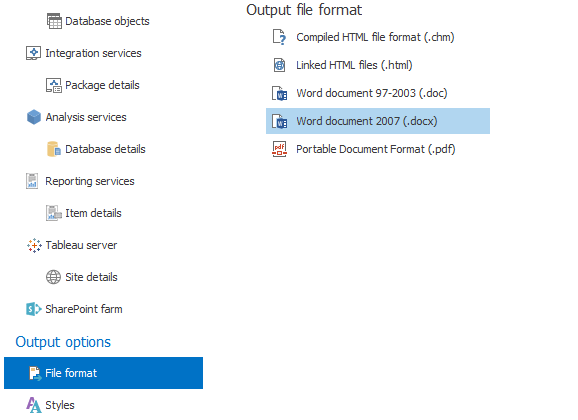
After selecting the objects and options for documentation, the next step is to choose the output file format. This can be done in the File format tab.
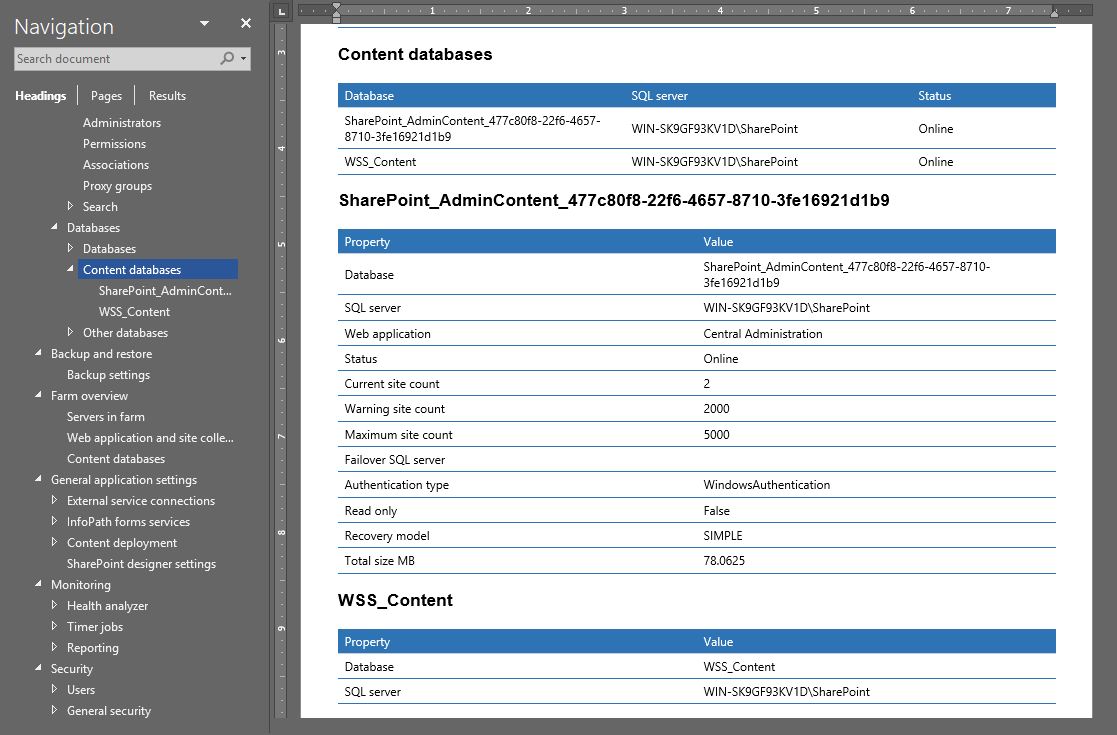
Once the documentation preferences are selected it’s time to start the documentation process. This is done by clicking the Generate button in the Home ribbon bar.

After the documentation process is completed, the generated documentation will look similar to the example shown below:

Automating SharePoint farm documentation
When it comes to documenting a SharePoint farm using the CLI, there are two main solutions:
-
Saving the documentation settings into a project file and then running it with a PowerShell script, using the switch combination shown below:
&’C:\Program Files\ApexSQL\ApexSQL Doc\ApexSQLDoc.com’ /pr: ‘E:\Desktop\SharePointDocumentation.axdp’ /v /f
$LASTEXITCODEFirst, enter the path to ApexSQLDoc.com file, which is used to start the CLI of ApexSQL Doc, then define the saved project file path using the /pr: switch.
After that optionally specify the /verbose switch for detailed output of the documentation process and use the /force switch to override any previously created documentation with the same file name.
When the documentation process is finished, the result will look like this:
The operation has finished successfully
The file D:\documentations\SharePoint server.SharePoint farm.docx already exists. The application will overwrite it
Generating docx file…
The documentation has been written in D:\documentations\SharePoint server.SharePoint farm.docx
The operation has finished successfully
0Note that ApexSQL Doc returns a code at the end of the documentation process. In this case, it’s “0”. This is due to added PowerShell command $LASTEXITCODE
The most common codes in ApexSQL Doc CLI are:
0 – success
1 – general error
2 – invalid switch
4 – incompatible switch
9 – invalid file pathThe complete list of return codes is available when specifying the return code switch /rc
-
Setting up the documentation preferences and opening the Save project as batch file window. This window appears when clicking Save as batch in the Home ribbon menu.
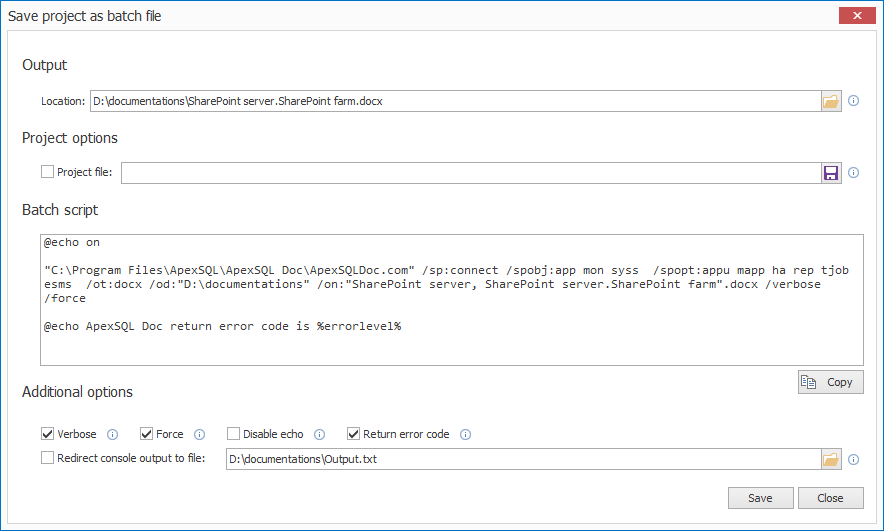
As seen on the picture above, ApexSQL Doc automatically generates a batch script.
Main switches described
ApexSQL Doc uses three main switches to document SharePoint farms:
/sp:connect – connects to a SharePoint farm. The mandatory argument is [connect]. If no SharePoint object switch is specified, the switch selects every SharePoint farm object by default.
/spobj:app mon syss – selects specified SharePoint farm objects. Each SharePoint object is specified as an argument. Arguments are divided with an empty character. The switch also selects all specified SharePoint objects options by default. In this example, the SharePoint object switch selects Applications, Monitoring and System settings.
/spopt:appu mapp ha rep tjob esms – selects a specified SharePoint object option. Each option for SharePoint objects is specified as an argument to the switch. Arguments are separated by empty character. In this example, the switch selects Application urls, Monitored applications, Health analyzer, Reporting, Timer jobs and Email and text messages object options.
|
Quick tip: The /spopt switch overrides the “select all options” function of the /spobj switch and all options for selected objects must be listed in /spopt switch. ApexSQL Doc automatically generates the batch script this way, so it can be used without further modification. |
The batch script can be saved as a .bak file directly from ApexSQL Doc.
When the documentation process is over, the results will look like shown below:
Checking the selected database’s accessibility…
The operation has finished successfully
The file D:\documentations\SharePoint server.SharePoint farm.docx already exists. The application will overwrite it
Generating docx file…
The documentation has been written in D:\documentations\SharePoint server.SharePoint farm.docx
The operation has finished successfully
ApexSQL Doc return error code is 0
FAQs:
Q: Can ApexSQL Doc connect to a SharePoint farm remotely?
A: ApexSQL Doc can be used only locally on the server farm. However, automated documentation processes can be set up on the server and then the documentation can be shared via network and e-mail
Q: Where can be the whole list of SharePoint switches be seen?
A: The full list of SharePoint switches with usage explanations and arguments can be accessed from the CLI using the help switch /? , and in the ApexSQL Doc CLI switches article
Q: Is it required to set the output location when documenting a project file using the CLI?
A: The destination can be set in the project file. If the destination is not set, ApexSQL Doc uses the default output folder.
Q: Which versions of SharePoint Server farms are supported in ApexSQL Doc?
A: SharePoint server version support can be found on the system requirement page
Useful links:
- How to automate and schedule CLI execution with SQL Server Job
- ApexSQL Doc Command Line Interface (CLI) switches
- Save project as batch file
- How to customize SQL database documentation
August 25, 2017


