


Introduction
SQL Server maintenance is not a one-time event, but rather a part of a continuous process. Apart from regular backups and integrity checks, performance improvements can be achieved with index maintenance. If done at regular intervals, it can free the server to focus on other requests rather than losing time scanning for fragmented indexes.
This article should serve as a guide as to how to automate and schedule SQL Server index defragmentation, and will cover three different ways of doing it:
- Automate and schedule SQL Server index defragmentation using SQL Server maintenance plans
- Automate and schedule SQL Server index defragmentation using SQL Server Agent jobs
- Automate and schedule SQL Server index defragmentation using ApexSQL Defrag
Automate and schedule SQL Server index defragmentation using maintenance plans
Maintenance plans in SQL Server are a good way to automate some of the routine tasks. In this section will be explained how to automate and schedule SQL Server index defragmentation using maintenance plans.
To do that, first we need to open up SQL Server Management Studio.
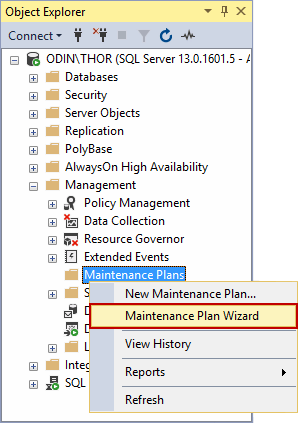
When SSMS is opened, we need to go to Management and then right-click on Maintenance Plans and select Maintenance Plan Wizard
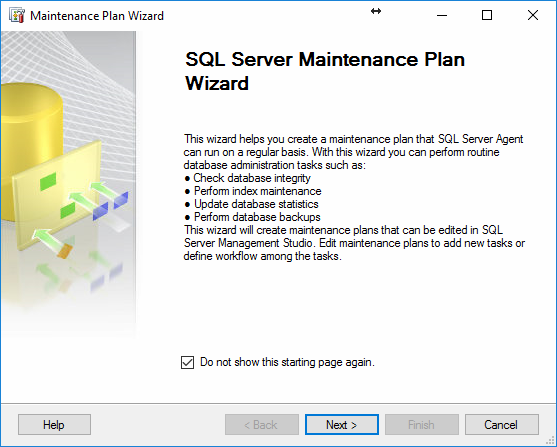
After the wizard opens, go to Next to go to the next page
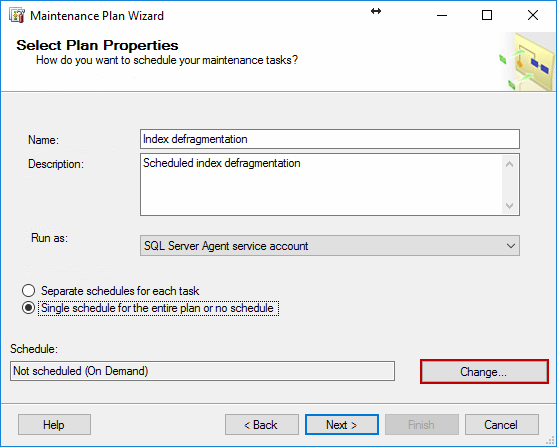
Once there, enter the maintenance plan name, optionally enter the description, select whether to have a separate schedule for each task or single schedule for the entire plan or no schedule (for the purposes of this article, we are going to select the single schedule) and click on Change to edit the schedule
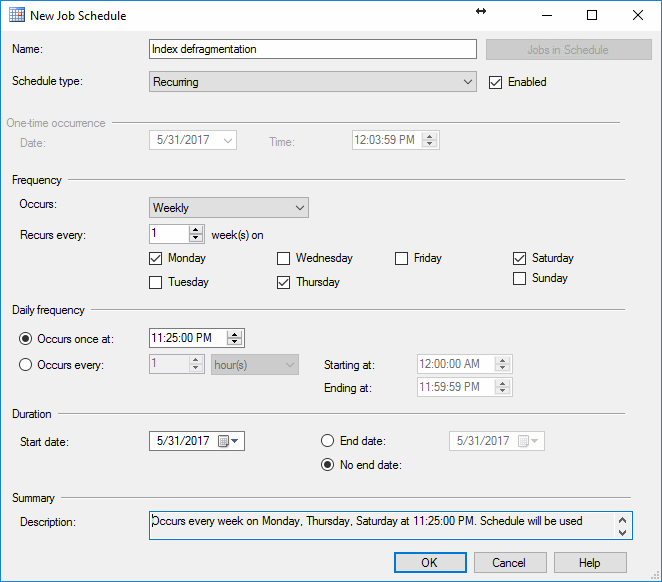
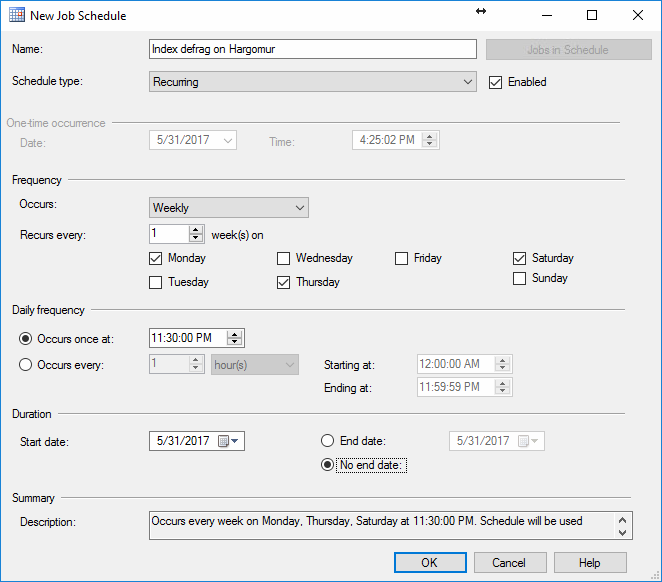
In the New Job Schedule, setup the schedule as per your individual needs.
For the schedule type, there are a few options – Start automatically when SQL Server Agent starts, Start whenever CPUs become idle, Recurring and One time. For the purpose of this article, Recurring is chosen since it allows to schedule precise time when to start the job.
The Frequency option allows choosing whether to do the job on a daily, weekly or monthly basis. In this case, Weekly is chosen since it allows to run the job on certain days of the week which can be beneficial by allowing the user to select the days with the least amount of traffic on the server.
Daily frequency allows to select a specific time of day to run the job, or a selected time span in which the job runs on an hourly basis.
Duration is used to choose on which day to start the job and optionally to specify the end date, after which the job will not run anymore
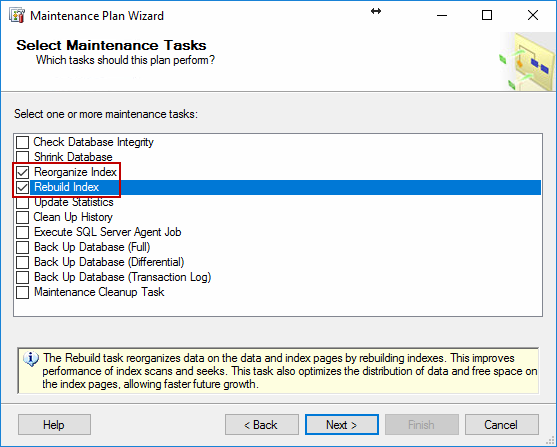
Moving on to the next page of the wizard, select the maintenance tasks. For the scope of this article, Reorganize Index and Rebuild Index tasks are chosen
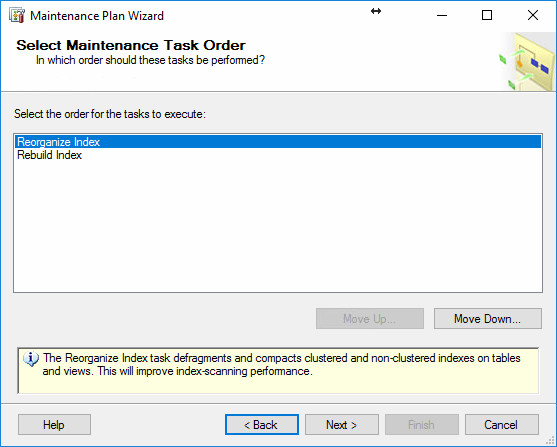
The Select Maintenance Task Order page appears when there’s more than one task chosen. The order is made in this page.
Users can also make a separate maintenance plan for the reorganization of indexes as well as for the rebuilding of indexes, if needed.
On the next wizard page, Define Reorganize Index Task is where databases can be selected, as well as defining the Scan type and thresholds for the optimization in the Index Stats Options, such as fragmentation percentage, page count and the last time used

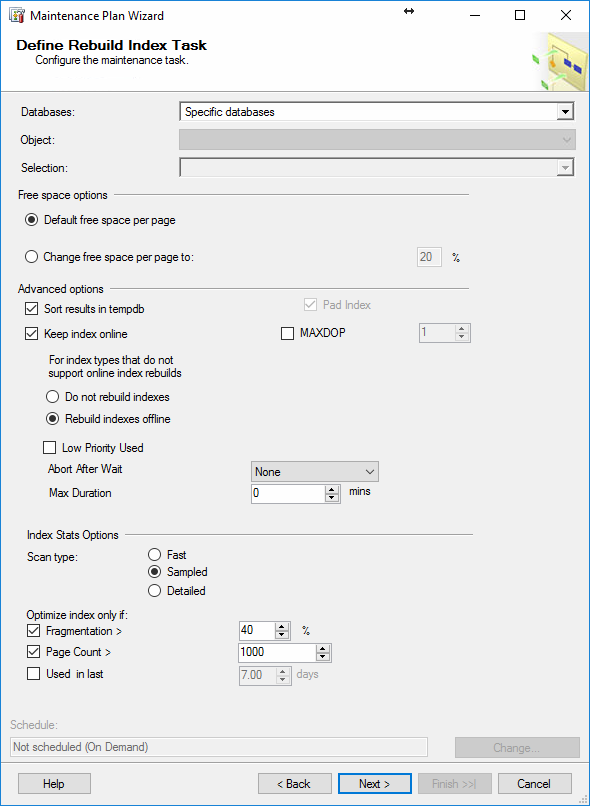
On the following wizard page, Define Rebuild Index Task, databases are selected
Free space options, the free space per page, or Fill factor, can be left as default values or changed (doing this changes the free space per page for all the indexes in the selected databases, which in some cases can be detrimental to the overall performance and fragmentation, despite the rebuild process)
Advanced options offer different options, such as sorting the results in tempdb, online index rebuild, maximum degree of parallelism among others.
Index Stats Options allows defining the thresholds and scan type
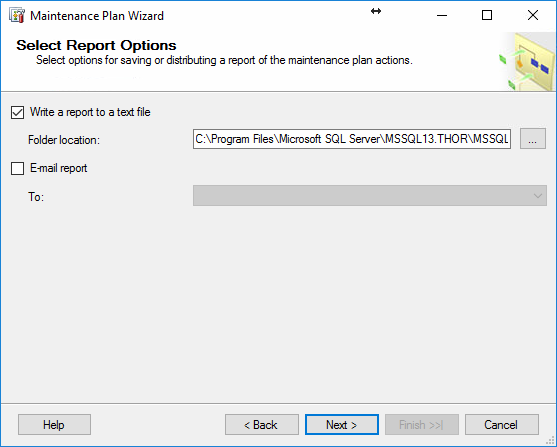
In the next wizard page, Select Report Options, it can be chosen to write a report to a text file, and/or send an email report
In the final page of the wizard the whole maintenance plan with all the tasks can be reviewed and created by pressing on the finish button

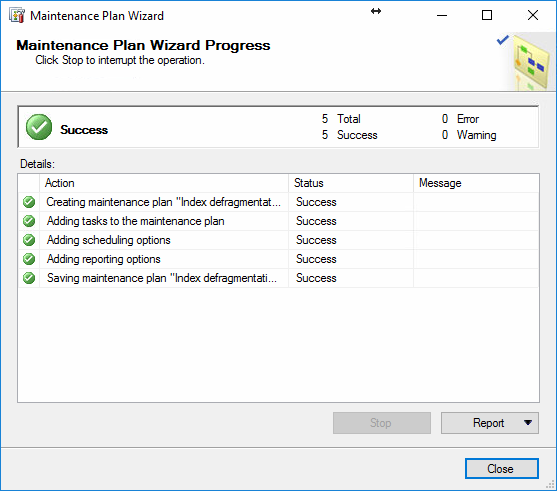
After pressing on the Finish button, the maintenance plan is being created and is presented at the end of the wizard as a series of operations, which, if successful, should look like in the image below
Automate and schedule SQL Server index defragmentation using a SQL Server Agent job
As well as maintenance plans, SQL Server Agent jobs are also a handy way to automate and schedule index defragmentation jobs in SQL Server. They are also configured from SSMS
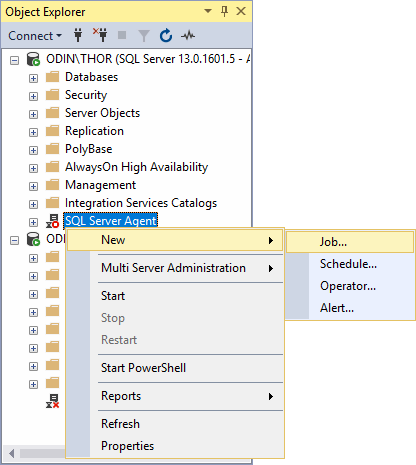
To create a new job, right click on SQL Server Agent, select New and then Job
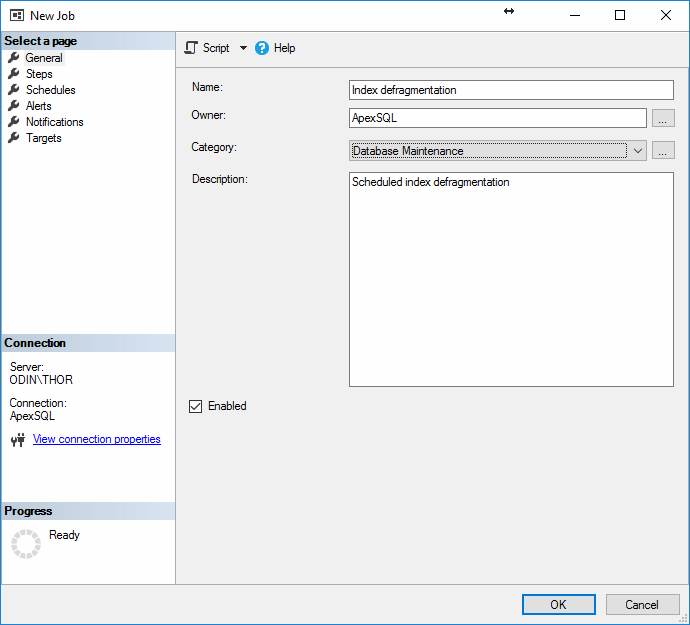
Next the New Job window will open. In it, enter the Job name, owner, optionally Category and Description
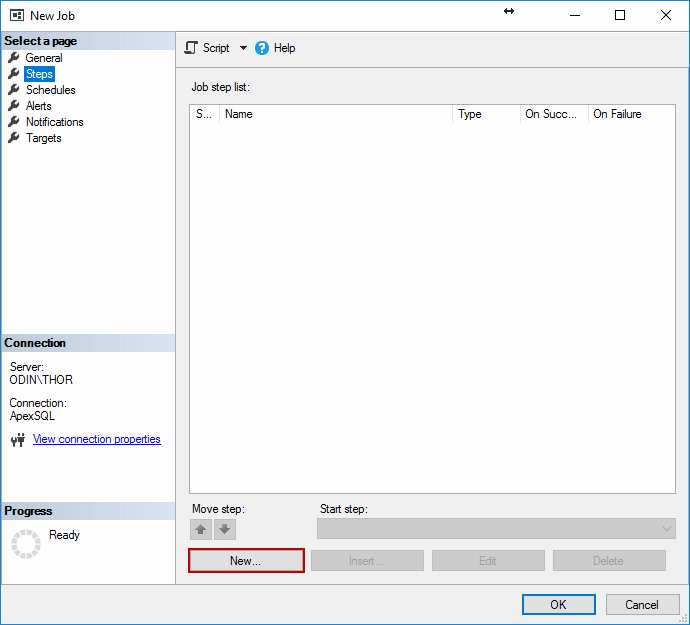
In the next tab, Steps, click on New to open a New Job Step window
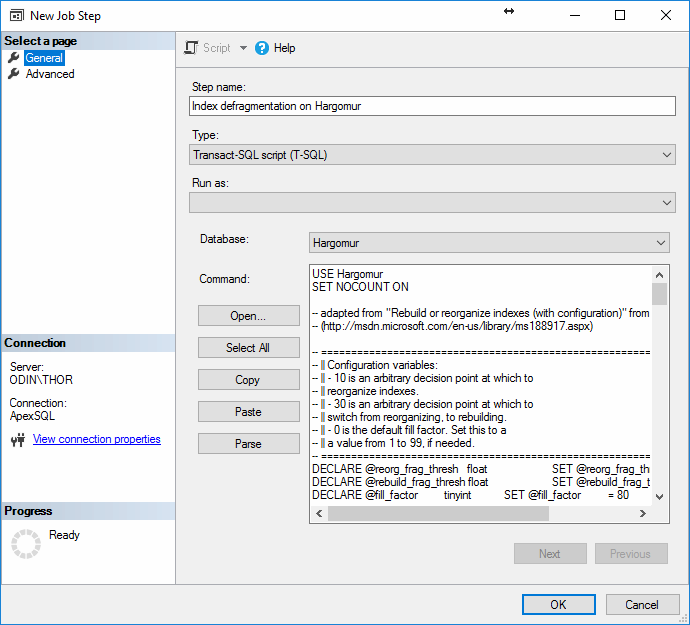
In the New Job Step, insert the Step Name, select the type of step to be Transact-SQL script (T-SQL), select the database to defragment
Note: For SQL Server Agent job steps, only one database can be selected in a single step
In the Command: window, enter the following T-SQL script which was taken and adapted from MSDN Books Online article “Rebuild or reorganize indexes (with configuration)” :
USE <databasename>
SET NOCOUNT ON

DECLARE @reorg_frag_thresh   float    SET @reorg_frag_thresh   = 10.0
DECLARE @rebuild_frag_thresh float    SET @rebuild_frag_thresh = 30.0
DECLARE @fill_factor         tinyint          SET @fill_factor         = 80
DECLARE @report_only         bit      SET @report_only         = 1

-- added (DS) : page_count_thresh is used to check how many pages the current
table uses
DECLARE @page_count_thresh  smallint SET @page_count_thresh   = 1000

-- Variables required for processing.
DECLARE @objectid       int
DECLARE @indexid        int
DECLARE @partitioncount bigint
DECLARE @schemaname     nvarchar(130)
DECLARE @objectname     nvarchar(130)
DECLARE @indexname      nvarchar(130)
DECLARE @partitionnum   bigint
DECLARE @partitions     bigint
DECLARE @frag           float
DECLARE @page_count     int
DECLARE @command        nvarchar(4000)
DECLARE @intentions     nvarchar(4000)
DECLARE @table_var      TABLE(
                          objectid     int,
                          indexid      int,
                          partitionnum int,
                          frag         float,
                  page_count int
                        )

-- Conditionally select tables and indexes from the
-- sys.dm_db_index_physical_stats function and
-- convert object and index IDs to names.
INSERT INTO
    @table_var
SELECT
    [object_id]                    AS objectid,
    [index_id]                     AS indexid,
    [partition_number]             AS partitionnum,
    [avg_fragmentation_in_percent] AS frag,
  [page_count]           AS page_count
FROM
    sys.dm_db_index_physical_stats (DB_ID(), NULL, NULL , NULL, 'LIMITED')
WHERE
    [avg_fragmentation_in_percent] > @reorg_frag_thresh
  AND
  page_count > @page_count_thresh
  AND
    index_id > 0


-- Declare the cursor for the list of partitions to be processed.
DECLARE partitions CURSOR FOR
    SELECT * FROM @table_var

-- Open the cursor.
OPEN partitions

-- Loop through the partitions.
WHILE (1=1) BEGIN
    FETCH NEXT
        FROM partitions
        INTO @objectid, @indexid, @partitionnum, @frag, @page_count

    IF @@FETCH_STATUS < 0 BREAK

    SELECT
        @objectname = QUOTENAME(o.[name]),
        @schemaname = QUOTENAME(s.[name])
    FROM
        sys.objects AS o WITH (NOLOCK)
        JOIN sys.schemas as s WITH (NOLOCK)
        ON s.[schema_id] = o.[schema_id]
    WHERE
        o.[object_id] = @objectid

    SELECT
        @indexname = QUOTENAME([name])
    FROM
        sys.indexes WITH (NOLOCK)
    WHERE
        [object_id] = @objectid AND
        [index_id] = @indexid

    SELECT
        @partitioncount = count (*)
    FROM
        sys.partitions WITH (NOLOCK)
    WHERE
        [object_id] = @objectid AND
        [index_id] = @indexid

    -- Build the required statement dynamically based on options and index
stats.
    SET @intentions =
        @schemaname + N'.' +
        @objectname + N'.' +
        @indexname + N':' + CHAR(13) + CHAR(10)
    SET @intentions =
        REPLACE(SPACE(LEN(@intentions)), ' ', '=') + CHAR(13) + CHAR(10) +
        @intentions
    SET @intentions = @intentions +
        N' FRAGMENTATION: ' + CAST(@frag AS nvarchar) + N'%' + CHAR(13) +
CHAR(10) +
        N' PAGE COUNT: '    + CAST(@page_count AS nvarchar) + CHAR(13) +
CHAR(10)

    IF @frag < @rebuild_frag_thresh BEGIN
        SET @intentions = @intentions +
            N' OPERATION: REORGANIZE' + CHAR(13) + CHAR(10)
        SET @command =
            N'ALTER INDEX ' + @indexname +
            N' ON ' + @schemaname + N'.' + @objectname +
            N' REORGANIZE; ' +
            N' UPDATE STATISTICS ' + @schemaname + N'.' + @objectname +
            N' ' + @indexname + ';'

    END
    IF @frag >= @rebuild_frag_thresh BEGIN
        SET @intentions = @intentions +
            N' OPERATION: REBUILD' + CHAR(13) + CHAR(10)
        SET @command =
            N'ALTER INDEX ' + @indexname +
            N' ON ' + @schemaname + N'.' +     @objectname +
            N' REBUILD'
    END
    IF @partitioncount > 1 BEGIN
        SET @intentions = @intentions +
            N' PARTITION: ' + CAST(@partitionnum AS nvarchar(10)) + CHAR(13) +
CHAR(10)
        SET @command = @command +
            N' PARTITION=' + CAST(@partitionnum AS nvarchar(10))
    END
    IF @frag >= @rebuild_frag_thresh AND @fill_factor > 0 AND @fill_factor < 100 BEGIN
        SET @intentions = @intentions +
            N' FILL FACTOR: ' + CAST(@fill_factor AS nvarchar) + CHAR(13) + CHAR(10)
        SET @command = @command +
            N' WITH (FILLFACTOR = ' + CAST(@fill_factor AS nvarchar) + ')'
    END

    -- Execute determined operation, or report intentions
    IF @report_only = 0 BEGIN
        SET @intentions = @intentions + N' EXECUTING: ' + @command
        PRINT @intentions
        EXEC (@command)
    END ELSE BEGIN
        PRINT @intentions
    END
  PRINT @command

END

-- Close and deallocate the cursor.
CLOSE partitions
DEALLOCATE partitions

GO
Note: Make sure to enter the database name in the first line of the script according to the environment in which the job will be used
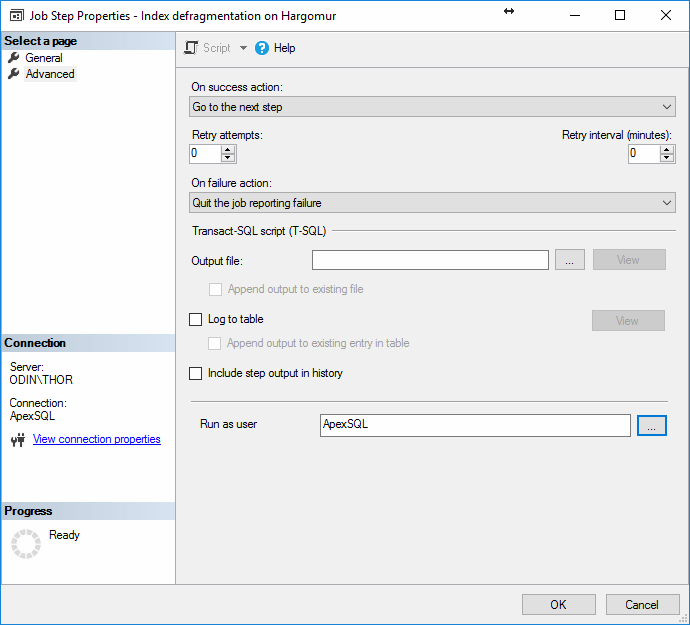
In the advanced tab of the same window, action on success, action on failure can be set from the dropdown menus, as well as the ability to export the script to a file, log the action to table and include the step output in history
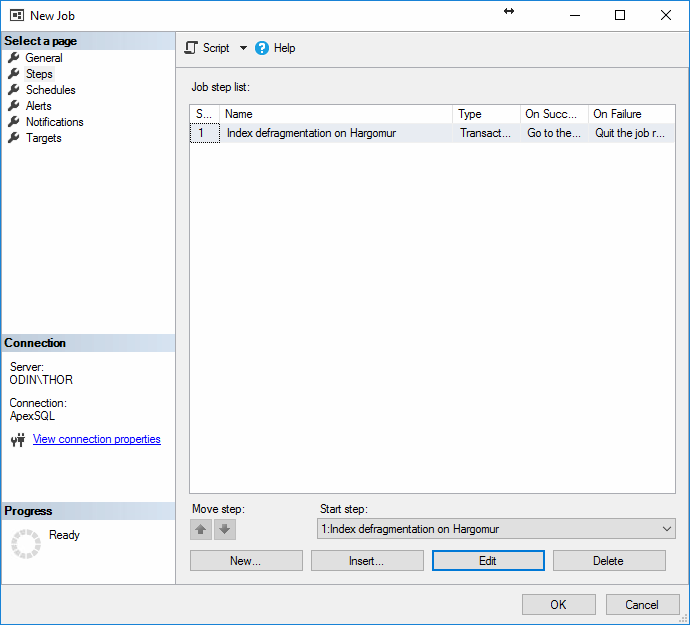
After creating the step, the New Job window should look something like this
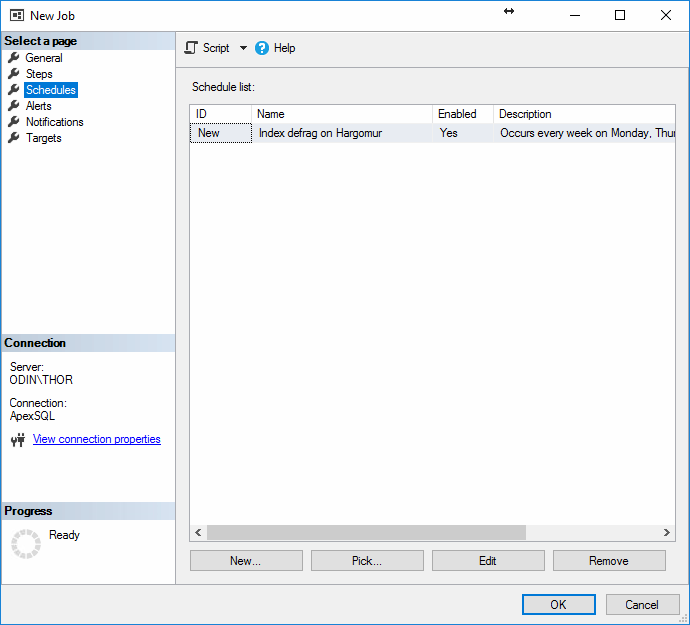
On the next tab, Schedules, click on New… to open the New Job Schedule
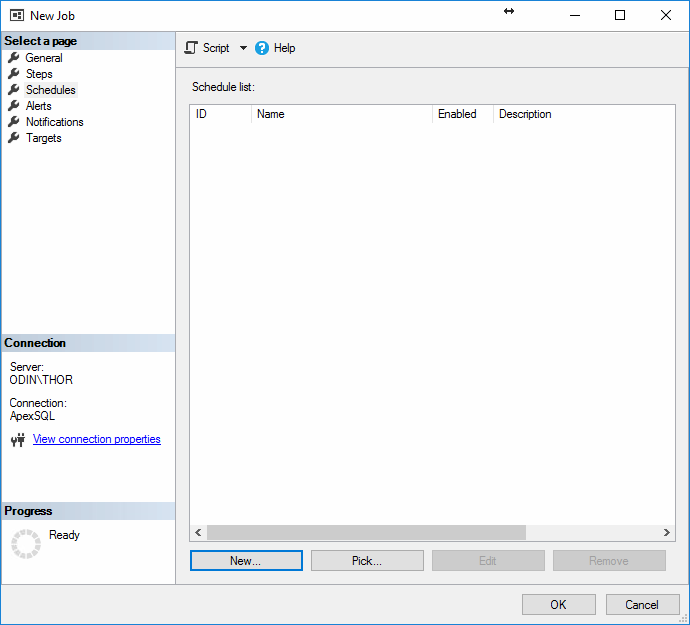
In the New Job Schedule, same as when creating the schedule for maintenance plans, a detailed schedule can be set up
After creating the schedule, the New Job window should look as follows
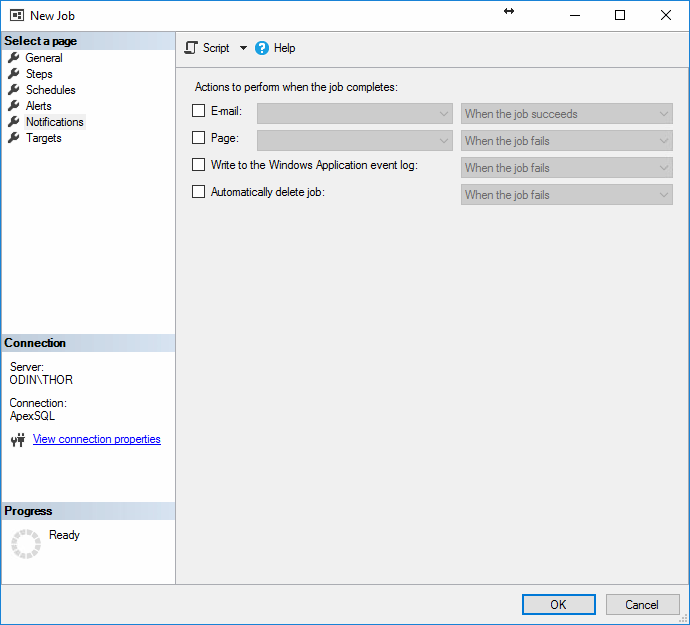
On the Alerts tab, alerts can be setup in case of specific events
On the Notifications tab, email notifications, pager messages can be sent, an entry in the Windows Application event log can be made and the job can be deleted automatically upon success or failure
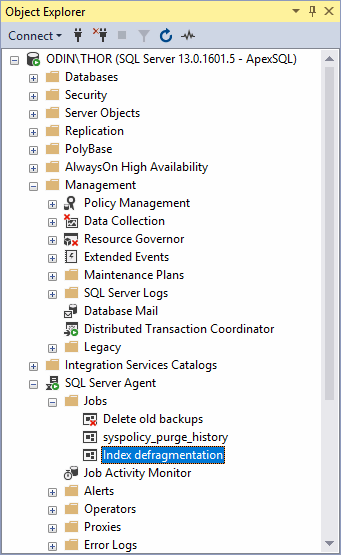
After pressing OK, the job will be created, and can afterwards be viewed in the Object Explorer under the SQL Server Agent – Jobs
Automate and schedule SQL Server index defragmentation using ApexSQL Defrag
Another way to automate and schedule SQL Server index defragmentation is by using a 3rd party tool such as ApexSQL Defrag. ApexSQL Defrag is an enterprise SQL Server tool which is used for monitoring, analyzing and managing SQL Server index defragmentation which works down to a single index level. Spanning across multiple databases and servers, ApexSQL Defrag takes care of reorganizing indexes, rebuilding online or offline, whether the defragmentation process is started manually or is run automatically through a policy
To automate and schedule SQL Server index defragmentation using ApexSQL Defrag, first, download the application from this link and install it
Note: For installation and troubleshooting guide, consult this article
After running ApexSQL Defrag, presented is the main interface of the application

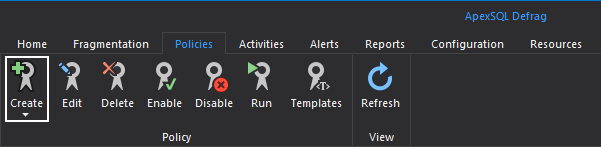
Navigating to the Policies tab, presents the policy explorer. On the main ribbon, click on Custom option on the Create button to start the Policy creation wizard.
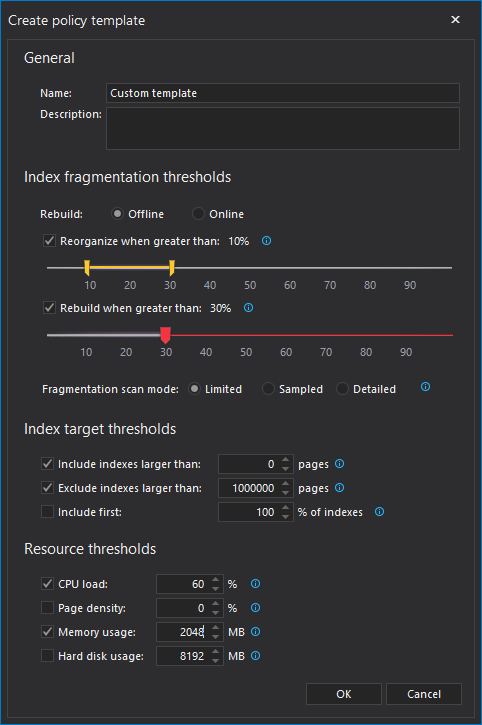
In the Policy creation wizard, under General tab, insert policy name, optionally a description, rebuild type (online or offline).
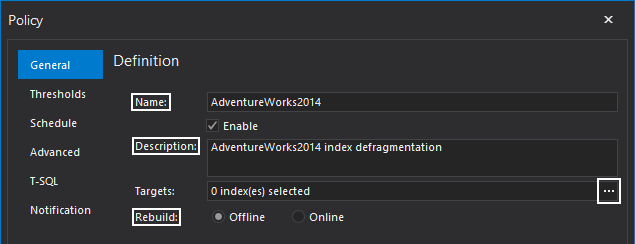
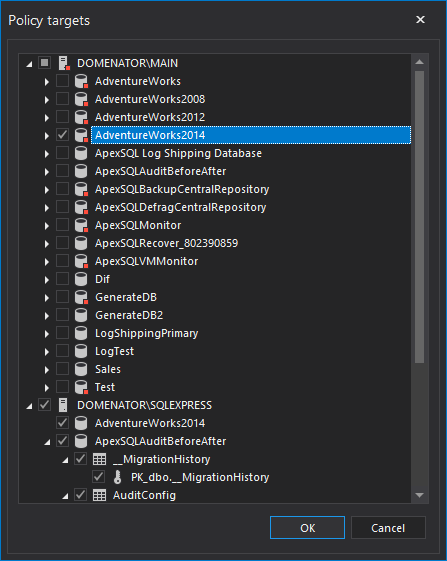
In the same tab, by pressing on the three dots at Targets, a policy targets explorer opens where the indexes can be chosen for maintenance. As it can be seen, targets can be on a different servers, different databases, and can be selected individually.
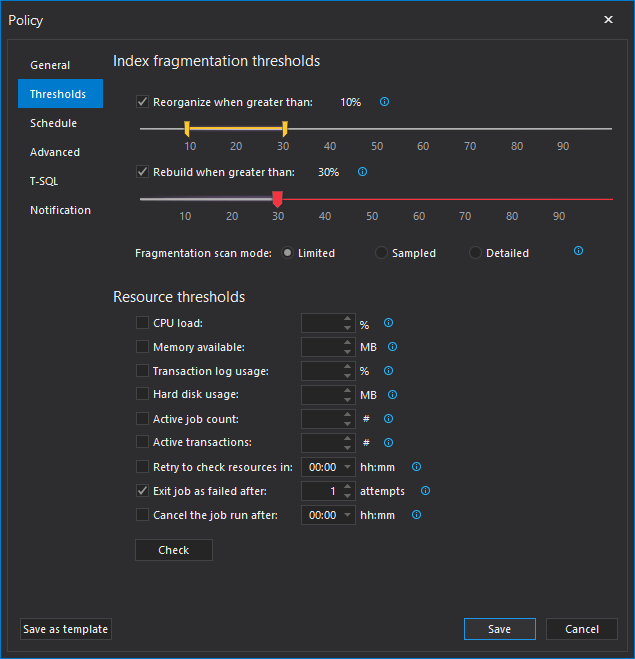
After checking the targets, go to the Thresholds tab of the policy creation wizard. Reorganize and rebuild thresholds can be set using the sliders. Limited, sampled and detailed fragmentation scan mode can be chosen, as well as the various resource thresholds.
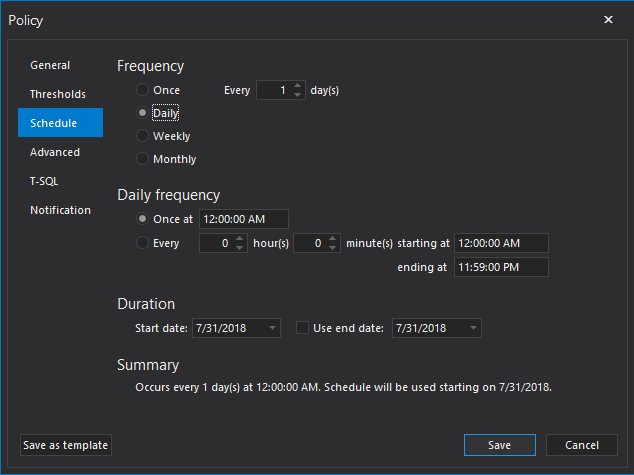
In Schedule tab, set the frequency for the defragmentation job. For this example, one daily run at 12AM will be used, but if the fragmentation occurs more often, schedule can also be set to run every few hours.
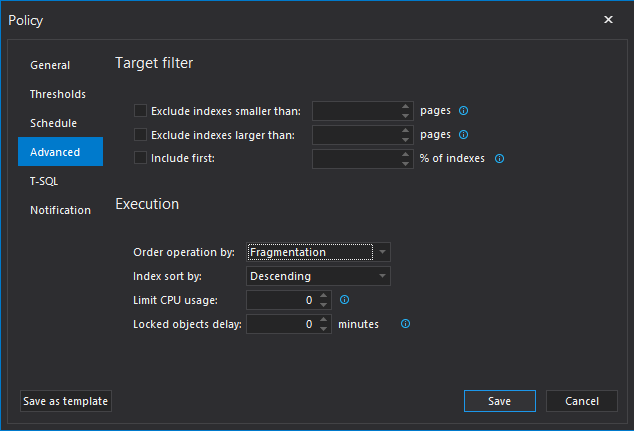
In Advanced tab, filters for index page number and top % of indexes can be configured. Few additional features are available on the form:
- Execution order of scheduled operations can be set by fragmentation value, page count or size of targeted indexes.
- Number of CPU cores that will be used in policy execution can be limited
- Execution delay on locked objects can be set
In the Notifications tab of the same wizard, email notifications can be set to be sent depending on the policy outcome status.
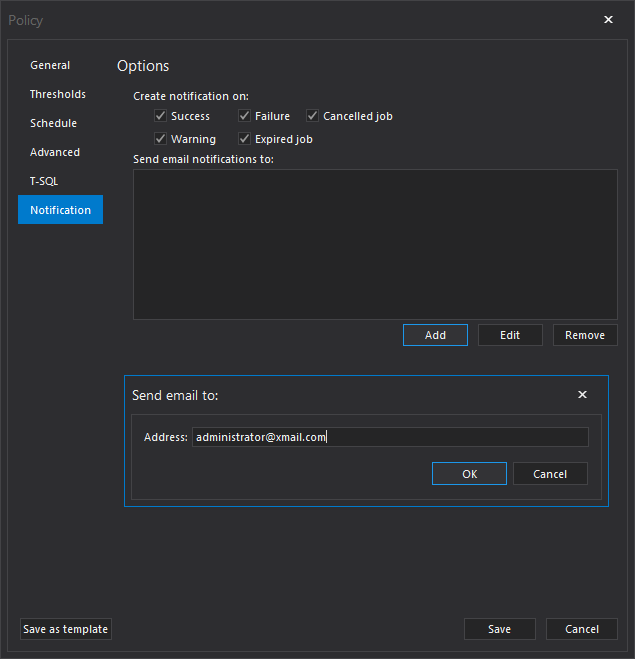
Note: SMTP settings need to be set up from the Configuration tab in the main application window to be able to set up email notifications in the policies.
Click on Save button at the bottom to create the policy. The policy can be run on schedule or started manually from the Policies tab.
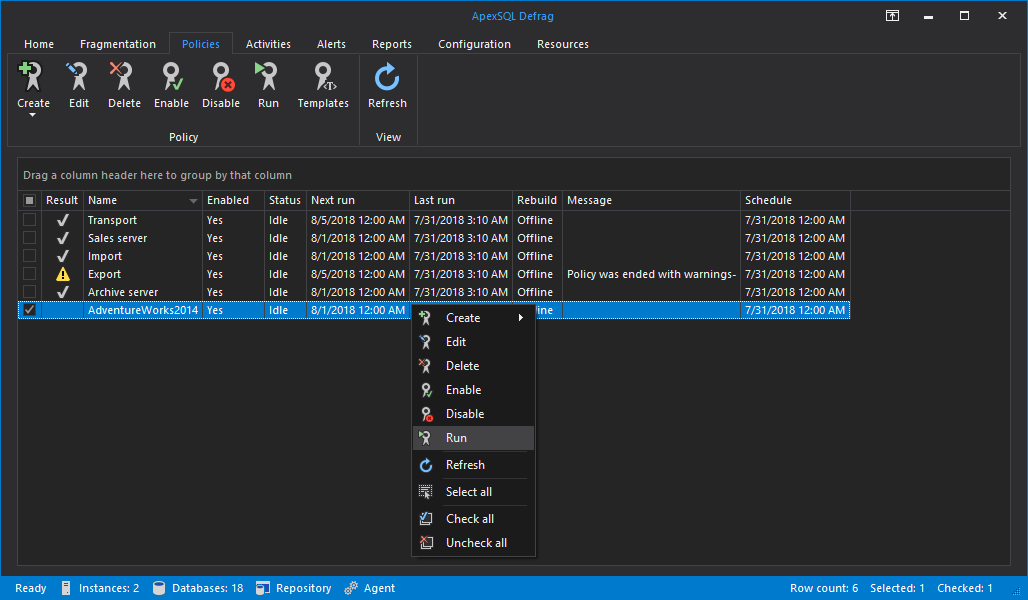
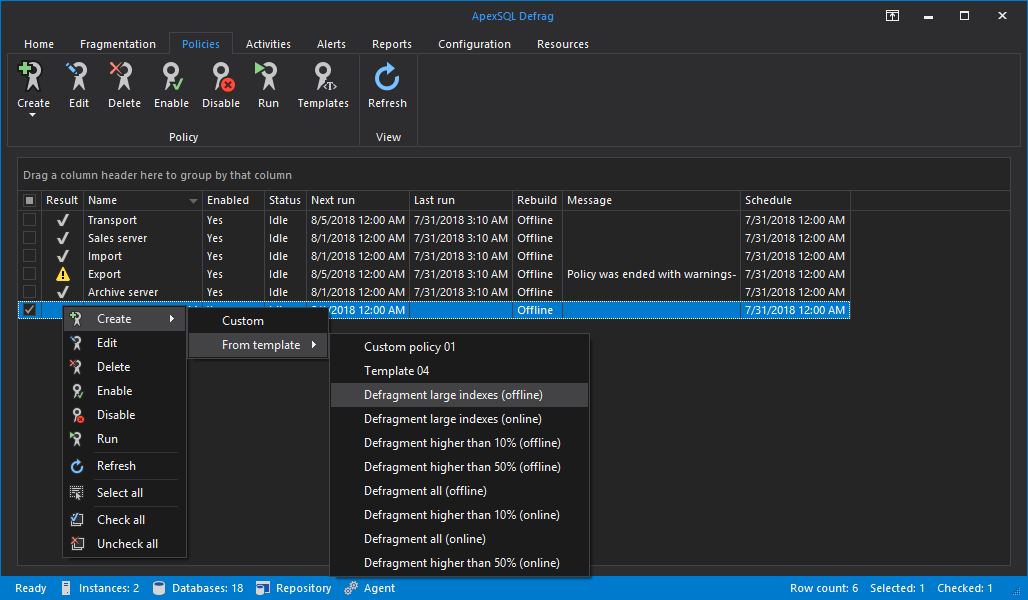
In the Policies tab, operations such as editing, enabling and disabling can be run. Also, policy templates can be used for faster creation of policies with the most common types already predefined in the application itself. All the user needs to do is set up the schedule and select policy targets.
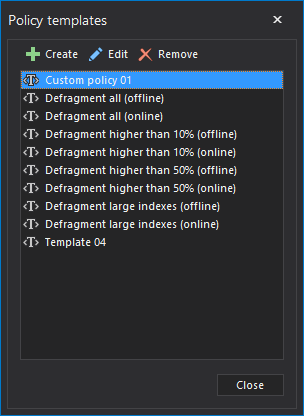
As well as creating policies from templates, users can also create their own templates
User created templates can easily be accessed from the drop down menu when Create button is clicked in the Policies tab main ribbon. Alternatively, templates can be loded from the context menu, by choosing options Create/From template. This will automatically load the template settings when creating policies.
Downloads
Please download the script(s) associated with this article on our GitHub repository.
Please contact us for any problems or questions with the scripts.
June 5, 2017


