


ApexSQL Build is a tool that can build a new SQL database, update an existing SQL database, and consolidate scripts. Additionally, it can deploy databases directly from the source control repository, create C# solution or executable installer, and build SQL databases from scripts, ApexSQL snapshots, or script folders.
In the following steps, the whole process of the Build step will be described:
-
Run ApexSQL Build
-
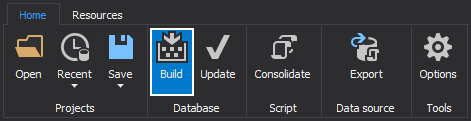
In the main application window, choose the Build action, under the Database section, in the Home tab:
-
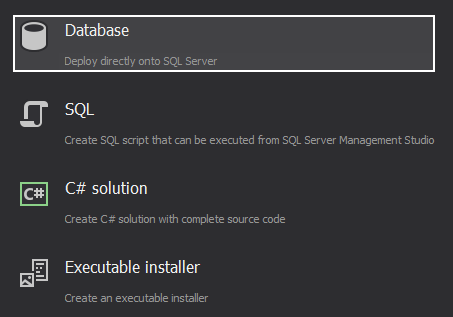
The Build wizard will be shown and in the first step, choose the Database as an output type, so that input source will be deployed directly to a SQL database:
-
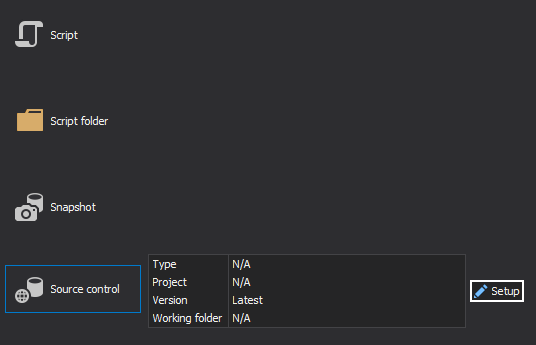
When the output is set, click the Next button, and in the following step, chose Source control as an input source:
-
To configure the source control repository, from which SQL objects will be pulled for building a database, click the Setup button, as shown in the above screenshot
-
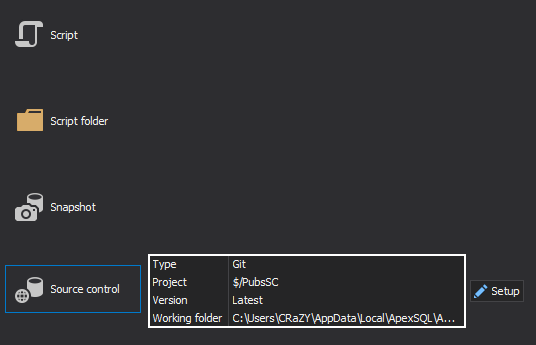
The Source control setup wizard steps are the same as in ApexSQL Diff’s steps 5) and 6) and once the Finish button is clicked, all information of the source control repository will be loaded:
-
When the Next button is clicked in the above window, all SQL objects will be pulled from the source control repository and copied to a local working folder:

-
In the next step, SQL Server connection information, where a database will be build, needs to be provided:
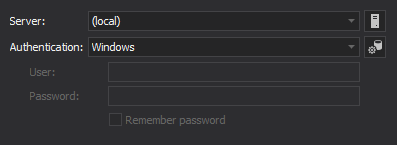
If a database is not built on a local server, a server name and a way of authentication must be provided.
-
Under the Database options step, a database can be built from: 1) source control, 2) script file, 3) built-in configuration:
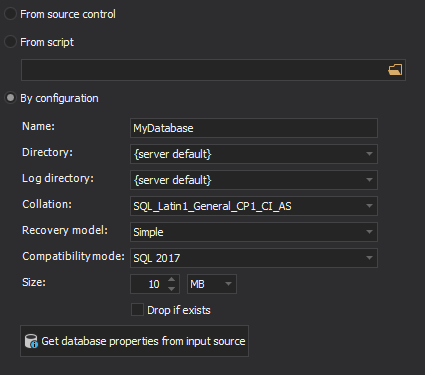
A database name can be specified, along with the appropriate compatibility mode and other database properties.
-
In the Build objects step, a list of all pulled SQL objects from the source control repository will be shown:
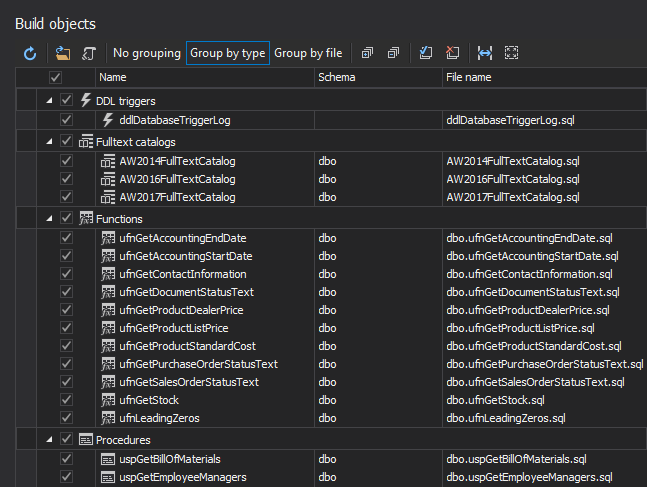
Objects can be individually checked for the Build process, if needed, but in this case, all of them will are selected.
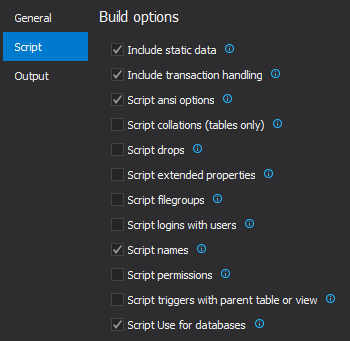
Additionally, by clicking the Options button from the Home tab, under the Script tab, several build options can be included in the Build process, along with the Transaction handling option, which can report if/when something failed to be executed on a database:
-
After setting up everything up in the Build objects step and clicking the Next button, the Preview step will be shown with the Action summary and Dependencies, similar to ones in ApexSQL Diff:

-
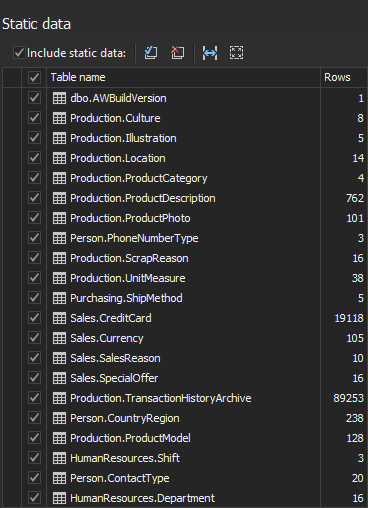
In the Static data step, static data from the source control repository can be included in the build process, so that after creating database schema, tables will be filled out with data:
-
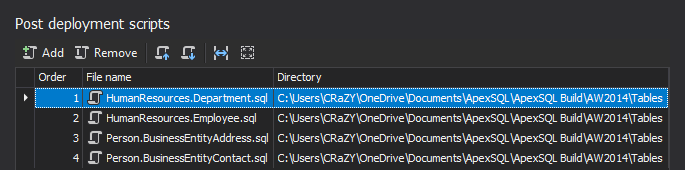
The next step can be skipped, but if needed, additional Post deployment scripts can be executed on a database:
-
In the last step, the Output options step, the Script and Optional information options can be set. Under the Script tab, a copy of build script can be saved to the specified location, while under the Optional information tab the Header options can be included in it:

Under the Optional information tab, the Header options can be included in it:
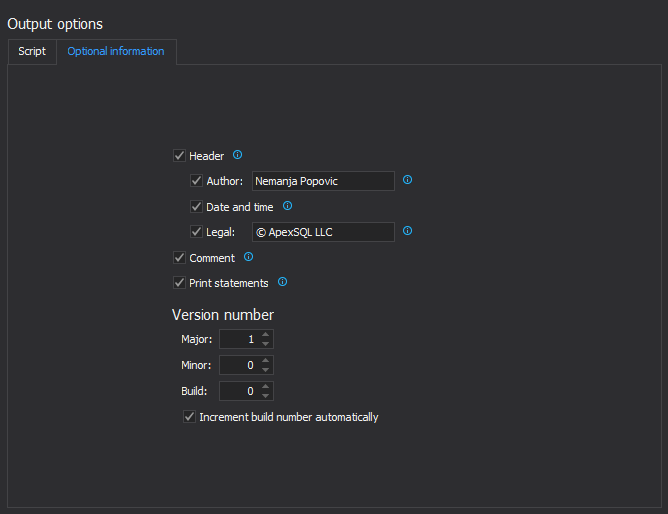
Also, an option that can be useful in the CI workflow build step, can be found under the Version number section in the Optional information tab, where a script version number can be specified and it will be written in the script header of the created build script.
Additionally, the Increment build number automatically option can be checked and each time this process is run, the build number will be increased.
Before starting the build process, save the project file in order to have all settings saved for later reusing the same project (instead of setting up everything each time) and for the automation process.
-
Click the Finish button to initiate the build process and once it’s done, the Results window will report success or failure:

Automating process using ApexSQL Build and PowerShell
In order to make this process easier and to run it unattended on a schedule, a PowerShell project can be created for that purpose. When creating this kind of a scheduled project, the following should be included:
-
The task should be created with switches that will specify the frequency and start time
-
The task should be named in order to avoid any overwriting, along with the appropriate force switch
-
The called application (ApexSQL Build) should have an output file with all messages about the execution process
-
The called application should provide return code upon the finished execution process
The PowerShell project will contain the following parts:
| Schtasks.exe /Create | # creating a task |
| /SC HOURLY | # task frequency |
| /ST 07:00 | # start time for a task |
| /ET 17:00 | # end time for a task |
| /TN Build | # task name |
| /F | # a value that overwrites the task, if already exists |
| /TR | # path for a task that will be run at the scheduled time |
| ApexSQLBuild | # application’s path |
| /pr:ProjectName.axbd | # the path of the saved project file |
| /v | # prints all messages in console |
| /f | # overwrites an existing build script |
| /out:C:\output.txt | # redirects console output to specified file |
| @echo ApexSQL Build return code is %errorlevel% >> /out:C:\output.txt | # return code upon finished build process |
Note: The application’s CLI code must be under single quotation marks, so it can be called by the PowerShell project, and all the code must be in the same line.
By using the project file switch, all passwords will be saved as encrypted. Also, any CLI switch used along with the project file, it will override the option saved in the project file.
There are also a few other ways for handling login credentials that involve running the process even unattended if needed. Read more about it here.
Once the PowerShell project is executed, all execution messages will be shown in the output file and at the end an information about success/failure will be provided:
Generating the build script
The script was generated successfully and saved to C:\BuildScript.sql
Create database MyDatabase
Executing the build script
MyDatabase was created successfully
ApexSQL Build return code is 0
If any error occurs during the execution, ApexSQL Build will provide one of the failure return codes.
Regardless of using the project file or individual switches, each new change in the source control repository will be added to the process and executed in the correct order, making sure that no dependency is broken.
January 13, 2017


