


Challenge
Generating test data for SQL Server database should be a process that easily populates a SQL database with data (where needed). Adding of test data can be done by manually creating scripts or by using a specific tool. But for repeatable processes like continuous delivery (aka DLM, CI, continuous integration), automation of test data generation is an important consideration.
Solution
As a solution in this article, a 3rd party tool ApexSQL Generate will be used to add test data to an existing SQL database and two ways will be described: manual generation of test data using GUI and generating test data unattended using CLI.
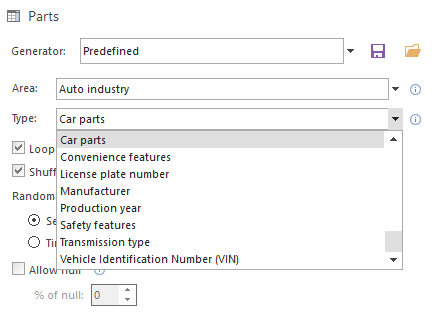
ApexSQL Generate is a tool that can generate test data for SQL databases for desired tables or to export test data into one of the following formats: SQL, XML, CSV, JSON, and Excel. It has various generators that support all SQL data types and have ability to identify them and offer real-world test data. More than 200 predefined generators can be used to generate meaningful data, from different areas and types, for example, if the Auto industry is chosen for the Area, the following Types are available: Car parts, Convenience features, License plate number, Manufacturer, Production year, etc.
Beside the generation process itself, ApexSQL Generate supports relational integrity support, so that dependent objects can be included/excluded from the generation process. Also, it notifies on errors and warnings, and provides information messages before the generation process.
To manually generate test data via the GUI in ApexSQL Generate, follow these steps:
-
Initiate ApexSQL Generate
-
In the New project window, under the Database connection tab, select a server and the target database:
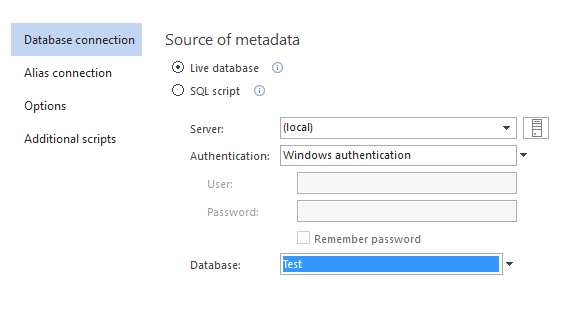
The Alias connection can be also used and more about it can be learned from here.
-
Switch to the Options tab and set the following options:
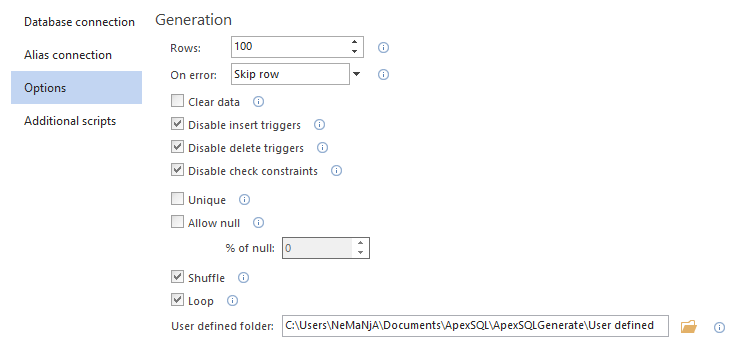
Set the number of rows that will be generated for each table and the Error handling option, whether it should Skip row or Stop generation in case of some error during the data generation.
Uncheck the Clear data option, if there were already data in some tables. Leave the Disable insert and delete triggers options, and the Disable check constraints option checked to avoid referential integrity errors.
Learn more about all these options from the article on this link.
-
Once all the options are set, click the Connect button in the bottom-right corner of the New project window to load all tables with columns for the selected database.
-
Once a database is loaded and if there is a need to change any of the previously set options, it can be done from the options pane on the right side of the Results grid:
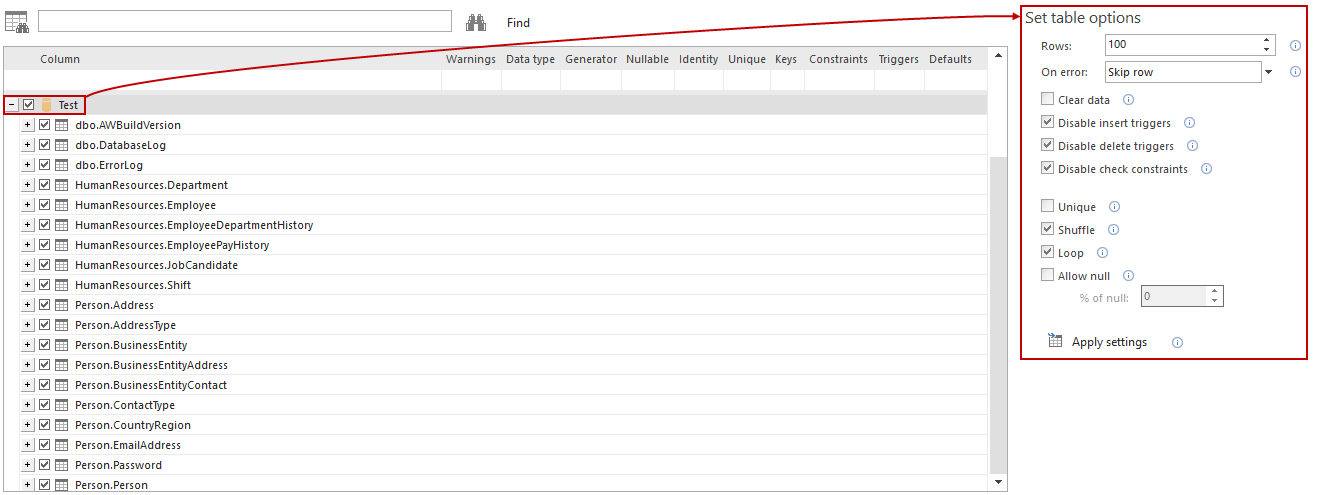
If any specific option needs to be applied on desired tables, the Apply settings option can be used. Learn more about this option from the article on this link.
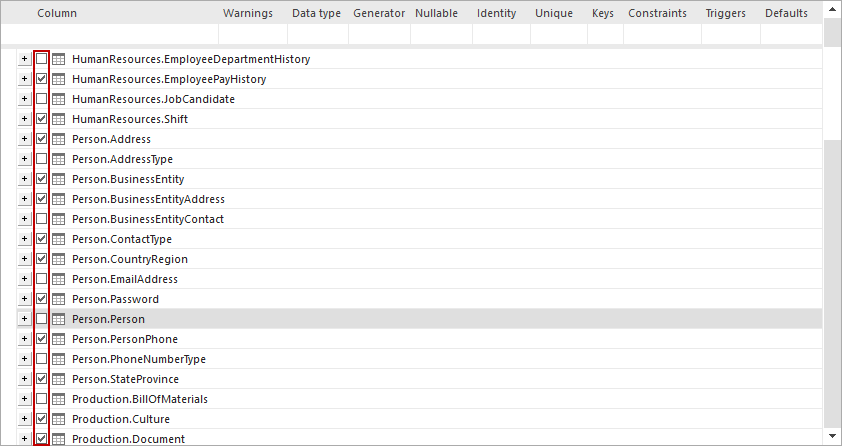
- If there are tables with data, those tables can be unchecked, while other tables without data, can be checked for the generation process:
-
For each table, additional options can be set:
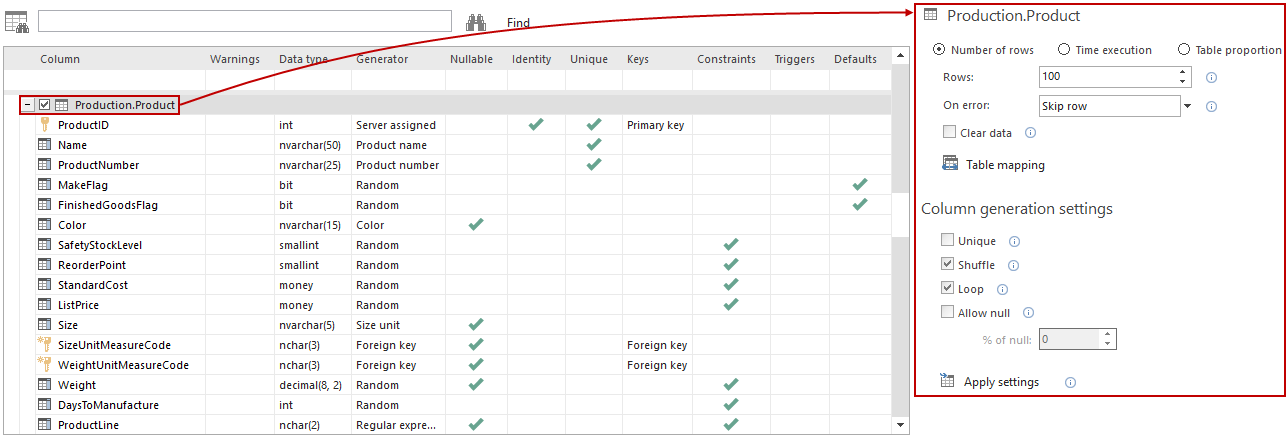
The number of rows can be generated in three different ways for each table:
- Number of rows – sets the exact number of rows that will be generated
- Time execution – sets the amount of test data that will be generated by specifying the exact time of execution
- Table proportion – sets the amount of test data that will be generated by calculating the percentage of referenced table’s row count
One more additional option is the Table mapping option which allows to copy data from an external source, such as a CSV file or a SQL table. More about the Table mapping options can be found here.
Also, as on the database level options, all options settings on a table level can be applied to all/specific columns, using the Apply settings option.
-
ApexSQL Generate identifies the data type and column’s name, and sets the most convenient generator:
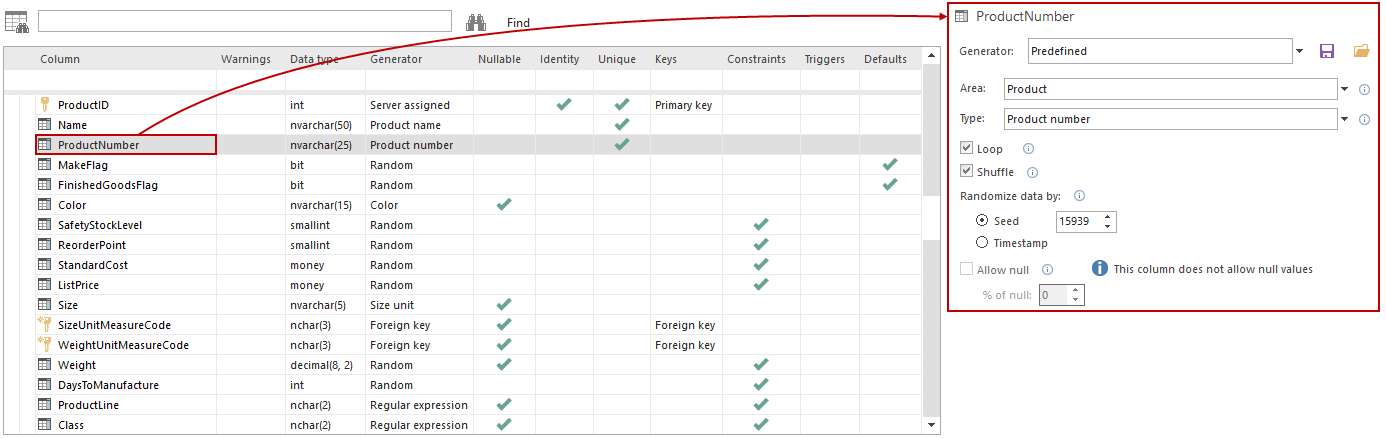
Additionally, a different generator can be chosen for each column by selecting a desired column in the Results grid and setting up options on the right-side menu.
-
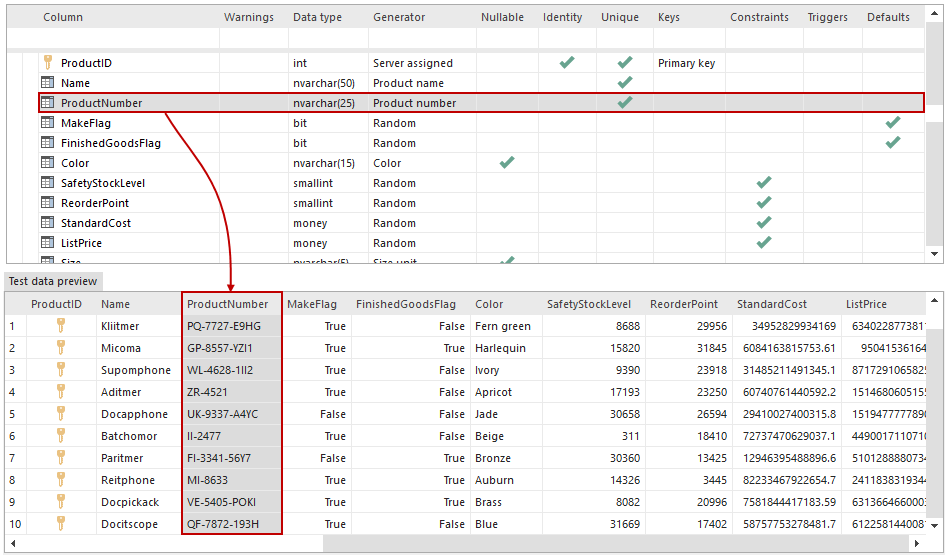
The test data can be previewed before the generation process, in the Test data preview pane, after each column generator is set. When a column is selected in the Results grid, the same column will be selected in the Test data preview pane:
-
Once everything is set for the generation process, click the Save button from the Home tab, and choose the Save as option to save all settings to a project file:
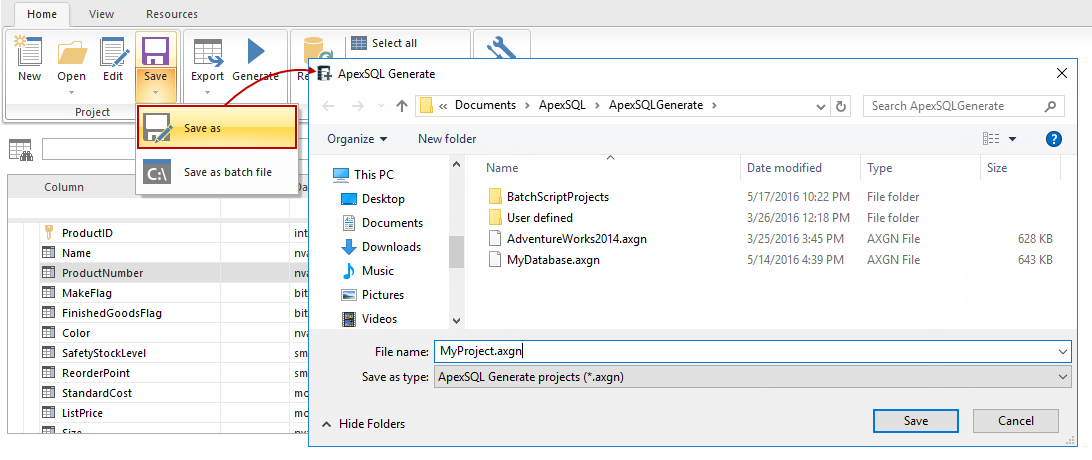
The project file will be used later on for the automation process.
-
Click the Generate button from the Home tab to initiate the generation process.
-
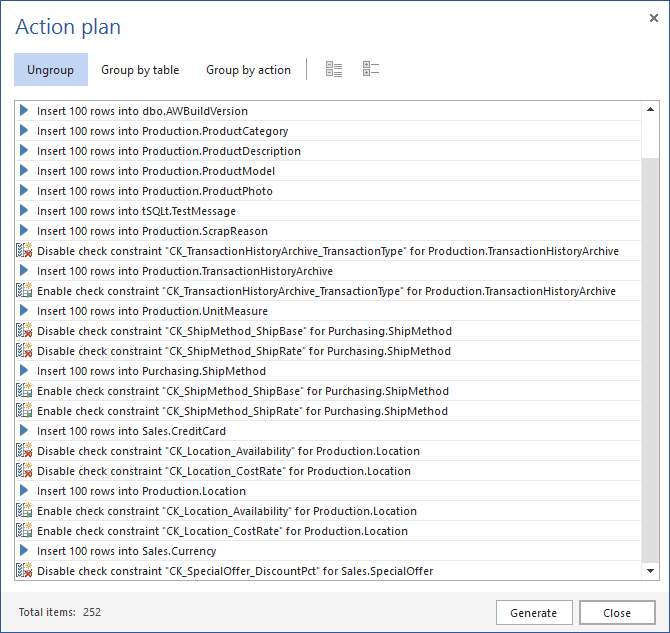
The Action plan window will be shown, with all actions that will be taken during the generation process:
-
After the Action plan is reviewed, click the Generate button in the bottom-right corner of the window to start the test data generation.
-
Once the generation process is done, the Post generation summary window will be shown:
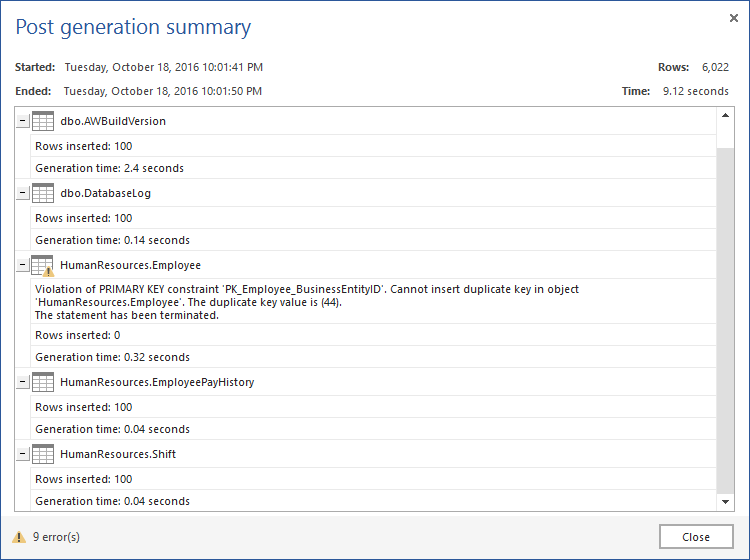
If there were any issues during the generation process, warnings will be shown for each table with the explanation why the test data couldn’t be generated for that particular table. In the screenshot above, there was a violation of primary key constraint and therefore generating test data for table HumanResources.Employee was skipped, due to the Error handling option that was previously set.
Automating the process
In order to automate the above described process and run it unattended, the created project file will be used by scheduling it via PowerShell project:
| Schtasks.exe /Create | # creates a PowerShell task |
| /SC DAILY | # task frequency |
| /ST 00:00 | # start time for a task |
| /ET 05:00 | end time for a task |
| /TN GenerateData | # PowerShell task name |
| /F | # a value that overwrites the task, if already exists |
| /TR | # path for a task that will be run at the scheduled time |
| “ApexSQLGenerate” | # application’s path |
| /pr:”MyProject.axgn” | # the path of the saved project file |
| /v | # prints all messages in the console |
| /f | # overwrites existing files |
| /out:”Output.txt” | # redirects console output to a specified file |
| @echo ApexSQL Generate return code is %errorlevel% >> /out:”Output.txt” |
# return code upon finished generate data process |
Once the created PowerShell project is run, the output will be shown as:
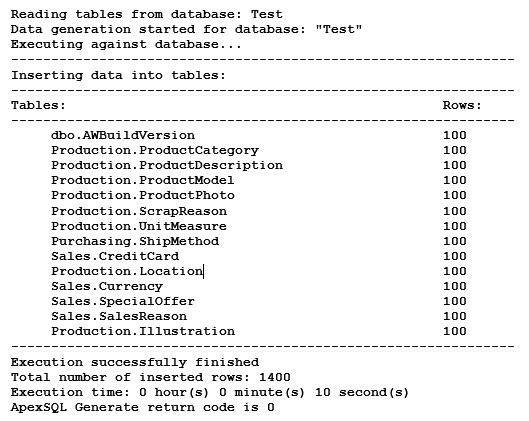
If any particular error is encountered during the generation data process, an appropriate return error code will be provided.
To learn more about using ApexSQL Generate CLI switches, along with some working examples, check out the article on this link.
In order to include ApexSQL Build in the automation process, a different kind of a PowerShell project needs to be created and more about that can be found in the article on this link.
If the process needs to be attended and server login credentials need to be entered on each start of the generation process, learn more about creating a prompt window for passing the login credentials from here.
October 24, 2016


