


This article will explain how to export data from SQL databases to Excel file format by using two methods:
- SQL Server Import and Export Wizard – Microsoft’s native way to copy data from a source to a destination
- ApexSQL Pump – a third-party SQL data pump tool for importing and exporting SQL Server data to different file types
In the database world, data plays an important role. Sharing data resources with multiple users is an often task that DBAs and developers are faced with on daily routines. Excel has proven to be one of the simplest solutions in data sharing for most users.
Exporting data from SQL database using SQL Server Import and Export Wizard
SQL Server Management Studio has an option that allows users to export data from SQL databases to different data sources. In this article, exporting data from an SQL database to an Excel file will be explained.
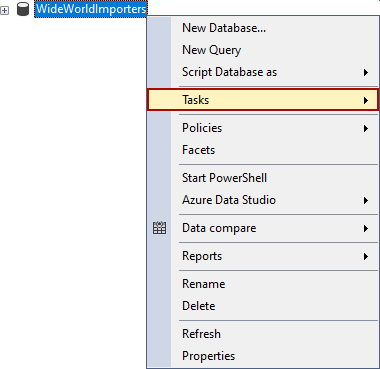
Launch SQL Server Management Studio and connect to the desired SQL Server instance. From Object Explorer right-click on the targeted database, in this case, the sample WideWorldImportes database, and click the Tasks option:
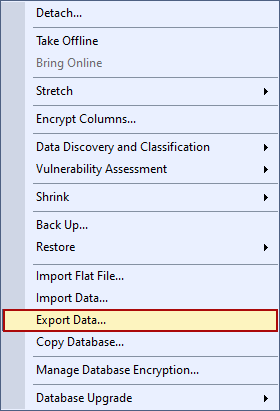
The Tasks submenu will appear, in which we need to click on the Export data command:
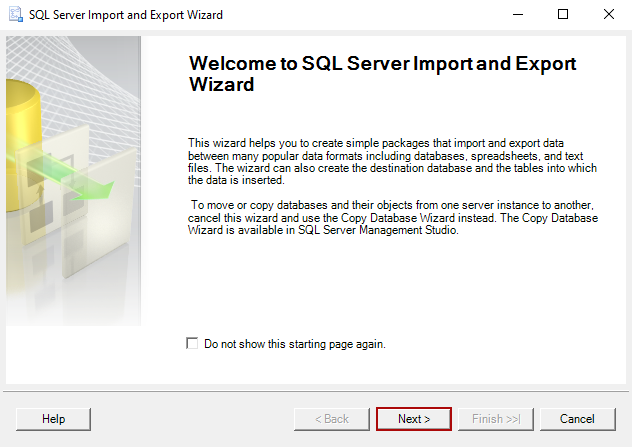
The SQL Server Import and Export wizard window will be opened, whereby clicking on the Next button export data process will continue:
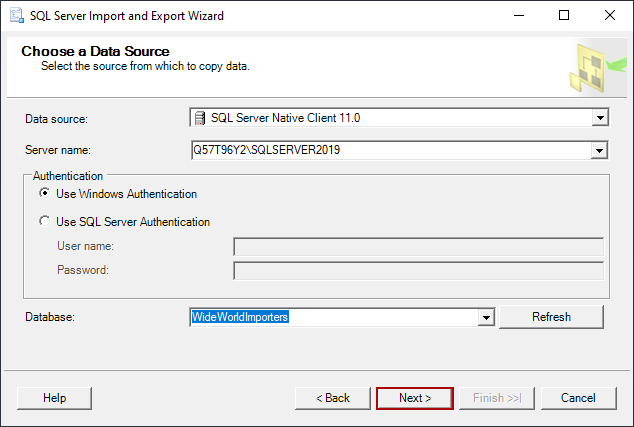
Choose a Data Source step is the first step. In this step, a data source from which data will be copied should be selected. Click on the Data source drop-down list and select the SQL Server Native Client 11.0 item.
The Server name drop-box will appear with the Authentication section and the Database options. Fill out the required, choose the SQL database from which data will be copied, and click on the Next button:
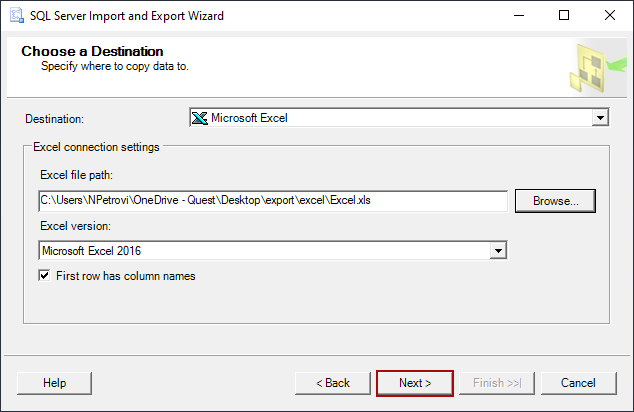
Chose a Destination step is next, in which a source where data will be copied will be selected. From the Destination drop-box list, choose the Microsoft Excel source. Section under the Destination drop-box will be changed according to the selected destination source.
In this particular case, the Excel connection settings section is shown. In this section, click the Browse button to choose a path for the Excel file, and from the Excel version drop-box list, choose the type of Excel version. When everything is selected, click on the Next button to proceed further:
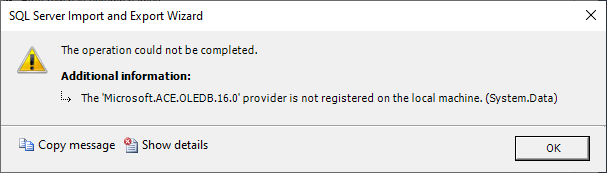
“The operation could not be completed” error might be encountered. This issue is usually encountered on a 64-bit operating system in a combination with the 32-bit version of SQL Server Management Studio:
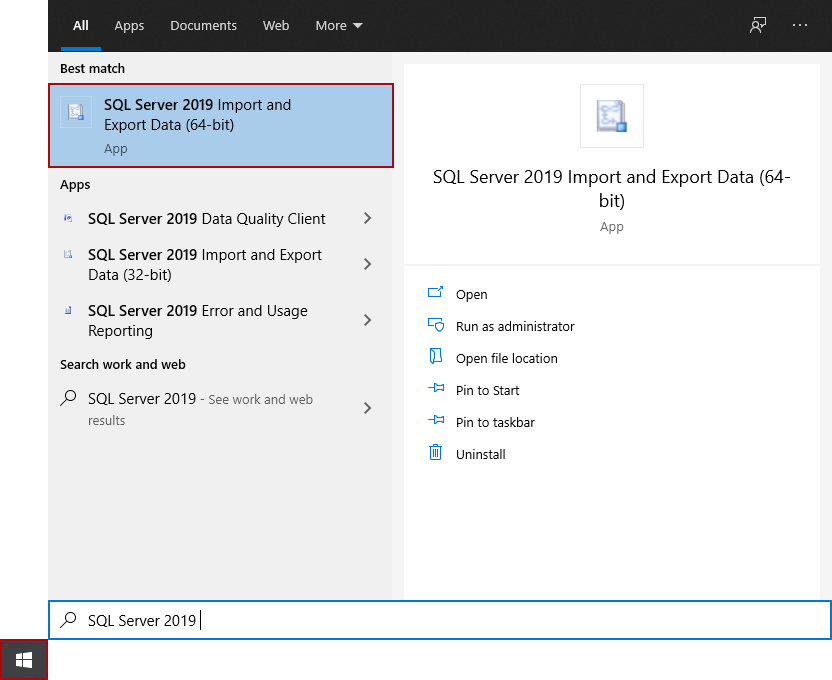
To overcome this error, close SQL Server Management Studio, find the 64-bit version of SQL Server Import and Export Wizard from the Start menu, and run it:
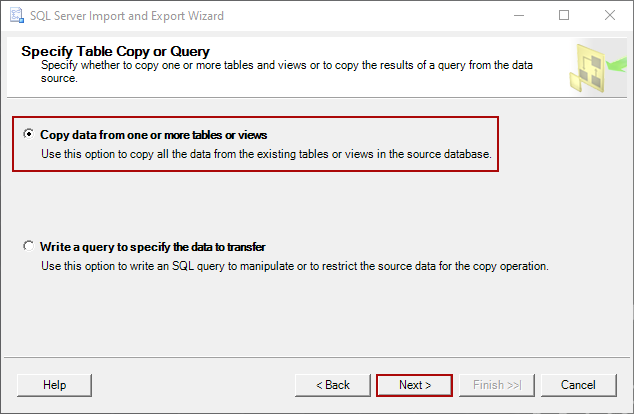
This time, the 64-bit version of the SQL Server Import and Export is opened. Go through the configuration one more time up until the step when it previously failed. Only this time, when we click the Next option, it will go to the next step, Specify Table Copy or Query.
Select Copy data from one or more tables or views option and click the Next button to continue:
The Select Source Tables and Views step will be next, which will be choosing one or more tables or views to export data from the SQL database to an Excel file. When tables and/or views are selected, click on the Preview button to see data that will be exported to an Excel file:

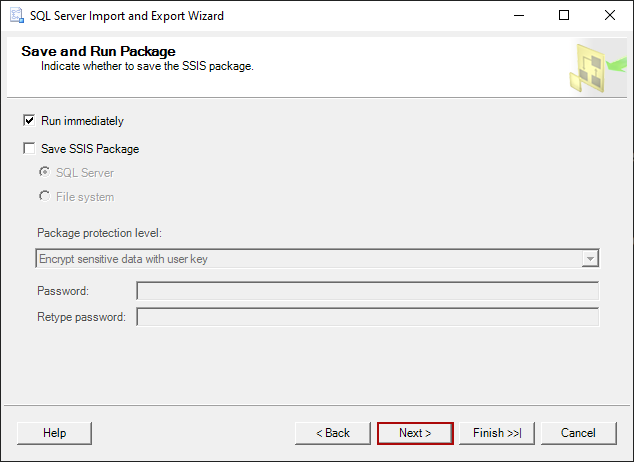
If satisfied with the results, click on the Next button to open the Save and Run Package window, where the Run immediately option is selected by default. If there is no need to save the SSIS package click on the Next button:
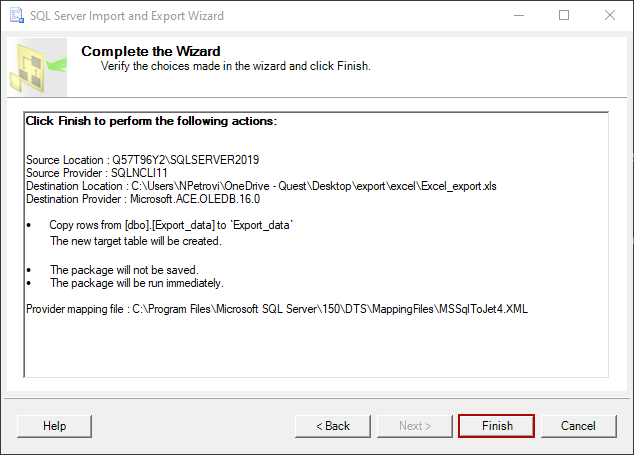
The Complete the Wizard step is last in the chain. It is a summary of the choices that have been made. Click on the Finish button to complete export data from SQL database to an Excel file:
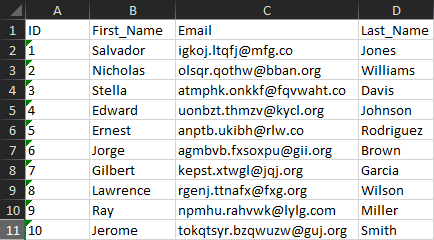
The Excel file with exported data will be looked like this:
Exporting data from SQL database using ApexSQL Pump
This chapter will explain how to export data from the SQL database to an Excel file by using ApexSQL Pump.
ApexSQL Pump is a SQL database tool that allows users to:
- Export data from SQL database to 13 different file types
- Import data from 11 different file types to the SQL database
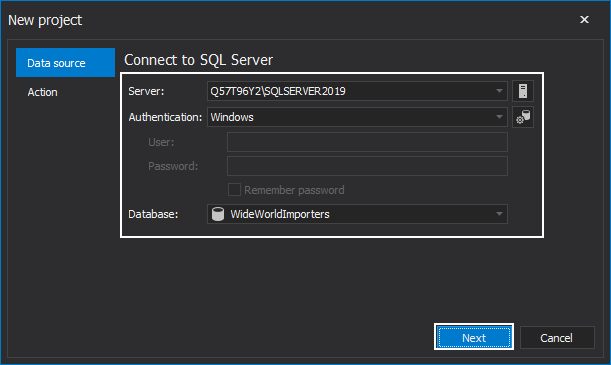
On the launch of ApexSQL Pump, the New project window will appear. In the Data source tab of the New project window, configure the SQL Server instance, type of Authentication, etc., and choose the Database which data wants to export to an Excel file. When all is set up, click on the Next button:
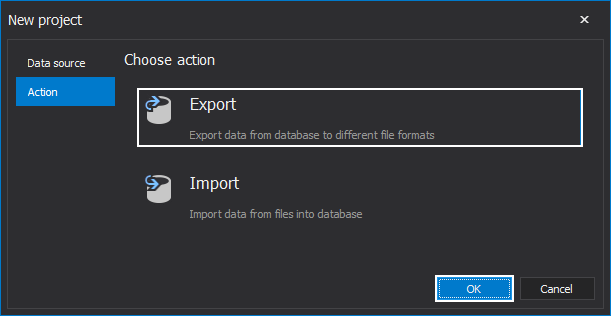
From the Data source tab, the view will go to the Action tab. Here, users can choose one of the following options:
- Export – export data from SQL database to the different file formats
- Import – import data from files into the database
For this article, the Export option will be chosen. Click the OK button to close the New project window and continue:
The main window of the ApexSQL Pump with the selected database will be presented, where the tables and the views will be checked by default. Let’s uncheck all, and only select the Export_data table like in the previous example:
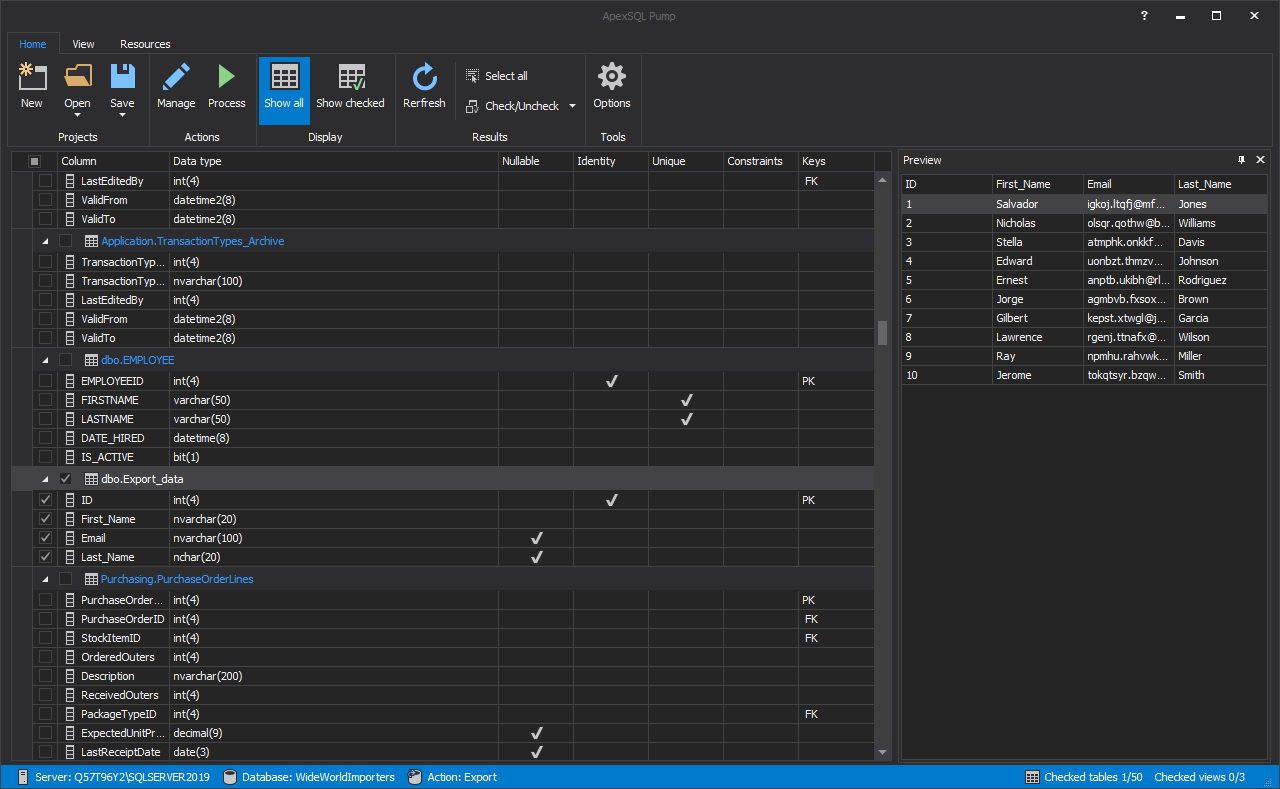
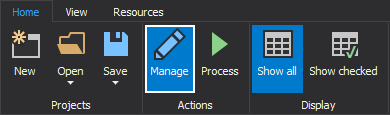
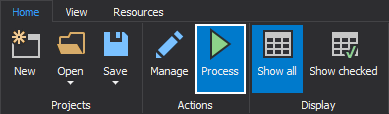
When the objects for export data from SQL database are selected, click on the Manage button from the Home tab:
The Manage export window will be opened. From the Formats tab, users can choose the file type to export data from the SQL database. By clicking on the MS Excel radio button, the Settings button will appear:
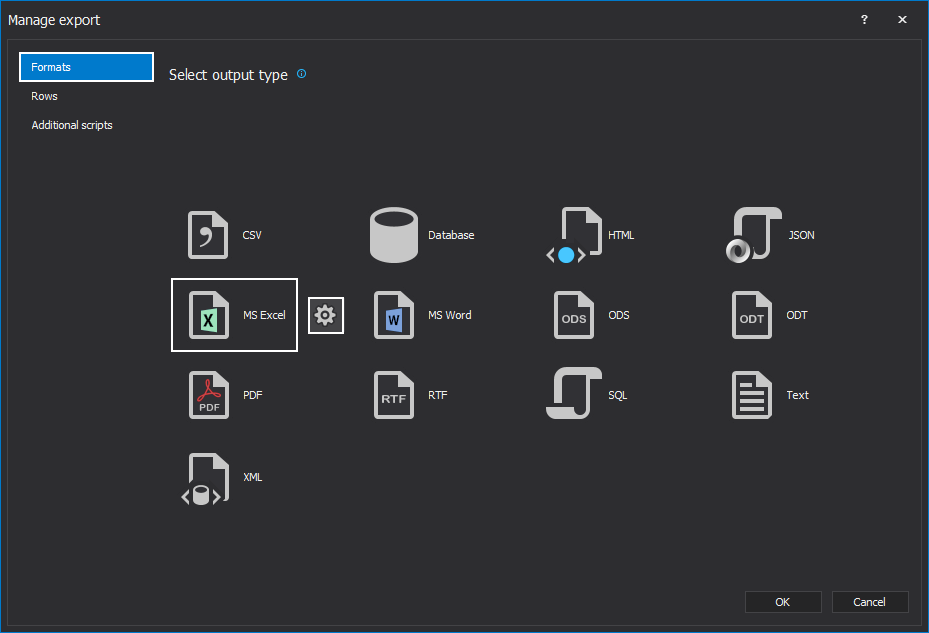
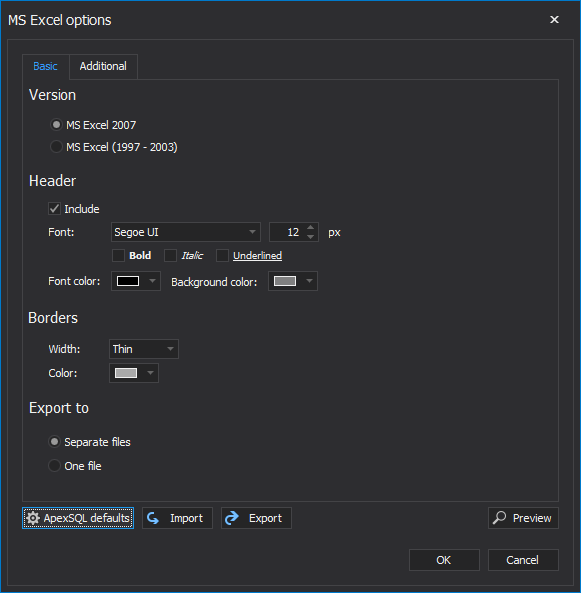
Clicking on the Settings button will open the MS Excel options window. In the MS Excel options window, ApexSQL Pump allows users to go through the Basic and Additional tabs to adjust the Excel file format.
In the Basic tab, this SQL data pump tool offers two versions of Excel files for exporting data depending on the user’s need. Also the appearance of o the exported data can be set in the Header and Borders section, as well as, how that data will be exported like the Separate files or One file:
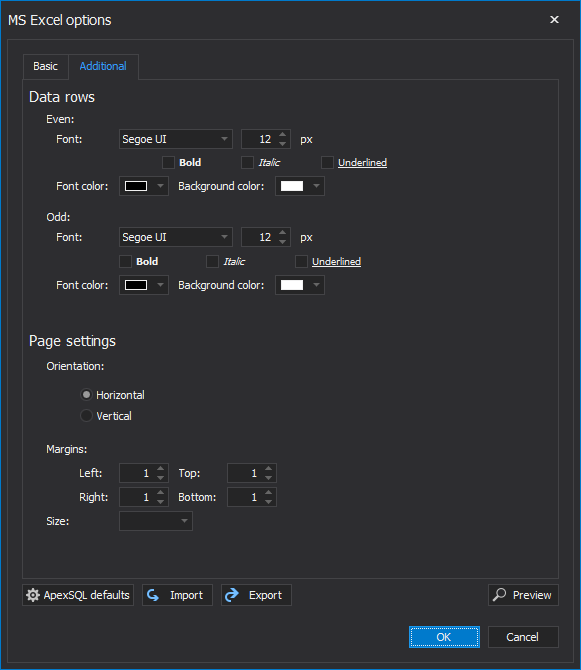
In the Additional tab, the font style of rows can be configured under the Data rows section, and the page orientation, margins, the page size can be tuned in the Page settings section. When all is configured, click the OK button to close the MS Excel options window and continue further:
The focus will go back to the Manage export window. Click the OK button to close it as well. When all is set, click the Process button under the Home tab:
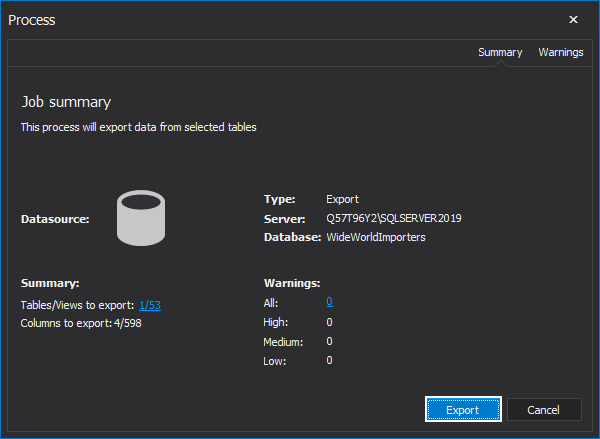
The Process window will be opened, with job summary information to inform the user before the exporting process begin. Click the Export button to export data from SQL database to an Excel file:
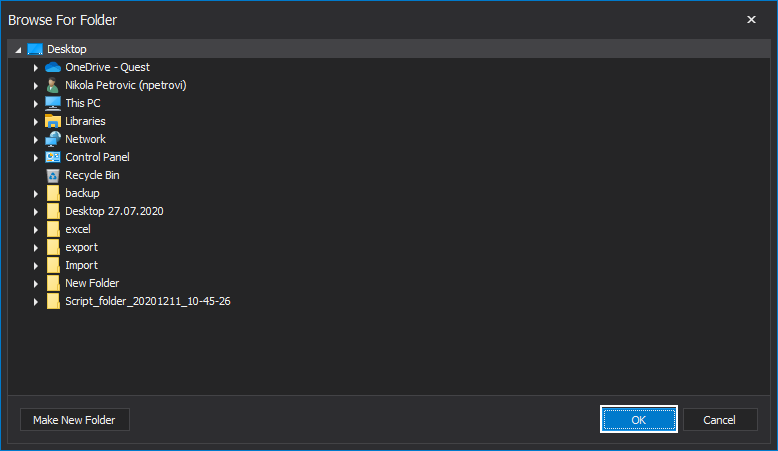
The Browse For Folder window will be shown where the path of the exported file can be configured. When all is set, click the OK button to continue:
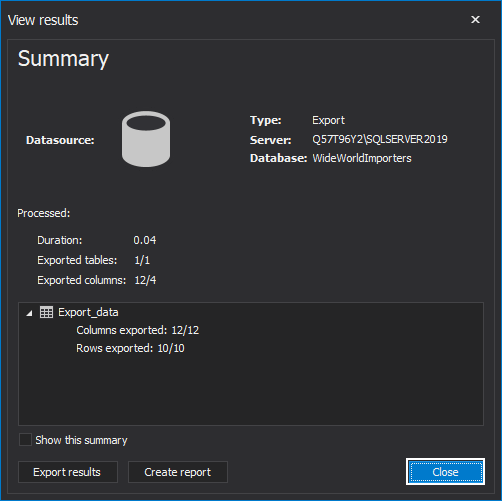
The View results window will appear when the exporting process is finished. This window contains information about the duration of exporting, how many tables and columns are exported. If there is a need for the results to be exported, the user can do it by using the Export results button, or a report can be created too by clicking the Create report button. Click the Close button to finalize the process:
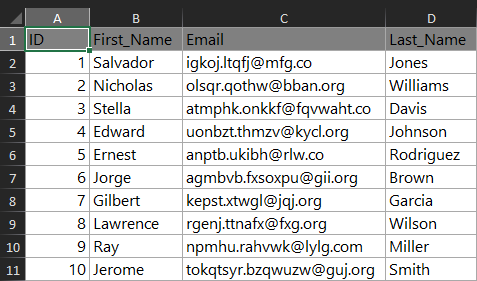
The exported Excel file will be found on the previously selected path and when opened, it looks like this:
January 5, 2021


