


Part 1 of this series shows how ApexSQL Audit should be set up for implementing the Administrative safeguards section of the HIPAA compliance (CFR 45 Part 164, Subpart C – Security Standards for the Protection of Electronic Protected Health Information developed to undertake protection of EPHI). In Part 2, the ApexSQL setup for fulfilling the remaining parts of the Administrative safeguards are discussed.
ApexSQL Audit settings that help in fulfilling the HIPAA’s Technical safeguards and Policies and procedures and documentation requirements sections will be demonstrated in this final part of this article
The HIPAA requirements from Administrative safeguards section that will be covered include:
The HIPAA Technical safeguards section supported by ApexSQL Audit:
§164.312(a)(2)(i) – Requires assigning a unique SQL Server Login name for identifying and tracking user identity
§164.312(b) – Requires implementing continuous auditing of SQL Server with mechanisms that log and report any activity in SQL Server contain or use EPHI
§164.312(c) – Implementing continuous auditing of all SQL Server activities related to EPHI, to protect EPHI from improper altering or deleting
The Policies and procedures and documentation requirements section of HIPAA supported by ApexSQL Audit
§164.316(b)(1)(ii) – Maintain a written or electronic form record of who, what and where auditing of SQL Server
§164.316(b)(2)(i), §164.316(b)(2)(ii), §164.528(a) – Ensure the appropriate audit log archival for 6 years from the date of creation and ensure that archived audited data are available on request
§164.312(a)(2)(i) Assign a unique name and/or number for identifying and tracking user identity
This HIPAA requirement imposes the obligation that every user that connects to SQL Server must connect with unique credentials assigned. This means that for each user who will have the right to access the SQL Server that stores the EPHI data, a unique SQL Server login must be created. In practice that mean that in case 5 users are granted access to the SQL Server with EPHI data, five unique logins must be created and ApexSQL Audit in its report must list five events for Create login . Whenever a new user is assigned a unique login, this must be reported and documented. Having a custom report for the Create login event is recommended as it will allow quick and easy and full insight in users and whether the §164.312(a)(2)(i) HIPAA section is covered properly
In order to prevent any misuse of the privileges and to ensure security, users are allowed to access the instance with EPHI data only from the computers assigned to them. This means that accessing the instance by the user from other computers must be logged and carefully reviewed. The ApexSQL Audit alerting engine is designed to allow real-time alerting on any such unapproved access that can help the person in charge to react immediately and to apply appropriate measures.
To be informed on such user non-aligned behavior an alert should be created that will be triggered on any such login or failed login attempt, with the following filter criteria
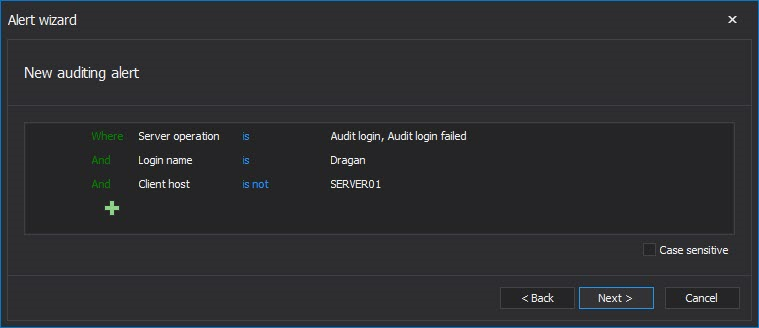
This particular example shows a separate alert for the individual user. If opted to cover all users that must be tracked via individual alerts, an alert must be created for each user of interest.
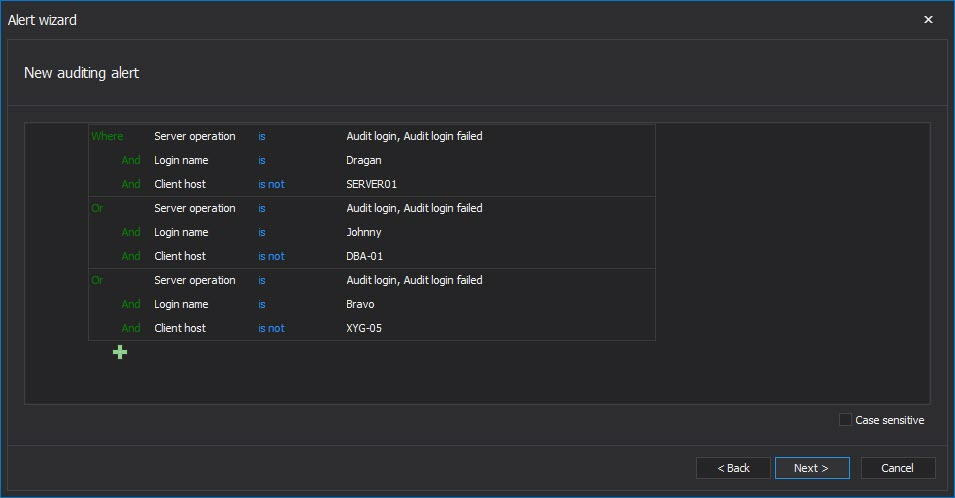
The advanced filter used in the ApexSQL Audit alert engine allows for a single alert for multiple users to be created which will be triggered when any of users listed in alert try to access the EPHI data instance from computer that is not assigned to him
Additional functionality to identify the issue faster includes customizing the alert information that will be displayed when the alert is raised. It is recommended to add the Client host info in the alert body in the following way
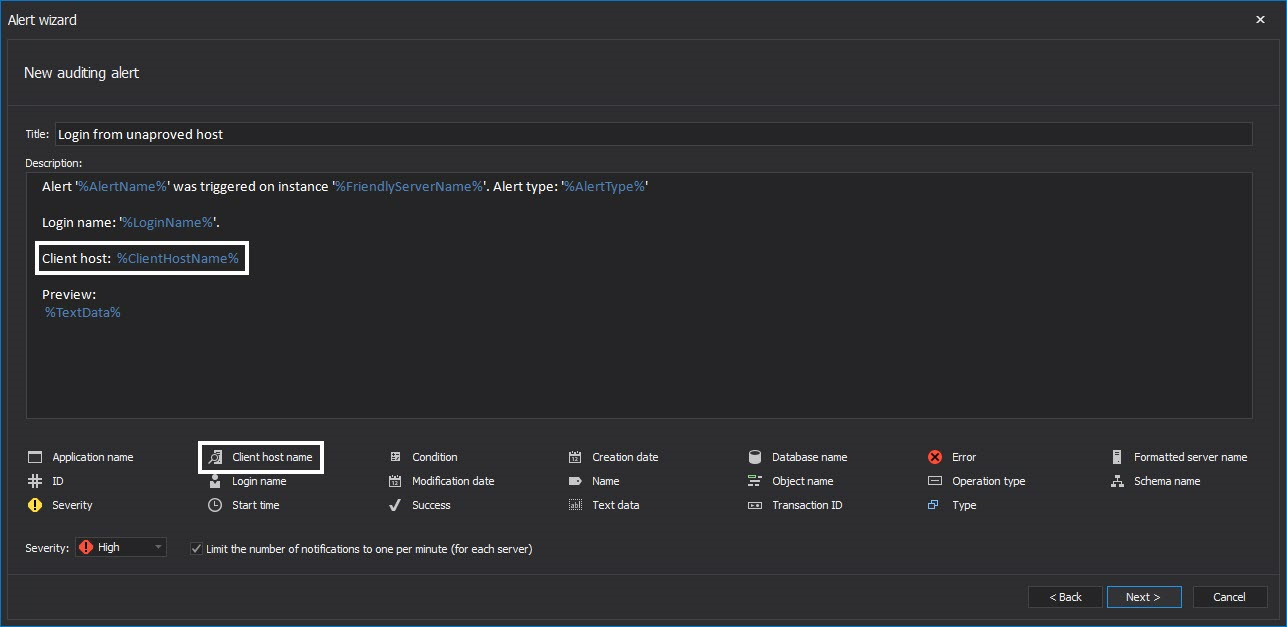
A variable “tag” e.g. %TransactionId% can be added easily without typing by clicking on appropriate tag name
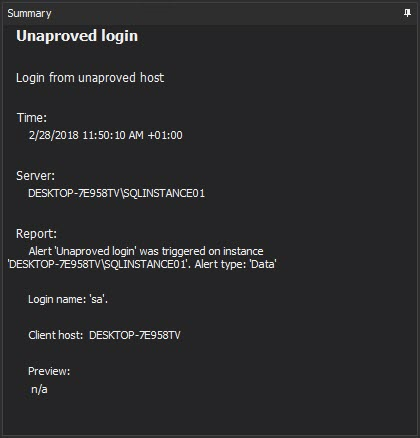
In such case, when an alert is raised, the responsible officer will have immediate information about the user who is trying to login and from which exact machine it is being attempted
§164.312(b) Standard: Audit controls, §164.312(c) Integrity & Mechanism to authenticate electronic protected health information
These sections basically require the implementation of policies and procedures that will ensure that EPHI stored in SQL Server will not be altered or deleted in an unauthorized manner. The basic requirements for fulfilling such requirement is Before-After auditing which is capable of ensuring full data change audit trails
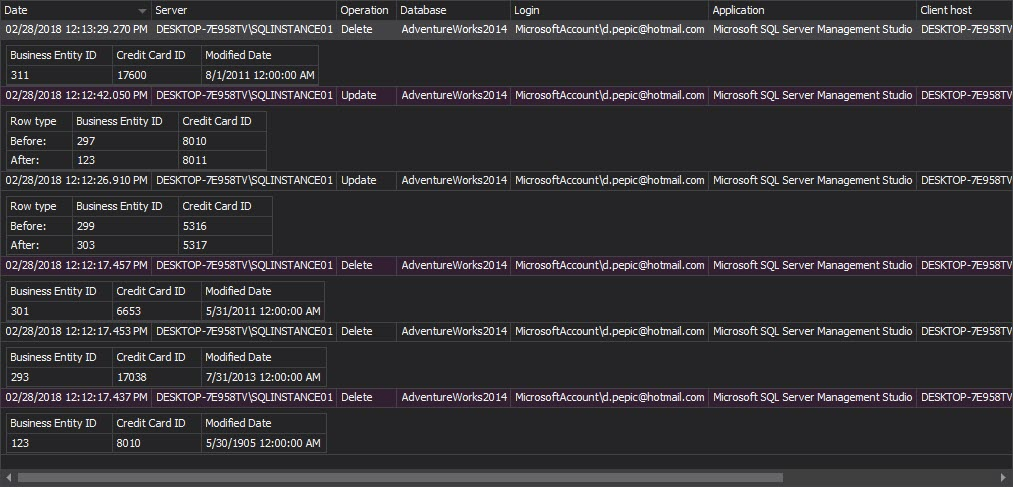
For HIPAA it is not only important to see who changed the data, but also whether the change is properly done. By logging the each DML change of the EPHI data ensures that mistakes or malicious changes can be detected by reviewing the chain of changed values to confirm the validity of each change or to detect the issue and start the procedure for correcting the EPHI data.
Captured data will be stored in two additionally created tables within the database where the audited table resides:
- The AUDIT_LOG_DATA table stores the actual values of data that was changed – the old data value before a change and new data value after the change has occurred
- The AUDIT_LOG_TRANSACTIONS table keeps the actual transaction information like: login name, application name, table name and date/time of the committed transaction
ApexSQL Audit Before-After feature is DML trigger based auditing. Tracking old and new values are an important type of audit, however this type of auditing should be done carefully and realize that these audits should be done selectively for the sensitive EPHI data only, as it can significantly increase the size of audited data store, and in some cases negatively impact performance
Note: Auditing of high activity tables is not recommended and might impose significant overhead on SQL Server and occupy the large amount of the storage space
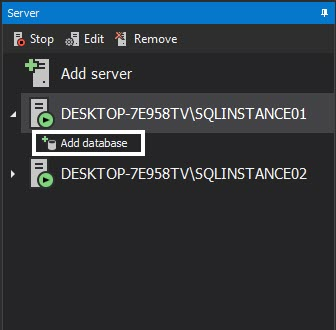
The Before-After feature is initiated by pressing the Before-After button in the main menu

Once the Before-after interface opens up we can proceed to add a database just like we would for a regular filter
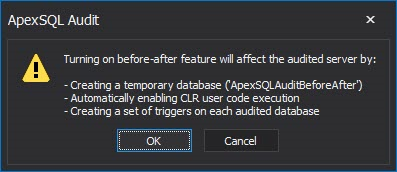
We will be using the AdventureWorks2014 database for this example. After we add the database a dialog pops up, notifying us of what applying Before-after filtering will entail
Now we need to select the tables, columns and operations that will be under Before-After auditing
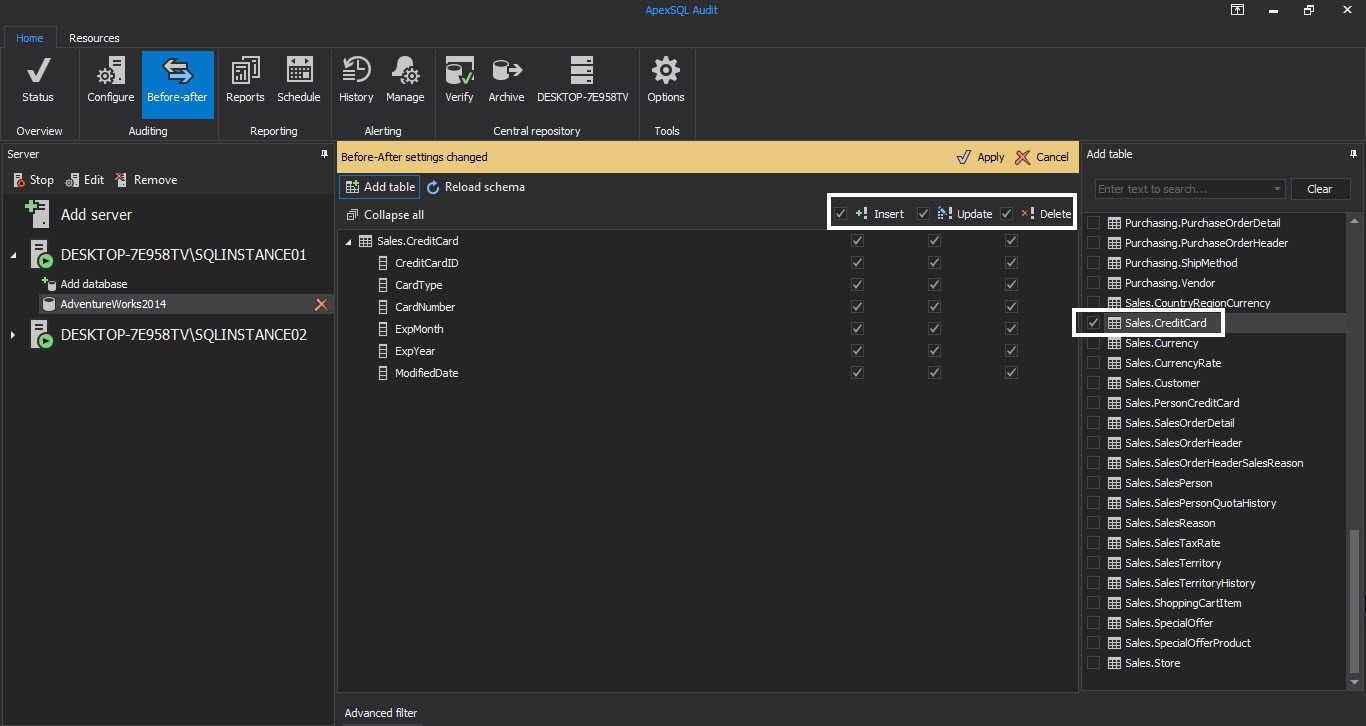
After we made our selection hitting apply will set the triggers up and Before-after auditing will start
In order to see the data on events gathered by Before-after we need to make sure that Before-after is selected as an event source in the reporting module
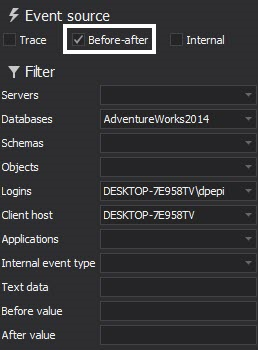
We can have Before-after data alongside trace data in the same report but in order to generate a clear example we have selected to show only Before-after events in the following example report
Presenting captured data via the built-in reporting module offers broad options for filtering of captured data and generated reports can be exported into a CSV, TXT, XLS, DOC or PDF file formats as well
§164.316(b)(1)(ii) Documentation, §164.316(b)(2)(i) Time limit , §164.316(b)(2)(ii) Availability , §164.528(a) Right to an accounting of disclosures of protected health information
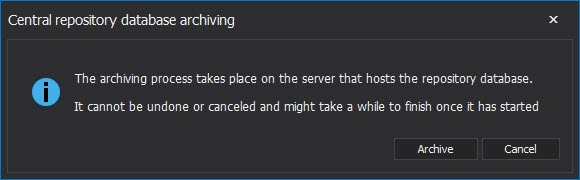
ApexSQL Audit can perform central repository database archiving including the ability to verify integrity and detect the tampering of the archived databases. The archived database are both time limited and it is on user to decide when and what archived databases will be purged. ApexSQL Audit allows each database to be added for reporting directly from the user interface in just a few clicks of the mouse if the archived database is on any available SQL Server
To archive the database, press the Archive button in the main menu

The archiving process is straightforward and after confirming the we want to go ahead in the following dialog the archival will begin
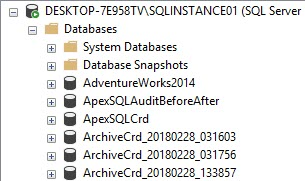
Upon completion we can verify that a new, timestamped, database exists on the server now holding the data that had been in the main CRD previously
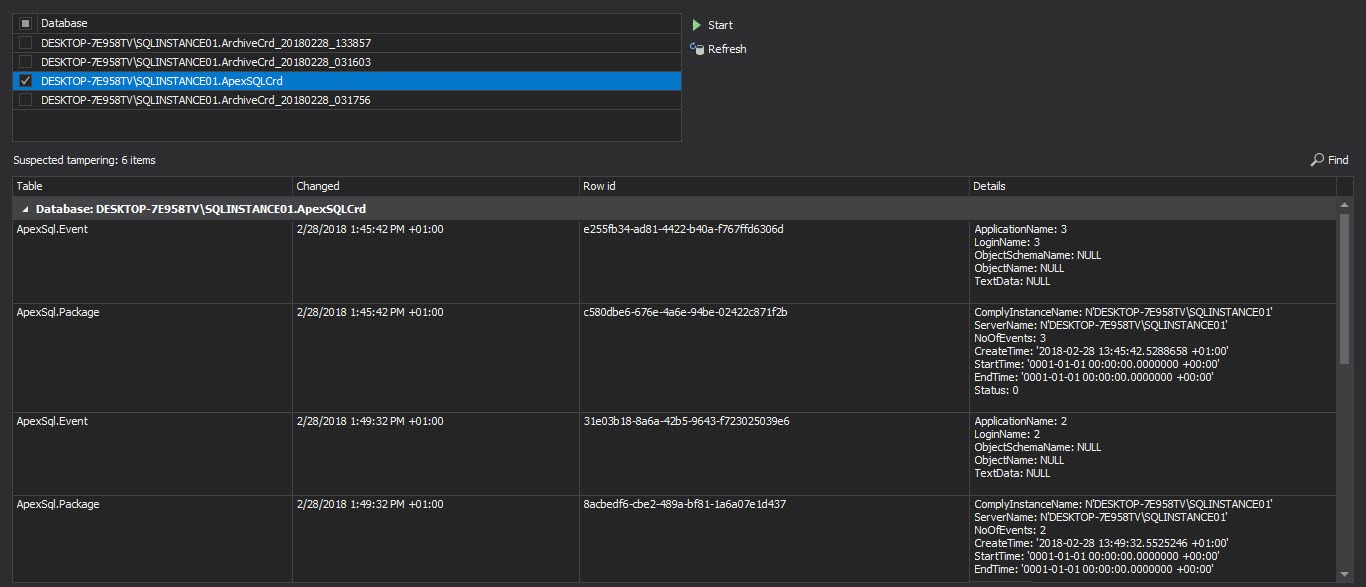
To verify audit integrity of the archive and detect potential tampering, select Verify in the main ribbon

In the Verify module select the database you want to check for tampering, hit start and wait for the process to finish


After the process has been complete any tampering events that had occurred will be shown alongside all possible information related to them
September 22, 2015


