


Having a team of developers working on the same (shared) database can be challenging for many reasons. It is critical to ensure that all changes are properly tracked and that each developer is informed about the status of objects currently used by the rest of the team. When using a shared database, all changes will be applied against the database before they are committed to the repository.
Challenge
The goal is to have a team of developers working on a single database hosted on SQL Server using a shared database development model. All developers must be able to communicate with the repository (pushing changes from the database, and pulling (applying) changes from the repository to the database).
In order to avoid overriding any changes, the solution must include detailed real-time presentation of object statuses e.g. checked-out, locked, or edited.
The solution should provide a mechanism to enforce a proper shared database development methodology, meaning that the set of rules can be established that will be followed by the rest of the team. Particularly, if the rule is to check out an object before editing, the solution must include a mechanism to prevent any developer editing an object before check out.
In addition, all changes committed to the repository should be easily accessed and reverted/applied against the database.
Requirements
Each developer must have a separate instance of SQL Server Management Studio. A separate instance of SQL Server is not required since the shared database is hosted on a single server where all developers have access.
Solution
Implementing shared model
ApexSQL Source Control, a SQL Server Management Studio add-in, offers the possibility for a team to implement shared database development model, and establish a set of rules in order to avoid overriding changes made by others.
Introducing the shared model using ApexSQL Source Control allows the team to set the environment where all changes can be presented in real-time.
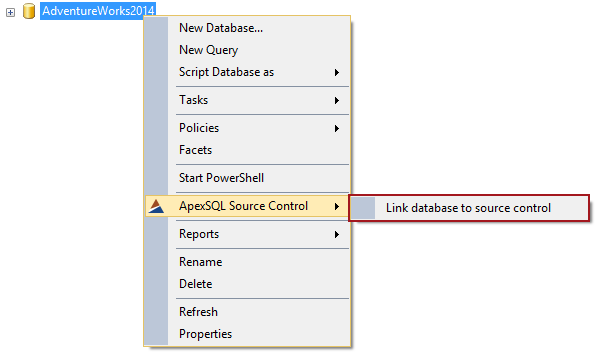
To link a database, right click on it from the Object Explorer pane and choose the Link database to source control option from the ApexSQL Source Control menu:
In the first step of the wizard, choose the source control system that will be used and make sure the Shared database option is selected:
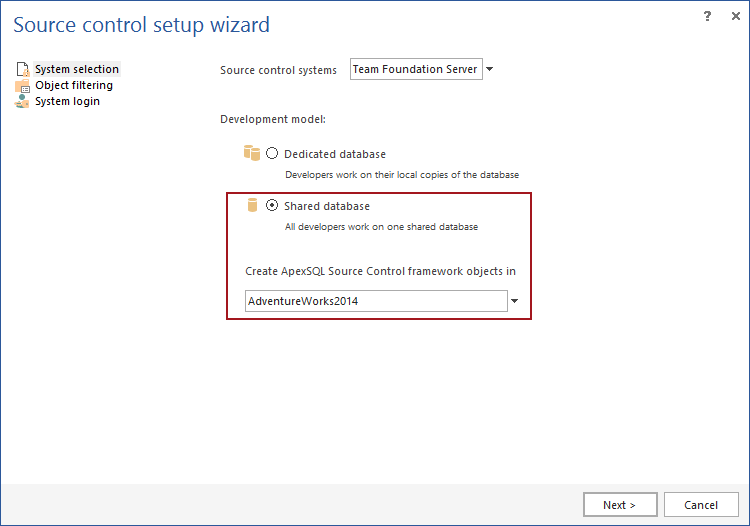
When using the shared model, ApexSQL Source Control offers an option to choose a database where additional objects will be created. By default, a database where these objects will be created is the same as the one that is being linked to source control. However, this can be changed by choosing another database that must be hosted on the same SQL Server. A database DDL trigger will be created in the database that is linked to source control, and the rest of objects (stored procedure and tables) can be created in a separate database.
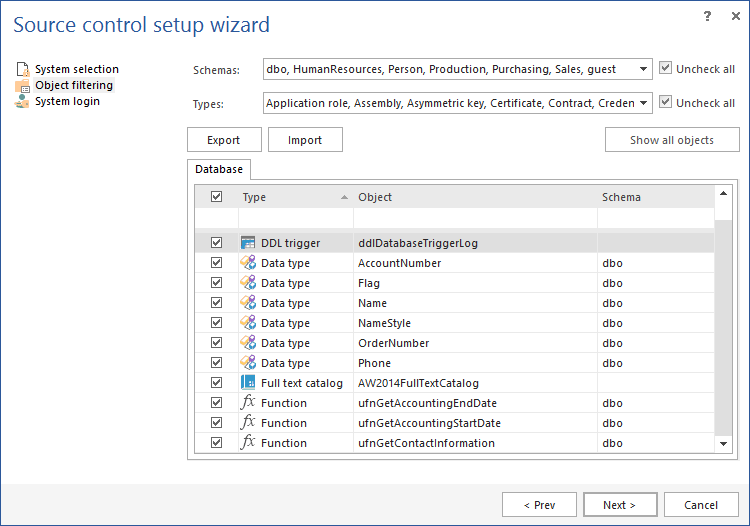
In the next step, all SQL database objects that will be version controlled should be checked. By default, ApexSQL Source Control includes all supported object types and database object instances into the version controlling process:
The final step is to specify the repository credentials and the exact location of the repository:

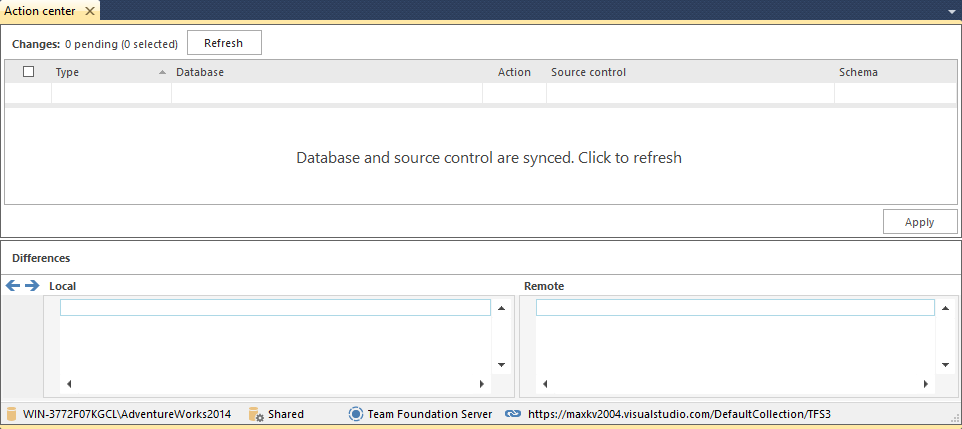
By clicking the Finish button, ApexSQL Source Control will create the previously mentioned additional objects in the selected database and will script all SQL database objects included in the process of SQL source control integration. Once all objects are scripted, ApexSQL Source Control compares scripted objects (the current state in the database) with the current state on the repository, and shows differences in the Action center tab. In case of an initial commit to an empty repository, the left side of the Action center tab shows all objects from the database, and the right side shows no objects since it represents an empty repository:

When working with the shared model, it is enough that the first developer who links the database performs the initial commit. The rest of the team will just need to link the same database from their machines, and the Action center tab shows no differences (nothing to commit):
From the moment when the last developer links the database to the repository, the shared model is implemented. From now on, each change can be tracked and the whole team will be aware if any team member is working on some object.
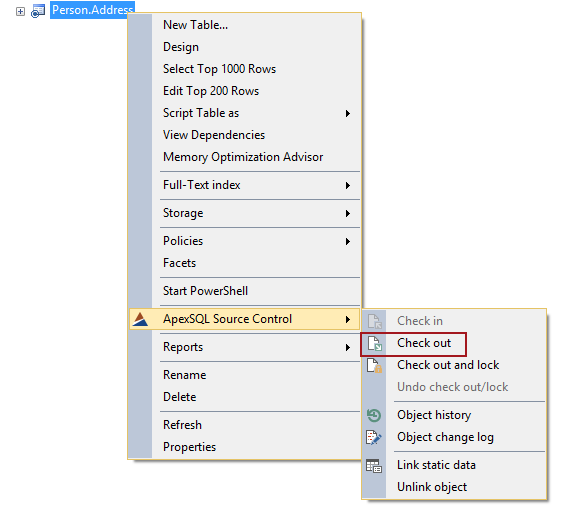
Check out, lock and object status
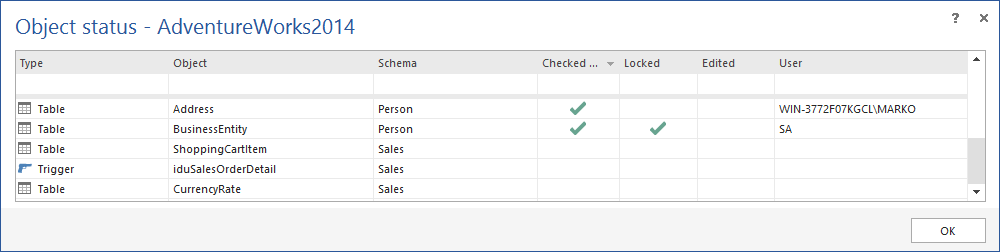
The Check out option means that a developer wants to work on an object and by checking it out, the rest of the team will be visually informed that the object is “in use” by changing the icons in the object explorer to include a checked out symbol (see below). To check out an object, right click on it from the Object Explorer pane and from the ApexSQL Source Control menu select the Check out option:
The object icon will be updated to represent the checked out state:
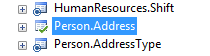
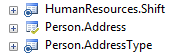
The rest of the team will be informed, as the icon will change, too:
The same mechanism will be applied when locking an object. The only difference between Lock and Check out is that the lock cannot be overridden. This means that if an object is checked out, another user will be informed that the object is checked out, but will be able to override the Check out operation. A Lock, on other side, cannot be overridden, and a developer who locked an object is the only one who can unlock it either by choosing the Undo check out/lock option from the ApexSQL Source Control menu, or by committing changes made against the locked object.
This serves to inform the team about the object status and, if needed, prevent anyone from editing an object, in case it is locked.
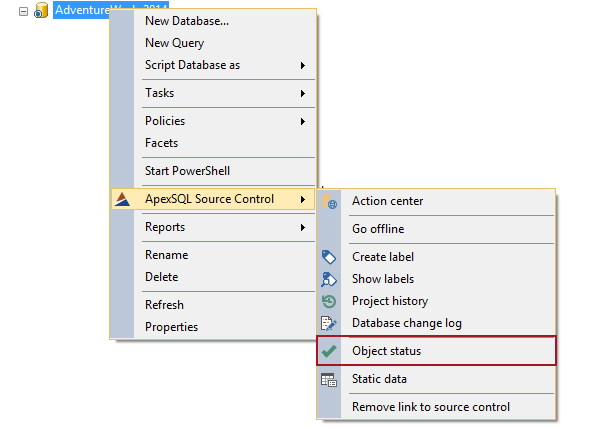
Besides the object icons in the Object Explorer pane, the whole team can check the status of any object in the Object status form. This can be done by clicking the Object status option from the ApexSQL Source Control menu:
Change log
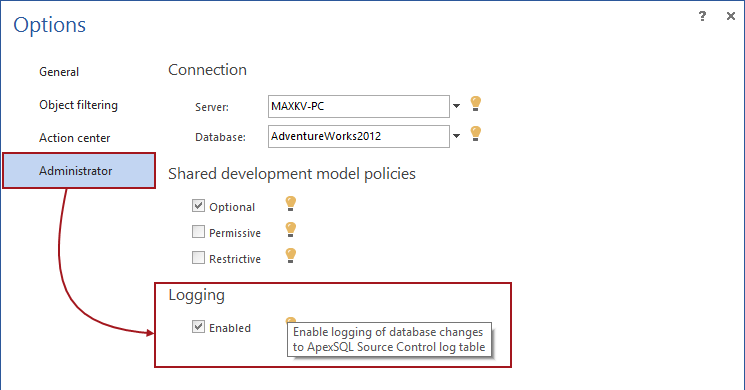
From the moment of enabling the Logging feature in the ApexSQL Source Control options, each change, made by any developer from the team will be logged:
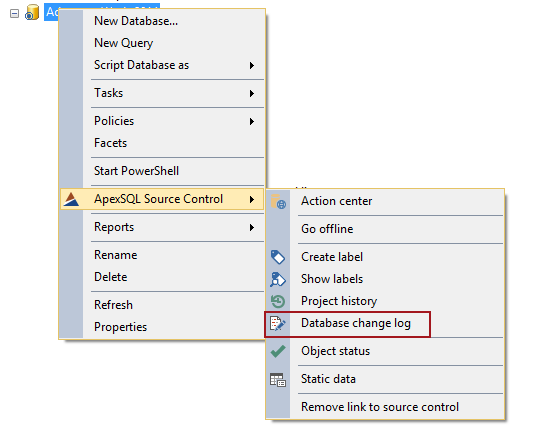
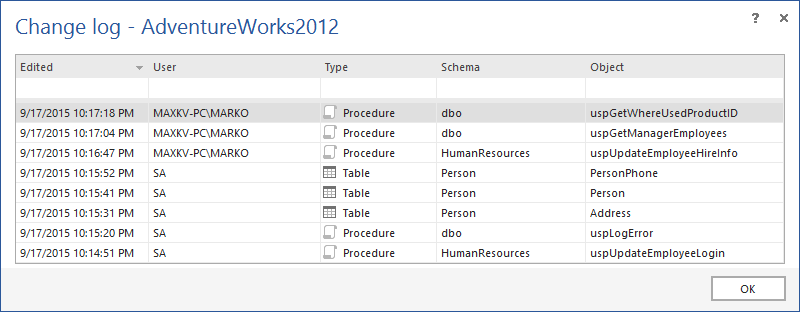
In case someone edited an object, but forgot to commit changes, the Logging feature will help to find who edited what object and when. All changes are accessible in in the Change log form:
Enforcing proper development methodology
By applying database policies, the team can introduce proper development methodology in terms of enforcing the set of rules to be followed. Database policies can be managed from the ApexSQL Source Control options:
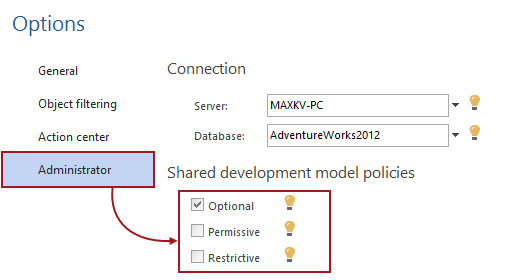
By default, the Optional policy is set which means that any developer can edit any object without the need to perform a Check out or Lock. By changing the policy to Permissive or Restrictive, each team member will be forced to Check out or Lock an object respectively, in order to edit it.
Project history
Just like in the dedicated model, the history of all commits can be accessed from the Project history form:
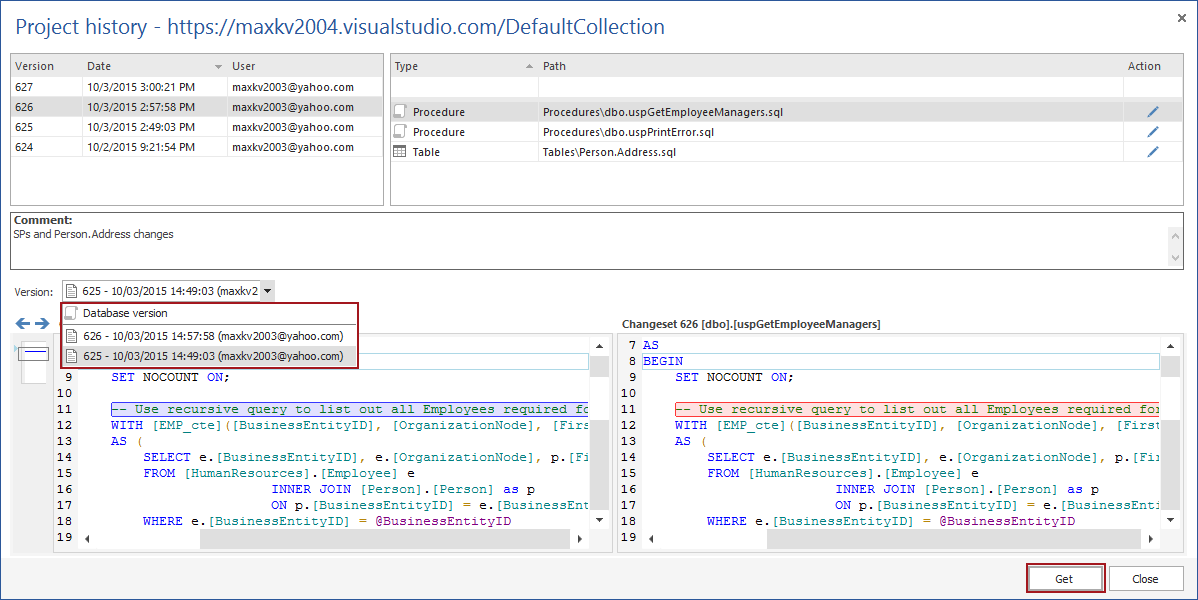
Beside the list of all committed changes, and the list of objects for each commit, ApexSQL Source Control displays line-by-line differences in the Differences pane, at the bottom half of the Project history form. The version of an object from the selected commit can be compared to any other version of the same object including the current version from the database. By clicking the Get button, the version from the selected commit will be applied against the database.
In this way, each committed change can be easily reverted and applied against the database.
October 9, 2015


