When confronted with a disaster recovery scenario with a very large database, but a small group of effected records, an opportunity exists to both speed the process and reduce risk of further damaging data, by updating more rows than necessary, simply by narrowing the subset of compared records.
ApexSQL Data Diff offers the ability to narrow the rows that should be synchronized, so only affected rows are updated. But, if the filtering isn’t done properly, “false positives” are risked, rows that are flagged as different/changed and should be synchronized, even if they weren’t in the subset of affected rows. Synchronizing these rows will update “good” data and roll back any production changes that may have been made, further damaging the data.
To address this, ApexSQL Data Diff offers users a variety of possibilities to narrow the comparison itself, before even creating a set of rows to compare, significantly reducing the time to compare the two databases and at the same time isolating only the affected rows. This narrower comparison, also limits the risk of inadvertently synchronizing more data than the affected/damaged rows by not presenting them for synchronization at all. Even if the actual comparison filter is too broad, and some false positives get picked up for potential synchronization, there should be a much smaller set to review, and ideally this would allow them to be detected easier.
There are 3 ways to reduce the size of the compared set of data:
- The Object filter – selecting only affected tables
- The Column filter – selecting only affected columns
- The Row filter – selecting on the affected sub-set of rows
Object filter
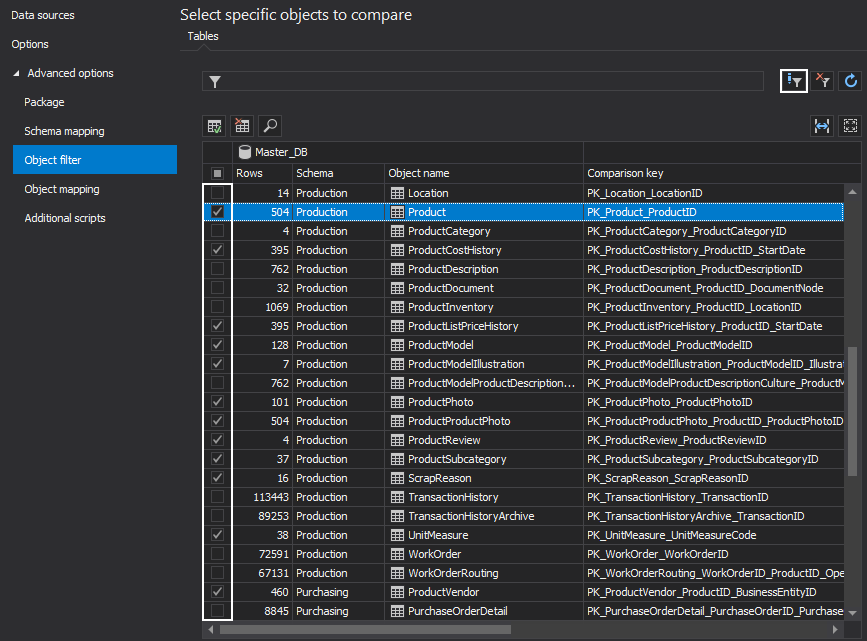
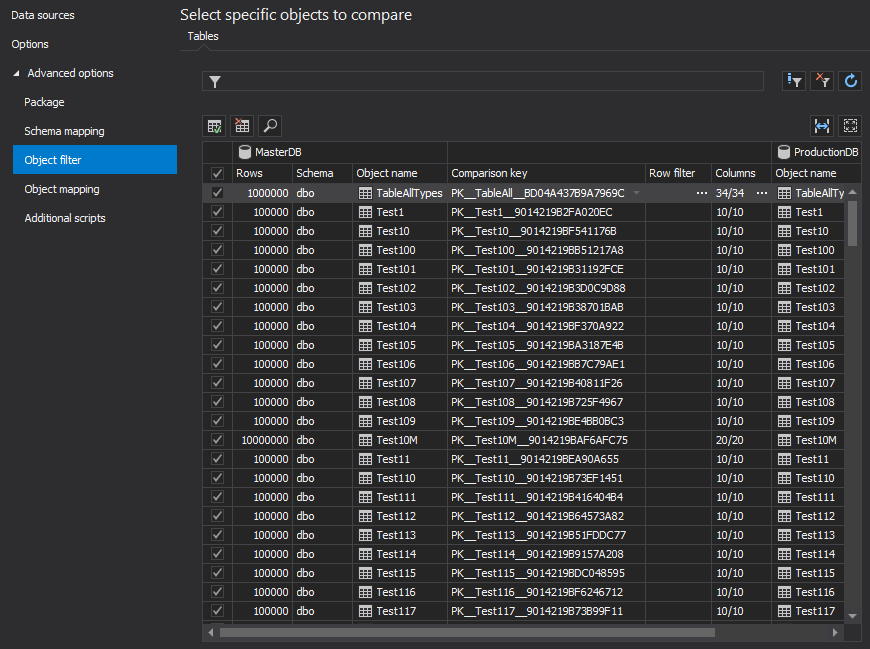
Once the databases are selected, expand the Advanced options, in the New project window, and click the Object filter tab:
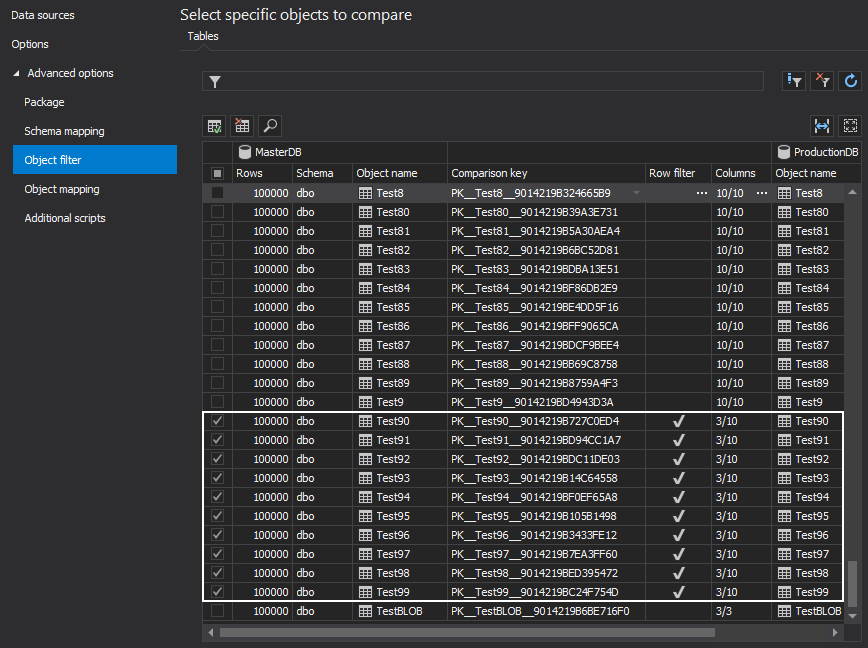
In the Object filter tab, by default, all objects will be checked. Uncheck all objects and just check the ones that contain affected data changes:
Object filtering is just a first step in narrowing down to desired objects and speeding up the comparison process. For large databases with a small sub-set of affected rows the narrower process could run faster by several factors, and in some cases save hours of processing time.
To additionally filter objects, provide specific conditions in the Filter editor window. By clicking on the Edit filter button, in the top right-corner of the object list, select custom filter criteria for the tables, or the views. Using the Filter editor feature, include/exclude objects for the comparison process.
The Filter editor feature allows users to specify custom conditions to include only the desired tables/views for the comparison. For example, if there is a need to include only tables that are under Production schema and their names contain the Product word, conditions could be specified as shown below:
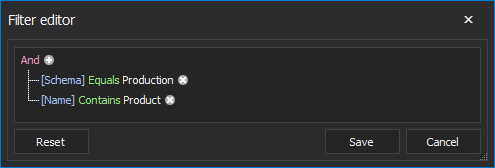
After setting up the conditions, tables will be filtered and only the ones that meet the condition will be shown in the Object filter list:
Column filter
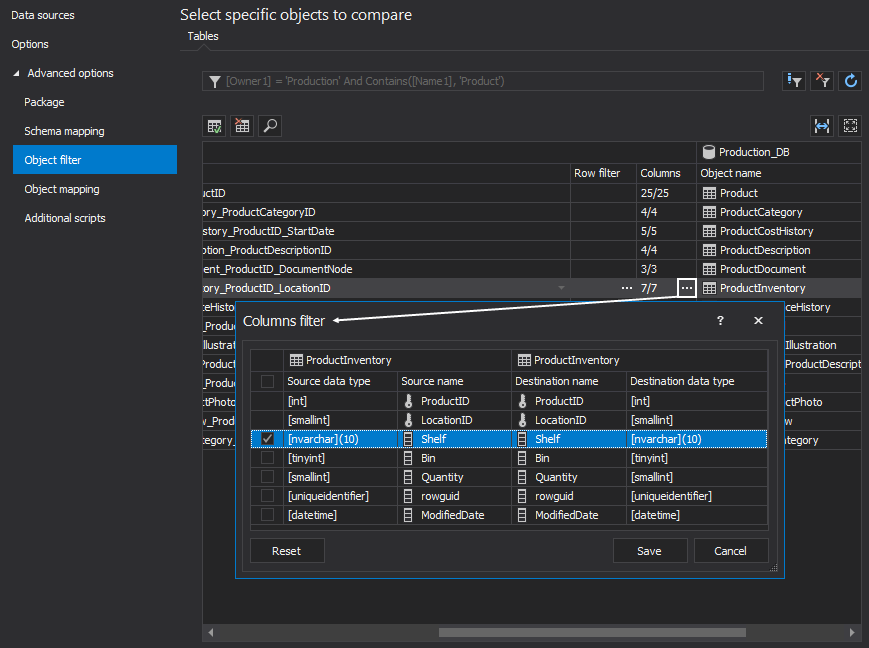
If the affected data can be narrowed to a specific column, these can be filtered as well. For the selected object, click the ellipse button in the Columns column:
In the opened window, check only the desired column, so that all other columns are ignored for the comparison process. The primary key will be selected by default. This will allow users to see only the row comparison for a desired column and to speed up the comparison process. By reducing the number of columns in the comparison, processing speeds can be improved exponentially.
Row filter
The final way to narrow the comparison sub-set is to isolate only those affected rows. This limits the comparison to only those rows in a particular table that were potentially affected, and ensures no others are processed.
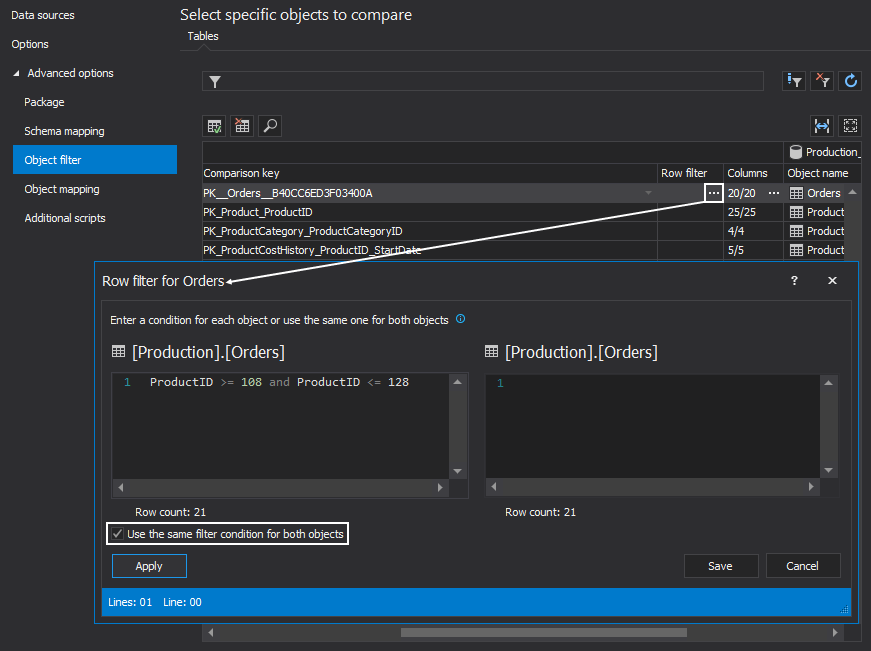
To accomplish this ApexSQL Data Diff offers a Row filter. In the Row filter window, specify a condition that will filter out only the rows that need to be recovered. In this specific example, only the products with the ID >= 108 and ID <= 128 will be included in the comparison process:
In the above example, the same condition is used for source and destination table.
In some cases, a different condition needs to be set and then the Use the same filter condition for both objects option can be unchecked.
Any syntax used by the Where or Having clause can be used in this filter to narrow down the result set of records.
Conditions can be evaluated by the number of rows they return. With a click on the Apply button from the bottom-left corner of the Row filter window, databases will be re-queried and the Row count number will be updated.
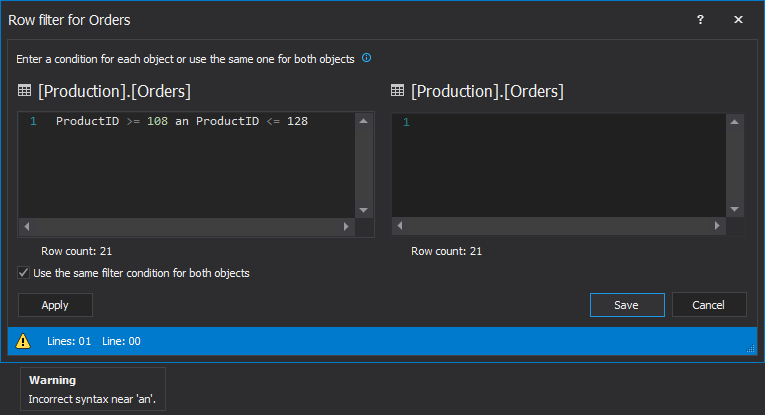
If there is some syntax error in the condition and the Apply button is clicked, the Row filter will validate it with the warning icon which provides a message on hover:
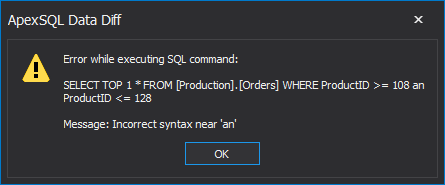
If the Save button is clicked, it won’t allow th user to proceed until this syntax error is resolved, and a more informative message will be shown:
More about the Row filter feature can be read from this link.
Using the filtering options
In the following example, a demonstration of what kind of impact filtering options can have on the comparison and synchronization process will be shown.
There are 2 databases, where each database has 40 million rows, 200 tables, and database size is 7 GB.
The task is to recover specific data rows in 10 tables for 3 columns and it can be done in two ways:
-
In the Object filter tab all tables are checked and no filtering options are applied:
The comparison process took 677 seconds and the synchronization 467 seconds.
Total time: 1,144 seconds -
In the Object filter tab, all tables are excluded except 10 tables. For each table, only 3 required columns are selected. The Row filter condition is set for all 10 tables to filter out only the desired ones for recovering (from 2,000 to 4,000 rows for each table):
The comparison process took 11 seconds and the synchronization 3 seconds.
Total time: 14 seconds
With the use of all filtering options in combination, the entire recovery process, using ApexSQL Data Diff was cut by 8000%. More importantly, the risk of additional data damage from overwriting good data, with the synchronization script was minimized, ensuring that the data was not only recovered quickly but safely.
November 6, 2015


