


Challenge
Even now there are some isolated SQL Servers (without internet access or a limited one) that need to have databases updated with data changes on a daily basis. These kinds of SQL Servers need a way to get the latest data changes from the master SQL database.
The first step would be sending a SQL database backup to one of the colleagues who has access to it. That colleague should compare the master database against received database backup and to create an update script and to package it. Once the package is created and needs to be sent back to the “isolated” colleague, so that package can be executed and a database will be updated with latest data changes.
Solution
This article describes how to synchronize specific rows on remote database using ApexSQL Data Diff’s database installer package.
ApexSQL Data Diff is a third-party tool that can compare and synchronize data of SQL Server databases, backups, and source control projects. In addition, it offers two ways of database packaging: executable installer and C# solution. The main difference between these two is that C# solution can be edited and built in Visual Studio, while the executable installer is the end product that cannot be edited. However, both of them have the same purpose – synchronizing data. To find out more, check out the article All about ApexSQL database installer packages.
In this particular example, it will be described how to synchronize specific rows on remote database using ApexSQL Data Diff’s database installer package.
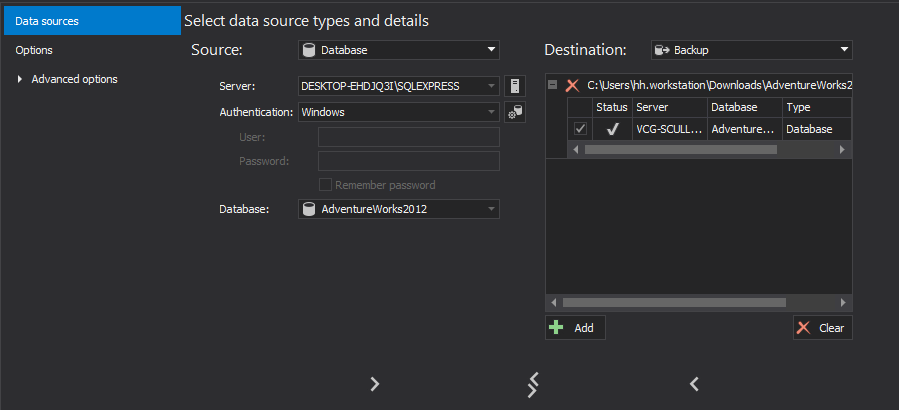
Once ApexSQL Data Diff is run, the first step is to set the master database as source and received database backup as destination in the Data sources tab of the New project window:
Once the data sources are set, there are a couple of options for installer packages that can be set in the Package tab, under the Advanced options:
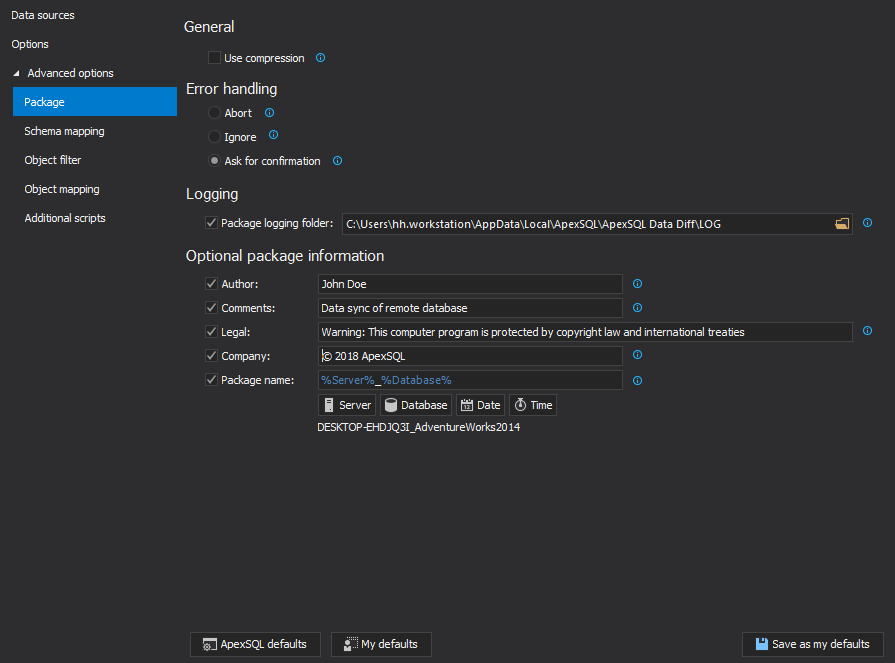
The Use compression option is quite a handy option when there is a need to synchronize larger amount of data. By using .NET compression algorithms, it will reduce the size of the resulting database installer package.
The second one is the Error handling option, which can be set to Abort, Ignore, or Ask for confirmation during the package execution.
Additionally, there are several optional package information that can be set, such as: Author, Comments, Legal, Company, and Package name.
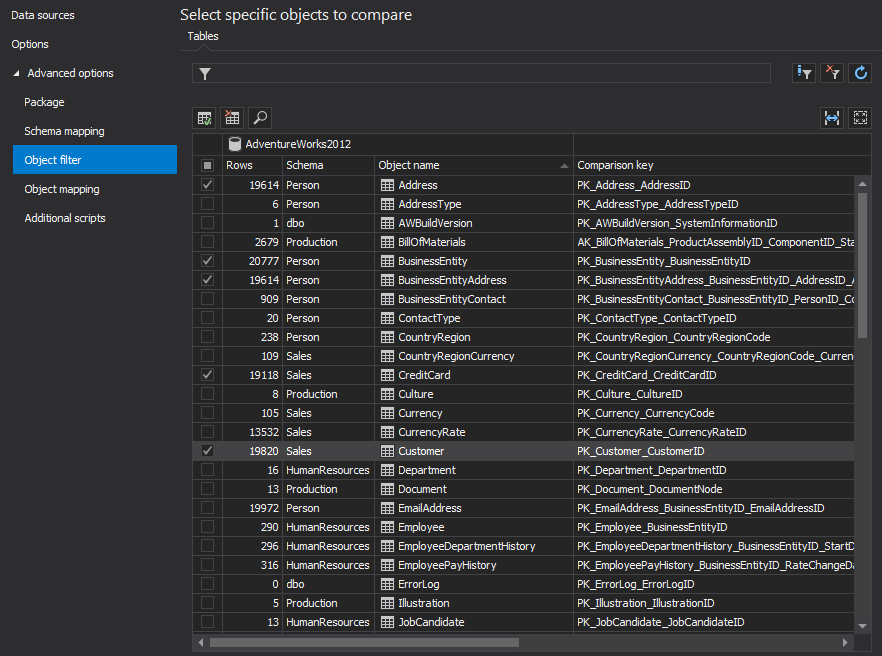
Once the Package options are set, go to the Object filter tab to choose the desired rows for specific tables that will be included in the package.
To achieve this, first uncheck all tables, as they are all checked by default, and check the desired tables:
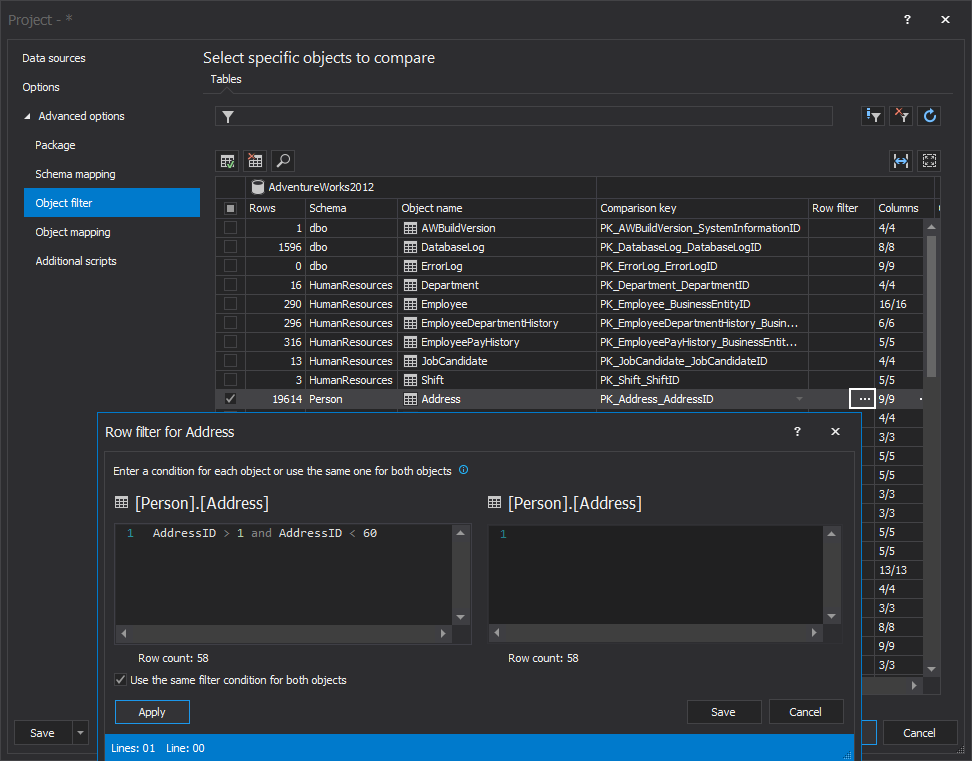
When needed tables are checked, set the Row filter condition for each checked table, in order to get only specific rows. Learn more about Benefits of using the Row filter in SQL database comparison.
In this example, the Address table is selected and in the Row filter cell, the Ellipse button is clicked. The Row filter window will be shown and by specifying the condition, it will only include the desired rows for the synchronization package:
Learn more about How to narrow a data comparison to affected rows only.
Now, when everything is set, click the Compare button in the bottom right corner of the New project window and wait until the comparison process is done and the results are shown in the Results grid:
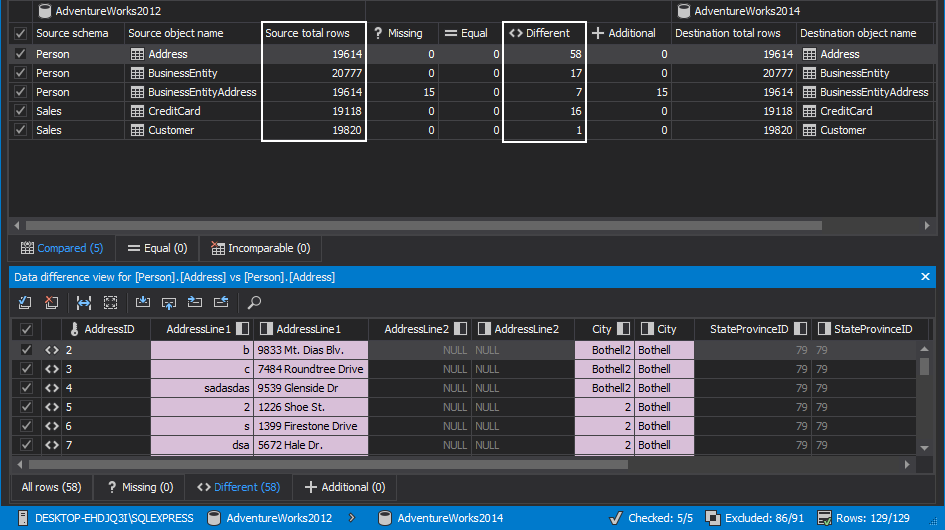
As it’s shown on the screenshot above, by using the Row filter conditions, the amount of different rows is reduced to a number that corresponds to the condition set.
Additionally, the specific different rows can be manually checked/unchecked for the synchronization package from the Data difference pane:

When all desired tables/rows are checked, click the Synchronize button, from the Home tab:

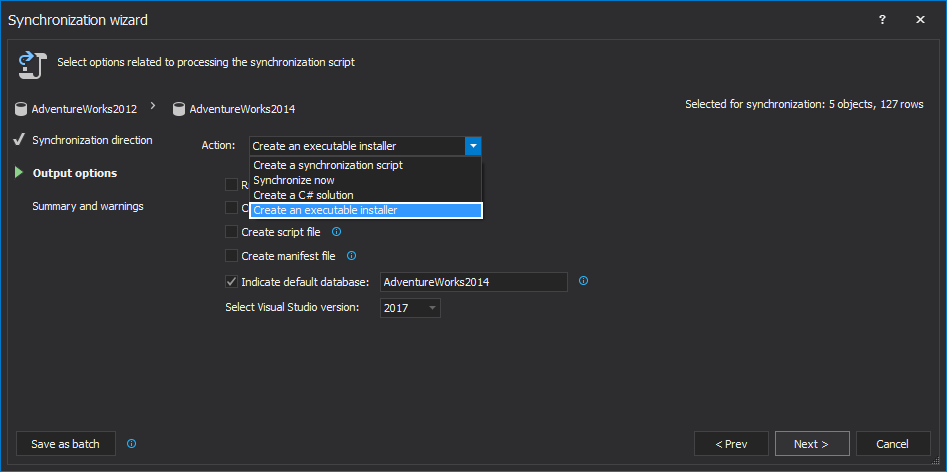
Since there is no need to change the synchronization direction, click the Next button for the first synchronization step.
In the second step, choose the Executable installer as an option action:
In the Output options step, there are a few other options that can be set for the executable installer:
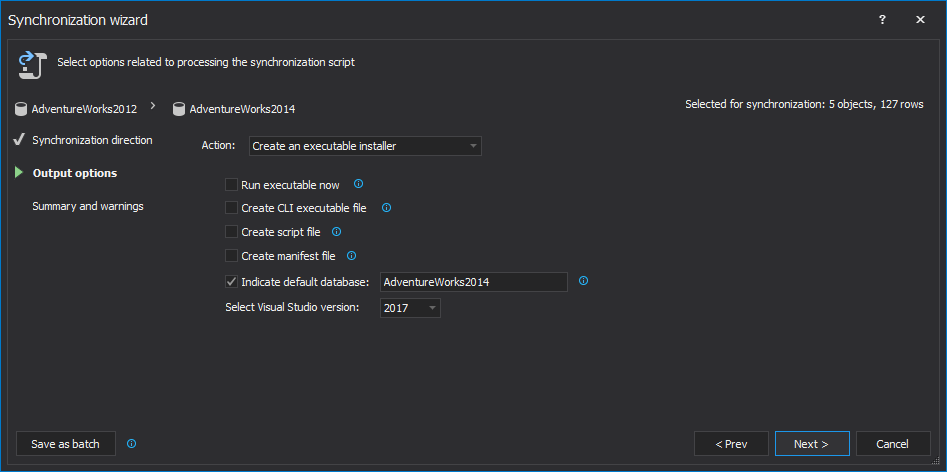
By default, the Run executable now option is un-checked, since in most cases it needs to be executed on a remote database.
The next three options create additional files and these can be checked depending on the need:
- Create CLI executable file – this option creates the CLI executable, which can be run using the Command Prompt for further automation
- Create script file – this option creates a script file which contains SQL code for creating new or updating the existing database
- Create manifest file – this option creates a .manifest file that contains information regarding OS compatibility versions for which this application is designed to work with and sets the Windows User Account Control level to allow the application to run without any additional permissions
The executable installer can work without including any of the above-mentioned files.
The Indicate default database option sets the default database against which the generated synchronization package will be executed.
In the last option, Visual Studio version can be selected, depending on the installed version.
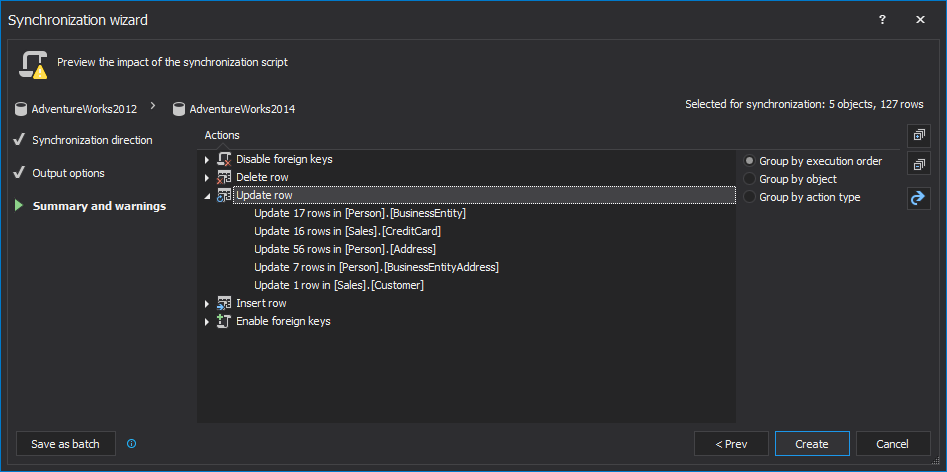
After setting up all of these options, click the Next button and the Summary and warnings step will be shown, in which all actions can be reviewed before creating the executable installer:
Once everything is checked, click the Create button in the bottom-right corner and the pop up window will be shown, in which the file name and location can be set.
Now, when the executable installer is created, it can be sent via e-mail or transferred to the remote database using the USB stick.
At the remote site, double-click the installer, and the following window will be shown:
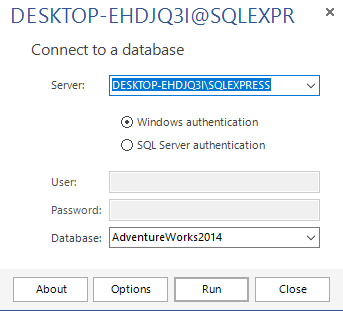
Here, the server, a way of authentication, or a database can be changed, if it’s needed to perform successful package execution.
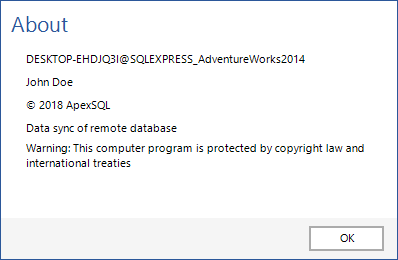
If the About button is clicked, all of the package information that was set in the Package tab, will be shown:
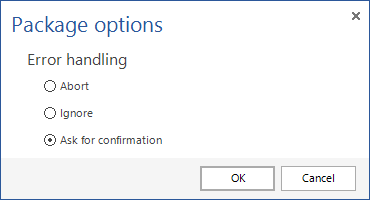
In the Options window, the previously set Error handling option will be used as default, but it can be changed here before the execution:
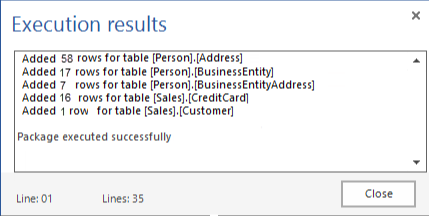
If everything is in order, click the Run button and after the execution is completed, the Execution results window will be shown:
May 8, 2017


