


In the first part of the series, we’ve showed how to perform a point in time restore using SQL Server Management Studio and ApexSQL Log. In the second part of the article, we’re going to introduce two more solutions – performing a virtual restore (in time) with ApexSQL Restore, and performing a full point in time restore with ApexSQL Backup.
ApexSQL Restore is a SQL Server tool that enables the user to attach a database backup, virtually. The restore process is much faster and saves disk space, in comparison to ‘true’ restore, yet attached database is fully usable as any other SQL database, and can be accessed or manipulated via SQL Server Management Studio, Visual Studio, or any other third-party tool.
This means that by using ApexSQL Restore, the user will not affect existing live database, but will create a virtual restore of a database backup as a separate database. This allows comparison of the live database with the same database, reverted to exact point in time or investigation without affecting live database in any way.
To restore a database (backup) to a specific point in time with ApexSQL Restore, the following steps need to be executed:
-
Start ApexSQL Restore and click the Add virtual database button:

-
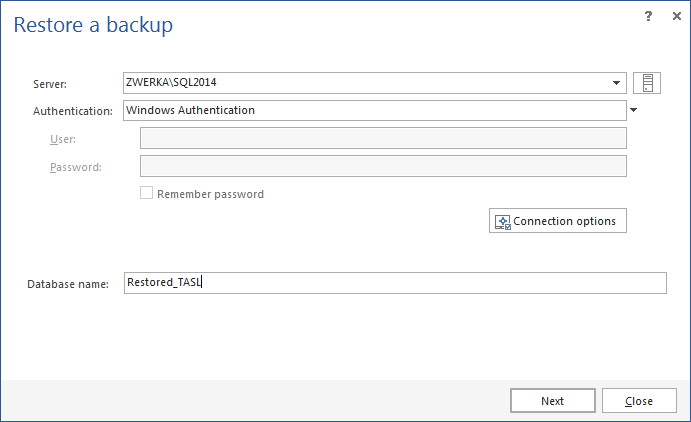
In the Restore a backup wizard, select a SQL Server that will host a database, choose authentication method, provide credentials and a name for the virtually restored database:
-
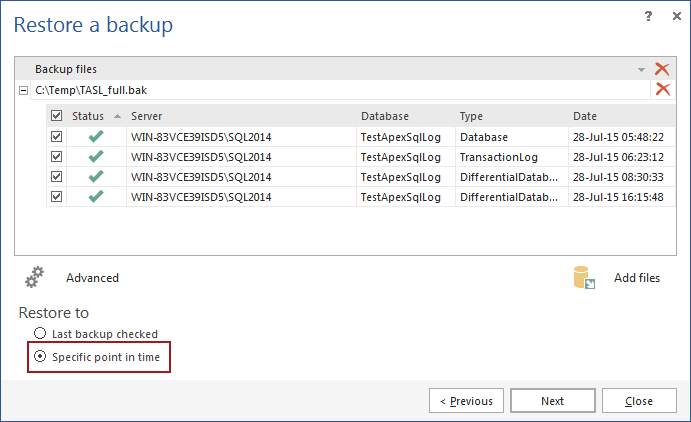
In the next step, click the Add files button and select database backups – multiple non-full backups may be added to form a backup chain:

-
In the same step, choose to restore to Specific point in time and click the Next button:
-
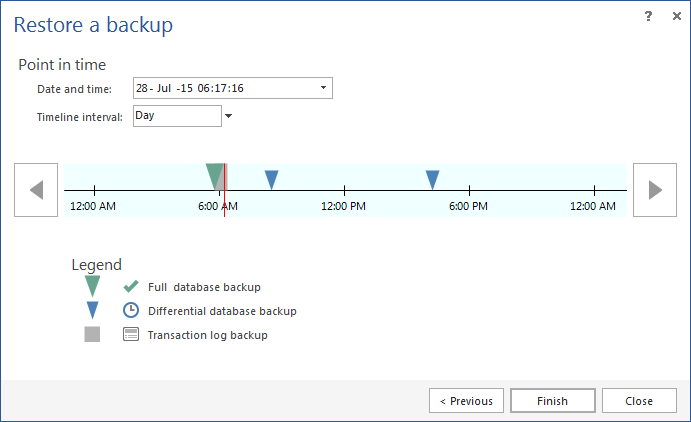
In the next step, the backup history will be shown in the comprehensive time-line. Specify the exact point in time to restore database to and click the Finish button:
With this, ApexSQL Restore will virtually restore a database to specified point in time. From here, database can be manipulated in the same way as any live database.
Even though, restoring database to a specific point in time with ApexSQL Restore doesn’t directly affect actual database, this method has several benefits:
- Production database is not affected in any way during the restore process, and upholds it’s ‘live’ status during the full coarse of process
- Continuous restores to different points in time are faster and easier, due to the high virtual restore performance – this is especially useful when working with or comparing several points in time, since processing will be much faster, and allocated disk space will be much lower than ‘true’ restore
Finally, the last solution to restore database to a point in time is to use ApexSQL Backup.
ApexSQL Backup is a tool for advanced management and automation of backup & restore jobs, as well as log shipping automation. The main feature of ApexSQL Backup that enables easy point in time restoration is the fact that all jobs are performed while maintaining the chain of backup files.
To perform a point in time restore, do the following:
-
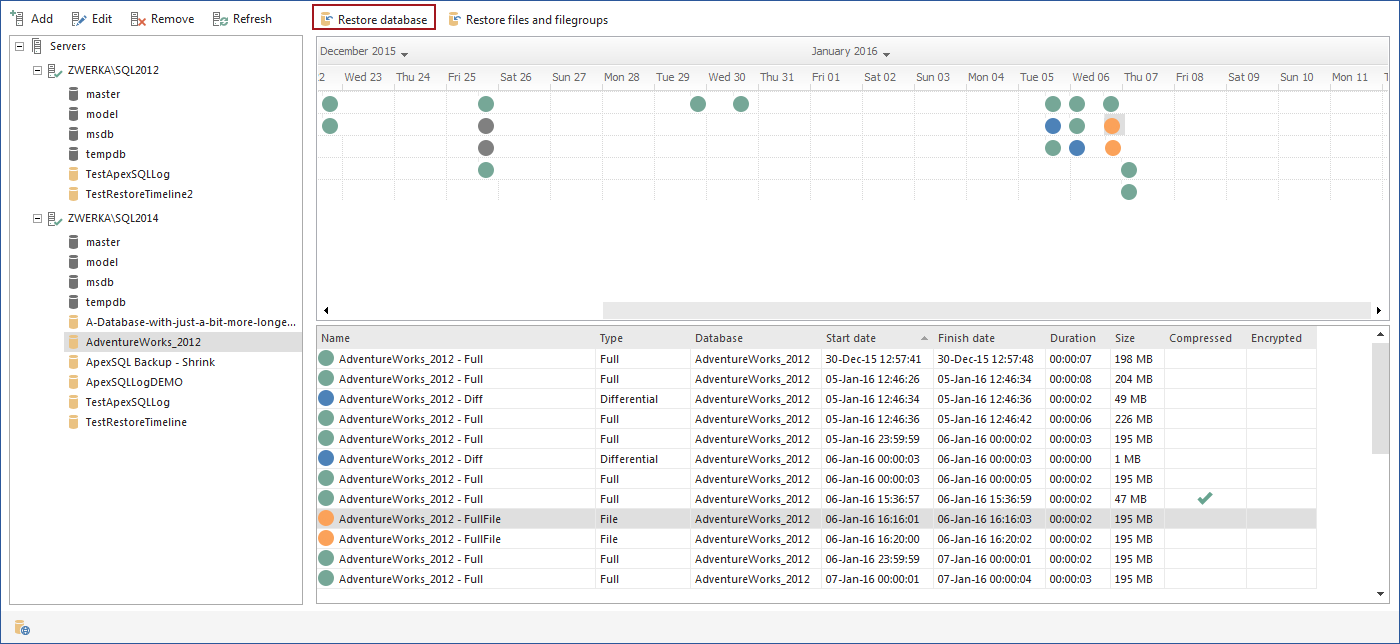
Start ApexSQL Backup and select a database for point in time restore:

-
Click the History button in the main menu to bring forth the historical view:

At this point, ApexSQL Backup will track all backups for the selected database, whether they were created from SQL Server Management Studio, ApexSQL Backup, or any other 3rd party tool. As long as a native backup has been created, it will be automatically added to the backup list, regardless of the backup type.
Additionally, calendar view shows graphical view of database backups in relation to a date of creation:

-
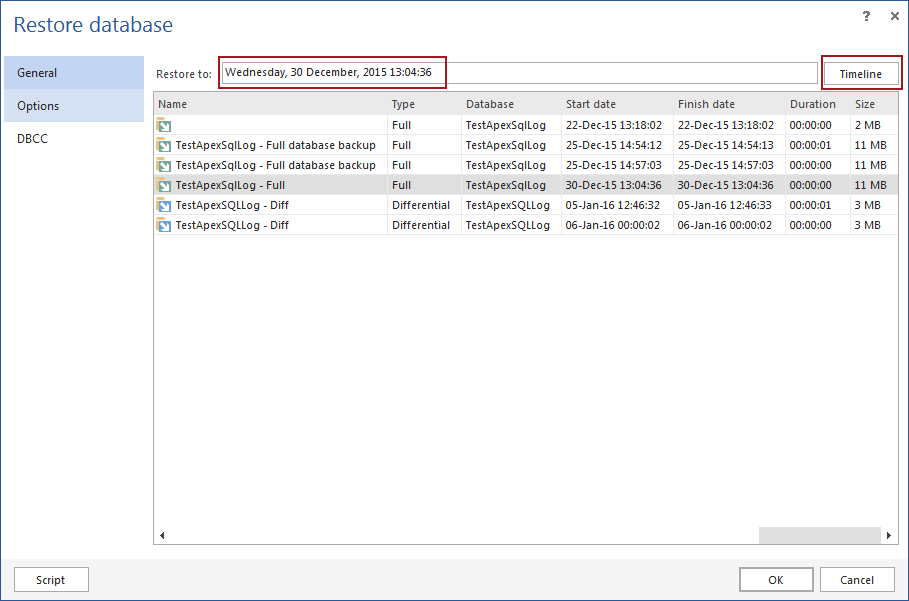
Click on the Restore to button to start the point in time restore wizard:
-
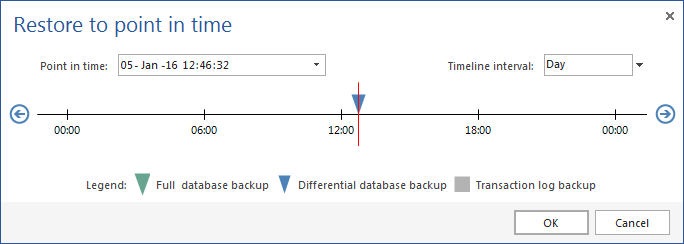
In the Restore database dialog, specify the exact point in time to which you’d like to restore database to, by manually entering the time, or by switching to the Timeline and moving the tracker to the desired point in time:
-
At this point, the only thing remaining is to select an output:
-
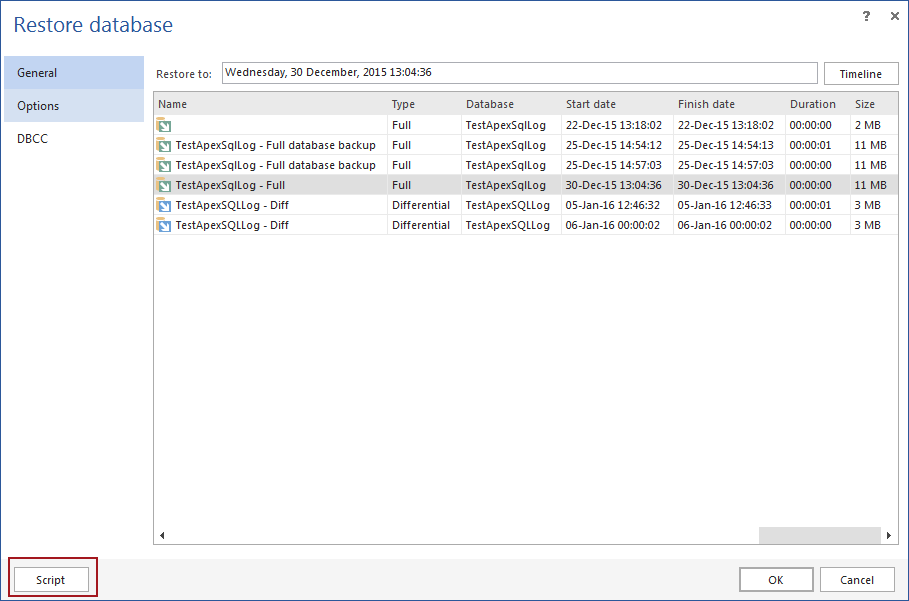
By clicking on the Script button, ApexSQL Backup will create a SQL script which can be copied, saved, changed or executed from SQL Server Management Studio or any other management tool.

- Clicking on the Ok button, restore process will be occur immediately
-
Regardless of the choice, this will conclude the process of point in time restore.
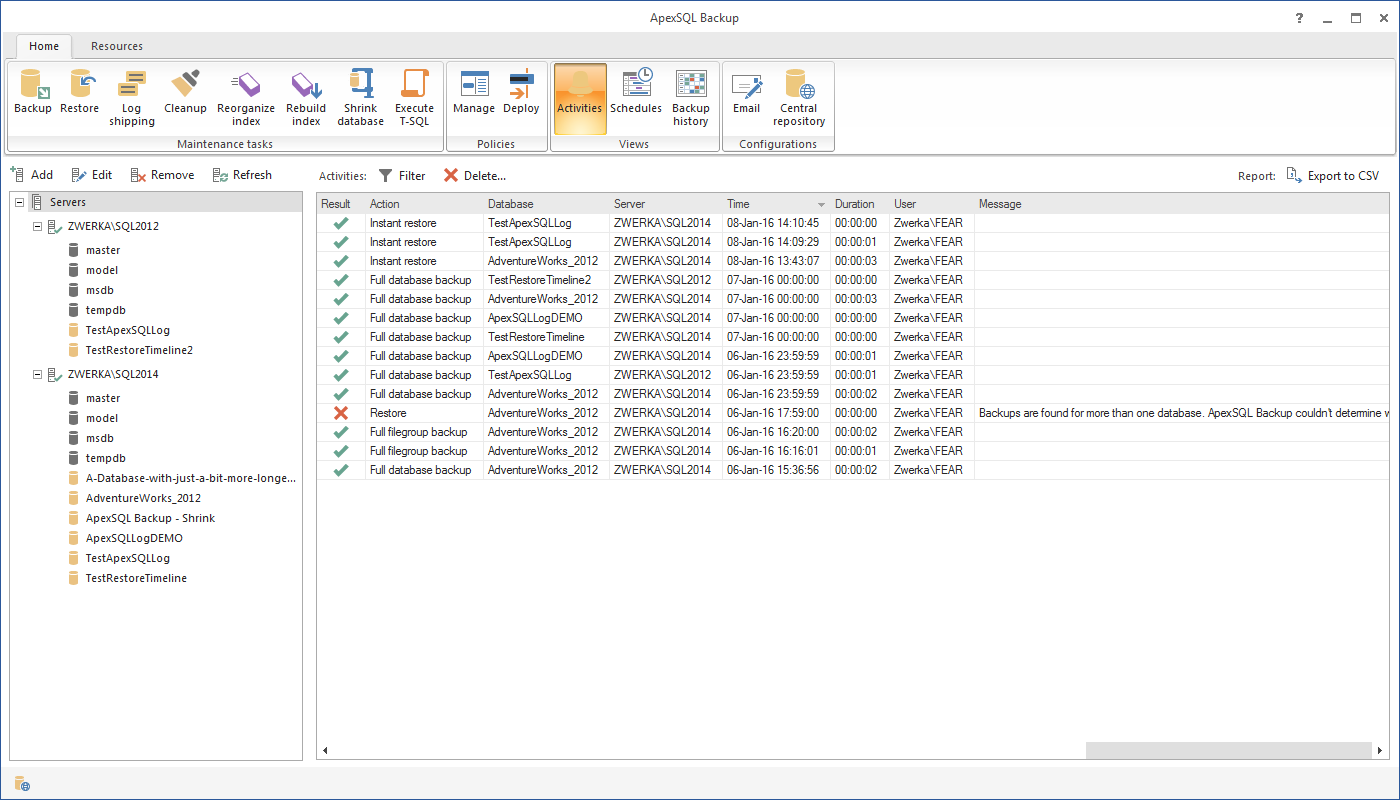
As a bonus feature, ApexSQL Backup offers a full history of database backup/restore activities, including all point in time restores, making it easy to keep track of when the database backup was created, when a database was restored to a point in time, as well as the when the process was unsuccessful due to explicit occasions. The Activities view can be accessed from the main menu at any time:
The main benefits of using ApexSQL Backup to perform a point in time restore are:
- Application automatically searches for all backup types through history, so they do not have to be tracked manually. The user simply needs to choose from the backup list to which point in time to restore to
- Full historical view (with calendar and timeline) of all database backups (including all backup types) offers a comprehensive and easy navigation through history of each database
- Straight-forward (quick and easy) wizard
- Post process history keeps track of all successful or failed jobs
Each represented solution in the article series offers unique approach and solution to revert a database to a point in time. Here is a quick recap:
- ApexSQL Log – reads transaction log files/backups and creates a SQL script to roll back changes and revert transactions back to the original state in the exact point in time
- ApexSQL Restore – virtually attaches a database backup, allowing quick access to the backups, saving space and time, and allowing user to compare point in time backup to the live database without affecting it
- ApexSQL Backup – offers most variety and comprehensive graphical overview of backups history, as well as tracks all historical jobs, whether they were successful or not
July 31, 2015


