If you’ve accidentally executed a TRUNCATE statement and you have a full database backup, given that no changes occurred after the table was truncated, you can simply recover the data by overwriting the original database with the backup. However, if that’s not the case, either because the database objects and data have been changed after the TRUNCATE SQL statement was executed or because you don’t have a valid database backup, there is still a way to recover all of your lost data.
Namely, SQL Server logs each TRUNCATE operation, albeit minimally. This means that, just like when a DELETE statement is executed, the transaction log stores the information that is required to recover the transaction; the difference is that the transaction log doesn’t store information on each individual row that has been truncated and thus doesn’t support point-in-time recovery from TRUNCATE.
Since TRUNCATE is logged to the transaction log, it can be rolled back if it’s encapsulated within an explicit, active transaction. For instance, the following SQL query:
TRUNCATE TABLE Employee
SELECT *
FROM Employee
will return 0 results as the Employee will be truncated. However, the following SQL code:
BEGIN TRAN
TRUNCATE TABLE Employee

ROLLBACK

SELECT *
FROM Employee
will return all of the rows in the Employee table as the TRUNCATE operation will be rolled back.
However, if the transaction containing the TRUNCATE operation is no longer active, for instance since it has been committed, the truncated data cannot be rolled back. Does that mean that you can’t recover the data lost due to a TRUNCATE operation if no full database backups are available?
Fortunately, no. This is where ApexSQL Recover comes into play.
ApexSQL Recover is a recovery tool for SQL Server databases which recovers deleted, truncated or damaged data. It recovers objects and data lost due to drop operations and restores both deleted and online BLOBs as files making it ideal for SharePoint recoveries.

To recover data lost due to a TRUNCATE without backups:
- Start ApexSQL Recover
- Select the Data recovery-From TRUNCATE operation option
- In the Select the database to recover step: Specify the SQL instance where the database you want to recover the data to reside from the Server drop-down box
- Specify the authentication method for that SQL instance (and a valid set of credentials if you chose SQL Server authentication)
-
Specify the name of the database containing the truncated table in the Database drop-down box and click Next
- In the Select the table(s) to recover step, select the tables which have been truncated
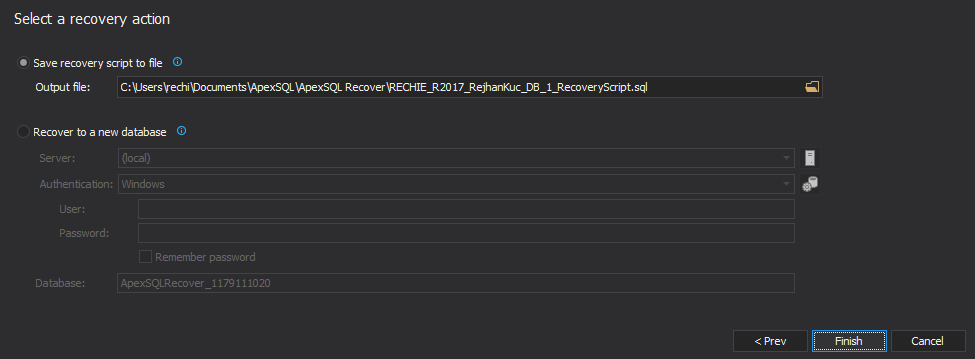
- In the Select a recovery action step, select the Save the recovery script to a file option and specify the path where a T-SQL script that will insert all the lost data when executed will be saved
- Click Recover button
And just like that, you will get your lost data back without having a single backup.
Last Updated:
June 28, 2016
April 4, 2013


