A regular expression (abbreviated regex or regexp and sometimes called a rational expression) is a sequence of characters that forms a search pattern, mainly for use in pattern-matching and "search-and-replace" functions. They can be also used as a data generator, following the concept of reversed regular expressions, and provide randomized test data for use in test databases.
Using regular expressions to create realistic test data
One of the most used information is a phone number, and that is a good example of data that can be used to populate a database with. For our example we will use US based phone numbers, and show how they can be generated using the regular expression.
To explain this, first the syntax of US base phone numbers must be understood. They are defined by the North American Numbering Plan (NANP). The NANP is a system of numbering plan areas (NPA) using telephone numbers consisting of a three-digit area code, a three-digit central office code, and a four-digit station number. The example of the US phone number syntax is below:
### – ###- ####
area code – central office code – station number
The rule for the real US phone number is that the three-digit area codes first digit can be in a range from 2-9, this applies to a three-digit central office code too. The last four-digit station number can use numbers in a range from 0-9.
Following this rule, we will create a regular expression that will generate random US phone numbers using syntax elements used for regular expressions in data generation, from the list below:
|
Syntax |
Example |
Data generated |
|
. = Indicates any character |
John |
John |
|
\ = Indicates that the character that follows is interpreted as is, instead of as a special character |
\.2 |
.2 |
|
() = Operators that are inside the parentheses are grouped |
(Gr34T) |
Gr34T |
|
{n} = Generates n instances of previous item |
ab{2} |
abb |
|
{n,m} = Generates at least n instances but no more than m instances of the previous item |
Rd2{2,5} |
Rd22 or Rd2222 (for example) |
|
{n,} = Generates n or more instances of the previous item |
T{3,} |
TTT or TTTT or TTTTT (for example) |
|
* = Generates zero or more instances of the previous item |
Rom3* |
Rom or Rom33 or Rom333 (for example) |
|
+ = Generates one or more instances of the previous item |
Tun4+ |
Tun4 or Tun444 (for example) |
|
? = Generates zero or one instance of the previous item |
Op3n? |
Op3 or Op3n |
|
| = Generates an item on either side of the | character |
True|False |
True or False |
|
[] = Generates any character inside the brackets |
[tRu3] |
t or R or u or 3 |
|
[a-z] = Generates any character in the specified range of characters |
[0-9A-Z] |
U or 5 or Z (for example) |
|
[^abc] = Generates any character except those inside the brackets |
[^0aT] |
Y or 5 or + (but not 0, a or T)(for example) |
Since the first digit of a three-digit area code can be only in range 2-9, the following syntax element is used [2-9] that will generate a random number from a range 2-9.
The next two digits of the area will be generated using the following syntax elements [0-9]{2}, where [0-9] sets a range 0-9 from which the random numbers will be generated, and {2} instructs the generator to take two random numbers from the [0-9] range set before it. So the regular expression to create a three-digit area code will look like this [2-9][0-9]{2} and it will give random results like 254, 634, 893, etc.
To visually divide the groups of digits in a phone number, the dash symbol is used (–) that has no syntax value, just visual.
A three-digit central office code uses the same rules as the three-digit area code, so the regular expression for it is the same as for the three-digit area code, and is used after the dash symbol. That will make the current regular expression look like [2-9][0-9]{2}–[2-9][0-9]{2}, which will produce the following possible results: 367-245, 743-854, 423-522, etc.
Again, the dash symbol is used to visually divide groups of digits.
The four-digit station number can use numbers in a range 0-9. To create a regular expression for it the syntax element for a range [0-9] and the syntax element for how many numbers will be chosen from a given range {4} will be used, that gives the following regular expression [0-9]{4}. Examples of possible results for this expression are: 0245, 4392, 7402, etc.
The complete regular expression to generate realistic US phone number looks like this:
[2-9][0-9]{2}-[2-9][0-9]{2}-[0-9]{4},
and the random numbers generated will look like these: 254-573-9330, 453-623-0521, 832-571-9562, etc.
This regular expression is used in the following options available for the random data generation.
RegEx libraries for programming languages as data generators
There are lots of libraries available on the internet that can be used in programming languages like PHP, Java, C++, which allow generation of data using the regular expressions. One of the examples would be xeger, a Java library for generating random text from regular expressions. We will use the regular expression: [2-9][0-9]{2}-[2-9][0-9]{2}-[0-9]{4} in the example. Using the library, you can now generate Strings matching this pattern like this:
String regex = "[2-9][0-9{2}-[2-9][0-9{2}-[0-9]{4}";
Xeger generator = new Xeger(regex);
String result = generator.generate();
assert result.matches(regex);
Using this code would produce the following random data:
239-456-8845
345-542-5392
584-583-2940
879-220-3412
733-430-3290
…
Creating a Data Generation Plan in Visual Studio 2010 using the regular expressions (RegEx) generator
Another option is to leverage Visual Studio 2010 and its feature to generate random test data using a Data Generation Plan. A Data Generation Plan allows to select how the test data will be generated for specific tables and columns. It has several built in data generators which generate random data according to the column data type. Properties of these generators can be changed, to define the range and format of the generated test data.
One of those generators that we are interested in is the Regular Expression generator, and it can be used in the following way:
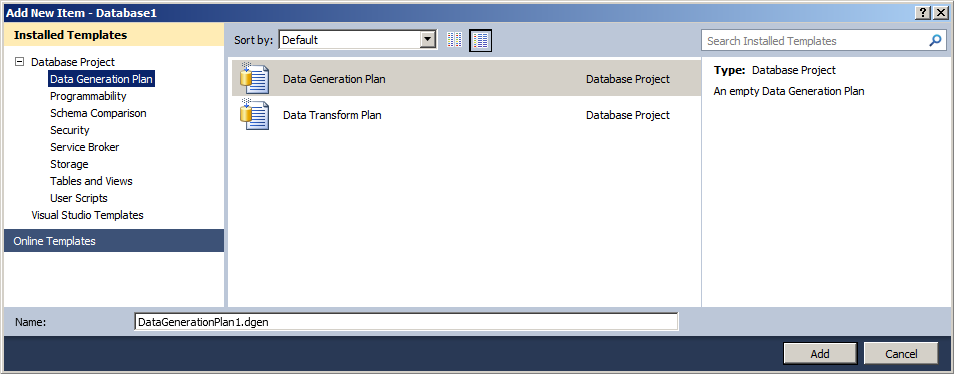
Start the Visual Studio 2010 and load your database project. Right click on the project node in the Solution Explorer, and go to the Add menu and click on the New item:
From the Add New Item dialogue box, choose Data Generation Plan node under the Database Project node and select empty Data Generation Plan template form the list. Name of the data generation plan can be defined in the Name box, and to proceed click the Add button:
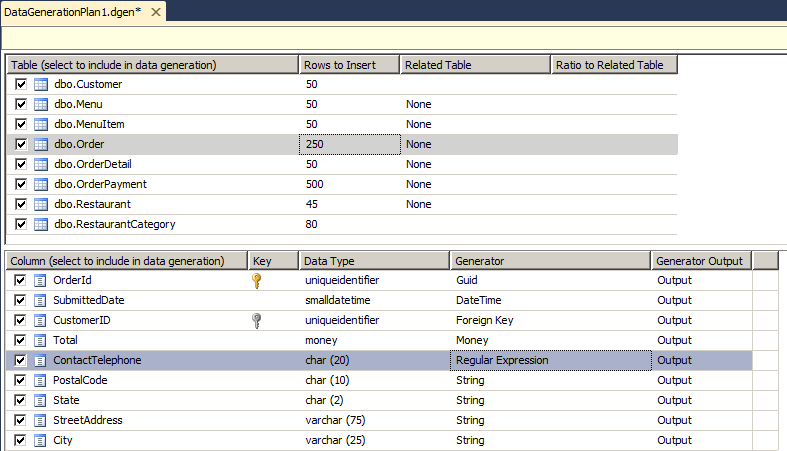
The schema objects of the database project are scanned and all the tables that exist are listed by Data Generation Plan. All the tables are included in the plan for data generation by default. Select the tables for which the data is generated, and enter the number of rows that will be generated for the tables selected:
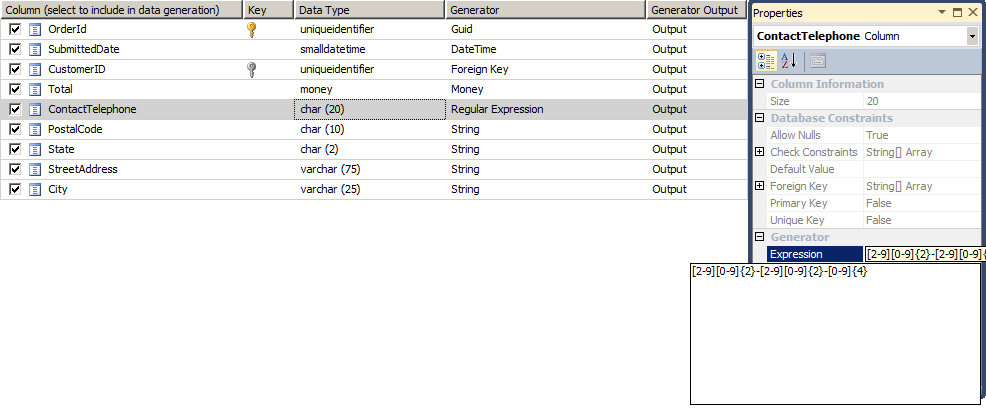
Next, select the Colum for which the Regular Expression (RegEx) generator will be used and in the Generator drop down menu select the Regular Expression generator. After the generator is set, the regular expression which will be used to generate random data should be entered. That is done in the properties window of the selected column, which is accessed by right clicking on the column and selecting the Properties item, or by pressing the F4 key. In the expression box enter the desired regular expression (in the example below the regular expression, explained in the beginning of the article, [2-9][0-9]{2}-[2-9][0-9]{2}-[0-9]{4} will generate random US telephone numbers):
The generated data would look like this:
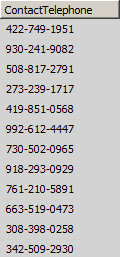
To preview the test data that will be generated, right click on the data generation screen and click on the Preview Data Generation. This will show the test data in a preview screen:

If the preview looks good, the next step is to generate actual data. This is done by clicking the Generate Data button in the toolbar or pressing the F5 key. This will bring the Connect to Database wizard, where the details of the database are specified:
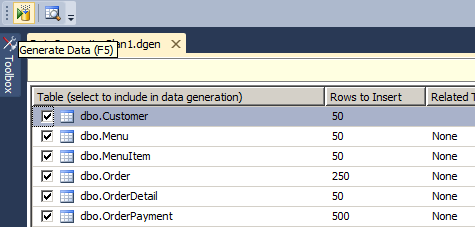
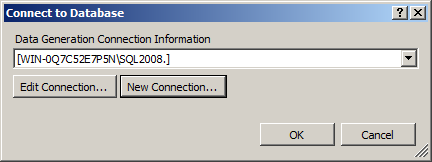
To execute the data generation plan and generate data for selected tables, database connection needs to be specified, and then click on the OK button.
Please note that test data generation was deprecated after Visual Studio 2010.
Generating randomized test data using the Regular expression generator in ApexSQL Generate
ApexSQL Generate is a SQL data generator tool, which has the ability to quickly generate data, using various sources, with a variety of data generators.
One of its features is to generate randomized data using the regular expressions.
The goal is to enter a regular expression, which will be used to populate columns with a test data. This can be done in the following way:
-
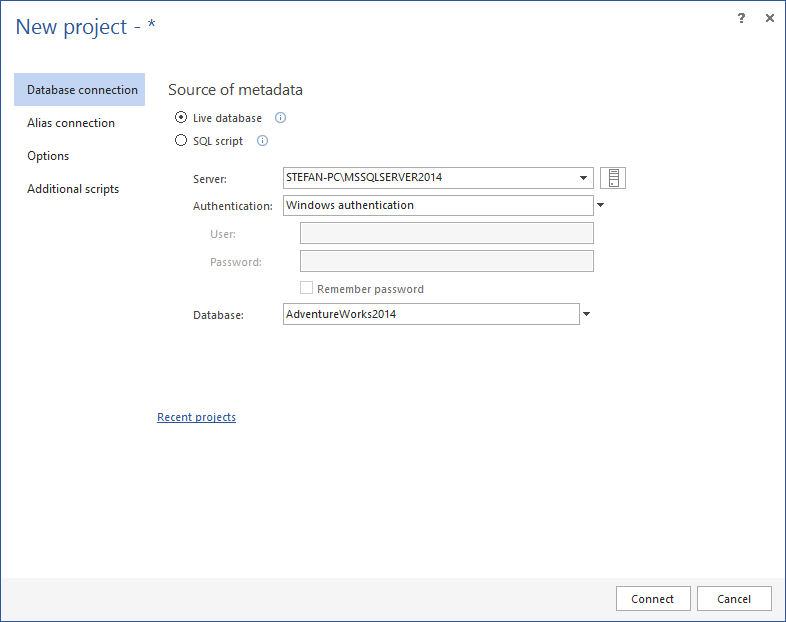
Connect to a database using the Database connection or the Alias connection:
-
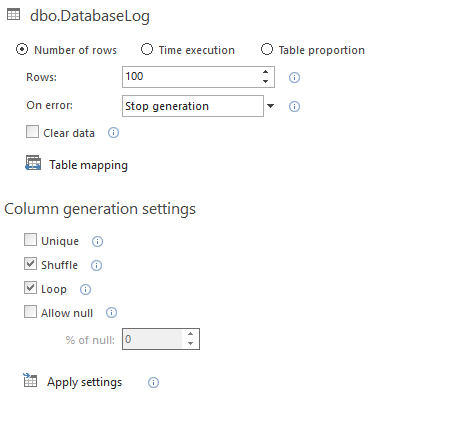
In the main grid, select the table for which the test data is to be generated, and from the Generation options set the number or rows to be generated:
-
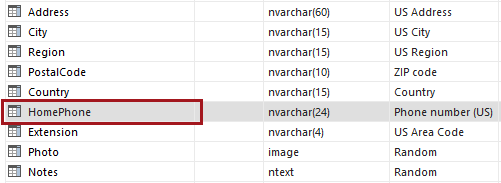
Then select the column, which is to be populated with the data:
-
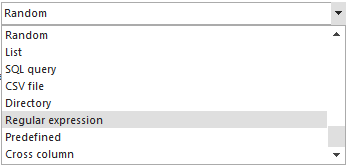
From the Generator list, select the Regular expression generator:
-
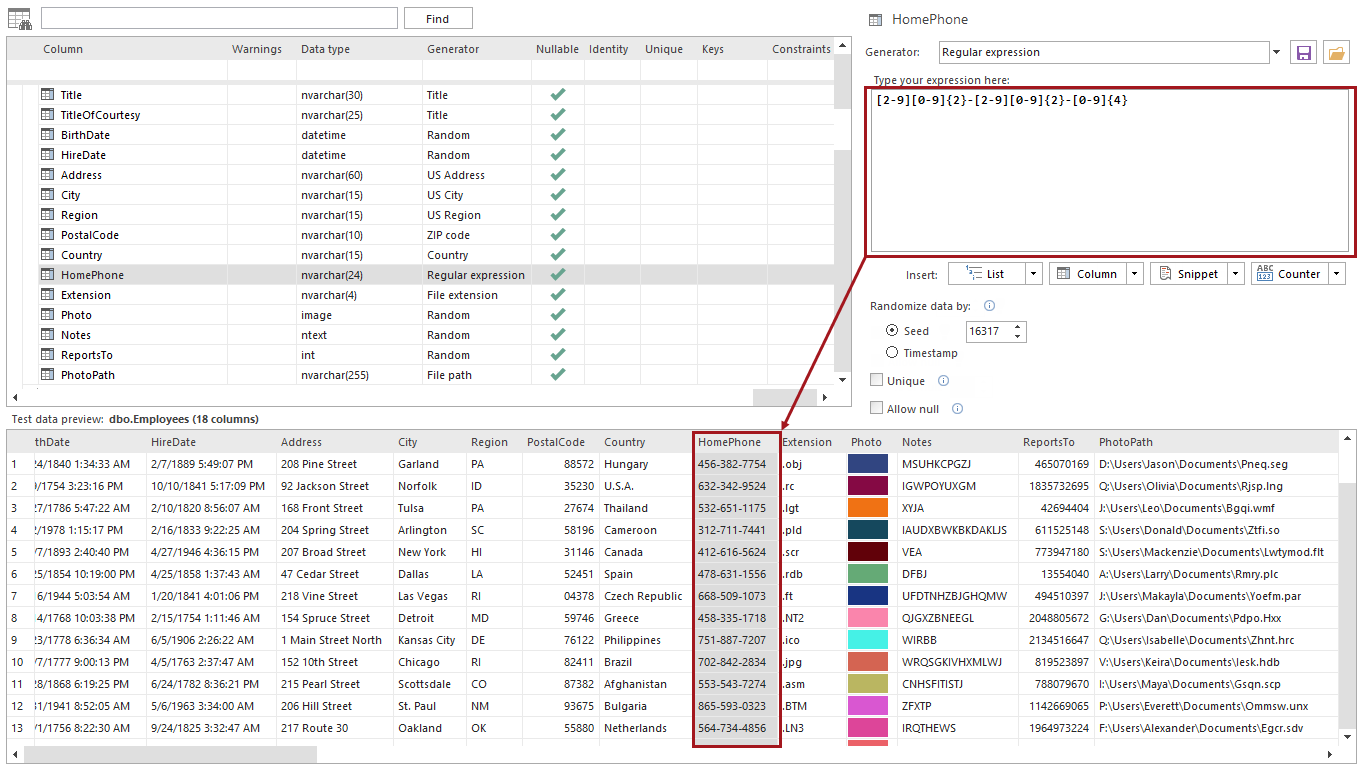
Enter the regular expression in the box, and after that you can see in the preview pane how the generated data will look. As the regular expression in being entered in the box, the preview pane will automatically generate the preview of first one hundred rows of data that will be generated, based on current input. In the example below, we have used the regular expression that was explained in the beginning of the article [2-9][0-9]{2}-[2-9][0-9]{2}-[0-9]{4} which will generate random US phone numbers:
The Unique option ensures unique values will be generated.
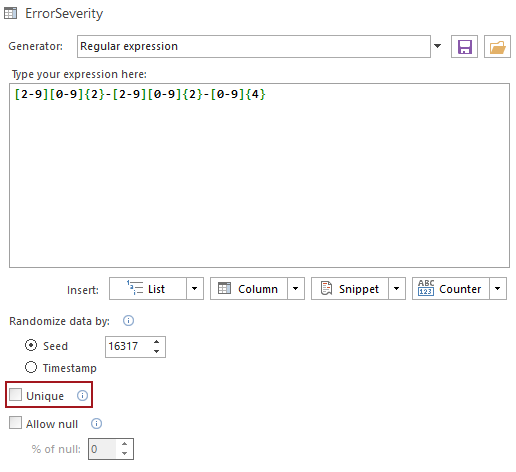
The important thing to note is that the generated set of values is defined by the Seed value. For every Seed value, there is exactly one set of possible generated data. For example, when the regular expression from the beginning of the article is used, and the Seed value is 0, the first few rows of generated data would be:

If the Seed value would be e.g. 53, the resulting set would be:

The generated set can be repeated by using the same regular expression and the same Seed value. This can be used when two or more columns have to be populated with the same data and in the exact same order.
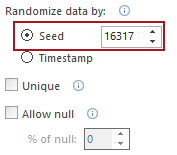
More information on the Seed value can be found in the KB article “Seed feature in ApexSQL Generate”.
After all the options are set, the data generation process can be executed by the Generate button in the main window.

May 11, 2015


