


Recovering DELETED records is something we would all like to avoid, but no matter how careful we are, it can come to that. Having regular full database and transaction log backups is a necessary practice and a great advantage in this situation, but even then, bringing back the deleted records might not be easy
The best-case scenario is that the records are deleted immediately after the last backup (full or transaction log one), no other changes happen, you can afford the database downtime and restore the backup. As this scenario almost never happens in real life, this kind of action will overwrite all the transactions that happen after the deletion of records, not to mention the downtime you will experience with the entire database
The first question you should answer is: do you have any database backups that contain the records you want to recover?
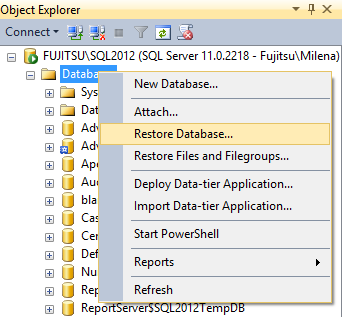
If the answer is yes, you can use SQL Server management Studio and the Export data option:
-
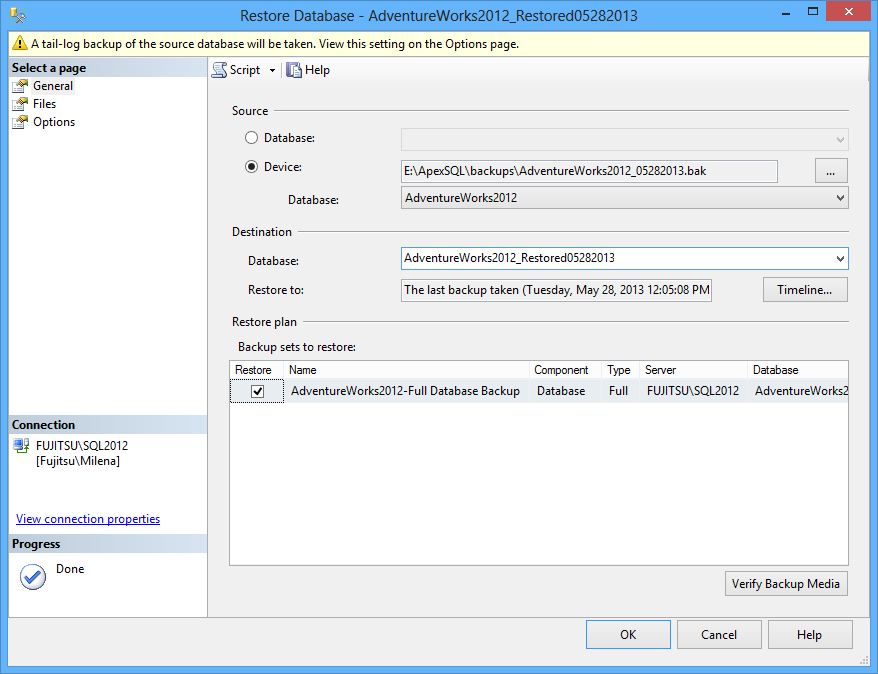
Take the old database backup and restore it on SQL Server
-
If you’re restoring it to the same SQL Server instance, make sure you specify a new name and path for the data and log files
- In the restored database, find the missing records. This is easy if all of them have been deleted from a single table. But if the records were deleted from multiple tables, and also fulfill specific requirements, this can be quite challenging. This step is not necessary, but it will help you recover the records if you know what you are looking for
-
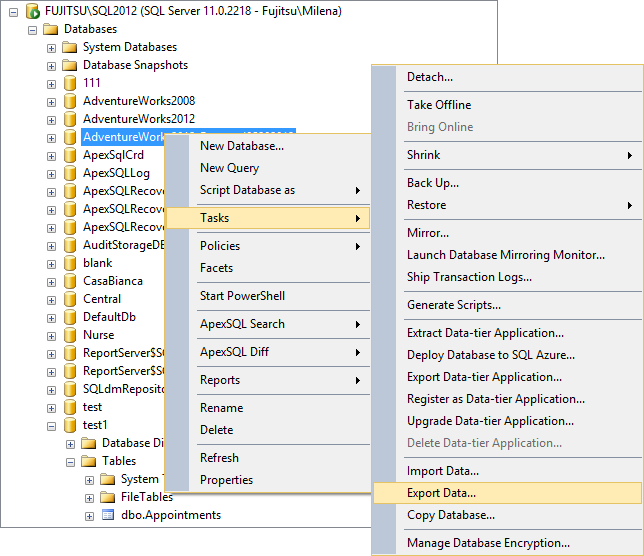
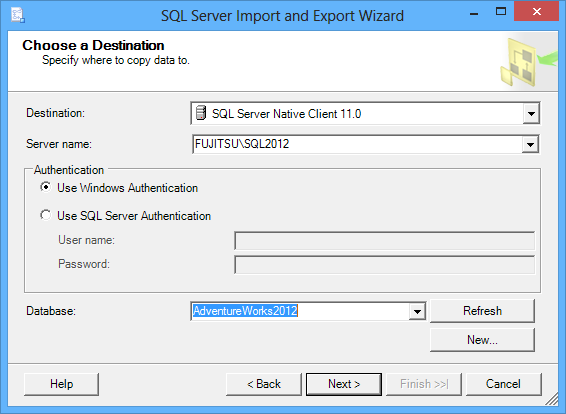
Script the records. Right click the database in Object Explorer and select Tasks > Export Data
-
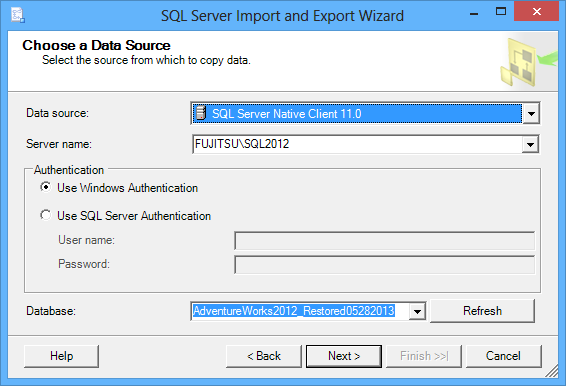
Specify the restored database as a data source and the original one as a destination
-
Click Next and you’ll get the following dialog
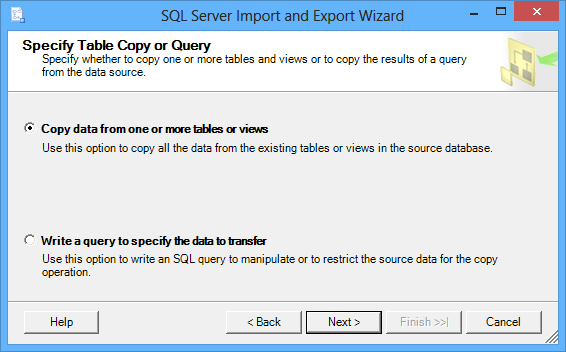
Although the option Write a query to specify the data to transfer looks more promising in a situation when the records from several tables are deleted using a specific query to filter them, it will not insert the selected records into their corresponding tables. All records will be inserted into a single table. This option doesn’t allow multiple result sets and only the first result set is inserted
If you go for this option:-
Specify the Select statement that returns the deleted records
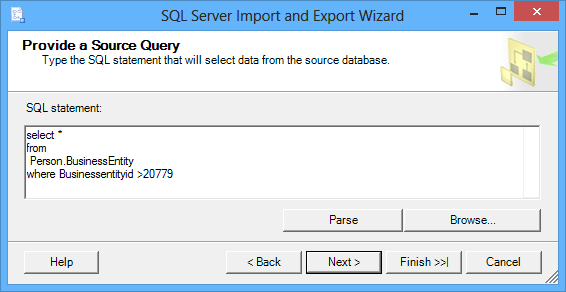
-
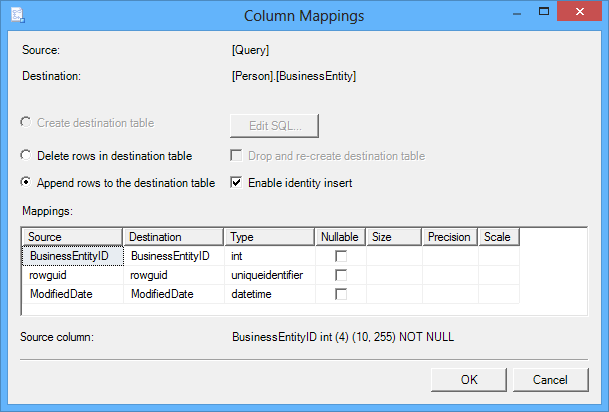
Specify the destination table. By default, a new table dbo.Query is set, so you have to change it to match the source table
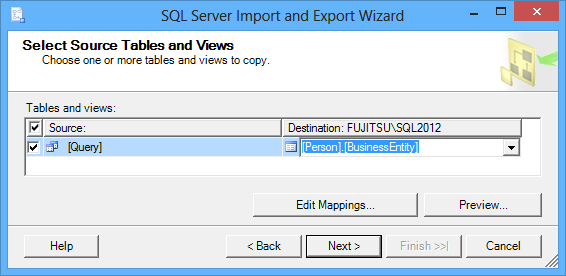
- Click Edit Mappings. Here, you can:
- Specify whether to drop and re-create the destination table. This option is disabled if a dependency will be broken
- Specify whether to enable identity inserts in the destination table. This is recommended to avoid script failure due to inserting into a read-only column
-
Specify whether to truncate the existing destination table
-
Click OK and complete the wizard steps. After the records are inserted, you have to repeat the steps a. through d. for all tables with deleted records

-
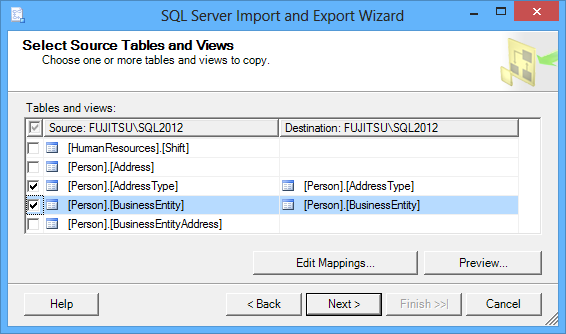
Another available option in SQL Server Management Studio Export data wizard is to copy data from one or more tables and views. You can specify several tables at once, but it’s not possible to filter the records
-
Select the tables from which the records have been deleted
-
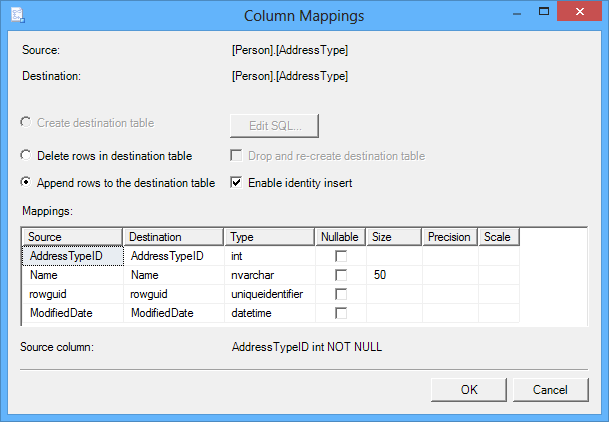
Check out the mapping for every table
-
Go through the wizard. After the records are inserted, if the destination tables are not empty, you might get an error report such as this one


Based on the examples shown above, the disadvantage of this method is that for multiple tables, it’s not easy to extract just the records you want to insert and to successfully insert them into the existing tables. The problems can be caused by violating primary and foreign keys, inserting duplicate data, etc. The tables with constraints cannot be dropped and recreated, so you cannot work around some of the problems this way
Use ApexSQL Data Diff
ApexSQL Data Diff is a SQL database comparison and synchronization tool which detects data differences. It can compare and synchronize live databases and native or natively compressed database backups and generate comprehensive reports on the detected differences
- Start ApexSQL Data Diff
- Select the database backup that contains the deleted records as a source
-
Select the online database as a destination
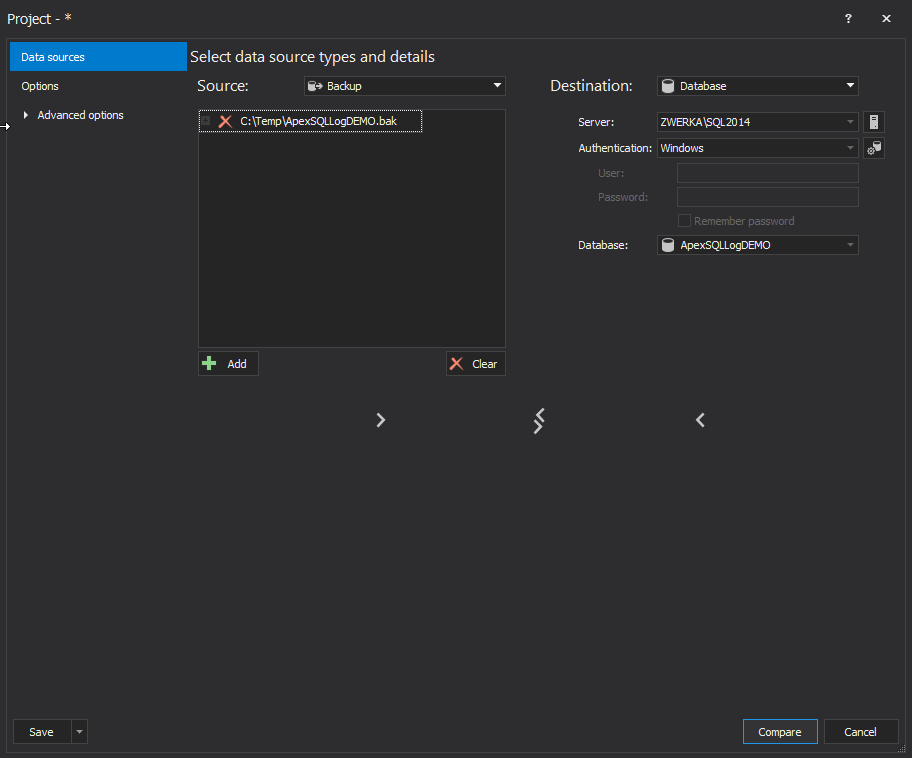
- Click Compare
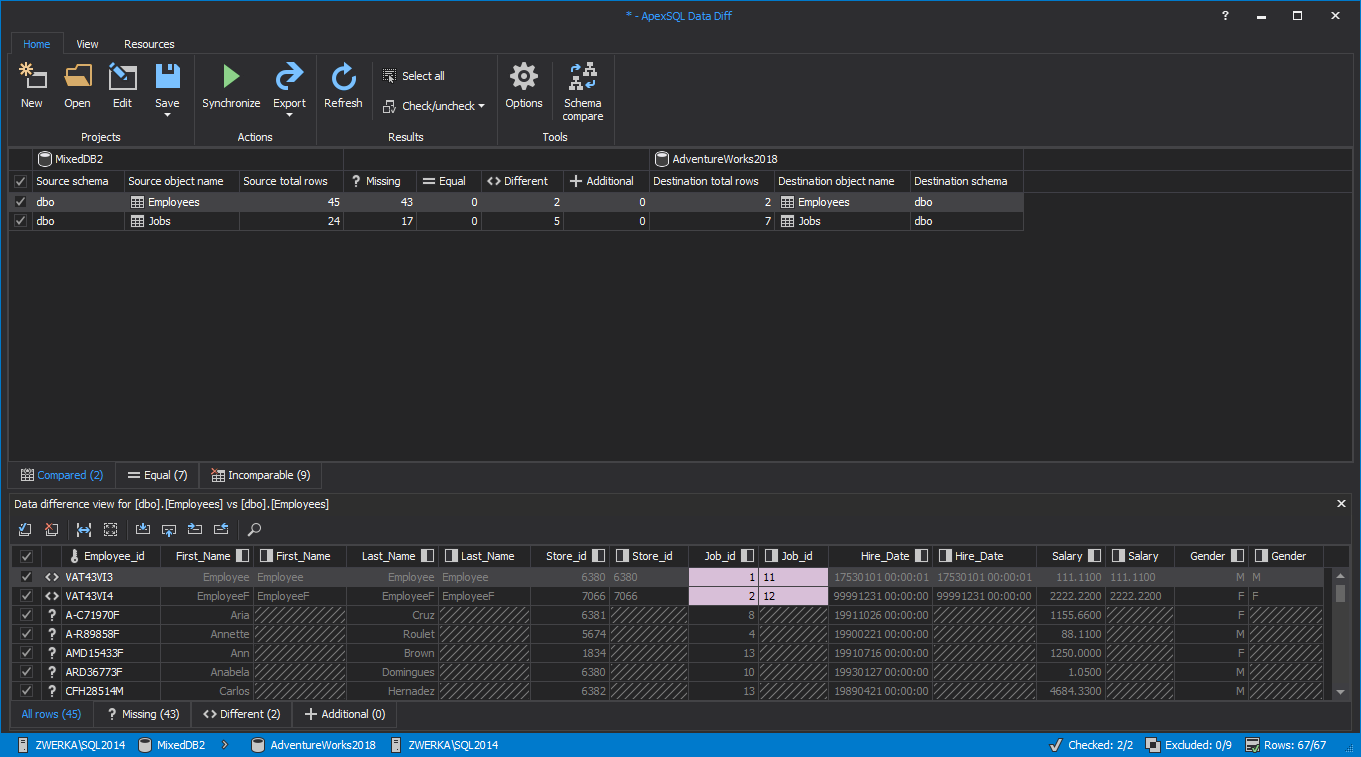
- The tables with different records are shown in the ApexSQL Data Diff main grid
-
Select the tables you want to synchronize. The selection is available on a column level also, so if there are some records you don’t want to synchronize, just uncheck them
-
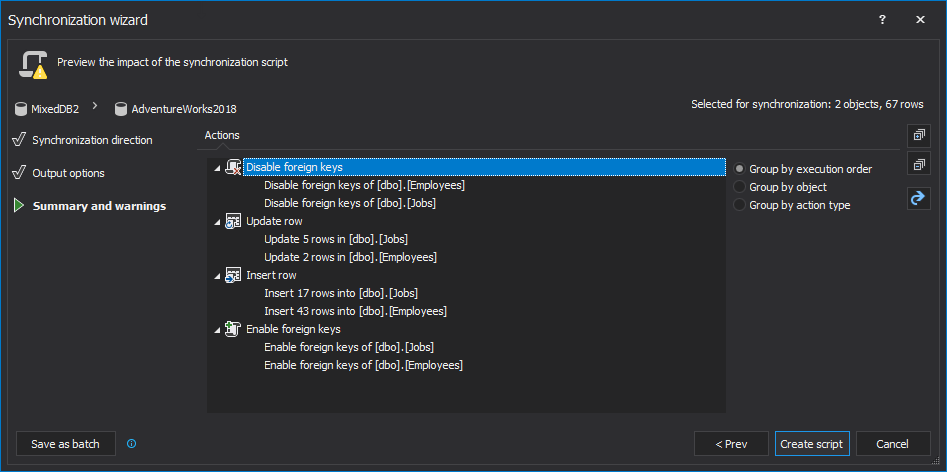
Click Synchronize on the menu and go through the steps in the Synchronization wizard


-
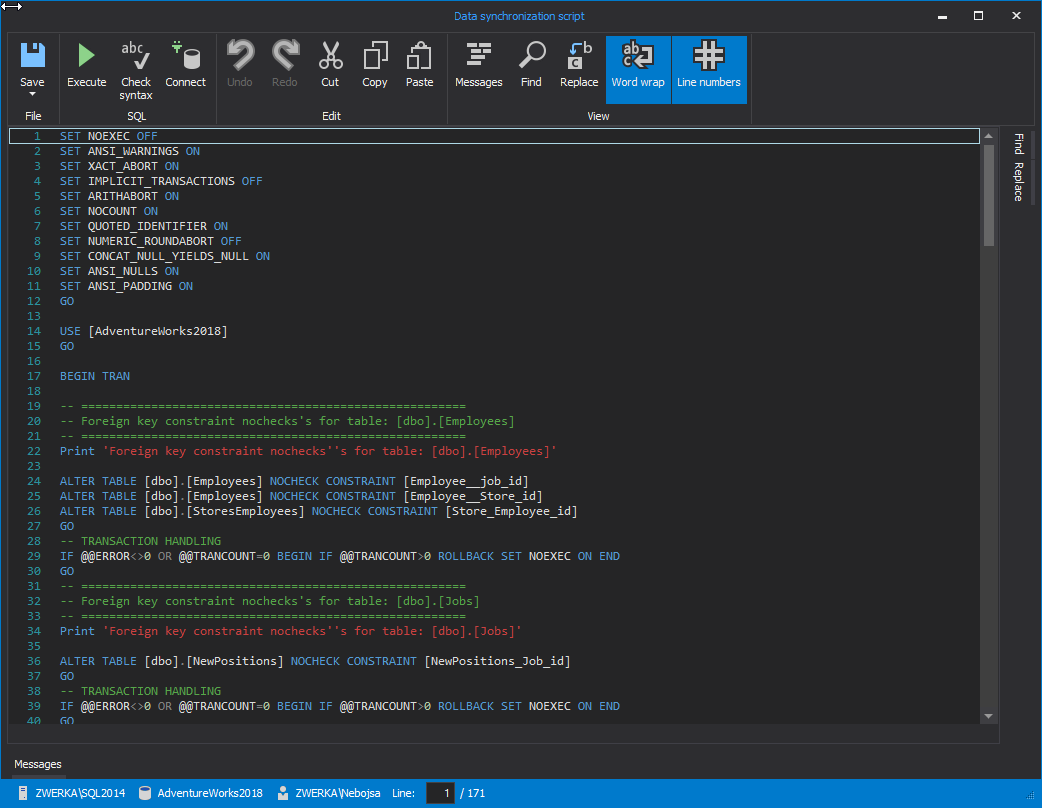
When the script is created, execute it. All the missing records will be inserted into the live database, without any identity or key violation problems
Use ApexSQL Recover
Another tool that can recover deleted records from a database backup is ApexSQL Recover, a SQL database recovery tool which recovers deleted, truncated, or dropped data. Besides reading the database backups, it reads online transaction log, transaction log backups and detached transaction logs.
To read the deleted records from a database backup using ApexSQL Recover:
- Start ApexSQL Recover
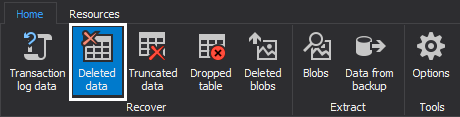
-
Select the Recover delete data option
-
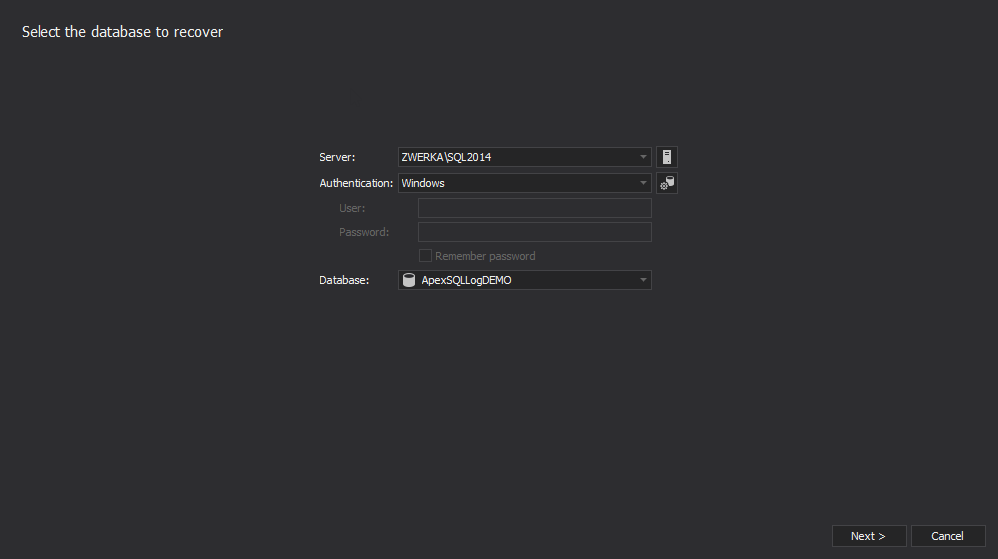
Select the database from which the records have been deleted
-
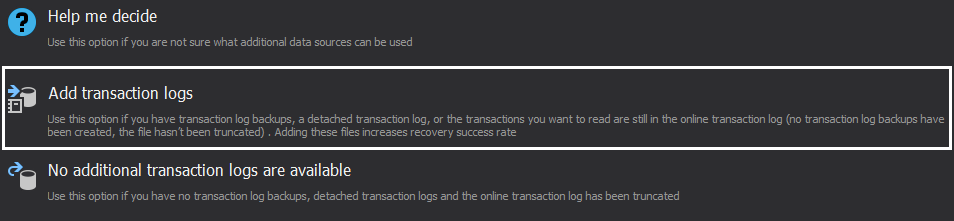
Select the Add transaction logs option
-
Besides the online transaction log, ApexSQL Recover automatically lists all data sources – transaction log backups and database backups created for this database. All of these will be analyzed. If you would like to add additional transaction log or database backups and a detached log file, click Add file button.

-
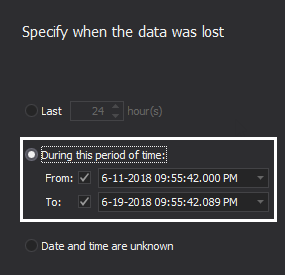
If possible, specify the time when the records were deleted
-
Select all the tables or just the specific ones

-
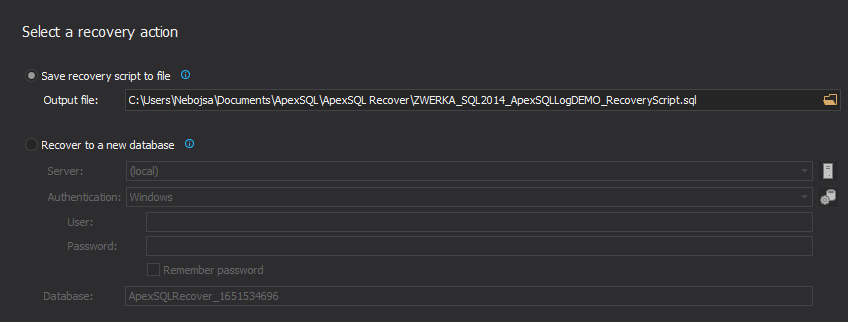
Opt to create a recovery script and change the path for the recovery script if you want and click Recover. Alternatively, recover data directly to a new database and browse or process recovery data from there
-
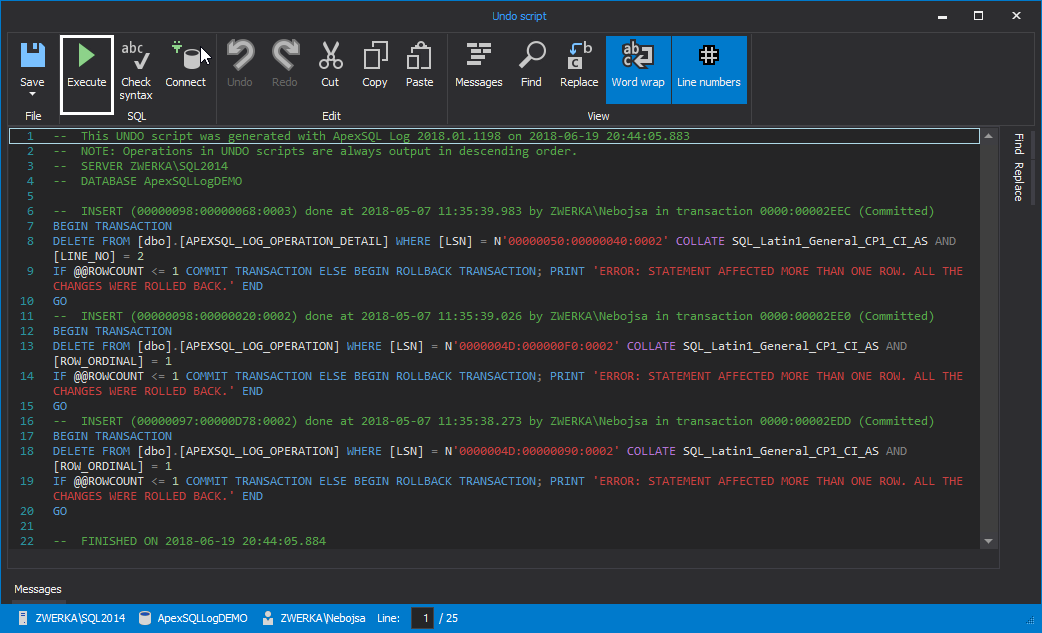
Recovery process will shortly complete and inform user on the recovery results. Created script can be accessed, investigated or even changed by clicking on the View script link which opens the script in the integrated editor.
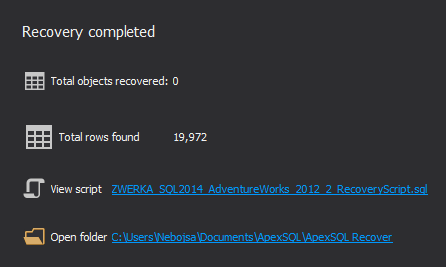
-
To complete the recovery process, click on the ‘Execute’ button and script will be executed against the database and lost data will be completely recovered
Even if you don’t have a database backup that contains the deleted records or a full chain of transaction log backups, ApexSQL Recover can still help, as it can read the deleted transactions from the database online data file – the MDF file. When a record is deleted from a table, it’s not immediately deleted from the MDF file but just marked to indicate that the space where the record was stored is now available. After a while this space will be reutilized, but in the meantime the record can still be retrieved. That SQL Server’s behavior is used by ApexSQL Recover
- As before,Start ApexSQL Recover
- Select the Recover deleted data option
- Select the database from which the records have been deleted
-
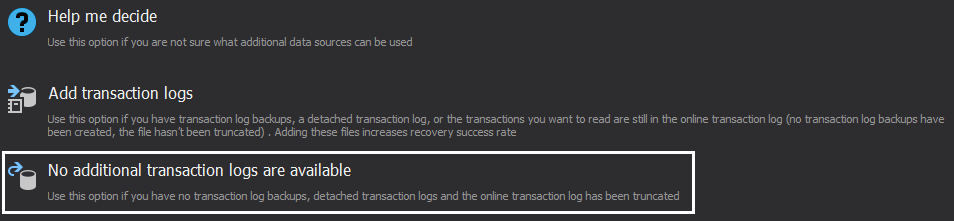
This is where we part ways with previous process. This time select the No additional transaction logs are available option
- As before, select all the tables or just the specific ones
- Choose recovery type (script or database), change the path for the recovery script if you want and click Recover
- After executing the recovery scipt, deleted data will be inserted back into your database.
Deleted data recovery has the highest success rate when you have all data sources necessary for a successful recovery, such as a full database backup with the deleted data. In this situation, you can choose among several scenarios, but not all of them are quick and error-proof. ApexSQL Data Diff provides a reliable and user-friendly solution for more complex recoveries, while ApexSQL Recover automatically finds and analyzes all available backups created for the database and can recover deleted data from transaction log files (online, backup or detached). If you have none of the data sources mentioned above, your only choice is to scrape the database data file and ApexSQL Recover can help there, too.
June 4, 2013


