


If only schema changes are made in the source control repository, a 3rd party tool – ApexSQL Diff can be used to perform the schema synchronization. ApexSQL Diff is a tool that can be used to compare and synchronize schema differences between live SQL database, source control repositories, database backups, script folders and ApexSQL snapshots. It can handle any dependencies, triggers, etc. and create an error-free synchronization script, while ensuring a database integrity.
To synchronize schema changes with ApexSQL Diff, the following steps should be taken:
- Building a database with latest changes from the source control repository using PowerShell and ApexSQL Diff. Learn more about it from: How to deploy changes directly to a SQL database from a source control repository.
-
Synchronize schemas from a built database from the source control repository with a QA database:
-
Run ApexSQL Diff
-
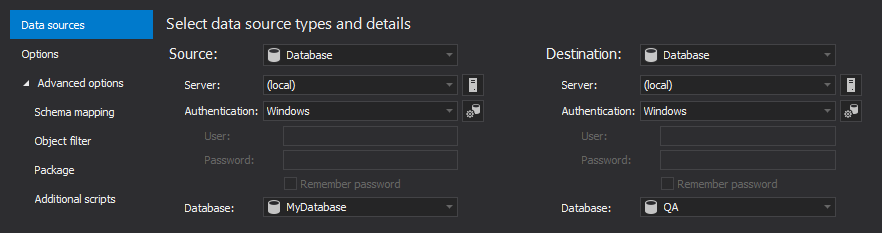
In the New project window, under the Data sources tab, select a built database from the source control repository as a source and a QA database as a destination:
-
Switch to the Options tab and set the following options to ensure error free synchronization process:
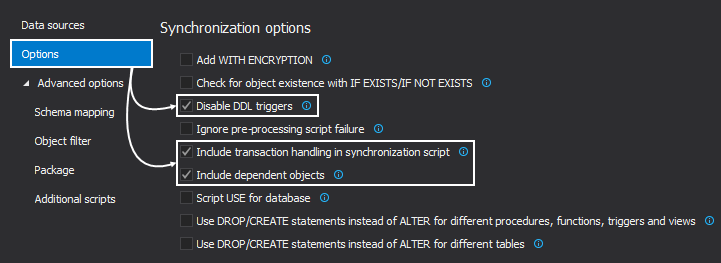
- Disable DDL triggers – DDL triggers that may cause issues during the synchronization are disabled and re-enabled once the synchronization is completed
- Include transaction handling in synchronization script – Error handling statements with Commit/Rollback commands, depending on the success/failure of the synchronization are added to the synchronization script
- Include dependent database objects – Dependent database objects will be included in the synchronization script, even if they were unchecked for the synchronization process
- After setting up the needed options, click the Compare button in the bottom-right corner of the New project window
-
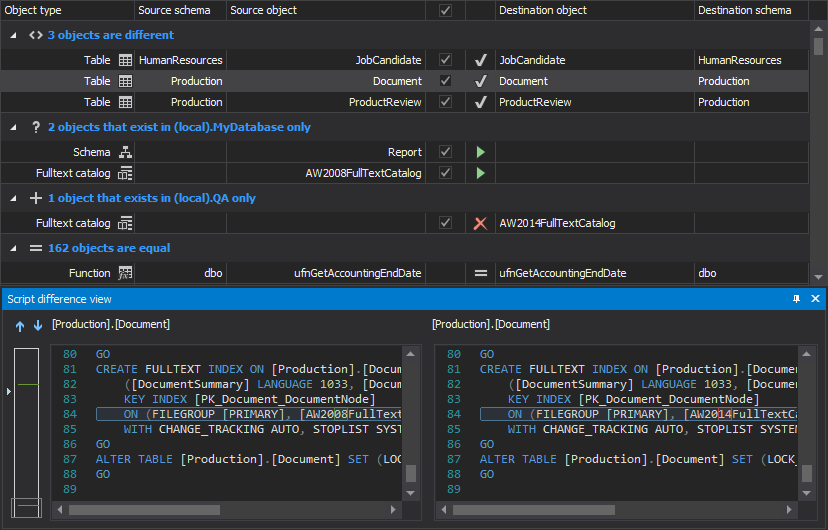
Once the comparison process is finished, compared objects will be shown in the Results grid, along with their differences below in the Script difference view panel:
-
Check all objects for the synchronization process and click the Save button from the Home tab in order to save all current setting to project file that can be used later for the automation:

-
Click the Synchronize button from the Home tab to initiate the Synchronization wizard:

-
The first step of the Synchronization wizard is to choose the synchronization direction. By default, it’s set to synchronize from source to destination
-
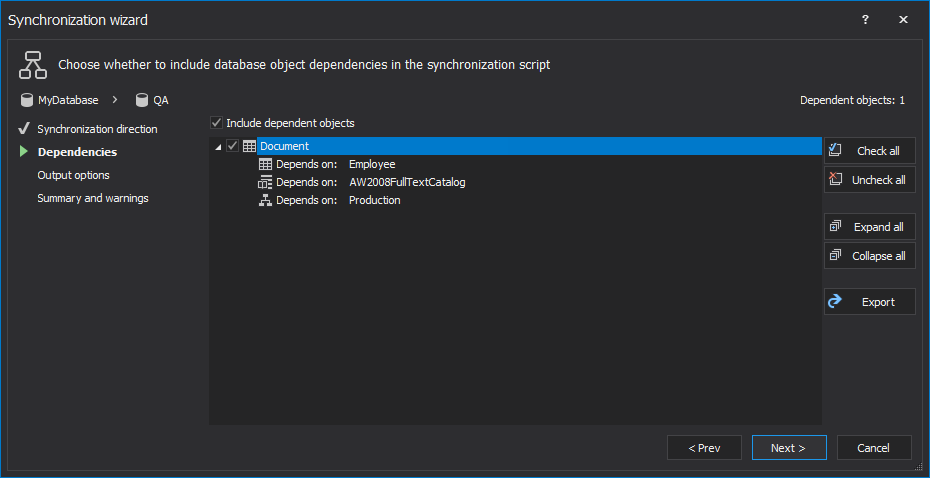
In the second step, ApexSQL Diff analyzes database dependencies and if dependent database object is found (which was not checked in the Results grid or it was already equal), it will be checked for the synchronization process as well:
-
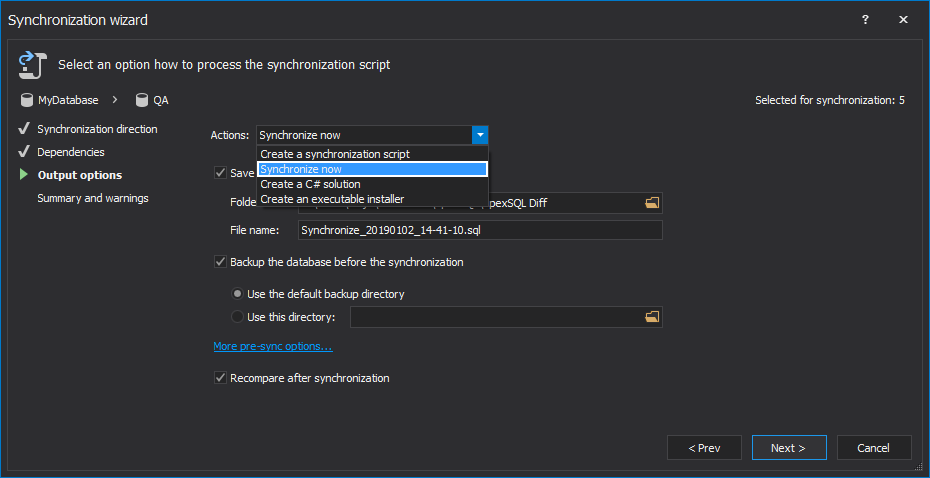
For the Output action in the third step, choose the Synchronize now action, to perform direct synchronization on a destination database:
-
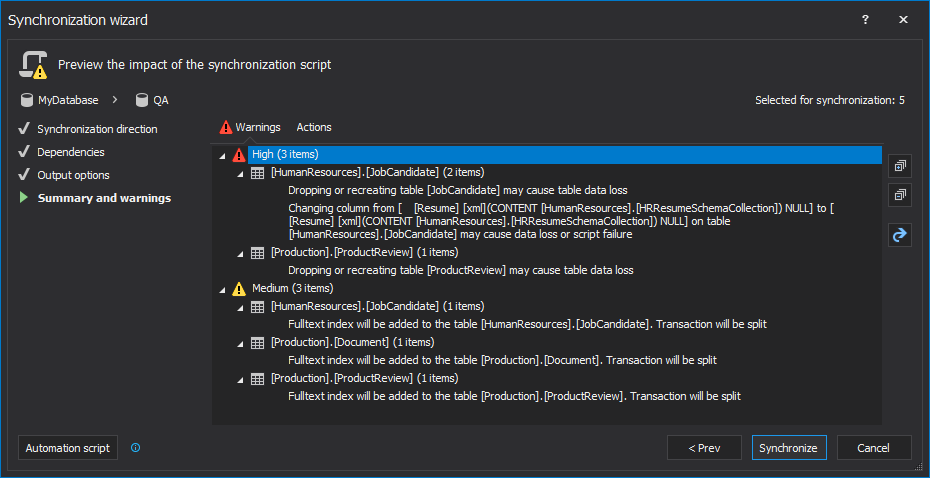
In the last step – Summary and warnings, in the Warnings tab, low, medium, and/or high warnings can be shown if there are any potential threat to the synchronization process. For example, dropping or recreating a specific table may cause table data loss or adding a Not null column to a table without default value may cause the synchronization script failure:
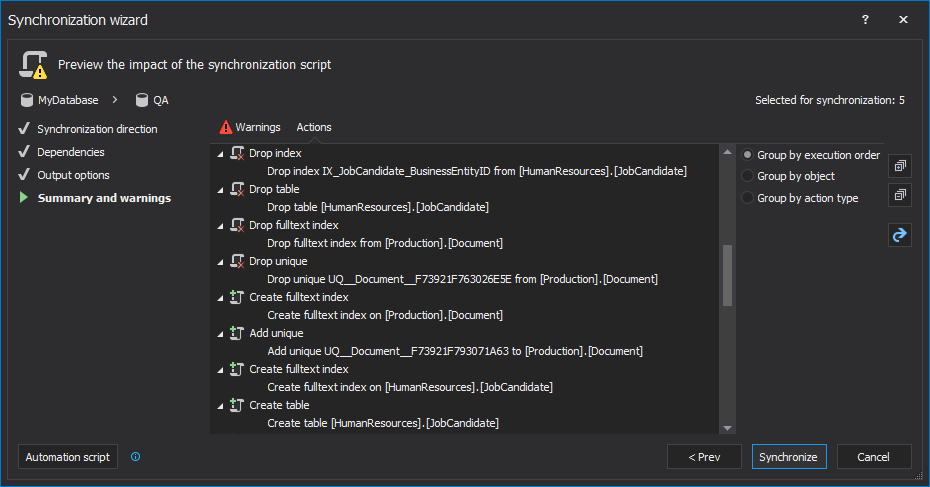
If there are no warnings, only the Actions tab will be shown, along with the list of all actions that will be performed in the synchronization script:
Options explanation:
Once everything is reviewed, click the Synchronize button in the bottom-right corner, to initiate the schema synchronization of a destination database
-
Run ApexSQL Diff
Automating the schema synchronization process
Since automating process for building a new database from a source control repository is explained in article: How to deploy changes directly to a SQL database from a source control repository, the part for schema synchronization of the new database with an existing QA database should be added to the sequence, in order to have the whole process for the sync step when there are only schema changes in the source control repository.
The part that should be added is:
|
# calling a 3rd party application |
|
|
ApexSQLDiff.com |
# the application’s path |
|
/pr:”SchemaSync.axds” |
# the path for the ApexSQL Diff project file |
|
/sync |
# executes the synchronization script |
|
/v |
# prints all messages in console |
|
/f |
# overwrites an existing build script |
|
/out:output.txt |
# redirects console output to specified file |
|
@echo ApexSQL Diff return code is %errorlevel% >> /out:output.txt |
# specifies a return code upon finished build process |
Find out more about ApexSQL Diff’s CLI switches from an article on this: ApexSQL Diff Command Line Interface (CLI) switches.
If for any reason, the synchronization process fails, due to the Transaction handling option, all changes will be reverted back and no changes will be applied to a QA database.
January 13, 2017


