


One of the challenges these days is how to pull the latest changes (of SQL objects) from the source control repository and deploy them into a SQL database. This process is particularly helpful in the CI workflow Build step, when developers want to build a SQL database from the committed changes in the source control repository, so they can test if their changes compromised SQL objects from the source control repository or they will be built successfully.
Problems
One of the possible problems that can be encountered while executing the deployment script are constraint and dependency errors. Also, a deployment script should take into consideration the same object types which depend on one another.
All of these possible issues must be avoided during the deployment script execution, so that creating a SQL database would be successful. There must be a mechanism in creating of the deployment script, which will drop triggers and constraints, order creating of SQL objects, and include any dependent SQL objects.
Solution
In this article, a 3rd party tool ApexSQL Diff will be used for achieving an error free deployment of changes from the source control repository to a SQL database and automation of that process through the PowerShell project.
ApexSQL Diff is a tool for comparison and synchronization of live SQL databases, backups, ApexSQL snapshots, script folders and source control projects. Also, it can allow to automate and schedule schema synchronization process, creating installer packages and to deploy changes directly to a database from the source control repository without dependency issues.
Since ApexSQL Diff is mainly a comparison and synchronization tool, it cannot create a database from scratch, so an empty database needs to be created manually or use the PowerShell project.
The following steps should be taken in ApexSQL Diff, in order to perform the Build step:
- Run a PowerShell project to create an empty SQL database or manually create it in SQL Server Management Studio
- Run ApexSQL Diff
-
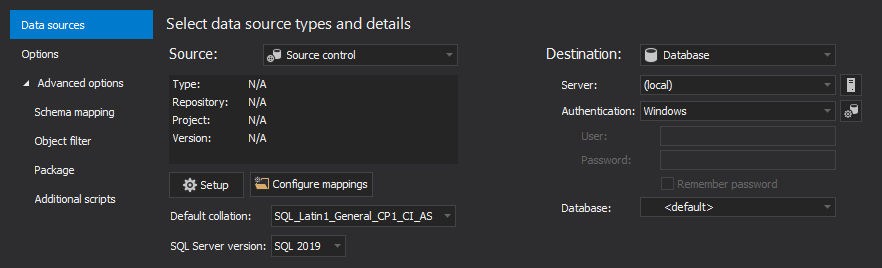
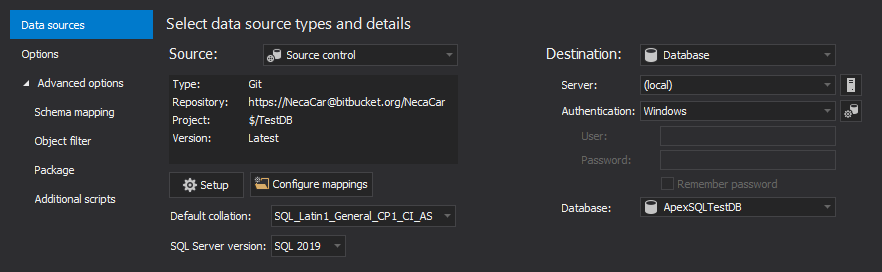
In the New project window, select Source control as a source and Database as a destination:
-
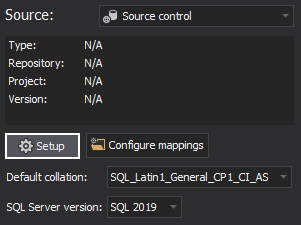
To configure the source control repository, click the Setup button:
-
The Source control wizard will be shown and its first step, where a source control system needs to be selected:

Since Git repository was used in previous article where all SQL objects are committed, the same will be used here.
-
After selecting a source control system, click the Next button and in the next System login step, please provide login information:

Use the Get latest option, so that latest changes would be pulled from the source control repository.
Additionally, the Get by label option can load the list of all labels for that source control repository and get the specific state (label) of the source control repository if needed:
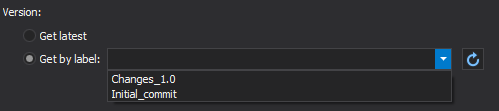
Find out more about labels from here.
-
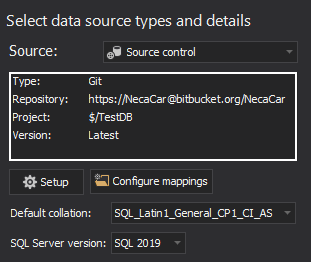
Once everything was set for the source control repository, click the Finish button that will close the Source control wizard and load all information in the New project window:
-
For the destination, select the new database created with the PowerShell project):
-
At this moment, a project file can be saved, by clicking the Save button in the bottom-left corner of the New project window so that all settings can be saved and when needed, everything can be loaded. Also, the project file can replace several switches while automating the process, later on in this article:

-
Since both data sources are set, click the Compare button in the bottom-right corner of the New project window to initialize the comparison process:

-
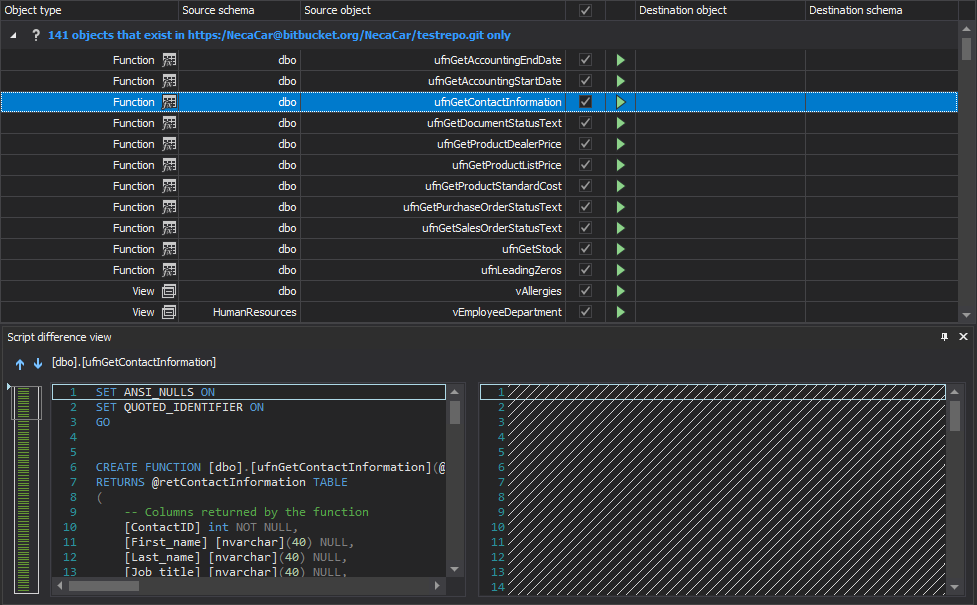
Once the comparison process is finished, compared SQL objects will be shown in the Results grid. Since a SQL database needs to be built with all SQL objects from the source control repository, check all SQL objects in the Results grid:
-
Click the Synchronize button, from the Home tab, to initiate the synchronization process:

- The Synchronization wizard will be started and in the first two steps, synchronization direction can be changed and all dependent database objects can be included. In this case, the synchronization direction should be as it is set by default (source -> destination) and dependent database objects option checked, so that any dependency issues during the synchronization process can be avoided
-
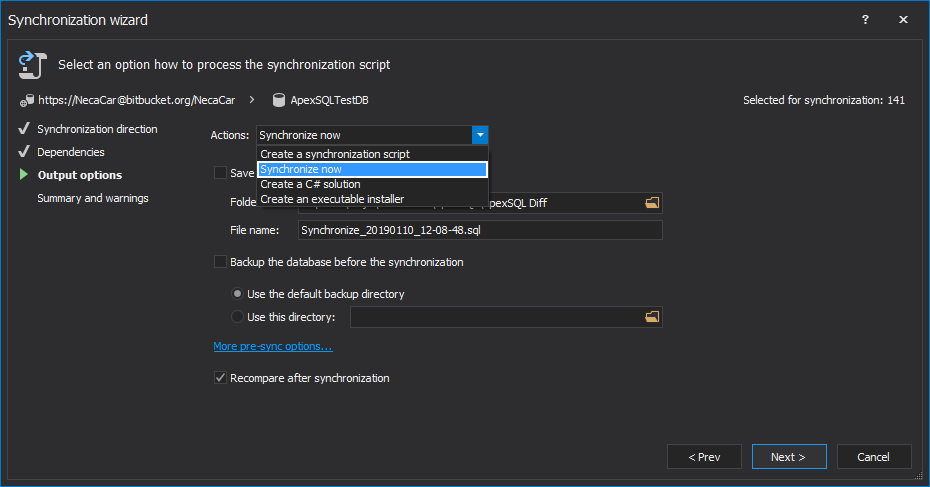
In the Output options step, of the Synchronization wizard, select the Synchronize now action to perform direct synchronization to a database:
-
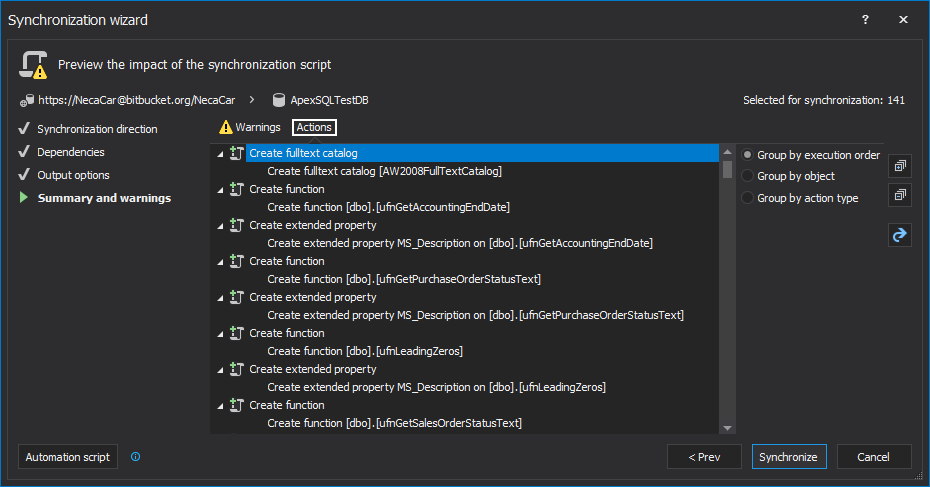
In the last step of the Synchronization wizard, as a part of the synchronization summary, Warnings and Actions will be shown. Warnings will provide information for specific objects, as in the below example:

In the Actions tab, execution actions will be shown and each action contains an explanation what will be done in the synchronization script. Actions can be grouped by: execution order, object, or action type. In below example, actions are grouped by object:
- After reviewing the synchronization summary, click the Synchronize button to execute the synchronization process
-
At the end, when the synchronization script is executed, the Results window will be shown with information about success or failure:
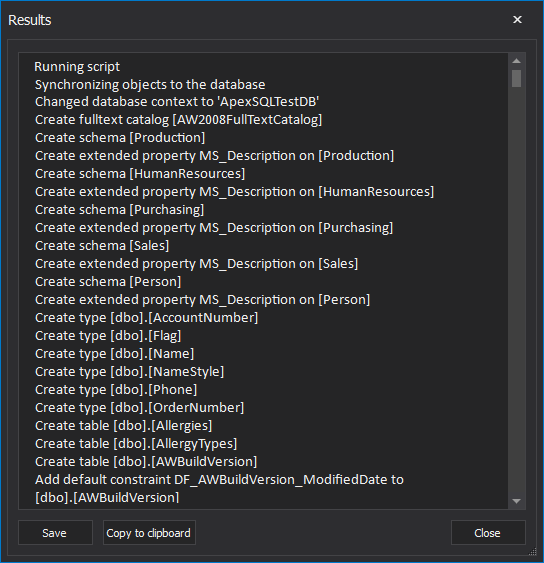
In this way, pulled SQL objects are “copied” on a newly created database and the Build step is finished.
Automating the process using ApexSQL Diff and PowerShell
Creating a PowerShell project for automating process using ApexSQL Diff, is similar to the one explained in the CI workflow Build step, using ApexSQL Build. The only difference is that ApexSQL Diff needs “help” in creating a database, as ApexSQL Build is doing that through its own build process.
Both tools take care of SQL object dependencies and creating SQL objects in the correct order to avoid any potential issues during the execution process.
The code for creating the PowerShell project, using ApexSQL Diff:
| #Creating a new database using the PowerShell project | |
| [System.Reflection.Assembly]::LoadWithPartialName(‘Microsoft.SqlServer.SMO’) | out-null | # loading assembly for executing commands below |
| $serverName = “SQLServer” $server = new-object (‘Microsoft.SqlServer.Management.Smo.Server’) $serverName $server.ConnectionContext.LoginSecure=$true; |
# specify server name |
| $db = New-Object -TypeName Microsoft.SqlServer.Management.Smo.Database -argumentlist $server, “MyDatabase” $db.Create() |
# create a new database |
| $db = $server.Databases[“MyDatabase”] $db.CreateDate |
# reference the database and display the date when it was created |
| # creating and scheduling a task. Learn more from here | |
| # calling a 3rd party application | |
| ApexSQLDiff.com | # the application’s path |
| /pr:ProjectName.axds | # the path of the saved project file |
| /v | # prints all messages in console |
| /f | # overwrites an existing build script |
| /out:output.txt | # redirects console output to specified file |
| @echo ApexSQL Diff return code is %errorlevel% >> /out:output.txt | # specifies a return code upon finished build process |
All of the above code must be in the same line and single quotation marks must around the CLI code for the called application.
The number of switches is reduced by using the saved project file. By using the project file, all passwords will be encrypted. Read more about it here
After executing the PowerShell project above, all messages of the application execution will be written to the output file and if the execution was successful, at the end of the output file the following will be shown:
Parsing dependencies in MyDatabase
Generating script
The script was generated successfully and saved to C:\sync.sql
The script was executed successfully
ApexSQL Diff return code is 0
If for any reason the execution fails, one of the other return codes will be provided.
April 27, 2016


