


It’s common knowledge that running database changes directly in production, without thorough testing first, should be avoided.
If there are enough resources in the environment, there would be at least one testing and one production SQL Server instance. However, that introduces another challenge. When everything is set up in the test, and runs smoothly and as expected, how can it easily be applied to the production instance?
Synchronizing several objects can be done manually, but applying multiple, complex changes to a live, high transaction database is something that can start an avalanche of problems, if not properly tested and executed.
What to do if wrong changes were applied to the production database, or if something had gone wrong and ended up with the messed-up production database and the incorrect object schemas in the test database. How to compare SQL schemas, and more importantly, how to safely synchronize them?
To compare and synchronize in any of the scenarios describes above, here is what can be done:
-
Compare the database objects in the production and test databases, using a SQL script such as the following one:
SELECT
       (SELECT TOP 1
           name
      FROM TestDB2.sys.schemas WHERE
           schema_id
           =
           D1O.schema_id) AS Schema_Name,
       D1O.name AS Object_Name
  FROM
       TestDB2.sys.syscomments D1C
       INNER JOIN TestDB2.sys.objects D1O
       ON
       D1O.object_id
       =
       D1C.id
       INNER JOIN TestDB.sys.objects D2O
       ON
       D1O.name
       =
       D2O.name
       INNER JOIN TestDB.sys.syscomments D2C
       ON
       D2O.object_id
       =
       D2C.id
WHERE
       D1C.text
       <>
       D2C.text;
There are various SQL scripts with different approaches that can be used to compare database object schemas. What they all have in common is that they use system objects.
The disadvantage of SQL scripts like this is that it doesn’t compare all object types, it treats object definition only as text and it compares only objects with exactly the same names. So, it cannot be used to compare the tables, Customers and tblCustomers, for example. Also, the system object structure has to be well known.
-
Once the different objects are found, synchronize them.
The easiest scenarios are to use an Alter script for the object or drop the object and recreate it using the object DDL script. These methods are applicable only if there are no dependencies.
For tables, all records have to be stored first, and then drop and recreate a table using the generated script:
-
Run SQL Server Management Studio
- In Object Explorer, expand the Databases node
-
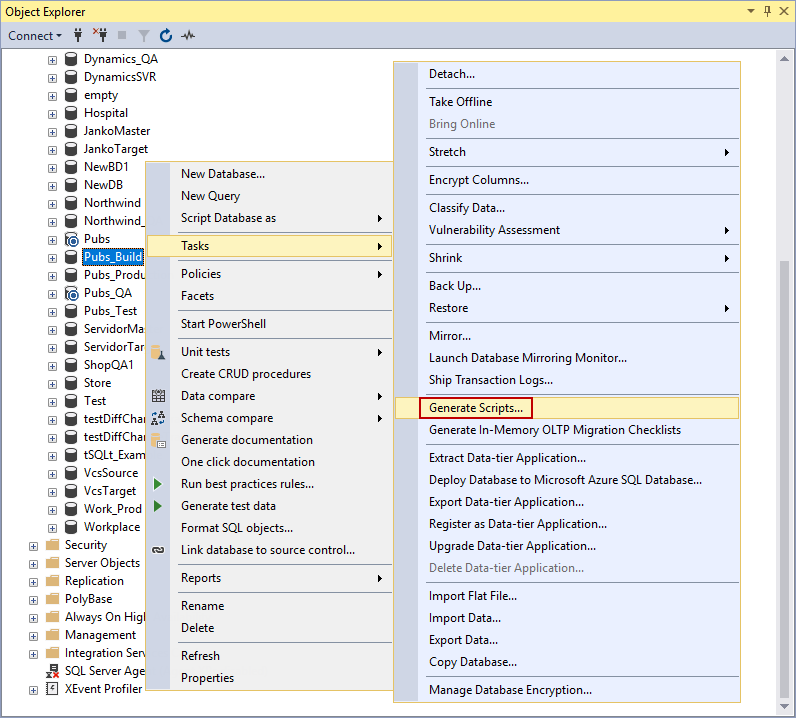
Right-click a database, open the Tasks sub-menu -> Generate scripts:
-
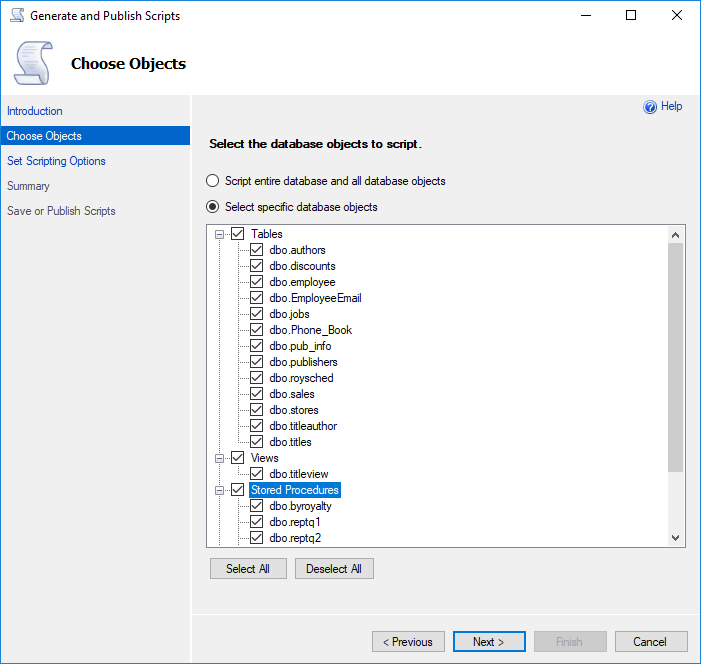
In the Choose objects tab, select the objects to script:
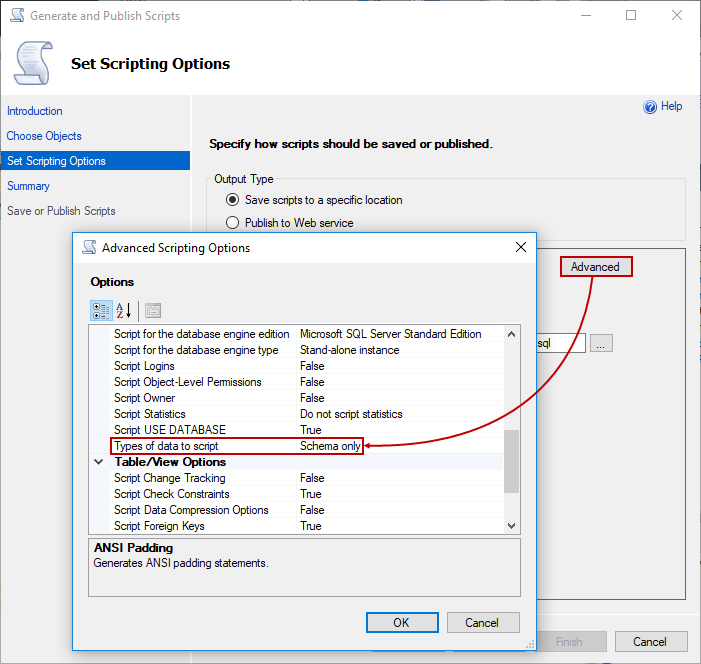
- In the Set scripting options tab, click the Advanced button and make sure the Types of data to script option is set to Schema only:
Besides the described disadvantages, the manual synchronization method is not recommended as it:
- Doesn’t handle object dependencies. Dependencies are easily overlooked, dependent objects are not scripted, SQL is not executed in the correct order. When SQL is executed without recreating all parent objects first, SQL will fail
- Is time-consuming – finding all different objects and creating synchronization SQL for them takes a lot of time. If developers didn’t document each and every change to a detail, this is close to impossible
- Error prone – huge databases with a large number of objects are not easy to maintain nor is keeping track of all changes manually. They usually involve complex dependencies which increase the problems manual synchronization brings
Instead of synchronizing databases manually and risk making a mess on the production instance, use SQL database compare tool ApexSQL Diff.
ApexSQL Diff is a SQL Server database comparison and synchronization tool which detects differences between database objects and resolves them without errors. It generates comprehensive reports on the found differences and can automate the synchronization process between live databases, backups, snapshots, script folders and source control projects.
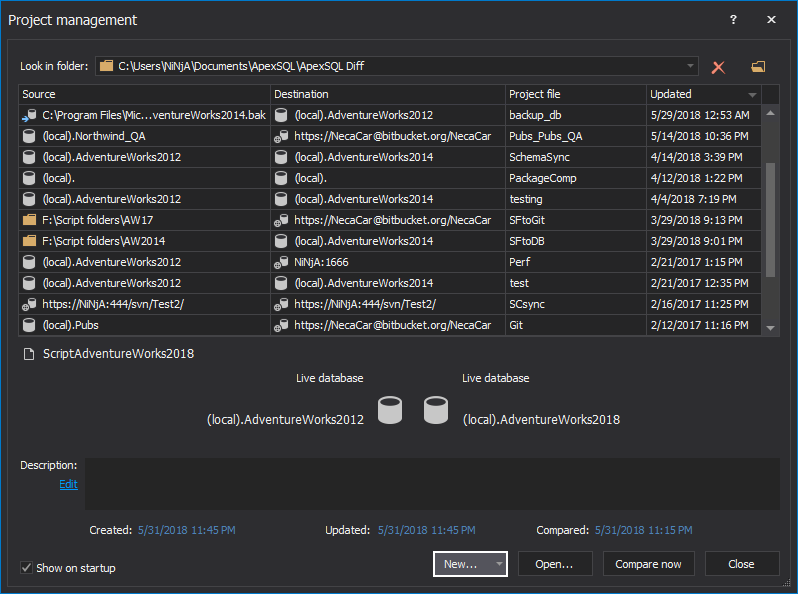
Follow these steps to set up the automation for the schema synchronization process:
- Start ApexSQL Diff
- Click the New button in the Project management window:
-
On the Source side of the Data source tab:
- Select Database from the Source drop-down list
- Specify the SQL instance with the test database from the Server drop-down list
- Specify the authentication method for that SQL instance (and a valid set of credentials if SQL Server authentication is chosen)
- Specify the test database name in the Database drop-down list
-
On the Destination side of the Data source tab:
- Select Database from the Destination drop-down list
- Specify the SQL instance with the production database from the Server drop-down list
- Specify the authentication method for that SQL instance (and a valid set of credentials if SQL Server authentication is chosen)
-
Specify the production database name in the Database drop-down list:

Note: Check the Remember password option, if using SQL Server authentication, as the CLI won’t be able to connect to the source and/or destination data source, unless a password is specified as a switch in the CLI.
- Click the Compare button in the bottom-right corner of the New project window once everything is set
-
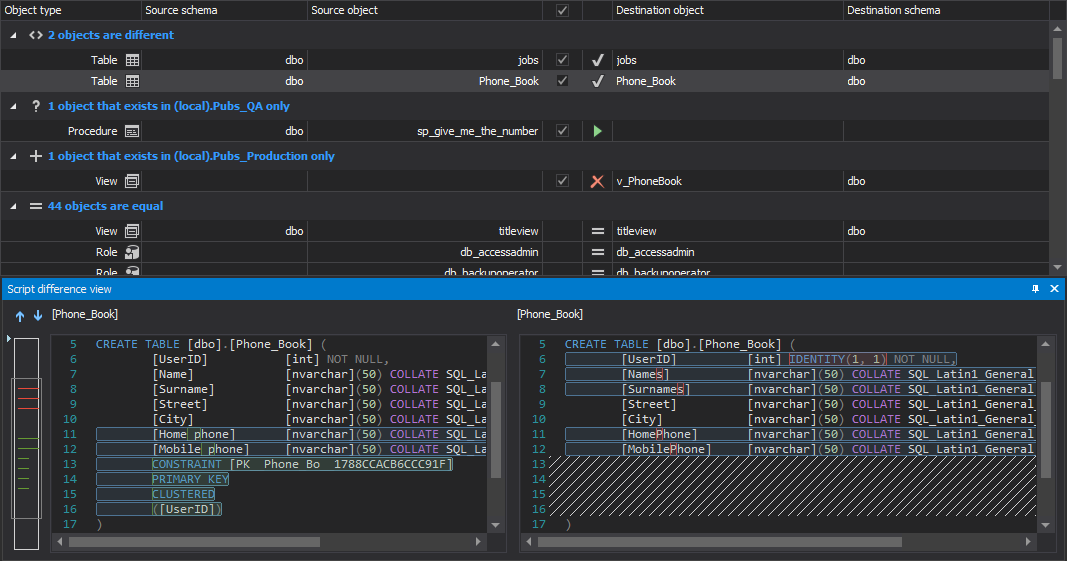
After the comparison process is done, select objects from the Results grid that will be included in the synchronization process:
-
Click the Save button, from the Home tab, to save the project:

The saved project file will be used later for automating the process.
-
Click the Synchronize button from the Home tab, to initiate the Synchronization wizard:

-
Select the Synchronize now action in the Output options step:

-
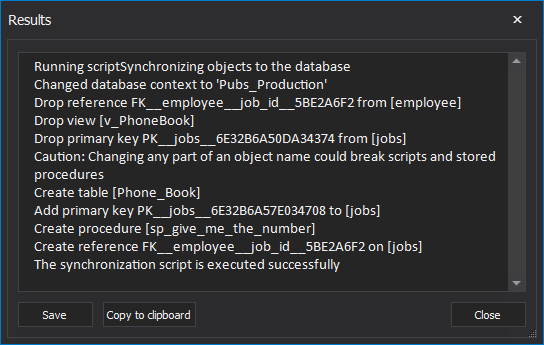
Once everything is set up, click the Synchronize button in the bottom-right corner of the Synchronization wizard
- After the synchronization is finished, the Results window will be shown:
Automating schema sync process
Since the first synchronization was successful and the project file was created, the automation of process can be done by creating a PowerShell script.
In this example, we used SQL Server authentication and the login password is encrypted in the saved project file. Learn more about ways of handling login credentials.
#application’s location and its parameters
$diffLoc   = "ApexSQLDiff"
$diffParams = "/pr:""MyProject.axds"" /sync /v /f"
Next, the command that will call ApexSQL Diff and execute its parameters, is provided:
#initiate the schema compare and sync process
(Invoke-Expression ("& `"" + $diffLoc +"`" " +$diffParams))
Additionally, the “no differences detected” return code can be utilized in this PowerShell script, so that before each schema synchronization, comparison will be initiated and if there are no schema changes, the job will go back to sleep.
Scheduling schema sync process
Once the PowerShell script is created and saved, it can be easily scheduled in one of the several ways. Learn more about ways of scheduling ApexSQL tools.
There is no need to worry about database synchronization any more. ApexSQL Diff will compare all database objects, check for dependencies and script them along with the objects, make sure the scripts are executed in the correct order, and create a full database backup before the synchronization. All this can be scheduled to run unattended.
April 4, 2013


