


The challenge
As a DBA considering version controlling a database, there are a lot of challenges to setting up the team with software to check in changes, to manage the development environment (shared or dedicated models) and set the rules of the game – locking vs not locking etc. But before committing to this fully, a potentially preliminary stage would be to set up a centralized system, where the database was automatically committed to source control each night. This could be done by a single person and wouldn’t require developer participation or even knowledge.
The advantages of this approach are that it is quick and easy to set up, inexpensive but it ensures full change monitoring and complete versioning of all changes. This provides versioning, monitoring, and even rollback, with no effort, once the job is set up and run.
The basic solution
One approach would be to script the database each night, in its entirety, to file, regardless of whether it changed or not. The database could be scripted as individual objects to source control and you can check how to do it in this article: How to automate batch SQL object scripting and committing to source control.
This would function as a poor man’s versioning system, but with no means of real change monitoring. Also by scripting everything, it would create a potentially large amount of redundant check-ins that would make reviewing object change history to isolate changes difficult. There would be no easy way to isolate specific changes without going through individual objects and comparing them.
The advanced solution
Alternatively, using just ApexSQL Diff, a third-party tool for comparing databases, we can set up a simple yet powerful system to monitor an unlimited number of databases, that can be connected to via the workstation client that ApexSQL Diff is installed on.
This system will poll the database nightly and compare it to the latest version in source control and/or a schema snapshot of the latest version. Changes can be detected, isolated and versioned, and a report can be created (only if changes were made that day). The presence of the report would have indicated changes, so it could easily be checked each morning.
This system could easily scale and for multiple databases, a summary report could be created indicating the changes across the full spectrum of databases. This could even be set up to email changes easily, precluding the DBA from even having to manually check a folder for the presence of a summary report.
In addition to monitoring, we can automatically check in the changed objects into source control, or all of the objects, as part of a schema snapshot, if any of them were changed.
The final pieces of our solution will create:
-
An HTML schema change report to file (only when changes were detected). See this article on schema change reports in ApexSQL Diff
-
a schema snapshot to file as well, which will allow us to:
-
Fully document that version, with ApexSQL Doc
-
Compare that version to any other database version or label in source control. with ApexSQL Diff
-
-
a date stamped label in source control, that we can revert to at any point in the future, or compare to other labels
Setting the baseline
We’ll use ApexSQL schema snapshots to set our rolling baseline for change detection
We’ll snapshot the schema of a database that we want to audit to create a change baseline. We’ll save it with the file name template [Server name].[Database name]. [Server name].[Database name].MMddyyyy.axsnp e.g. MyServer.MyDatabase.11142016.axsnp to a folder under the ApexSQL Diff app directory designated to act as a repository for our monitoring output called /baselines:
#region Editable variables
$rootFolder        = "C:\Monitor"
$databasesTxtPath  = "C:\Monitor\Databases.txt"

$diffLocation      = "C:\Program Files\ApexSQL\ApexSQL Diff\ApexSQLDiff.com"
#endregion

foreach($line in [System.IO.File]::ReadAllLines($databasesTxtPath))
{
#region Non-editable variables

    $server   = ($line -split ",")[0]
    $database = ($line -split ",")[1]

    $snapshotsLocation = CheckAndCreateFoder $rootFolder -Baselines
    $reportLocation    = CheckAndCreateFoder $rootFolder -Reports
    $logLocation       = CheckAndCreateFoder $rootFolder -Logs

    $srvCleanName   = ($server -replace "\\","")
    $today          = (Get-Date -Format "MMddyyyy")
    $latestSnapshot = FindSnapshotByDate $snapshotsLocation $srvCleanName $database

    $snapshotName = "$srvCleanName.$database.SchemaSnapshot_$today.axsnp"
    $reportName   = "$srvCleanName.$database.Report_$today.html"
    $logName      = "$srvCleanName.$database.SnapshotLog_$today.txt"

    $exportSettingsSnapshot  = "/s1:""$server"" /d1:""$database"" /sn2:""$snapshotsLocation\$snapshotName"" /export /f /v"

     #if no previous snapshot found, create snapshot for current state and skip the rest
    if($latestSnapshot -eq $null)
    {
         #create snapshot of current database state
        (Invoke-Expression ("& `"" + $diffLocation +"`" " +$exportSettingsSnapshot))
    }
For instructions on how to create this snapshot manually see this article: ApexSQL Diff – Exporting SQL data sources.
Next we’ll create an example PowerShell script to compare the database with the snapshot. We’ll assume Windows Authentication for database credentials:
#region Editable variables
$applocation = "ApexSQLDiff.com"

$CompareSettingsSnapshot = "/s1:""ServerName”" /d1:""DBName"" /sn2:"" MyServer.MyDatabase.MMddyyyy.axsnp"" /f /v"

(Invoke-Expression ("& ""$applocation"" $dbVsCompareSettingsSnapshot"))
For this change system to work in real life, though, we need to reset the schema snapshot as a new baseline each time there was a change. So, our script will automatically create a schema snapshot if none exists for that server, and replace it with a newer version each time, if there were changes.
Checking for differences
Our script will open ApexSQL Diff and execute a comparison between the database and the schema snapshot baseline, then check for differences. If the comparison ran without errors and differences were detected a value of 0 will be returned (If no differences were detected 102 will be returned and the script will abort).
If differences were detected, we will want to proceed and execute our monitoring steps:
-
We’ll output the results of the job as a log of the process. (If the job failed this will contain the error code indicating failure reason)
-
We’ll create a new time stamped schema snapshot baseline file [Server name].[Database name].MMddyyyy.axsnp
-
We’ll create a schema change report and save to file with name [Server name].[Database name]. Report_MMddyyyy.html
(Invoke-Expression ("& ""$diffLocation"" $compareSettingsSnapshot"))
    $returnCode = $LASTEXITCODE

    #differences detected
    if($returnCode -eq 0)
    {
 		 #create snapshot of current database state
        	(Invoke-Expression ("& `"" + $diffLocation +"`" " +$exportSettingsSnapshot))
    }
    #there are no differences (return code 102) or an error occurred
    else
    {
        #  #remove the newly created report, since no differences are detected
        if(Test-Path "$reportLocation\$reportName")
        { Remove-Item -Path "$reportLocation\$reportName" -Force:$true -Confirm:$false }

    }
Once this is built and is working, we’ll schedule it to run every weeknight at midnight.
Now, our efficient DBA can come into work each morning and simply check the file folder for any change activity, by looking for recent summary reports. Clicking on the report will provide information on the changes. There is no reason to sort through files etc. because new files will be added to the folder only if there were changes.
Email notification
To make this process even better, we can add a step to email the change report to a distribution list, so everyone can see the previous day’s changes. This can also be configured to be sent if the job terminated with an error. Otherwise no report will be sent, and there will be no reason to even manually check the folder. In this example * gmail will be used:
function SendMail($subject, $text, $attachment)
{

    $SecurePassword = "PaSSw0d" | ConvertTo-SecureString -AsPlainText -Force
    $from = "fromnoname@gmail.com"
    $to = "tononame@gmail.com"
    $Credentials = New-Object System.Management.Automation.PSCredential ("fromnoname ", $SecurePassword)
    $smtpServer = 'smtp.gmail.com'


     $mailprops=@{
        Subject = $subject
        Body = $text
        To = $to
        From = $from
        SmtpServer = $smtpServer
        UseSsl = $true
        Port = 587
        Credential = $Credentials
    }

        try
        {
            if($attachment -ne $null)
            {
                Send-MailMessage @mailprops -ErrorAction:Stop -Attachments:$attachment
            }
            else
            {
                Send-MailMessage @mailprops -ErrorAction:Stop
            }
            return "Mail succesfully sent`r`n"
            #or return $true
        }
        catch
        {
            return ("Send mail failed: " + $_.Exception + "`r`n")
            #or return $false
        }

}
Upgrading to use source control
Once this process is established, the next step would be to set up a repository in source control, and in addition to cutting the schema snapshot to file, the job can also update the repository with changed objects.
Assuming that a repository has been set up and all objects initially committed (Please refer to this article: Automatically script SQL Server table data and object schema directly to source control, on how to accomplish this), let’s go ahead and modify our job to use the repository as the baseline, instead of the last schema snapshot, and if there are changes, to automatically synchronize the repository by committing new and changed objects (as well as deleting objects that have been removed by the database):
$syncSettings    = "/s1:""$server"" /d1:""$database"" /sct2:$scType /scu2:""$scUser"" /scp2:""$scPass"" /scr2:""$scRepo"" /scj2:""$scProj"" /v /f /scsc:$today /scsl:""Label_$today"" /sync"

#sync with source control
(Invoke-Expression ("& `"" + $diffLocation +"`" " +$syncSettings))
A month in the life our new process
Now that we have put in the hard work of building our system, let’s fire it up, generate some results and have some fun:
Day 1
Let’s check our results folder … but there is nothing in there except a summary log. Ok, let’s open it and see the results. Ooops – the job ran but our software wasn’t activated and the trial period had ended. A quick call to ApexSQL Sales and that is fixed.
Day 2
Hmmm … nothing but the processing log. I can see that the timestamp of the log has changed and size has increased. Let’s pop it open to see what happened.
Based on the summary info and return code, I can see that the job processed but there were no database changes so no further action was taken.
Day 5
5 days of checking this sleepy database and nothing. I’m going to implement the email alert so I don’t have to waste time checking unless there was some action.
Day 10
I got an email alert –great. So now that I’ve been alerted, I’ve checked the folder contents and I see a newer timestamped schema from 12:01 AM along with a schema change report.
Looking at the report I can see a few changes were made to existing stored procedures. Great. I feel in the loop now.
Day 11
I get another email and check the folder again. Again I see a new snapshot and also a new report. When I open the report now I see a lot of changes. Seems like our developers are now working on database development as part of the new version. Since there will likely be a lot of changes, I’m going to turn the switch and start pumping changes to a new source control repository the team set up.
Day 15
More emails, snapshots, and reports. But what is great is that I know all of these changes are being automatically added to source control so we have a complete version history of everything.
Day 31
Ooops – the database broke related to the Employee module – new employees can no longer be added without throwing an error. Looking at the summary report, I see a lot of changes so isolating the problem is a bit of a challenge. I’ll take ApexSQL Diff and compare the previous two labels, the current one from Midnight last night (which represents our current database) and the one immediately before it. As the problems were reported today, it seems something in the last changeset would have been responsible.
I’ve isolated the only change that could be related to the Employees table, the AddEmployee stored procedure. In ApexSQL Diff I can quickly compare the current and previous versions to look for anything untoward but I don’t see anything that would cause an error.
Going to my source control client I can check the version history of that object and notice several new versions uploaded in the last few days. Comparing version pairs of this object, walking backward in time, one pair at a time, allows me to identify the likely cause that was introduced several days ago but was only noticed when that module started to be tested yesterday. Wala! With a minimum of effort, I was able to isolate the problem.
Better yet, I can get the script from the last working version of the proc along with the notes of the exact change to the devs, so the change can be reverted and the proc can be updated in a way that doesn’t break the database. Always nice.
Additional variants
Now that our system is up and running, we can consider some further modifications and enhancements.
In this example, we have used default comparison and synchronization options by default. To customize the comparison, you can set up ApexSQL Diff manually and configure the comparison to your exact specifications, then save it as a project.
Now, we’ll amend our script to allow the ApexSQL Diff CLI to consume the project, and by doing so the comparison, synchronization and reporting will all be dictated by the options you specified:
$compareSettingsSnapshot = "/pr:””MyProject.axds”” /sync /f /v"
We can continue to use the project for our settings for future examples, although we may use different Servers and Databases.
Scaling
Our monitoring and auditing job can easily be scaled to multiple databases. We have already made it extensible by including the Server and Database in the snapshot and report names.
To execute this for multiple databases we would want to create a list of Servers and Databases, have the script iterate through them, capture these names as variables, pass them as part of login, but also use them to form the file name, from our template:
foreach($line in [System.IO.File]::ReadAllLines($databasesTxtPath))
{
    $server   = ($line -split ",")[0]
    $database = ($line -split ",")[1]
}
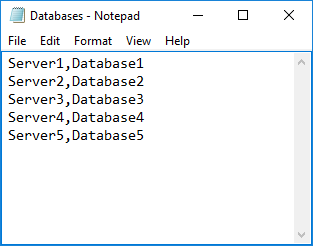
The “Databases.txt” file should contain the name of servers and databases as below:
Putting it into action
Here is the script in its entirety. It can also be downloaded from this link
To run this on your system:
-
Configuration:
-
Use the Snapshot.ps1 PowerShell script to create
-
If you want to store your schema change audit in source control (otherwise the script will just create change reports to file) use the SourceControl.ps1 PowerShell script and:
-
Create a source control repository on a Git hosting service
-
Script your database objects and commit initial versions to this repository, by comparing your database (source) to the source control repository (target) and synchronizing them – see this article for instructions: How to keep a source control repository updated with the latest SQL Server database changes
-
-
-
Create a file called Databases.txt that includes a comma delimited file of Servers and Databases that you want to audit
-
Put the above PowerShell script(s) in the ApexSQL Diff application directory
-
-
Changes:
-
Make a change to a stored procedure, or any other object, in your database
-
-
Running:
-
Double click on the PowerShell script(s)
-
Review the output
-
New date stamped processing log in the App dir/log sub directory
-
New date stamped schema snapshot in the App dir/baselines sub directory
-
New Schema change report in the App dir/reports sub directory
-
If you opted to use source control, open the source control client and look at the version history for that object and you should see the change
-
-
-
Scheduling and automating:
- If you like what you see, schedule this for unattended execution nightly
* Note: If the script doesn’t work, go to your gmail account and under the Connected apps & sites tab, turn ON the Allow less secure apps option:

Downloads
Please download the script(s) associated with this article on our GitHub repository
Please contact us for any problems or questions with the scripts.
January 10, 2017


