


There are many opportunities, before, during, and even after to guard against potentially fatal actions that may damage or destroy data, like executing an Update or Delete statement without a Where clause. Such a fatal action guard can be implemented in different ways and at different times, relative to the incident, for example, before it to prevent it from happening in the first place, or after, to reverse an action that has already been executed.
Before
The best way to create a fatal action guard to manage inadvertent data loss is to prevent the script from even being created in the first place, let alone executed. If there is a programmability object e.g. a stored procedure that may contain such fatal code, the problem needs to be cached before the object is added to production.
One way is to implement checks as part of a continuous integration and delivery process. These checks would review all code for any particular bad SQL code smells, and report violations prior to the code/commits being approved for production.
Such a Review step can be implemented as part of a continuous integration pipeline, with ApexSQL Enforce, with two rules, in particular, designed to detect and alert on fatal actions.
The first such rule is “Missing Where clause in Delete statement”. This rule is part of the pre-installed rulebases:
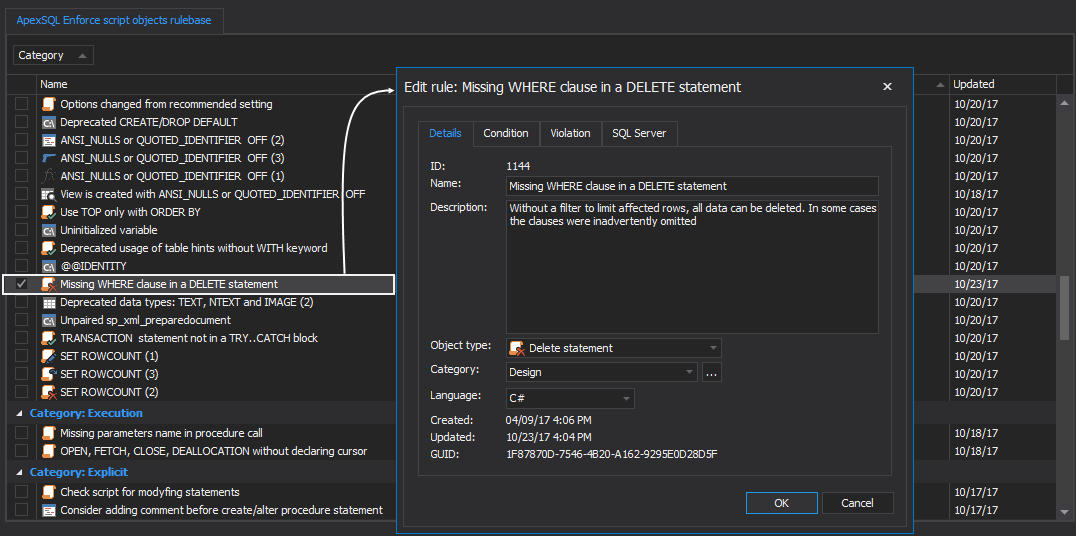
At its core, this rule is searching for statements that don’t have a Where clause and is set to target the Delete statements object.
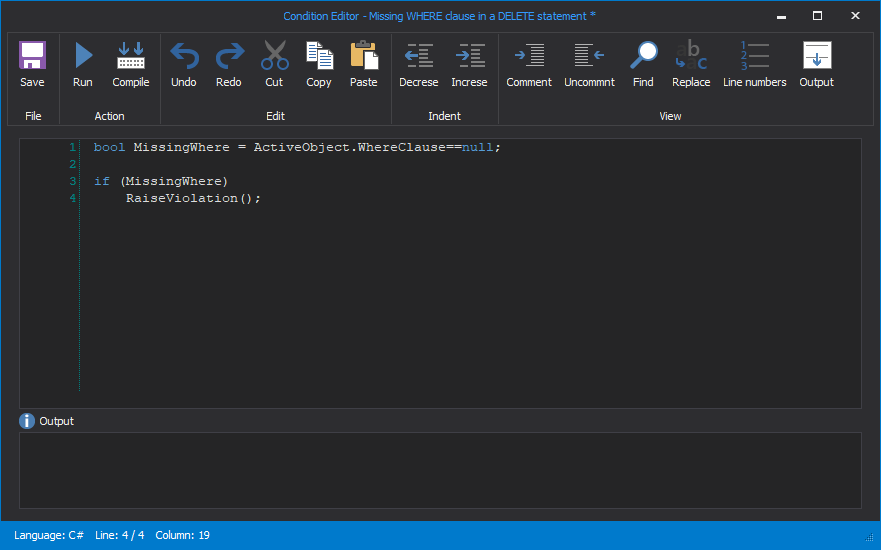
The first part of the condition is searching for Where clauses:
bool MissingWhere = ActiveObject.WhereClause==null;
The second part is set to raise violation if the MissingWhere is missing:
if (MissingWhere)
{
RaiseViolation();
}
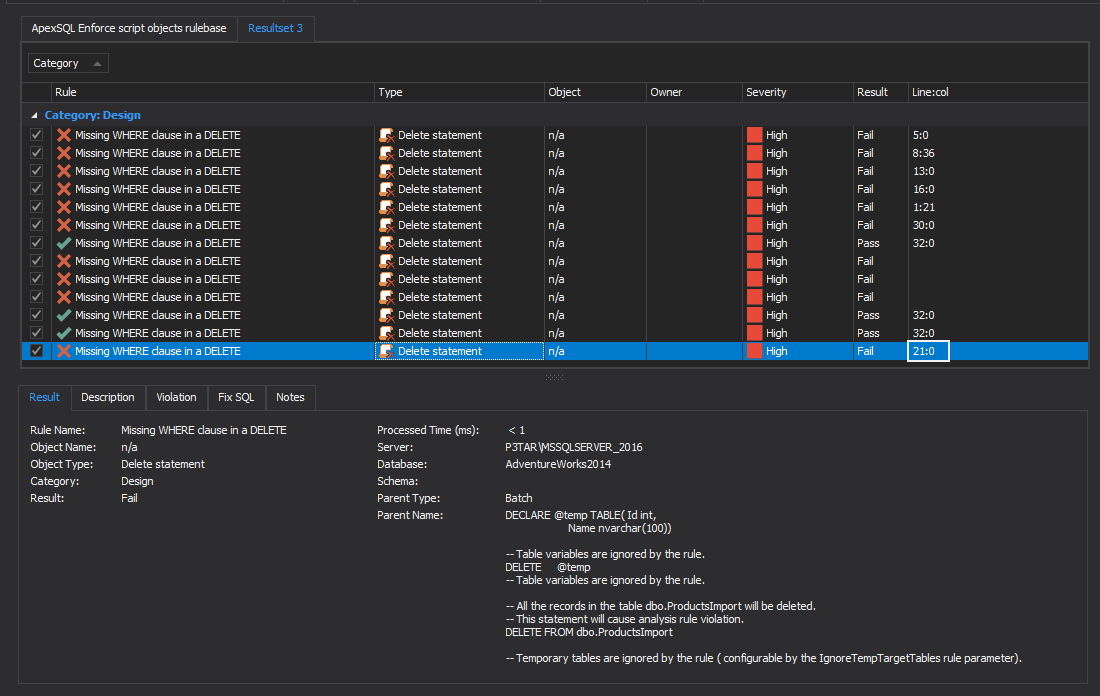
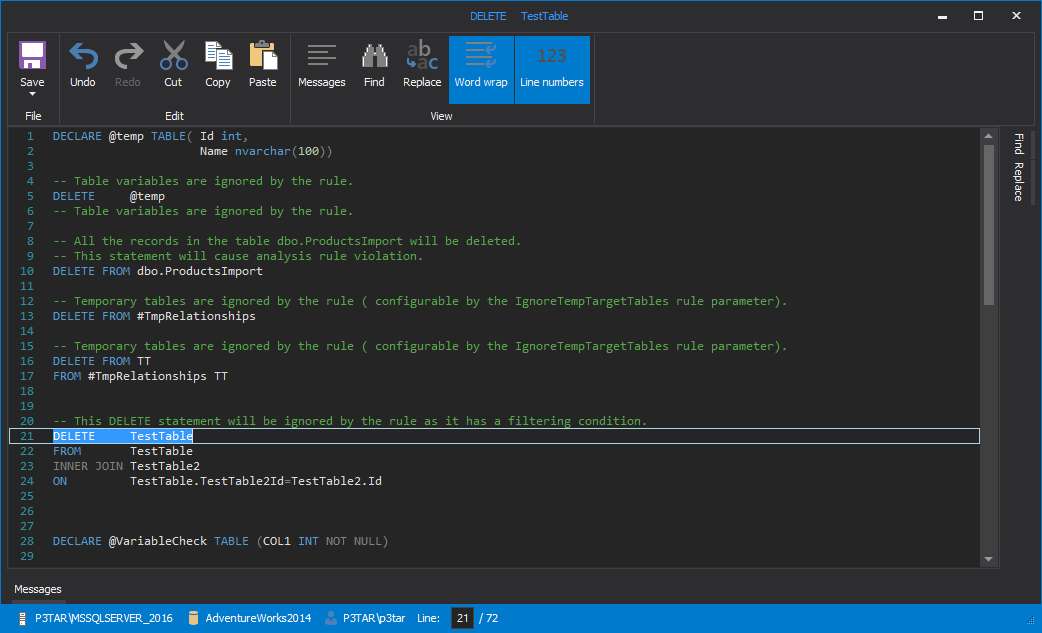
After a successful execution, ApexSQL Enforce will show the result summary with a detailed result set list with each statement in the script. The line:col column will show the exact spot where the violation is raised and makes it easier to review the script in the DDL viewer:
The second rule is the “Update without Where clause” and can be found in the same rulebase. As the name says, this rule is set to raise violations on Update statements without a Where clause. The condition for this rule is basically the same, with the only difference that the rule is set to target Update statements objects.
SSMS and Visual Studio integration
These checks can be moved forward in the development process, by integrating ApexSQL Enforce directly into SSMS or Visual Studio. That way as soon as the code is written, it can be immediately reviewed. Host integration is planned for ApexSQL Enforce R2.
Check-in policies and enforcement
Although this offers a great opportunity to catch bad code, it relies on the developer to manually execute these checks and to not forget. A fatal action guard that checks code on the actual check-in to source control, thus rejecting the check-in based on best practices violations, is a great way to keep bad code out of source control (and well away from production) and good code clean. By preventing the code from even being checked into source control, the threat is neutralized well before it even gets into a CI pipeline, let alone a database.
TFS offers check-in policies currently. See the article: How to utilize Team Foundation Server check-in policies for more information. Integration of this feature is planned for ApexSQL Source Control as well.
During
That is all well in good, but for developers and DBAs who live life on the edge and make changes directly to production, such pre-boarding checks won’t help. In this case, having a point-of-time fatal action guard to prevent inadvertently executing potentially fatal SQL code can be a lifesaver.
ApexSQL Complete, add-in for SSMS and Visual Studio offers a feature, to accomplish just that. Execution alerts exist to alert the user when they are attempting to execute an Update or a Delete without a Where clause.
This will not only alert the user to a potentially harmful action but also allow a quick, tactical retreat before the deleterious code is executed.
Execution alerts can be used as fatal action guard in real-time. The T-SQL code in the query editor is being analyzed right before the execution and compared against a so-called user-defined set of “rules”. If any of those rules are met, the mechanism triggers an alert in form of a warning message presenting a condition that might cause a problem in the future. It is up to the user to either proceed with execution or to abort it, leaving the database state unchanged.
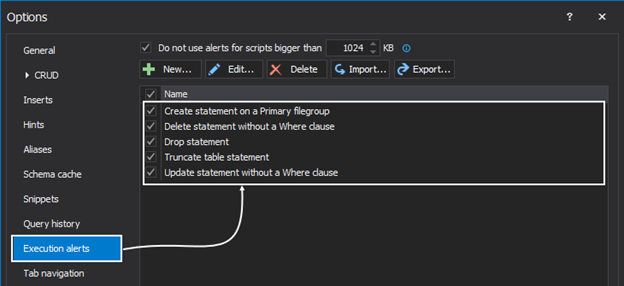
From the ApexSQL Complete main menu, click the Options command, and in the newly opened window select the Execution alerts tab. Notice that the Execution alerts comes with five predefined rules which are some of the most common mistakes DBAs make in a daily work:
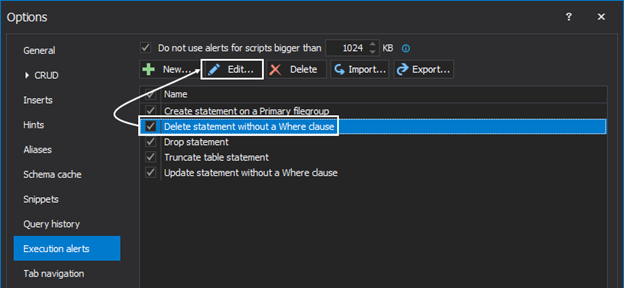
By default, all five rules are active. New rules can be created and/or edit the existing ones to meet the needs. To edit set of rules for an existing execution guard, simply select it from the list, and click the Edit button:
This will open the Edit alerts window in which there are three columns: Type, Condition, and Value:
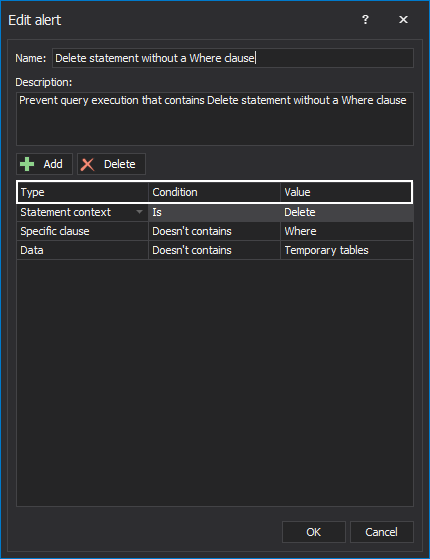
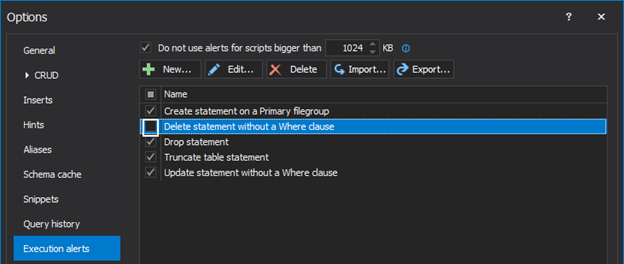
Each column has a drop-down list which represents a condition. All three columns combined make a rule. The user can combine conditions on multiple rows. If some rule is unnecessary, the user can either delete it or simply uncheck it and it will no longer be active:
To create a rule from scratch, use the New button. This will open the Create rule window in which the user can specify the Name and Description of a rule. From the Type, Condition, and Value columns it is up to the user to set the conditions using the drop-down boxes:
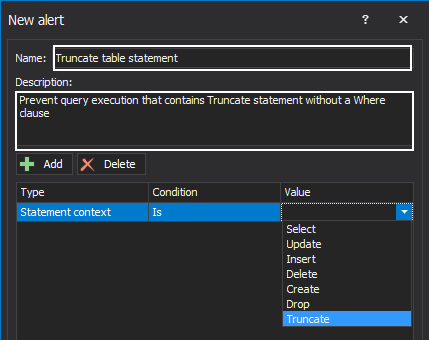
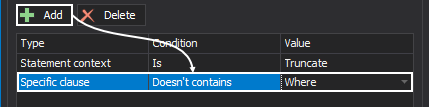
Use the Add button inside this window to add a new “line” of rules. The Delete button removes the entire row of conditions:
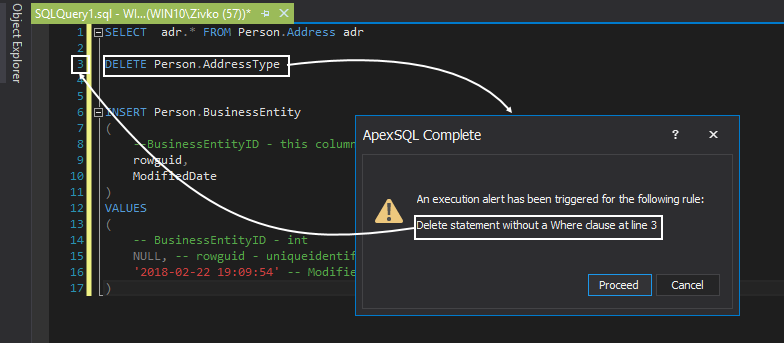
So, let’s see the Execution alerts in action and how this feature can be used as a fatal action guard in a simple Delete statement. Note that the Delete statement is without a Where clause, and execution of this query would delete every row in a table. When the query is executed, the Execution alerts analyze the query chronologically and look for any rules defined to guard accidental data loss/modification. If any of them are met, this will trigger an execution alert and prevent this action from happening. The warning message presents information to the user which execution alert is triggered and on which line in the query editor:
This use case scenario is covered by one of the predefined rules, but new ones can be created that are best suited in a daily job.
Multiple execution rules can be triggered for one query. If this is the case, the Execution alerts will list multiple rules that have been triggered in a single warning alert.
For more information on SQL coding execution alerts and fatal action guard methods please see the article: How to prevent accidental data loss from executing a query in SQL Server aka “Practicing safe coding”
After
Even with all of the aforementioned, bad code does get executed. Inadvertent changes are one of the leading causes of data damage and loss right up there with database failure, malicious changes, and administration snafus.
If the executed code damaged or destroyed data, all is not lost. In fact, if the proper safeguards are in place, such transactions can easily be rolled back like they never happened, and without having to restore from a backup and overwrite any changes made subsequent to the last backup. In this way, rely on a post-incident fatal action guard, that even though it may not prevent the incident, can easily roll it back and recover the damaged or destroyed data in full.
The following will be needed:
- A database set to Full recovery model, not simple
- A transaction log file(s), either online or backups, that include the transaction in question
- ApexSQL Log, a SQL Server transaction log reader that can selectively rollback any transactions that exist in the transaction log files
The process of rolling changes back with ApexSQL Log is simple:
-
Start ApexSQL Log
-
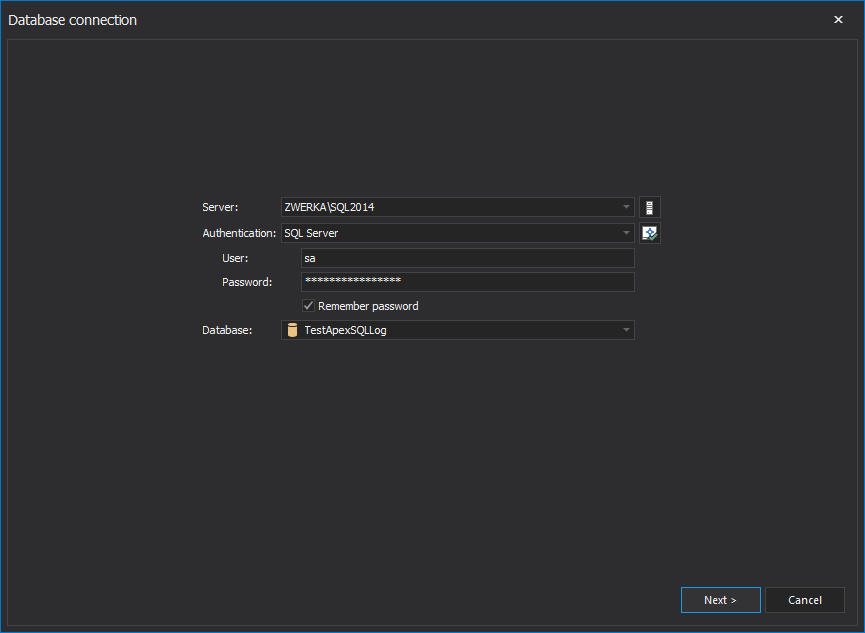
In the Database connection step of the wizard, choose SQL Server instance and the database for recovery and provide connection credentials
-
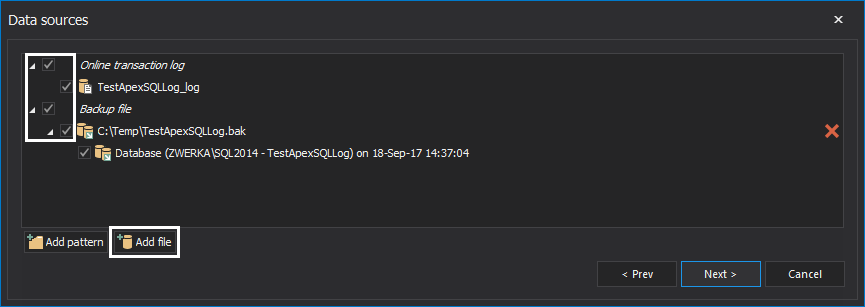
In the next step of the wizard, ApexSQL Log will automatically add transaction log files and backups that belong to a database. Additional transaction logs can be added by clicking on the Add file button. When adding transaction log backups, always ensure that full chain of transaction log backups has been added to ensure ApexSQL Log has proper sources to successfully perform the recovery:
-
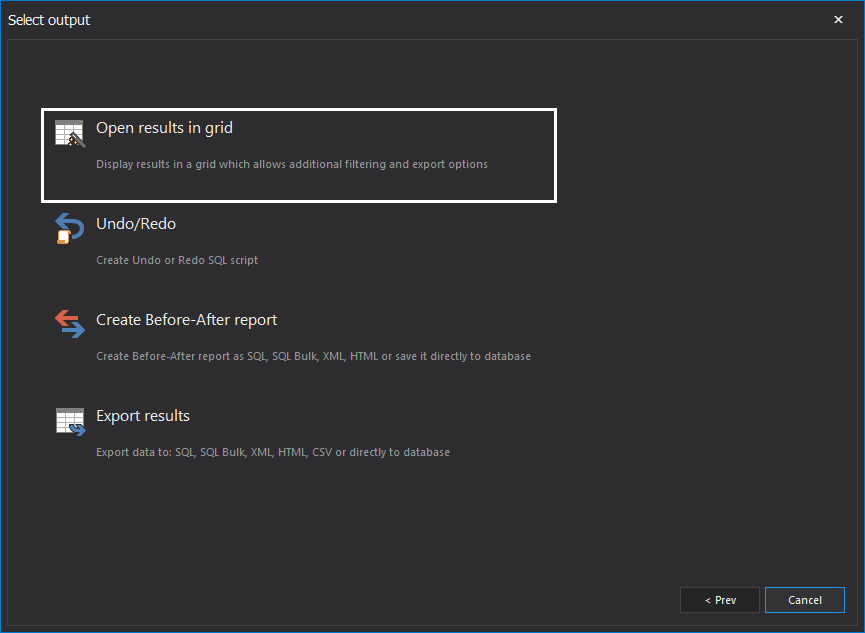
Next, in the Select output step of the wizard, opt to Open results in grid. This will allow to see auditing results in a comprehensive grid and investigate information found in the transaction log file and isolate the particular transactions using numerous filters:
-
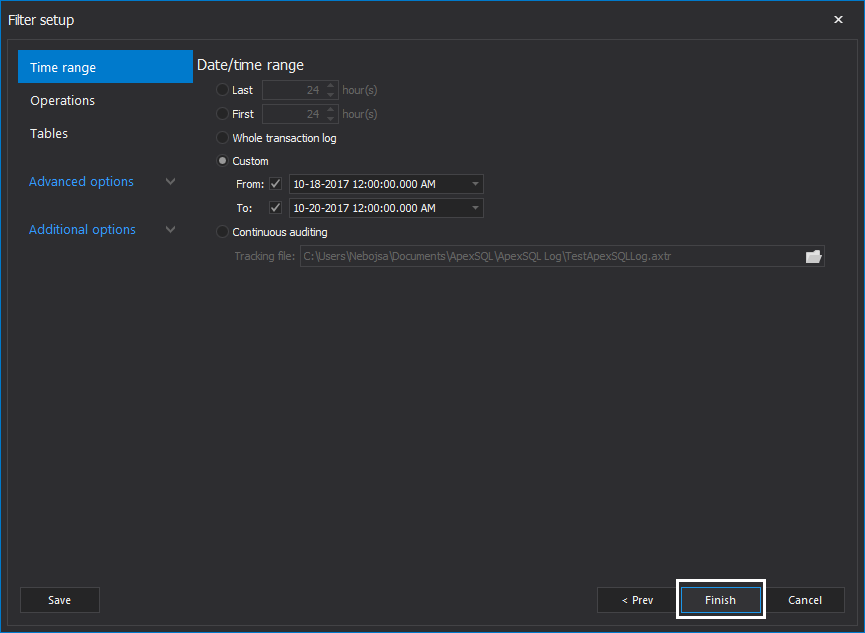
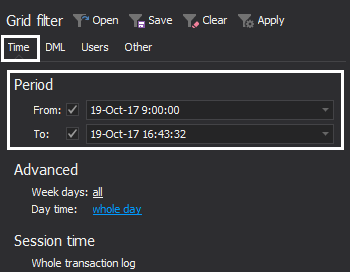
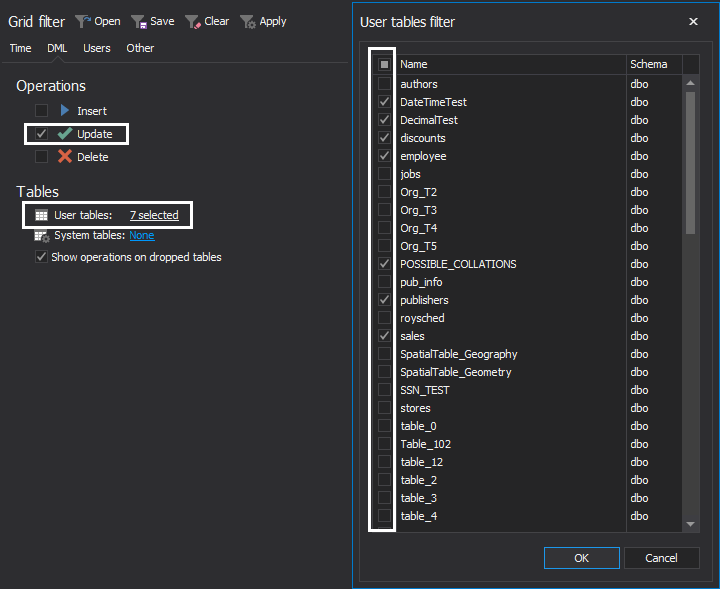
In the Filter setup step of the wizard, it is generally recommended to use plenty of filters to ensure that only those operations that need to be rolled back are included in the recovery process. Under the Filter setup step, the time range and exact operation types can be set, along with the tables where changes were made and users that have executed them, and more. Note that filtering process can/should be continued once results are audited into the grid, in order to isolate particular update operations that should be rollbacked, once a complete insight into transaction log files is obtained. Once filters have been configured, click the Finish button to proceed
-
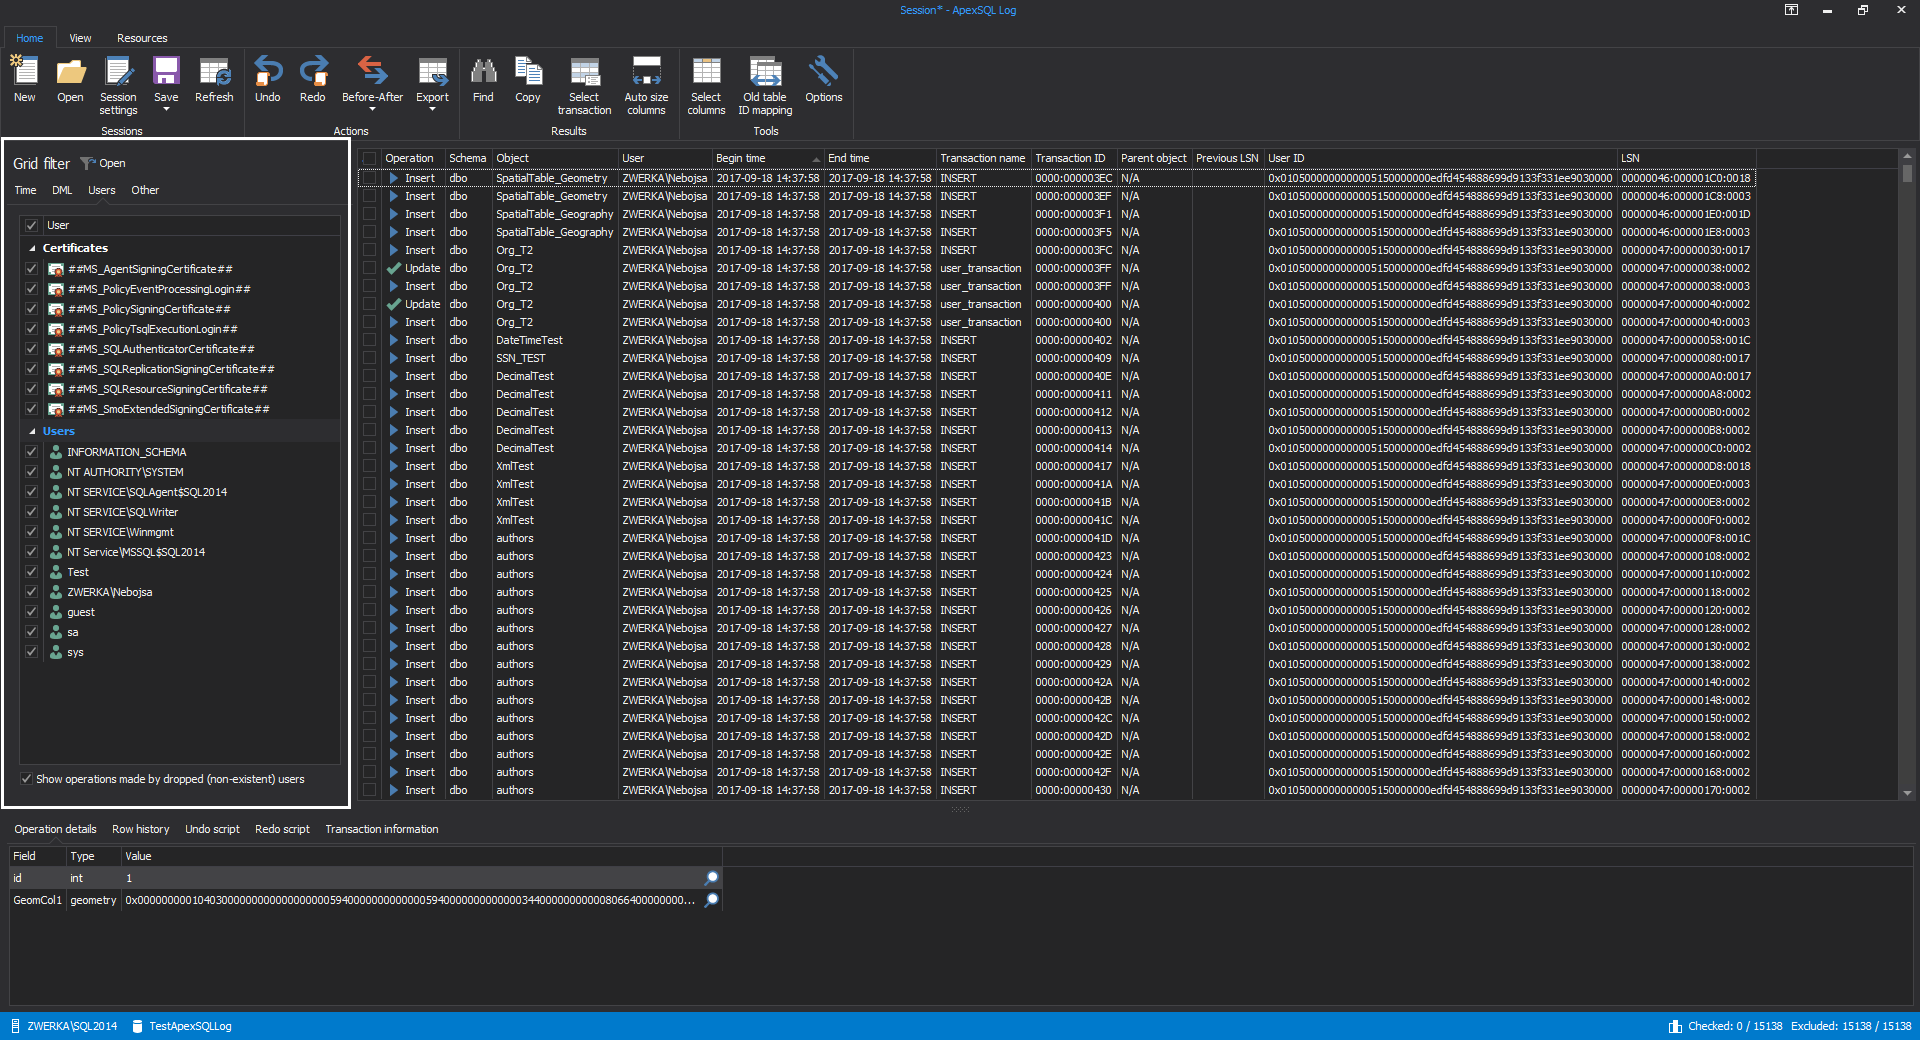
After short processing, ApexSQL Log will perform transaction log auditing and display auditing result in a grid where deeper investigation of the transaction log data can be performed and use grid filters to further filter out auditing results until they can completely isolate operations in question, such as specific updates in the example below:
-
Now that auditing results can be seen in the grid, filters can be tuned to increase precision. In accordance to the results, filter out:
-
Auditing time period
-
Specific operations and tables (even when there is a doubt which table(s) have been affected, it’s always a good choice to filter out all tables that were not affected with those unintended updates/changes):
-
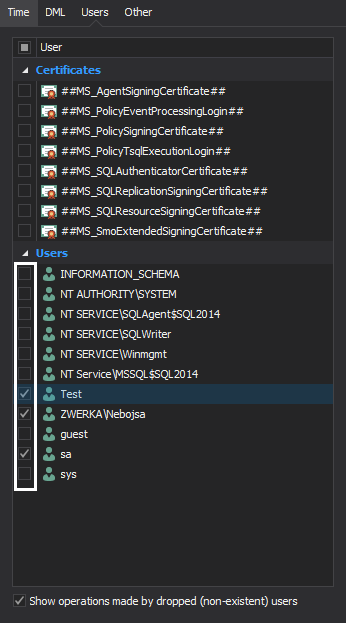
SQL Server users (logins) which were used to commit changes that are looked for:
-
-
Once configuring filters is completed, click on the Apply button to commit filter changes to the grid:

-
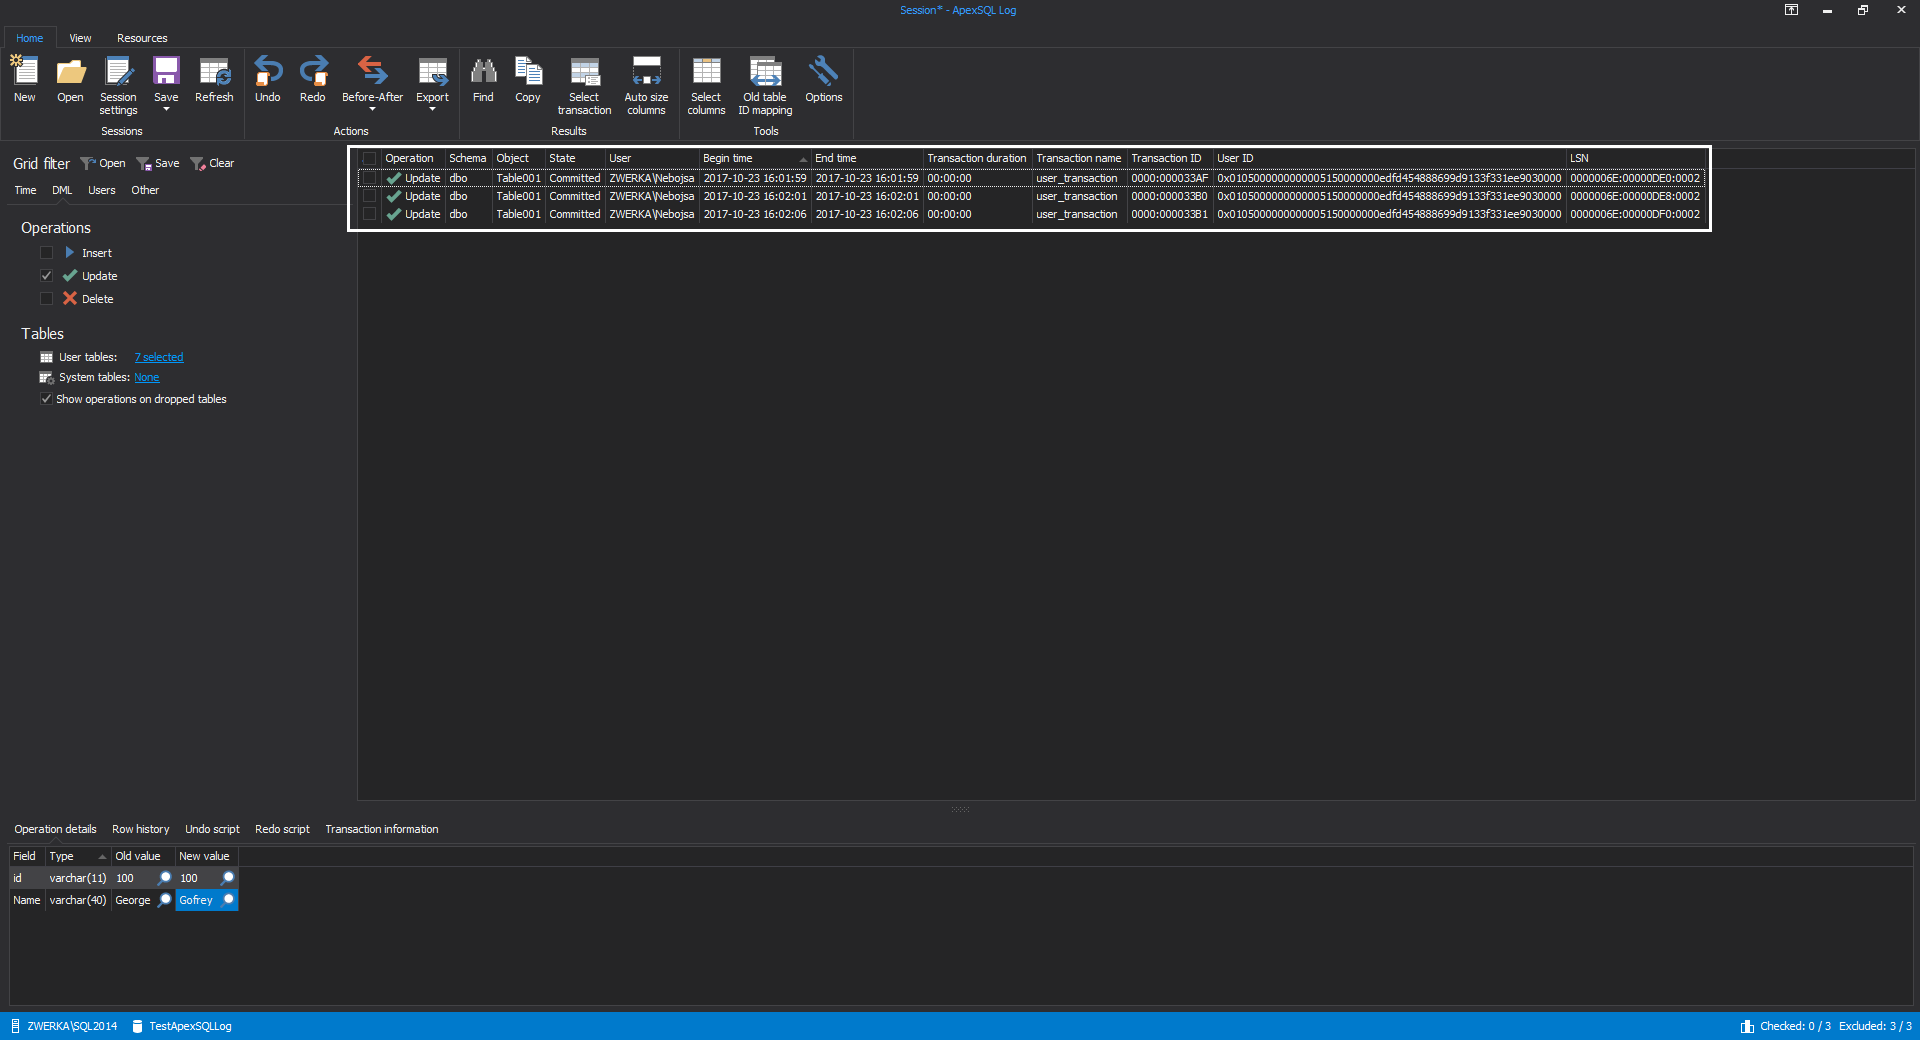
With filters in place, instead of a grid full of operations, it should be easier to isolate only those updates that need to be rollbacked:
-
Now that investigation is complete, the only remaining task is to roll back those unintended updates. To do this, select and check them in the grid, and click on the Undo button in the main ribbon:
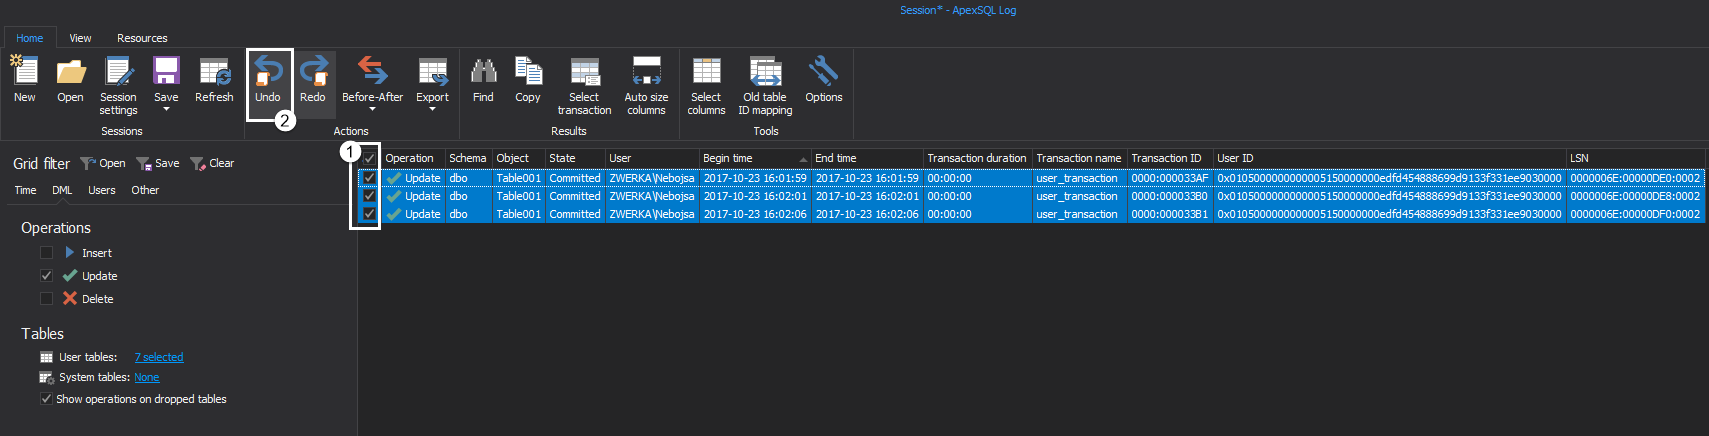
-
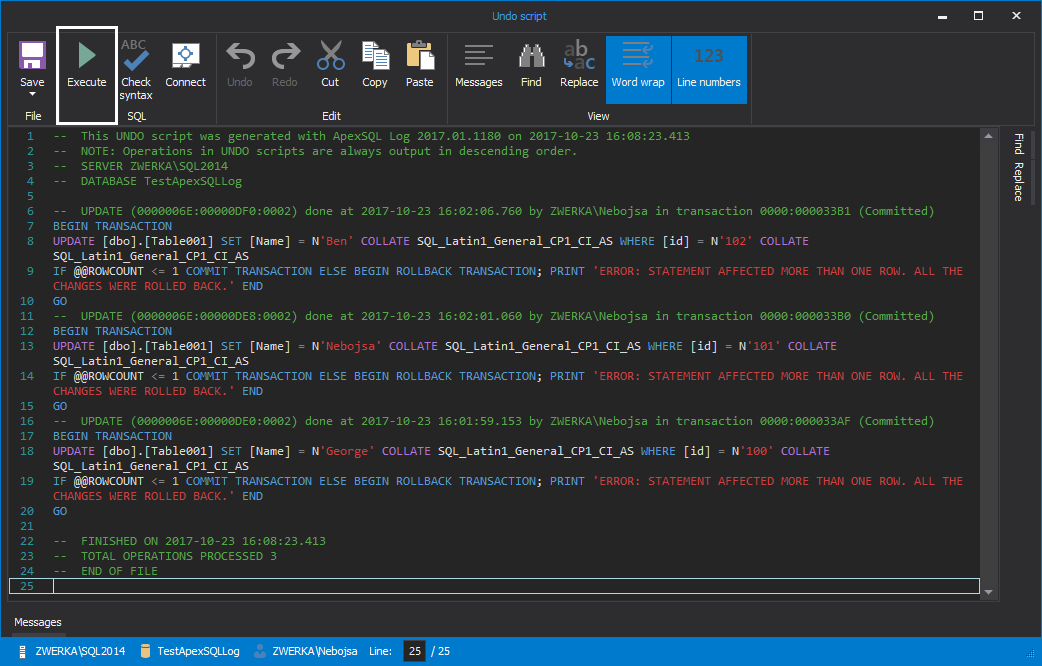
After few short moments, ApexSQL Log will generate an undo script and show it in the integrated editor where it can be inspected (and edited if the need requires it). The only remaining task is to complete the process by clicking on the Execute button in the main ribbon. And, just like that, unintended updates have been rolled back, as if they’ve never occurred:
October 24, 2017


