


Prelude
In the Understanding SQL Server database static data and how it fits into Database lifecycle management, we covered topics from the basics (what is the static data, why it is used), followed by the explanation of how to version control the static data, meaning how to initially commit, how to track changes and how to apply static data from SQL source control to a database.
Challenge
In this article, we will explain how to use the static data that is already committed to the repository and apply it against a database, no matter if it already contains some data or it is an empty database.
A sample database called Pubs is already committed to a local Git repository. This includes SQL database schema (objects) and static data:
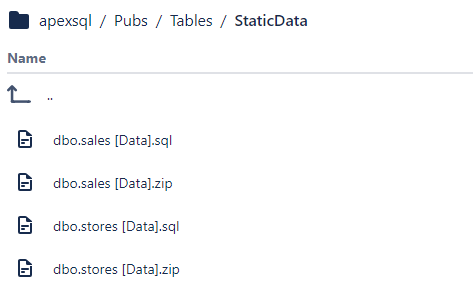
What we need to do is to take these tables (specifically static data from these tables) from the repository and update a database called pubsLatest, that is hosted in another environment.
Solution
To apply static data from SQL source control to a database, we will use ApexSQL Data Diff, a 3rd party tool that can be used to compare and synchronize data between multiple sources. ApexSQL Data Diff can compare and synchronize data between SQL databases, SQL database backups and source control. It supports all popular version control systems such as Team Foundation Server, Git, Subversion, Mercurial and Perforce. Besides being used to apply static data from SQL source control to a database, it can also be used to initially commit, or automatically synchronize SQL Server database static data with the repository. Read more about this in How to commit and/or update SQL Server database static data to a source control repository.
To get static data committed to the repository and update a database, take the steps below after ApexSQL Data Diff is started:
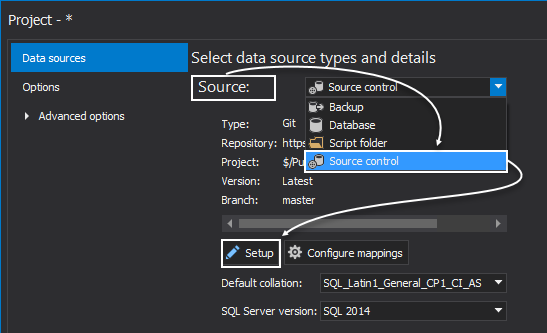
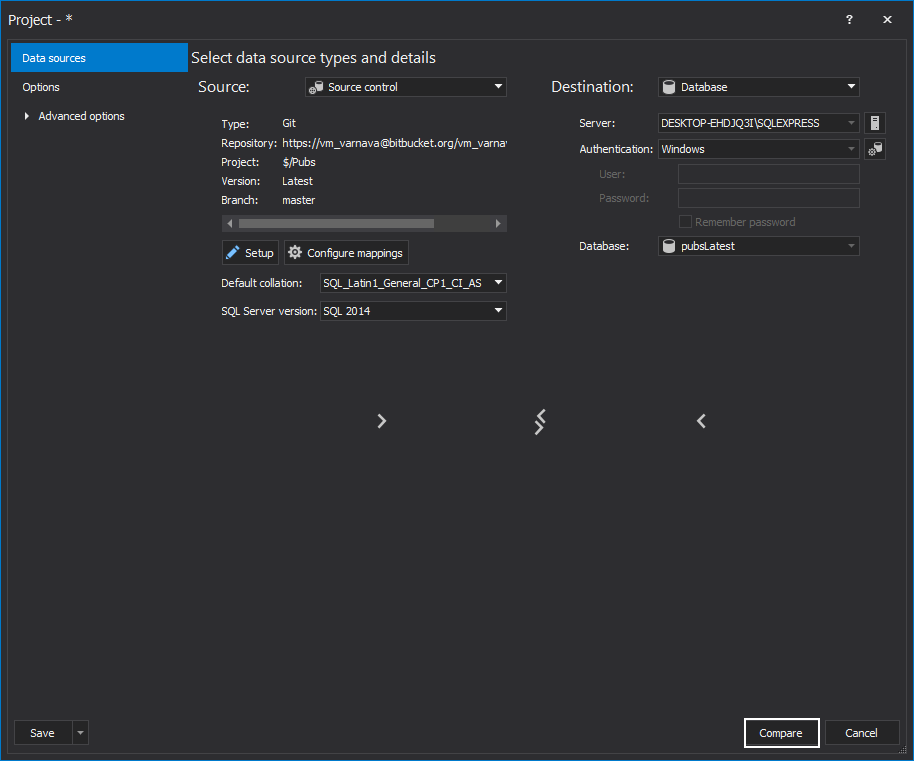
In the New project window, that will be initiated on the application startup, pick the Source control option, and use the Setup button to set the source control configuration:
We will pick Git as a source control system, under the Connection type step of the wizard:

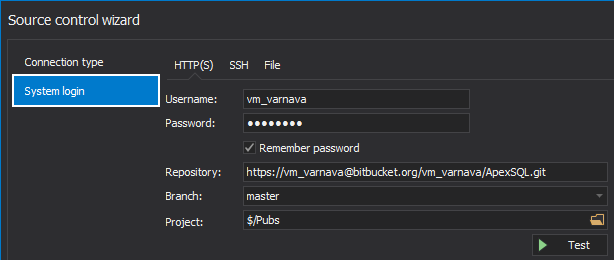
In the System login step, we need to provide all the necessary information for the tool to access the repository. Besides the username, password and a repository URL, the user can browse through the repository for the specific folder where a database is linked:
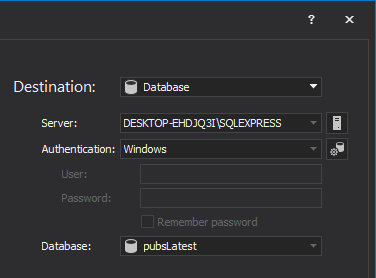
After the source side is set, let’s set the destination. We will choose the Database option from the Destination drop down list, pick a SQL Server instance where the pubsLatest database is hosted and select it from the Database drop down list:
When the source and the destination side are set, we will click the Compare button, to compare the source control with selected database:
After the comparison is finished, we’ll be presented with the results in the results grid:
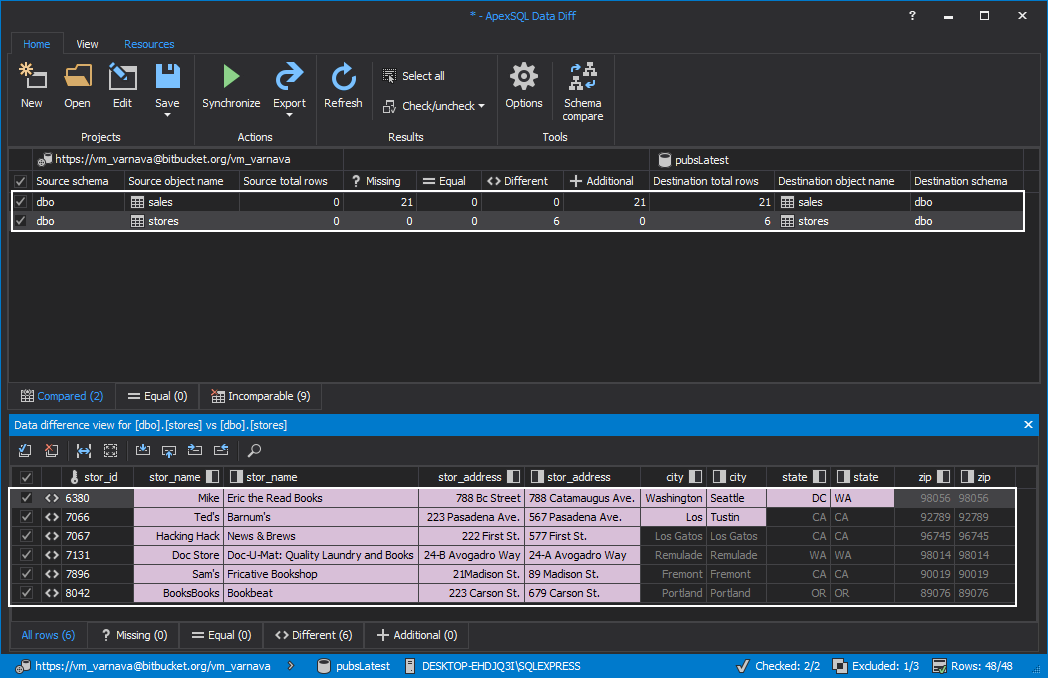
For the purpose of this article, we will treat different tables as the ones that contain static data, and as such we want to apply all the data to the pubsLatest database
At this point, and for the purpose of automating the process, we will save all the previous settings, including the table selection and all the rows that are selected to be synchronized. All the mentioned will be saved in the ApexSQL Data Diff project file using the Save as option from the Projects group under the Home tab:
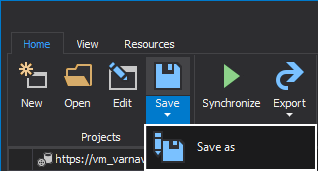
The project file will be saved as ApplyStaticData_pubsLatest.axdd, and used later in the automation process
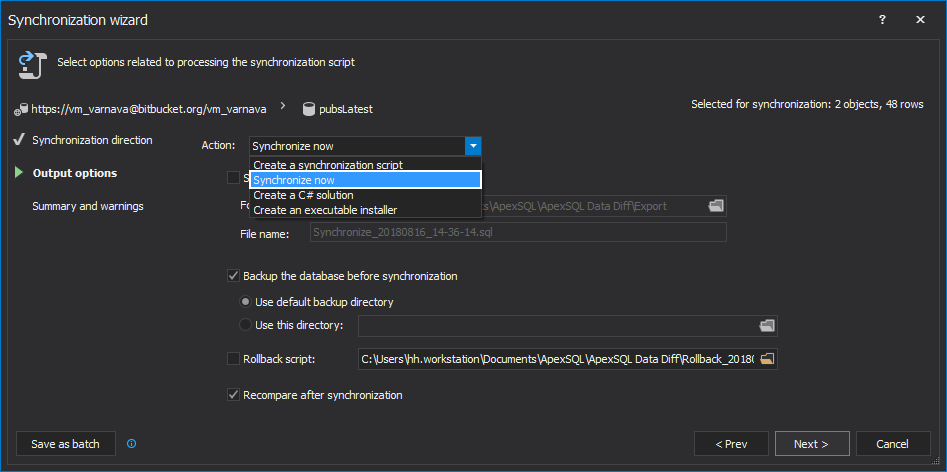
To finish the process manually, we will use the Synchronize button, in the Home group, under the Actions tab:

This brings the Synchronization wizard, and we will choose the Synchronize now option:
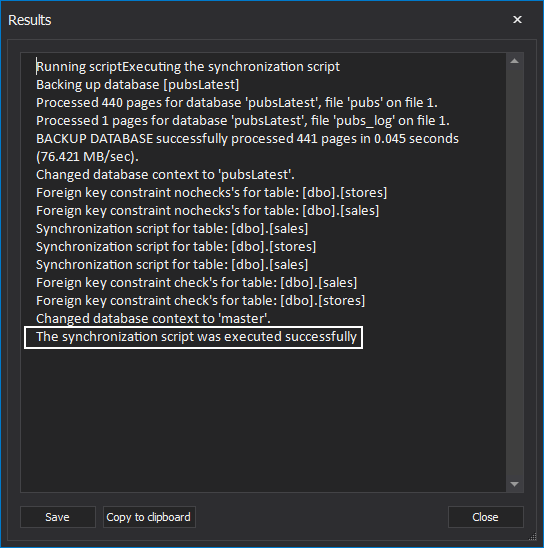
After the synchronization process is completed, the Results window shows the synchronization summary:
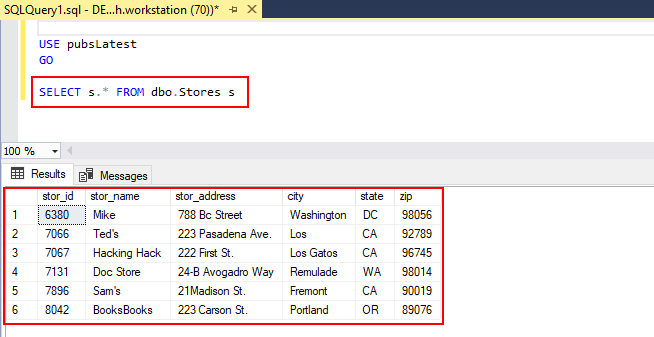
By checking the pubsLatest database, specifically one of the tables that should contain the static data, we can make sure that the synchronization was completed successfully:
By using the workflow described in the above steps, the user can apply static data from SQL source control to a database
Automation
To automate the process, we will create a simple PowerShell script which includes the application command, (specifically, a command to process the previously saved project file) followed by the appropriate arguments to make sure the synchronization will be performed. At the end, the script gives the synchronization summary including the exit code, so the user can easily determine if the process finished successfully or not. All the output will be written in the .txt file with a date stamp in its name:
|
$appLocation = “ApexSQLDataDiff” |
Specifies variable that stores the location to the application CLI executable |
|
$timeStamp = (Get-Date -Format “MMddyyyy_HHmmss”) |
Specifies variable that stores the value for the output file name that shows the date and time |
|
$appCLIcommand = “/pr:”” ApplyStaticData_pubsLatest.axdd”” /sync /v /f /out:””Output_$timeStamp.txt””” |
Variable that stores the command for calling the previously saved project file. This also generates the output file with a date stamp in its name and includes the summary of the executed task |
|
(Invoke-Expression (“& `”” + $appLocation +”`” ” +$appCLICommand)) |
Command used to call the previously specified CLI command followed by the switches that are added |
|
“ApexSQL Data Diff return code: $LASTEXITCODE” >> “Output_$timeStamp.txt” |
Includes the return code in the output summary |
We will save the script as ApplyStaticData_pubsLatest.ps1
The project file we have saved previously, and that is used in the PowerShell script contains encrypted passwords used to contact to Git repository, and for connecting to the destination SQL Server instance.
For alternatives to handling such credentials, see the article 4 ways of handling database/login credentials during the automated execution via the CLI.
Additionally, the PowerShell script we saved can be scheduled using various methods. For more about this, check the article 4 ways to schedule PowerShell script
When the script execution is finished, no matter if the execution is automated (scheduled) or it is manually executed, the result is as follows:
Changes:
-----------------------------------------------------------------------
 Name              Schema                  Updated   Added    Deleted
-----------------------------------------------------------------------
 Jobs               dbo                      0        14         0
 pub_info	    dbo   	             0         8         0
 publishers         dbo                      0         8         0
 stores             dbo                      0         6         0

 Total rows:		 		     0        36         0
-----------------------------------------------------------------------

ApexSQL Data Diff return code: 0
The value of the return code means that the process finished successfully.
For the complete list of return codes followed by the explanation, explore the Common return error codes section in the article General usage and the common CLI switches for ApexSQL tools
February 13, 2017


