


ApexSQL Generate is a tool that can populate SQL databases with test data using multiple generators for each column. It supports a full range of SQL data types and has an ability to recognize them in a loaded SQL database and provide real-world test data based on contained data types. It can generate: randomized test data using the Random generator and various options, and using the Regular expression generator, sequential data using the Incremental generator, and much more.
To generate test data:
-
Run ApexSQL Generate
-
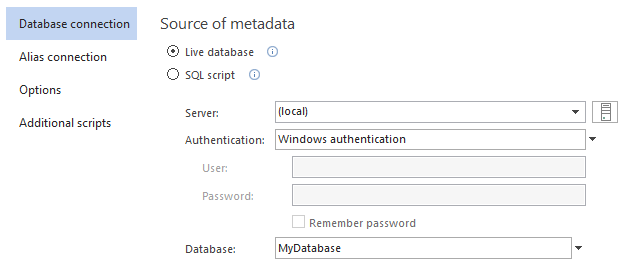
Select a built database from the Build step in the Database connection tab, of the New project window:
-
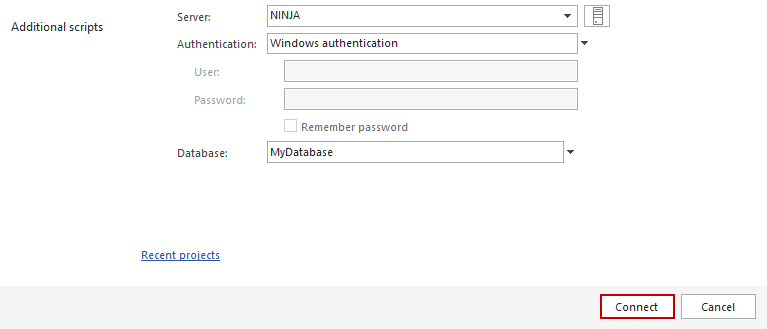
Once a database is set, click the Connect button in the bottom-corner of the New project window:
-
The application will load a database and show all tables and columns in the Results grid:

-
Select a database in the Results grid and set specific table options, from the menu on the right side, that can be applied to all tables in a database:
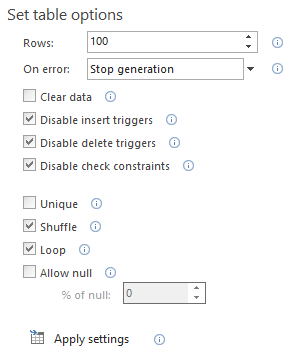
The Rows option allows to set the number of rows that will be generated for each table. This option can be also set for each table individually, by selecting a table and changing the number in the right-side menu.
If any error occurs during the data generation, the error handling option can be set to Stop generation or Skip row.
As mentioned, a built database could contain static data for some tables that were committed to the source control repository. In order to preserve that data, leave the Clear data option unchecked. To avoid any issues during the test data generation, disable triggers and constraints by using the options above.
-
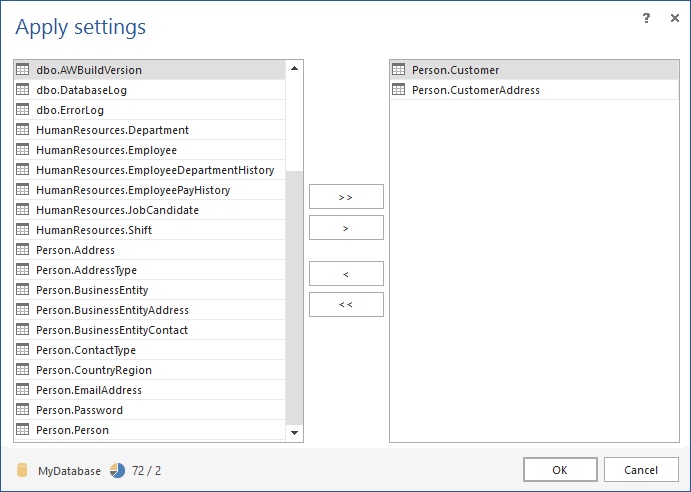
In order to apply the set of options on tables, click the Apply settings button at the bottom and in the Apply settings window, choose tables on which you want to apply settings, move them to the right side with arrow buttons and click the OK button:
-
Since the data exist in some tables and not in others, it can be inserted by manually checking only tables that don’t contain data in the Results grid:

If there is a need to add test data to all tables, just leave all tables checked, as it is by default.
-
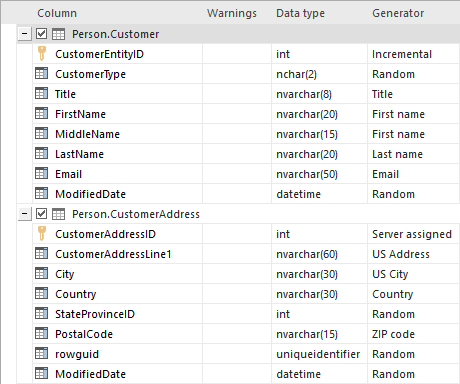
By default, ApexSQL Generate recognizes the column’s name and data type, and sets the most appropriate generator:
-
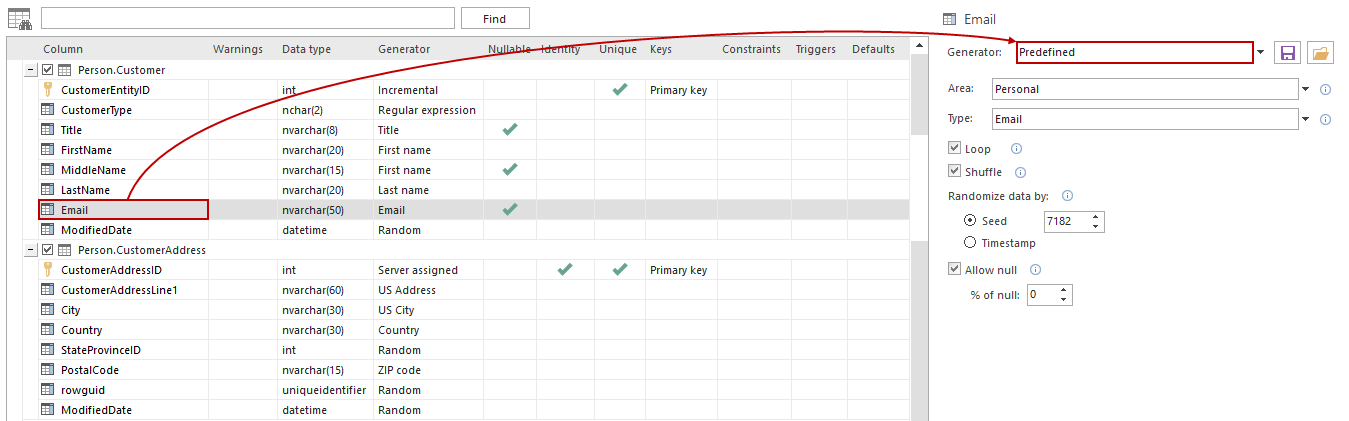
ApexSQL Generate allows choosing a different generator for each column. To choose a generator for a column, select a column and in the right-side menu, select a desired generator:
-
After each column generator is set, in the Test data preview pane, preview the generated data before executing or exporting:

-
Before starting the generation process, click the Save button, from the Home tab, and choose between the Save as (saving a project) or Save as batch file option:

By saving the project file, everything that was previously set in the current project will be saved in the project file and used for automating the process.
The other option is to use the batch file. If this options is chosen, in the Batch script preview, all previously set options will be expressed as CLI switches:
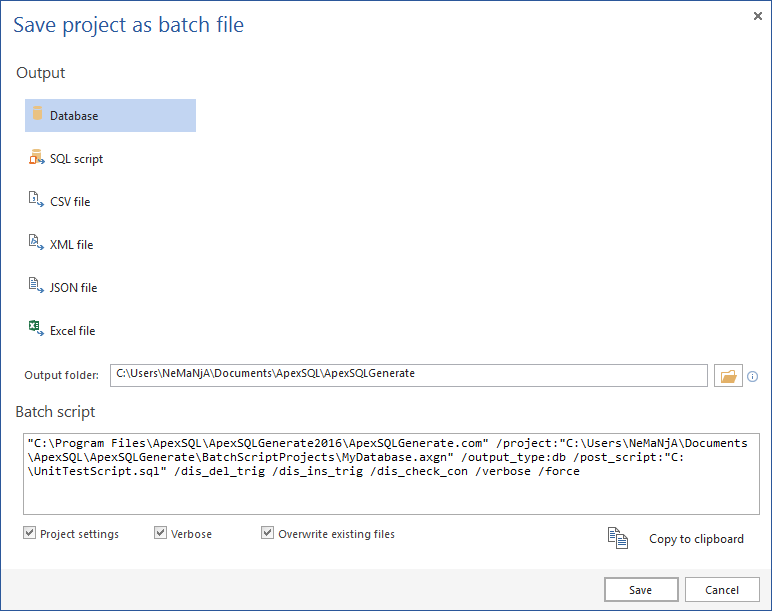
Check the Project settings option in the bottom-left corner, so that only checked tables are populated with test data.
After reviewing all option switches, click the Save button in the bottom-right corner and specify a location where to save it.
By saving the batch file, automating the process for the CI Populate step is much simpler, as less code is used in the PowerShell project.
-
To execute the generation process directly on a database, click the Generate button from the Home tab:
-
The Action plan window will be shown, with all actions that will be done on a database:
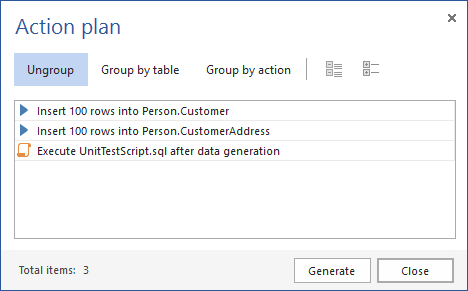
- After reviewing the Action plan, click the Generate button in the bottom-right corner and the test data generation will be executed.
-
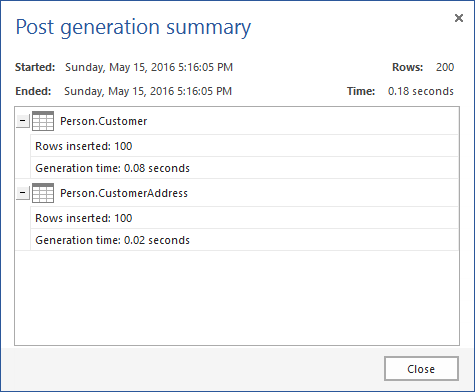
Once the generation and execution are done, the Post generation summary window will be shown:
Automating process using ApexSQL Generate and PowerShell
As previously mentioned, a 3rd party tool (in this case ApexSQL Generate) can be scheduled via a PowerShell project, in order to run it unattended.
In order to include the build step from the previous article in the automating process, so that the Build and Populate step are run in sequence, one after the other, i.e. once a database is built from the source control repository, it will be populated with static data. Also, there should be code for dropping the previously created database before each build step, in order to avoid any issues with building a database with the same name.
The best way is to schedule three tasks via PowerShell that will be run one after the other. The script for that kind of project will look like this:
Explanation of the code from the script:
Note: Each application called by the -Execute parameter and all application switches after the -Argument parameter need to be under single quotation marks. Also, each path, including the application’s path, project file path, and output file path, need to be under double quotation marks.
For both tools, Windows authentication was used, but if SQL Server authentication is used, login password will be encrypted in the saved project file. If for some reason, this process need to be run attended, check out this article on how to handle database or login credentials.
During the execution of the PowerShell project, the following execution messages of ApexSQL Generate are shown:
Reading tables from database: MyDatabase
Data generation started for database: “MyDatabase”
Executing against database
Inserting data into table Person.Customer
Inserting data into table Person.CustomerAddress
Execution successfully finished
Total number of inserted rows: 200
Execution time: 0 hour(s) 0 minute(s) 6 second(s)
ApexSQL Generate return code is 0
Learn more about using ApexSQL Generate CLI switches here.
If any error is encountered during the execution of the CLI code for data generation, it will be written into the output file. For example, if there is some constraint or primary key violation, the following messages will be provided:
Inserting data into table Person.Customer
Inserting data failed: Explicit value must be specified for identity column in table “Person.Customer” either when IDENTITY_INSERT is set to ON or when a replication user is inserting into a NOT FOR REPLICATION identity column.
Inserting data into table Person.CustomerAddress
Inserting data failed: Violation of primary key constraint “PK_Customer_CustID”. Cannot insert duplicate key in object “Person.CustomerAddress”. The duplicate key value is (1).
January 13, 2017


