


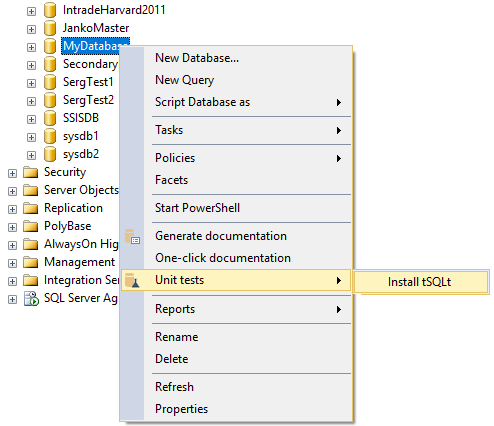
In order to begin this process, first the tSQLt, (SQL Server database unit testing framework) has to be installed on the database which will be used for unit testing. This can be done manually in SSMS by right-clicking the selected database in the Object explorer, find the Unit tests menu and select Install tSQLt.
When this option is selected, an additional menu will appear. In this menu, you will be prompted to install a desired tSQLt version and also to install SQL Cop unit tests.
SQL Cop tests are a set of predefined 48 unit tests, which can be installed by checking the Install SQL Cop tests option. As for the tSQLt installation, there are a few choices when selecting the source of tSQLt. You can choose to install the built-in tSQLt version, tSQLt from the file system or the Web option which will download the latest available tSQLt framework version and install it on the selected database.
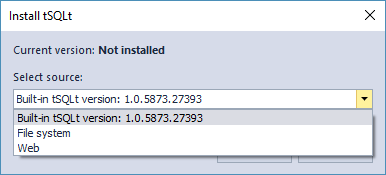
Once the corresponding version of tSQLt is selected and the option for installing SQL Cop tests is checked, click the OK button.

When the tSQLt framework and SQL Cop tests are installed, the unit test execution process can be started.
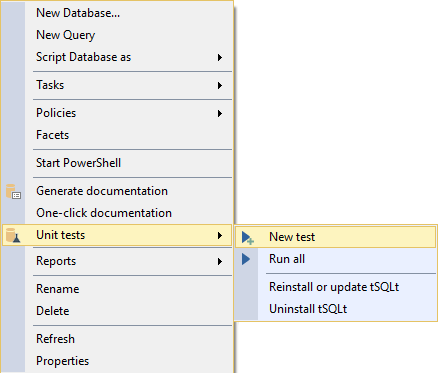
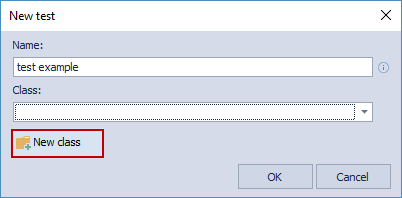
If there is a need for creating new unit tests or if there are no unit tests created for this database, right click it in the Object explorer and under the Unit tests menu and select the New test option.
This way we can create a new test container including unit test name and class name. Now enter a name for this test and select a valid class for it.
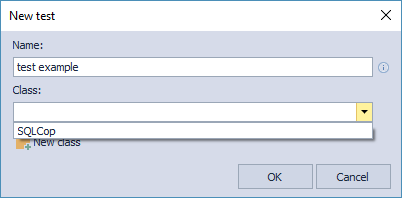
In the universe of SQL Server unit testing a “class” is basically a schema used for organizing and storing groups of unit tests, it acts as a container of sort.
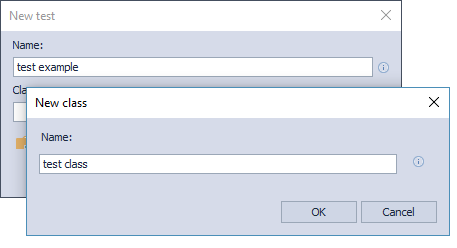
In this case if there are no classes created except for the predefined SQL Cop tests, click the New class button, enter a name for it and click the OK button.
Once clicked, another menu will appear where you need to enter the name of the new “Class” and click OK.
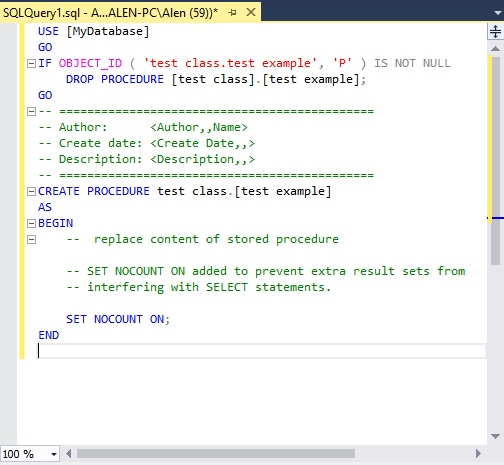
SQL Server Unit tests basically consist of stored procedures, so once the test container or class is created a new query window will appear, where the new unit test can be created as a stored procedure or scripted. The query editor can be used to create various unit tests based on any requirement.
Now let’s use a group of already created unit tests for the selected database, the previously installed SQL Cop tests. Right-click the selected database and in the Unit tests menu click Run all.
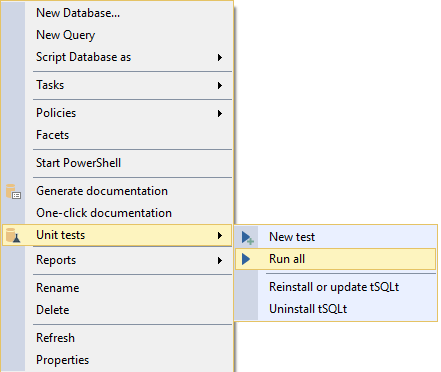
Once clicked, the Unit test explorer window will open up in SSMS and all created Unit tests will be executed.
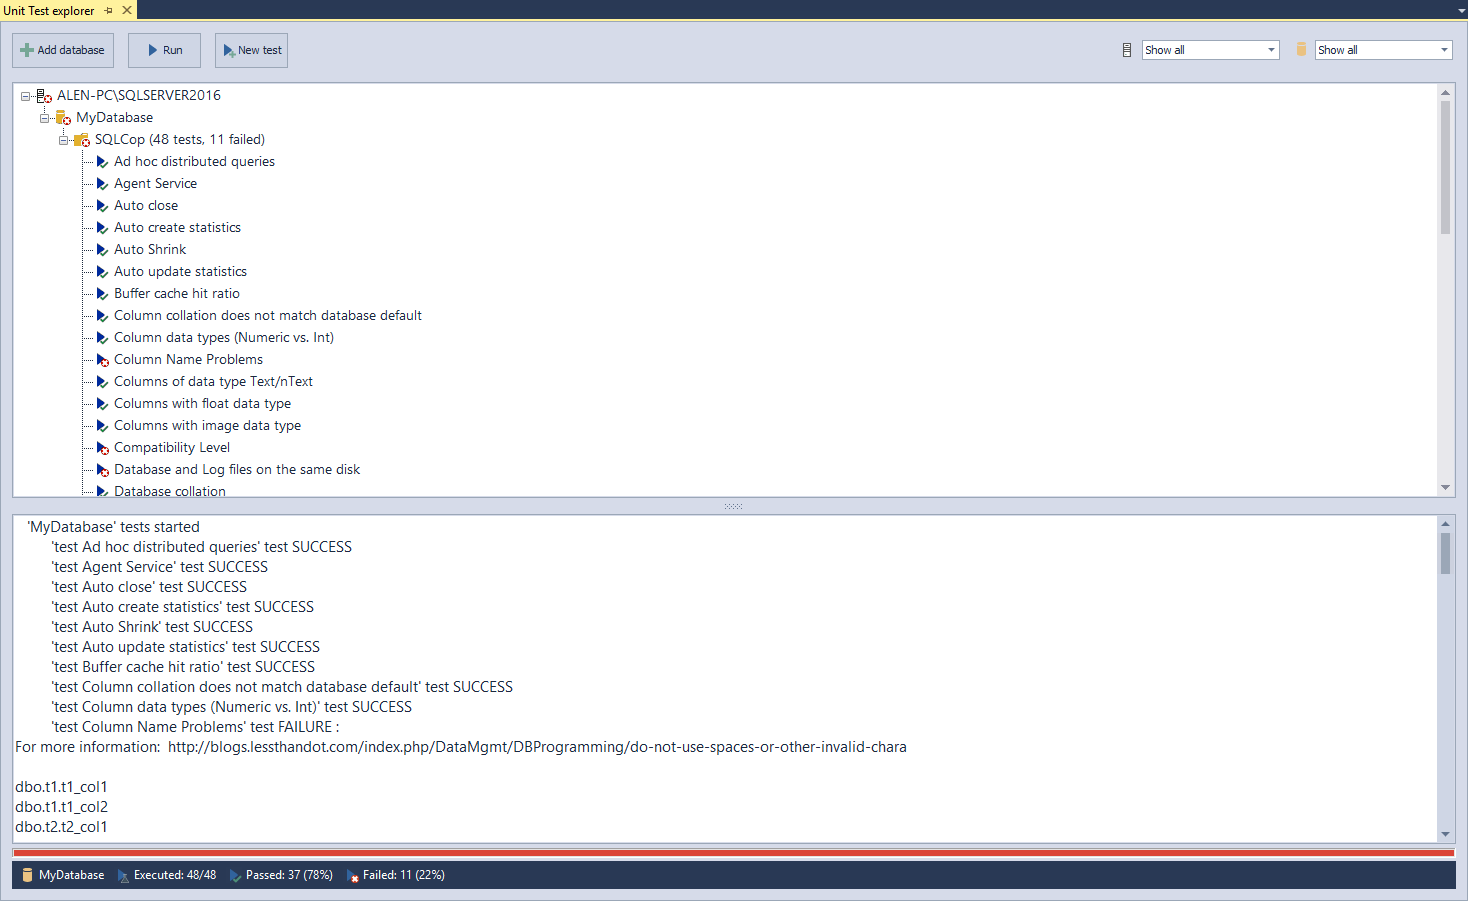
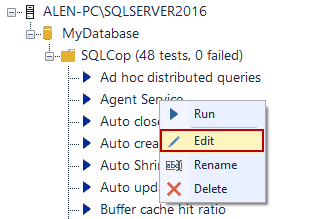
Any created unit test will be shown in the Unit test explorer window. In this menu, it is possible to run selected unit tests separately and the tests can be even edited if necessary.
Once the executed tests are finished, all results are shown in the bottom part of the Unit Test explorer.

Automating the Test step using ApexSQL Unit test with PowerShell
Now that we built the Test step manually by creating unit tests in our designated database and executing them, it’s time to automate the process. The goal will be to accomplish what we did manually for a designated database, be able to run it with a single click. This automated job will be able to be incorporated into a job that runs our entire continuous delivery use case, end to end. We’ll automate this step with Power Shell scripts using the command line interface of ApexSQL Unit test.
Let’s create a PowerShell script with a combination of CLI switches which will be used to run the created Unit tests and to create a report when finished.
& 'ApexSQLUnitTest.com' /s: ALENPC\SQLSERVER2016 /d: MyDatabase /it /isc /cl: SQLCop /f /v /rc
Let’s explain the code from the script:
| ‘ApexSQLUnitTest.com’ | # represents CLI executable file |
| /s:ALENPC\SQLSERVER2016 | # specified SQL Server name |
| /db:MyDatabase | # specified database name which will be used for unit test execution |
| /it | # install tSQLt framework on the database before executing tests |
| /isc | # install SQL Cop tests on database. It can only be used with the “/it” switch |
| /cl:SQLCop | # specified test class. If this switch is omitted, the tests are performed for all test classes |
| /f | # the “Force” switch, used for overwriting previously created files of the same name |
| /v | # the “Verbose” switch is used when there is a need for displaying more detailed messages about the whole unit testing process |
| /rc | # the return codes switch, used for outputting all return error codes to the console |
There are a few ways for handling login credentials when connecting to an SQL Server. In the example shown above we are using Windows Authentication, so we could run the whole process even unattended.
Now that the script is completed, save it and it’s ready to be executed. Now let’s open the script in the Windows PowerShell ISE and execute it.
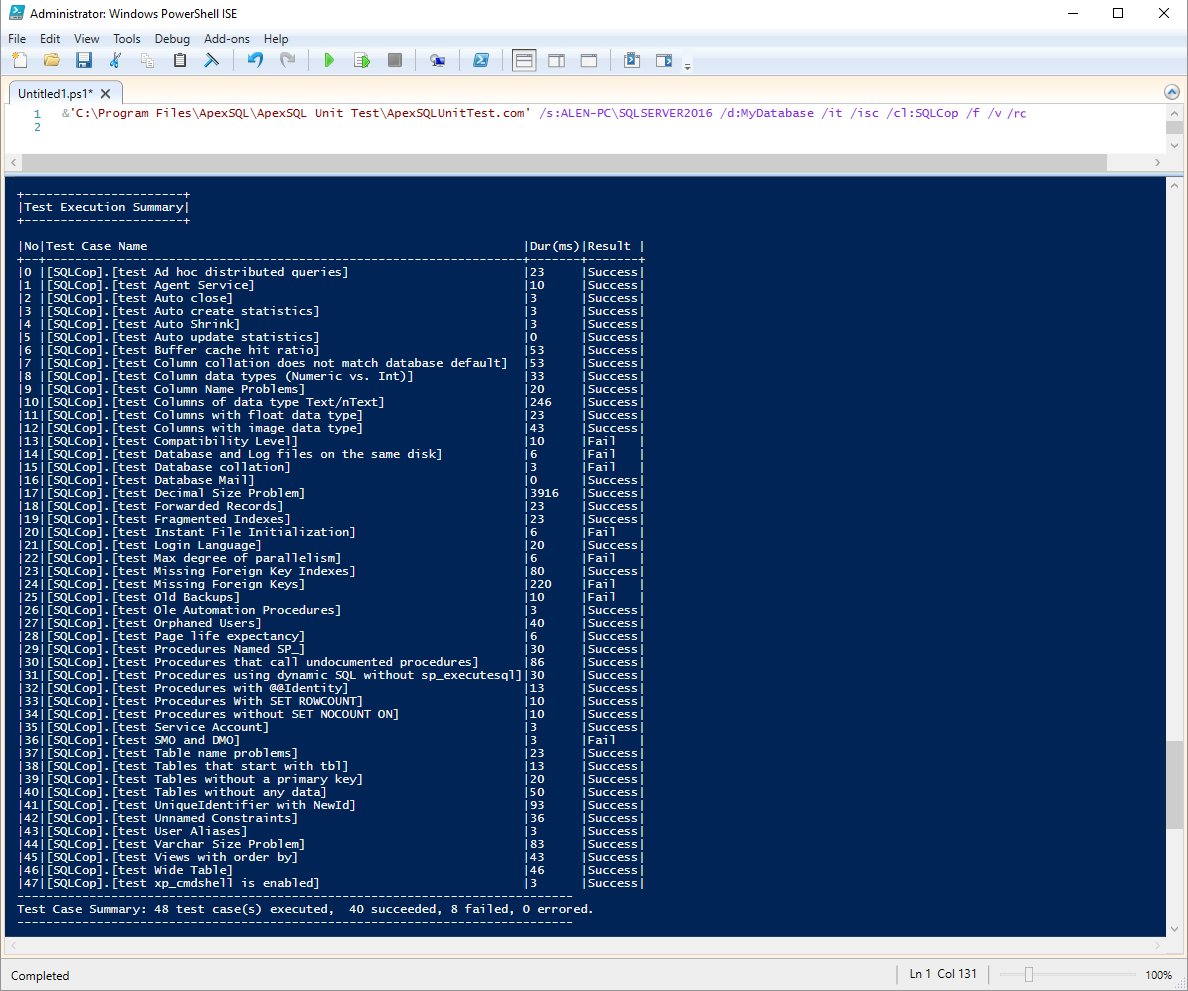
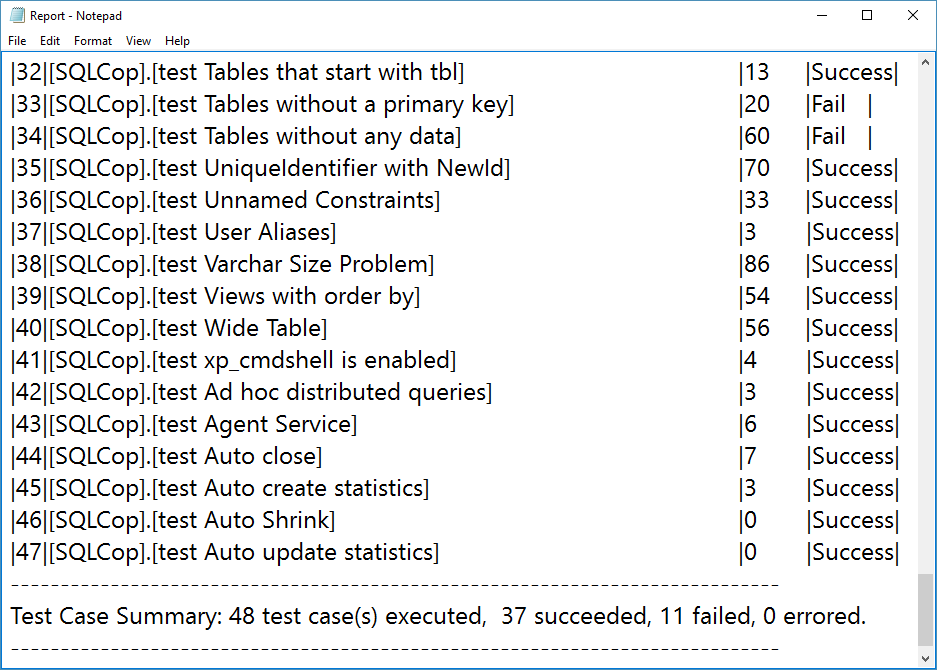
Once the Unit testing process is completed, the results will be displayed at the bottom of the Windows PowerShell ISE window. If the test results generated below need to be saved as a form of a report, the “/rn” switch must be added. In this case the script will look like:
& 'ApexSQLUnitTest.com' /s: ALENPC\SQLSERVER2016 /d: MyDatabase /it /isc /cl: SQLCop /rn:’E: \Report.txt’ /f /v /rc
The “/rn” switch can be used for generating a report about the Unit test results and saving it to a specified location with the given format. We have exported the created report to a Text document for illustrative purposes:
Useful links:
- tSQLt – The Database Unit Testing Framework for SQL Server
- Creating and running a SQL Server Unit Test
- Create an Empty SQL Server Unit Test
- Creating and Running a SQL Server Unit Test
- Using a Custom Test Condition to Verify the Results of a Stored Procedure
January 13, 2017


