In the previous article, we have described How to collect information about SQL audits and database mail using SQL documentation and the problem that topic envelopes.
As a part of the problem we should consider the linked server objects so, in addition to the beforementioned SQL Server objects, we will add these objects to the SQL documentation, and how to collect information related to linked servers will be described in the following article.
Linked server information in the SQL Server Management Studio
Linked servers allow database clients to work directly with other SQL Servers. This brings the benefit of:
- The ability to connect to a remote server
- The ability to execute remote queries, updates, commands, and transactions on a variety of data sources
- The ability to use different data sources in a similar way
Using SQL Server Management Studio, all needed information to recreate a linked server on another environment can be collected, so let’s demonstrate how to collect the related information.
Collecting Linked Servers information from Object Explorer
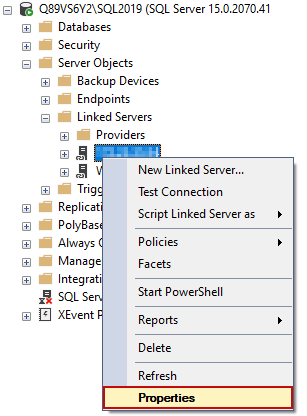
If the connection to the desired SQL Server, that has linked servers, is established, from the Object Explorer panel expand the Linked Servers item which can be found under the Server Objects folder:
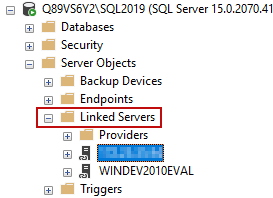
A list of all available linked servers will be shown. From this list, right-click over the desired linked server name and from the context menu select the Properties option:
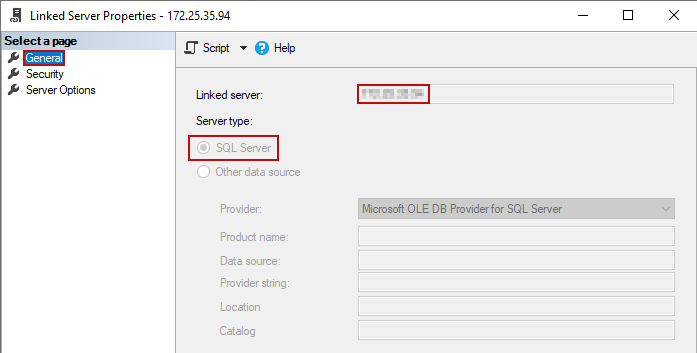
The new Linked Server Properties window will be opened. From the General tab, the information related to the Linked server name and the Server type can be collected:
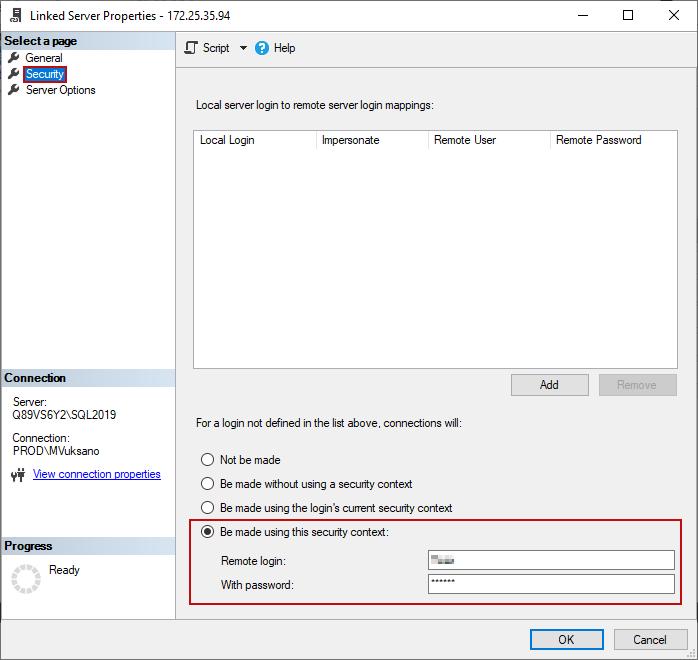
From the Security tab, the information related to a login toward linked server will be shown, in this example, no explicit login mapping is set , so the connections will be made using custom security context. This means that a %user% will be able to connect to the desired server using a remote login name and password:
From the Server Options tab, general server parameters, that define relationship and dependencies with the parent server, can be collected:
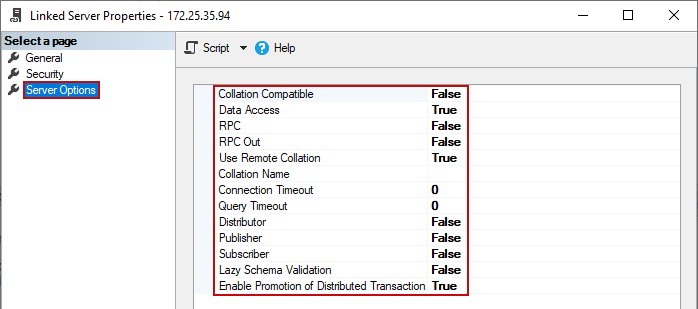
All collected information from the previous tabs can be used to create the SQL documentation, then recreate the desired Linked Server on some test server or even on the same server.
Collecting Linked Servers information using T-SQL
Collecting the linked servers information can be done using T-SQL. This is done with the right-click over the desired linked server name then from the context menu go to Script Linked Server as – CREATE To – New Query Window:
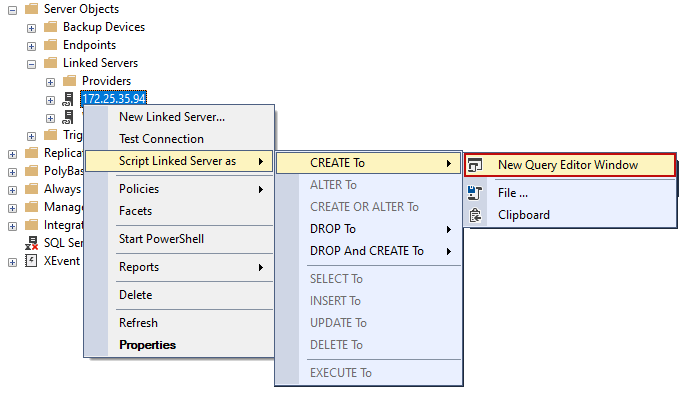
The following T-SQL Script will be created and opened in the new query window:
USE [master]
  GO

  /****** Object:  LinkedServer [%server name%]    Script Date: 11/14/2020 12:12:45 PM ******/
  EXEC master.dbo.sp_addlinkedserver @server = N'%Server name%'
      ,@srvproduct = N'SQL Server'

  /* For security reasons the linked server remote logins password is changed with ######## */
  EXEC master.dbo.sp_addlinkedsrvlogin @rmtsrvname = N'%Server name%'
      ,@useself = N'False'
      ,@locallogin = NULL
      ,@rmtuser = N'%User name%'
      ,@rmtpassword = '########'
  GO

  EXEC master.dbo.sp_serveroption @server = N'%Server name%'
      ,@optname = N'collation compatible'
      ,@optvalue = N'false'
  GO

  EXEC master.dbo.sp_serveroption @server = N'%Server name%'
      ,@optname = N'data access'
      ,@optvalue = N'true'
  GO

  EXEC master.dbo.sp_serveroption @server = N'%Server name%'
      ,@optname = N'dist'
      ,@optvalue = N'false'
  GO

  EXEC master.dbo.sp_serveroption @server = N'%Server name%'
      ,@optname = N'pub'
      ,@optvalue = N'false'
  GO

  EXEC master.dbo.sp_serveroption @server = N'%Server name%'
      ,@optname = N'rpc'
      ,@optvalue = N'false'
  GO

  EXEC master.dbo.sp_serveroption @server = N'%Server name%'
      ,@optname = N'rpc out'
      ,@optvalue = N'false'
  GO

  EXEC master.dbo.sp_serveroption @server = N'%Server name%'
      ,@optname = N'sub'
      ,@optvalue = N'false'
  GO

  EXEC master.dbo.sp_serveroption @server = N'%Server name%'
      ,@optname = N'connect timeout'
      ,@optvalue = N'0'
  GO

  EXEC master.dbo.sp_serveroption @server = N'%Server name%'
      ,@optname = N'collation name'
      ,@optvalue = NULL
  GO

  EXEC master.dbo.sp_serveroption @server = N'%Server name%'
      ,@optname = N'lazy schema validation'
      ,@optvalue = N'false'
  GO

  EXEC master.dbo.sp_serveroption @server = N'%Server name%'
      ,@optname = N'query timeout'
      ,@optvalue = N'0'
  GO

  EXEC master.dbo.sp_serveroption @server = N'%Server name%'
      ,@optname = N'use remote collation'
      ,@optvalue = N'true'
  GO

  EXEC master.dbo.sp_serveroption @server = N'%Server name%'
      ,@optname = N'remote proc transaction promotion'
      ,@optvalue = N'true'
  GO
This T-SQL script can be used later in SQL Server Management Studio to create the linked server on a test server or can be saved as a backup in SQL documentation.
SQL documentation software
ApexSQL Doc, allows database administrators to create various SQL documentation related to SQL Databases, SQL Server objects, SQL Server Integration Service (SSIS), etc. More information can be found on the SQL Database documentation tool page
As an alternative to previous examples on how to collect information related to linked servers using the SQL Server Management Studio, now is time to show how this can be done using ApexSQL Doc.
When ApexSQL Doc is started, from the Home tab, click the New button to initiate new project:
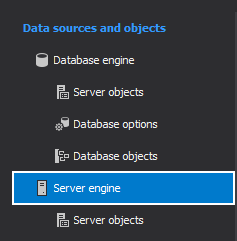
Select the Server engine from the Data sources and objects panel:
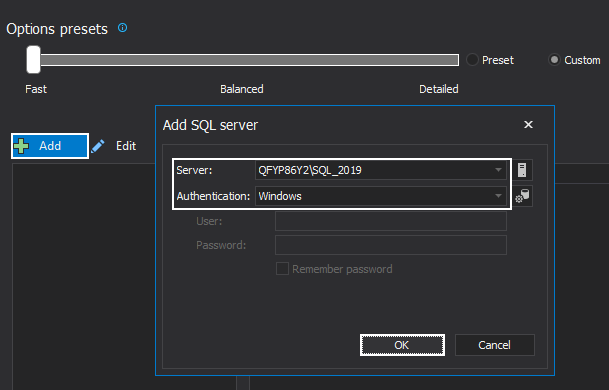
Click on the Add button and the Add SQL server window will open. In this window, select the targeted SQL Server, and type of the Authentication from the drop-down list, then click the OK button to confirm and establish connection:
In the server panel the connected SQL Server will be shown:
|
Quick tip: ApexSQL Doc allows adding more than one SQL Server at a time. |
Now is time to select the desired SQL Server objects which will be included in SQL documentation. This can be done by clicking on the Server objects under the Server engine tab.
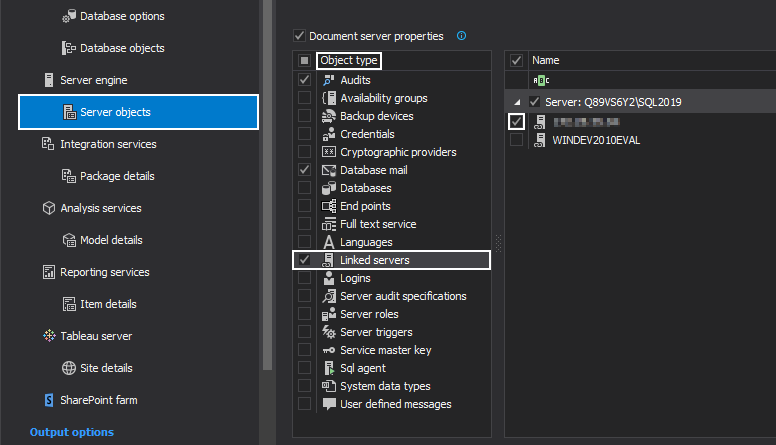
As we can see all available SQL Server objects will be listed below the Object type grid. To complement the information about database mail and SQL audits, included in previous article, find the Linked servers item and tick the check box next to it.
On the right side all available linked servers will be listed.
To select the desired linked server, tick the check box next to its name:
One more step is left before creating SQL documentation and that is to select an output file format for the documentation.
By default, ApexSQL Doc will generate documentation as .CHM file, but this can be changed by clicking the File format item under the Output options tab and selecting the desired output file format.
In this demonstrative purpose, Linked THML (.html) output file format will be used:
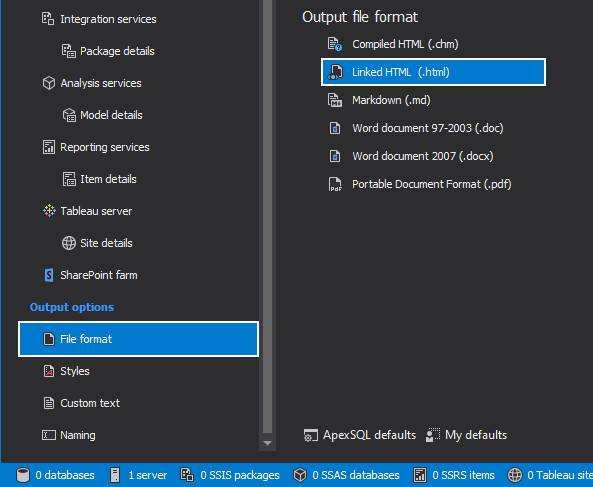
When the desired output file format is selected, the last step is to create a documentation, this can be done using the Generate button from the Home tab:
|
Quick tip: When the SQL documentation is generated in HTML output file format, it will be opened in the default browser. |
In the documentation, we can see that we have all items in one place, Audits, Database mail and Linked servers under the Server object content tree:
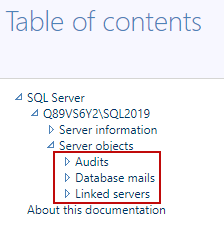
Collect SQL Linked Servers information using ApexSQL Doc
Click on the Linked server name in the generated SQL documentation and on the right side of the documentation the information about the Linked server properties will be shown:
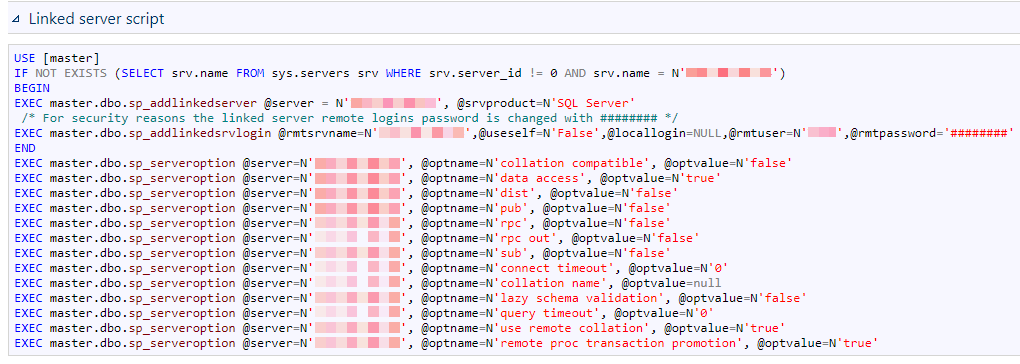
In the same page of the SQL documentation scroll down to the Linked server script section, where the T-SQL script is shown.
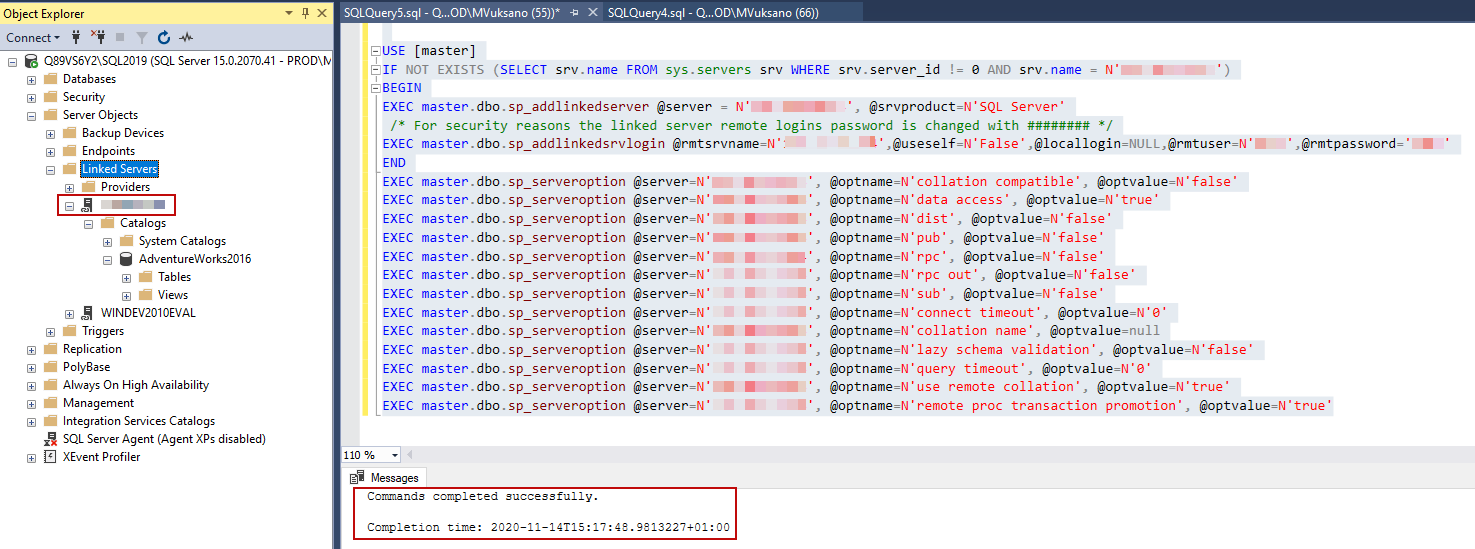
This SQL script can be executed in SQL Server Management Studio to recreate the linked server on the test server:
As we can see the result of executing T-SQL Script created by ApexSQL Doc, the linked server is successfully recreated:
Conclusion
As we can see the process of collecting the information is easy no matter which information collection method the data administrator uses.
Based on the environment, any type of the above-explained solution can be easy enough, but using a SQL documentation tool like ApexSQL Doc will provide:
- Preservation of collected information – When the linked server is created the database administrator can create a backup of the T-SQL script which can be used again, if, for example, someone deletes the created linked server
- Saving collected information in various output formats:
- Compiled HTML (.chm)
- Linked THML (.html)
- Markdown (.md)
- Word document 97-2003 (.doc)
- Word document 2007 (.docx)
- Portable Document Format (.pdf)
- Sharing the collected information between database developers – The created documentation can be saved on the cloud services or sent to another database developer
November 27, 2020


