


A DML trigger is a special kind of procedural code programmed to fire when a data manipulation language (DML) event occurs in the database server. DML events include UPDATE, INSERT, or DELETE statements issued against a table or view. SQL Server has three types of triggers: DML triggers, DDL triggers, and logon triggers. For the purpose of this article, only DML triggers will be used to demonstrate and achieve a specific goal.
This article describes how to create a trigger from Object Explorer in SQL Server Management Studio, as well as by using T-SQL code, and provides an example on how to create a trigger in a database to audit data modification in a table from the AdventureWorks2014 database. Furthermore, it describes a solution using a tool called ApexSQL Trigger.
DML trigger benefits
Triggers are generally used for auditing purposes and in particular Before-and-after data change auditing.
Triggers can guard against accidental or incorrect INSERT, UPDATE, and DELETE operations and enforce other restrictions that are more complex Transact-SQL statements. Also, they can analyze the state of a table before and after the data modification and take actions based on that difference. For example, you could create a trigger that detected if all of the rows in a table were deleted from a delete statement and, based on the assumption that this was a Delete without a Where clause, rollback the statement, essentially acting as a code execution guard.
For more information on DML triggers and their usage as preventive mechanism please see the article: How to prevent accidental data loss from executing a query in SQL Server aka “Practicing safe coding”
How to create a DML trigger
Before we create any triggers, let’s create an additional table inside the AdventureWorks2014 database that will be used to monitor and store information whenever a user updates data from an existing AdventureWorks2014 table.
To create this table, open a new query in SSMS, and execute the following T-SQL code:
USE AdventureWorks2014
GO

IF OBJECT_ID ('Purchasing.StandardPriceHistory', 'U') IS NOT NULL
	DROP TABLE Purchasing.StandardPriceHistory
GO

CREATE TABLE Purchasing.StandardPriceHistory (
	PriceHistoryID uniqueidentifier NOT NULL PRIMARY KEY,
	ProductID int NOT NULL,
	PreviousPrice decimal(19,4),
	NewPrice decimal(19,4),
	PriceChangeDate datetime NOT NULL
) ON [PRIMARY]
GO

When the table is created, the next step would be to create a trigger that will fire every time an UPDATE statement is issued against the StandardPrice column in the ProductVendor table. This trigger will basically create a snapshot of previous and new price, as an UPDATE is a DELETE followed by an INSERT statement.
As previously stated, a simple DML trigger will be created for the UPDATE statement on the ProductVendor table, and whenever the user updates any value for the StandardPrice column, the trigger will fire, and record what has been changed in the new table.
There are two ways to create this trigger, so let’s explore both options:
Using Transact-SQL
To create a trigger using only T-SQL, open a new query tab, paste and execute the following T-SQL code:
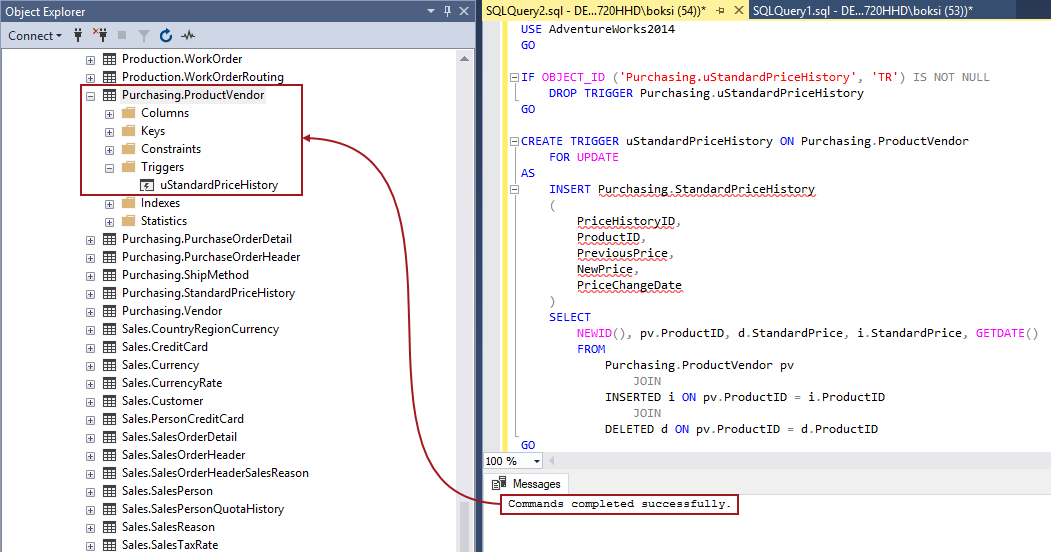
USE AdventureWorks2014
GO

IF OBJECT_ID ('Purchasing.uStandardPriceHistory', 'TR') IS NOT NULL
	DROP TRIGGER Purchasing.uStandardPriceHistory
GO

CREATE TRIGGER uStandardPriceHistory ON Purchasing.ProductVendor
	FOR UPDATE
AS
	INSERT Purchasing.StandardPriceHistory
	(
	    PriceHistoryID,
	    ProductID,
	    PreviousPrice,
	    NewPrice,
	    PriceChangeDate
	)
	SELECT
		NEWID(), pv.ProductID, d.StandardPrice, i.StandardPrice, GETDATE()
		FROM
			Purchasing.ProductVendor pv
				JOIN
			INSERTED i ON pv.ProductID = i.ProductID
				JOIN
			DELETED d ON pv.ProductID = d.ProductID
GO
Previously, there was no triggers defined on the ProductVendor table, and after refreshing the Triggers, the new one is listed:
Using SQL Server Management Studio
To create a trigger in SSMS, expand Databases, expand the AdventureWorks2014 database, expand Tables, and then expand the ProductVendor table, right-click Triggers, and then select the New Trigger from the context menu:
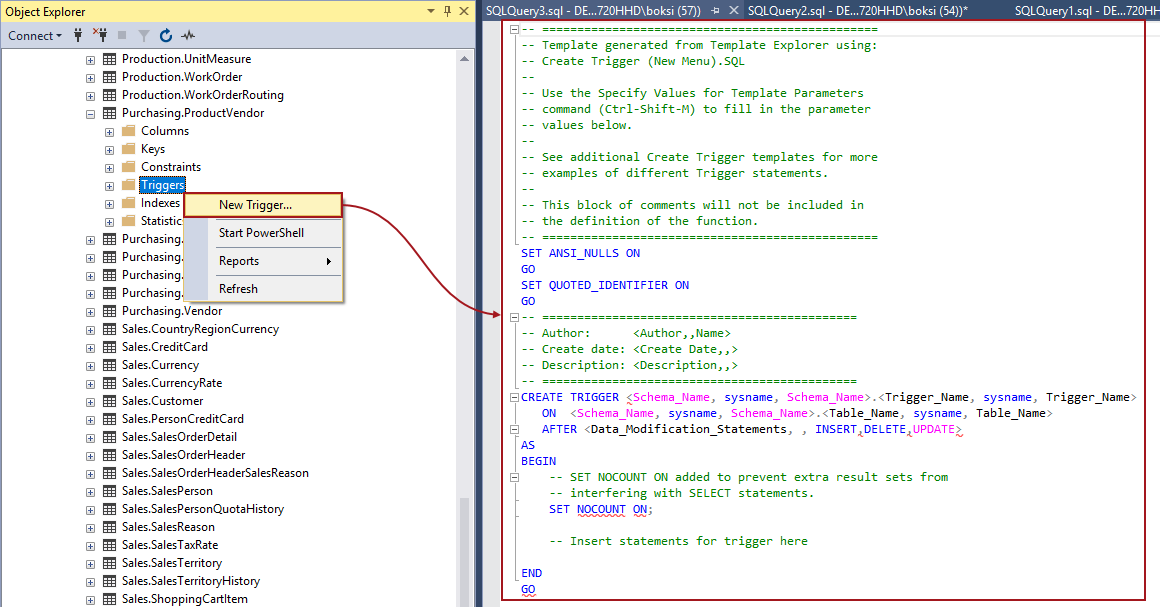
In SSMS 2017, this will open a new query tab with a default template for creating a trigger. With a few modification of the default T-SQL code, a similar trigger can be created that does the exact same thing as the one we previously created:
SET ANSI_NULLS ON
GO
SET QUOTED_IDENTIFIER ON
GO

CREATE TRIGGER uStandardPriceHistory
   ON  Purchasing.ProductVendor
   AFTER UPDATE
AS
	INSERT Purchasing.StandardPriceHistory
	(
	    PriceHistoryID,
	    ProductID,
	    PreviousPrice,
	    NewPrice,
	    PriceChangeDate
	)
	SELECT
		NEWID(), pv.ProductID, d.StandardPrice, i.StandardPrice, GETDATE()
		FROM
			Purchasing.ProductVendor pv
				JOIN
			INSERTED i ON pv.ProductID = i.ProductID
				JOIN
			DELETED d ON pv.ProductID = d.ProductID
GO
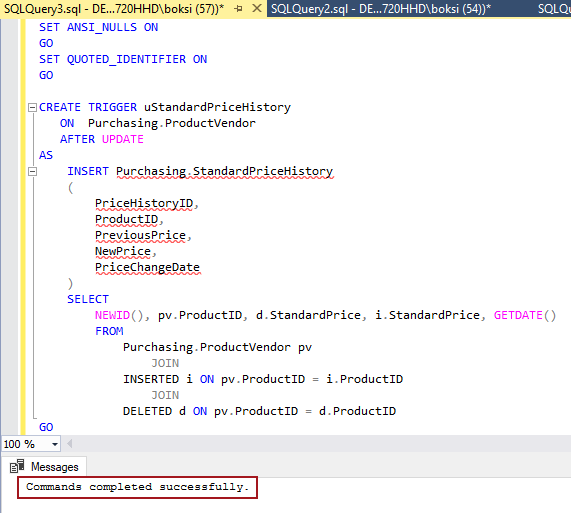
Note that FOR and AFTER statements are basically the same, but AFTER triggers cannot be created on views, and both of them specifies that the DML trigger is fired only when all operations specified in the SQL statement have executed successfully. Also, bear in mind that the same trigger action can be defined for more than one user action (for example, INSERT and UPDATE) in the same CREATE TRIGGER statement.
|
Quick tip: Creating a new trigger from Object Explorer in SSMS 2014 and older versions does not initially open a new query with the default SQL code template, instead it opens a new query menu, where the user can specify values for template parameters. Alternatively, the user can press (Ctrl+Shift+M) to open the Specify Values for Template Parameters dialog box |
After those two steps, if we run a simple SELECT statement to get data from the newly created table, there will be no data to return simply because we just created the table and trigger that will set records into it:

So, let’s change some data inside the StandardPrice column, so the trigger can fire and insert some data into the new table. Rather than writing T-SQL code and because it quicker, just navigate to the ProductVendor table in Object Explorer, right-click on the table, and then from the context menu select the Edit Top 200 Rows option:

From the grid, simply change the price of the first three products by clicking the StandardPrice cell, entering a new value, and hitting the Enter key:
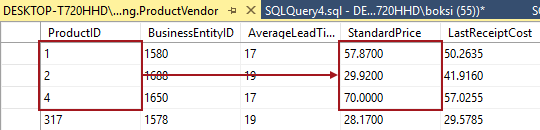
There will not be any confirmation dialog nor message that the action is successful, but the new values are set in the background.
|
Quick tip: If anything is wrong with the T-SQL statement that runs in the background or with the trigger itself, SSMS will raise an error and notify the user about invalid value, error message, cause, etc. |
Now, if we run the SELECT statement as before, there is data in the table that shows for which product (ProductID) was the price changed and the price before (PreviousPrice) and after (NewPrice), as well as the time when the change took place (PriceChangeDate):
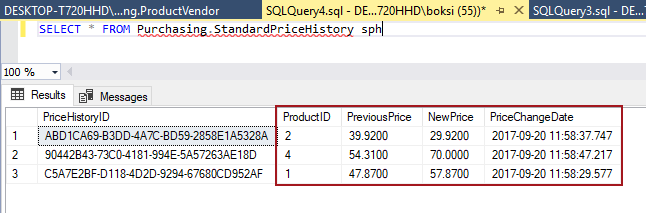
This new information can be useful in many cases, for example when DBA must analyze the state of a table before and after data modification issued by a user. The records from this table can be used as a log file, and hopefully, they can be used to restore table state if any accidental data modification is made.
So far, in this article, we described a special type of stored procedure (trigger) that automatically takes effect when a data manipulation language (DML) event takes place which affects the table defined in the trigger. Furthermore, we described how to manually create and use those triggers. Now, let’s see an out-of-the-box solution for automatic trigger creation.
ApexSQL Trigger
ApexSQL Trigger is a database-auditing tool for SQL Server, which captures the data and schema changes that have occurred on a database, including information on who made the change, which objects were affected by it, when it was made, as well as information on the SQL login, application and host used to make the change. It stores all the captured information in a central repository and exports it in print-friendly formats.
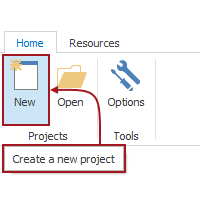
Let’s see how this can be done using ApexSQL Trigger tool. Run ApexSQL Trigger, and click the New button in the Projects group, under the Home tab to create a new project:
A New project dialog will pop-up in which Server, Authentication and Database must be specified (also Username and Password if SQL Server authentication is selected). From the drop-down list select everything as shown below, and then click the OK button:
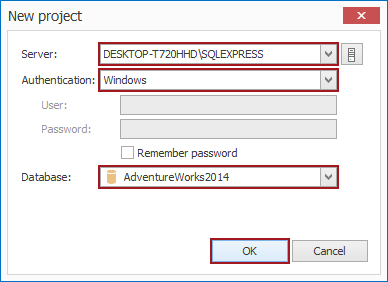
Note: Server name will in most cases be different based on full computer name, domain, and workgroup settings and SQL Server inctance name specified during installation by user
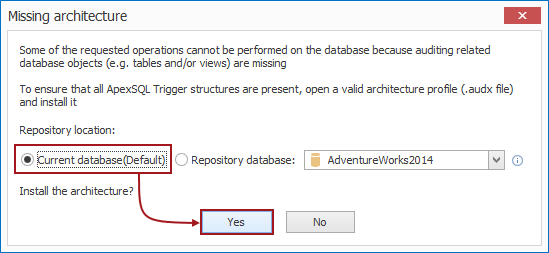
This will open another dialog providing information about missing architecture. This is the important step in project creation, as an auditing architecture needs to be installed on a database to audit data changes in tables. By default, the repository location is installed on the current database specified in the previous step in our case AdventureWorks2014 database. Leave this as it is, and click the Yes button:
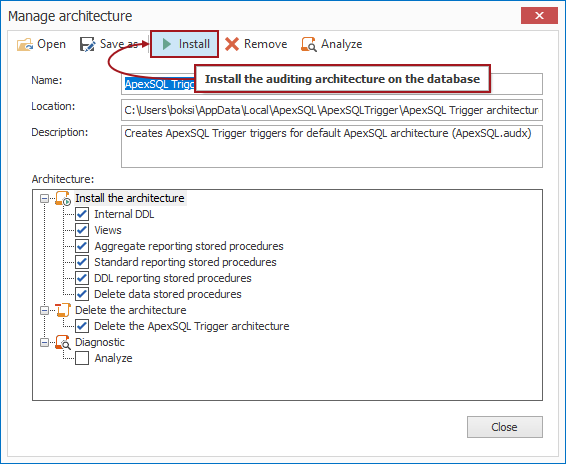
Next, a connection to the AdventureWorks2014 database is established, and the Manage architecture dialog appears offering various settings for installing an auditing architecture. Leave the default settings as shown below, and click the Install button:
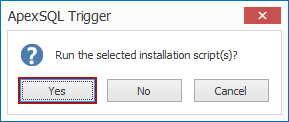
A confirmation dialog will pop-up upon the installation. Just click the Yes button and ApexSQL Trigger will install the script:
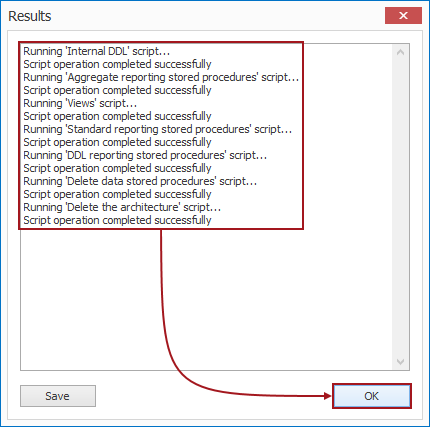
The Results dialog shows installation status for selected architecture. Once everything is installed, click the OK button to close the dialog:
For more information on installing auditing architecture and creating an auditing plan please see the article: How to create an auditing plan
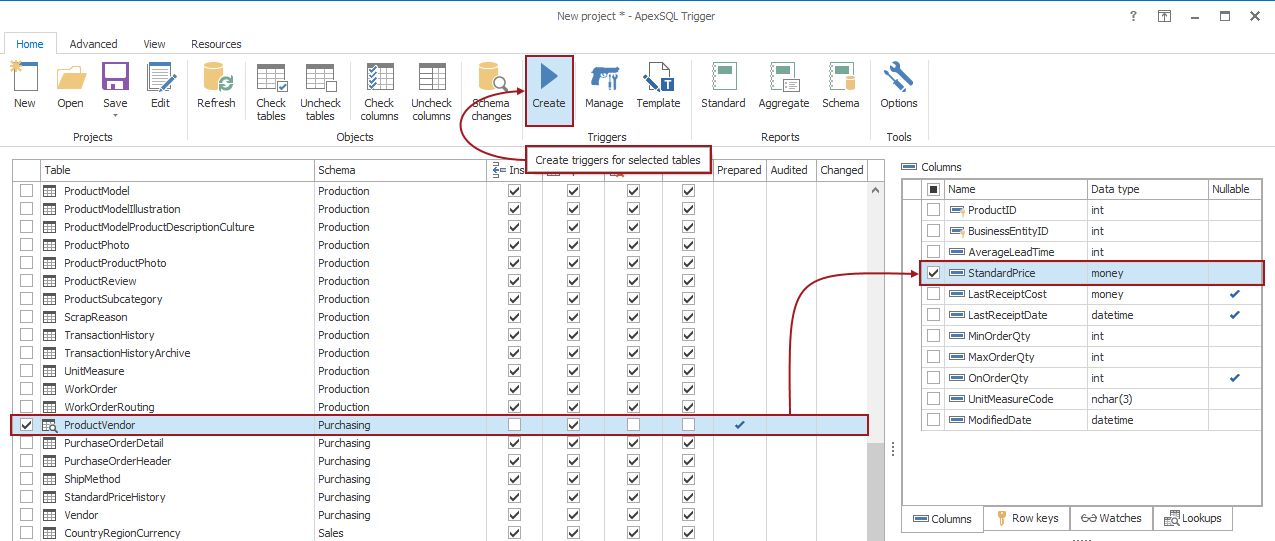
Once the auditing architecture is successfully installed, all tables from the AdventureWorks2014 database are listed in the application main grid. We are in particular interested in the ProductVendor table, as this is the one we want to audit. By default, all DML events (UPDATE, INSERT, and DELETE) are checked for auditing. As stated before, a DML trigger action can be defined for more than one event, and in our case, we only need it for an UPDATE event, so let’s uncheck the INSERT and DELETE events from the list of actions, and move on to the list of columns. From here, check the StandardPrice column, and click the Create button in the Triggers group, under the Home tab to create the trigger for selected table:
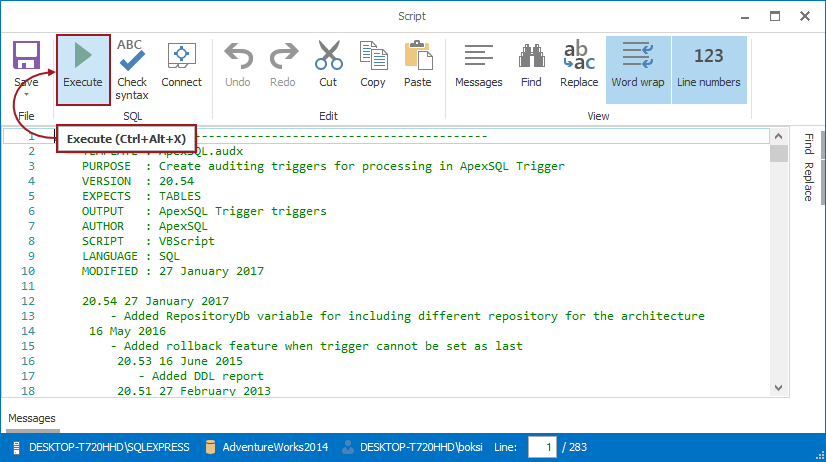
A new Script dialog will open in which the user can preview and modify the trigger to specific requirements if needed (similar to what we did while creating the trigger from the Object Explorer) in the Script window. Let’s leave everything as it is, and just click the Execute button to create the trigger on the ProductVendor table:
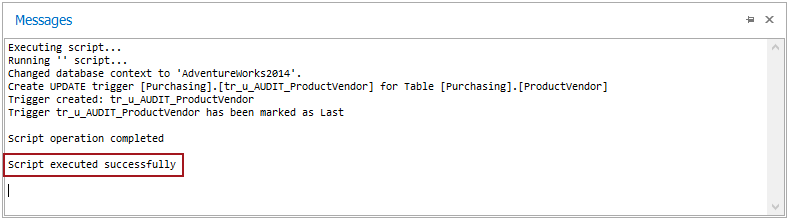
The Messages pane will pop-up at the bottom of the dialog indicating that the script executed successfully:
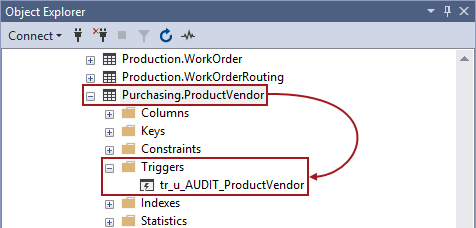
As before, a new trigger is created called “tr_u_AUDIT_ProductVendor” on the ProductVendor table:
After creating this auditing plan, the main application grid shows that the table is currently being audited with newly created trigger:

Again, let’s change the same data inside the StandardPrice column following the steps from before. Locate the ProductVendor table in Object Explorer, right-click on the table, and then from the context menu select the Edit Top 200 Rows option. From the grid, change the price of the first three products as before:

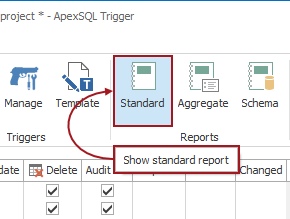
To see the changes, the user can use the Reports feature that is used to create detailed reports containing all changes made to the audited object. There are three report types: Standard, Aggregate, and Schema. For the purpose of this article, and to achieve the same goal as in the previous example, only the Standard report will be used. The standard report shows before and after analysis of the audited action.
For more information on all three ApexSQL Trigger report types please see the article: Auditing reports in ApexSQL Trigger
To create this report, click the Standard button in the Reports group, under the Home tab:
This will open the Standard data change report dialog in which the user can make changes to the Simple filter if needed. Leave all values in filter fields as they are, and click the Apply button to generate a preview of all the changes made for the ProductVendor table:
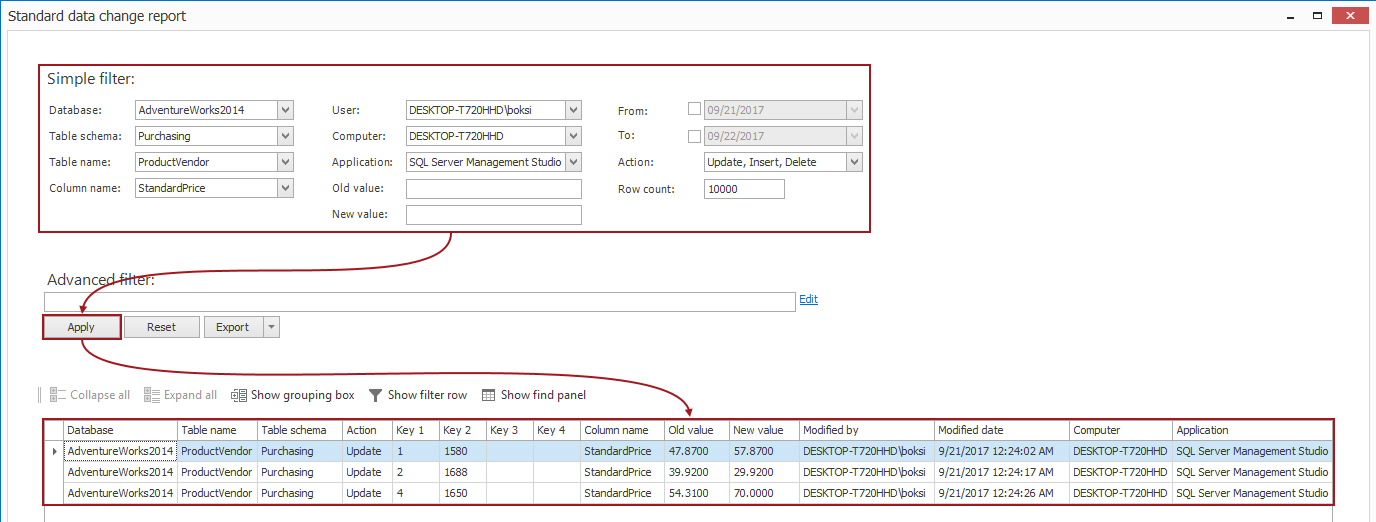
The information in the grid is much more detailed than the one we got earlier as it has information about not only product ID, old and new price, and time of change, but it also provides information on who made the change (Modified by), which objects were affected by it (Database, Table name, Table schema), application and host (Computer) used to make the change, etc. Furthermore, the user has the ability to set simple or advanced filters, to export data to desired file formats, and much more in a few mouse clicks.
Useful links:
- CREATE TRIGGER (Transact-SQL)
- Create DML Triggers
- Auditing triggers in SQL Server databases
- SQL Server database auditing techniques
- How to automate adding SQL auditing triggers to a new, or changed database
September 21, 2017


