


Introduction
One of the common struggles in a large data collection environments, like collecting the SQL audit trails is the low storage space event. With the mechanisms provided by the ApexSQL Audit tool and with some alternative methods using PowerShell automation, these issues can be prevented or resolved.
This article explains what built-in methods for low storage space events ApexSQL Audit can offer and how to resolve critical situations where the storage space situation has to be resolved unattended.
Temporary files
One of the methods to manage and distribute necessary storage during SQL auditing is to plan and set the location for temporary file storage. These files represent collected SQL audit data from an audited instance that is queued to be processed and imported in the central repository, and it is set per audited SQL Server instance. In case the low storage space event occurs for the partition where temporary files are set, some auditing data can be lost.
When a new instance is added for auditing, the dialogue that defines the connection to that instance will have the option to set the temporary files location. This can be a location with some storage space reserves and/or low storage consumption in general.
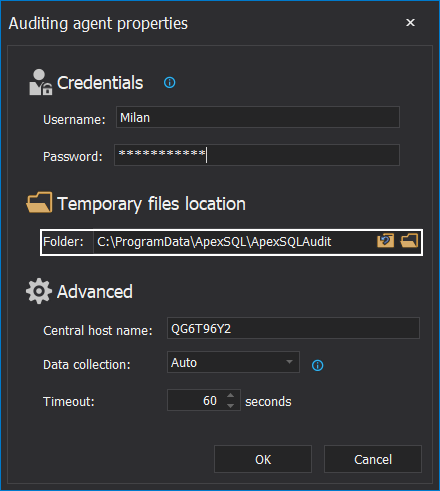
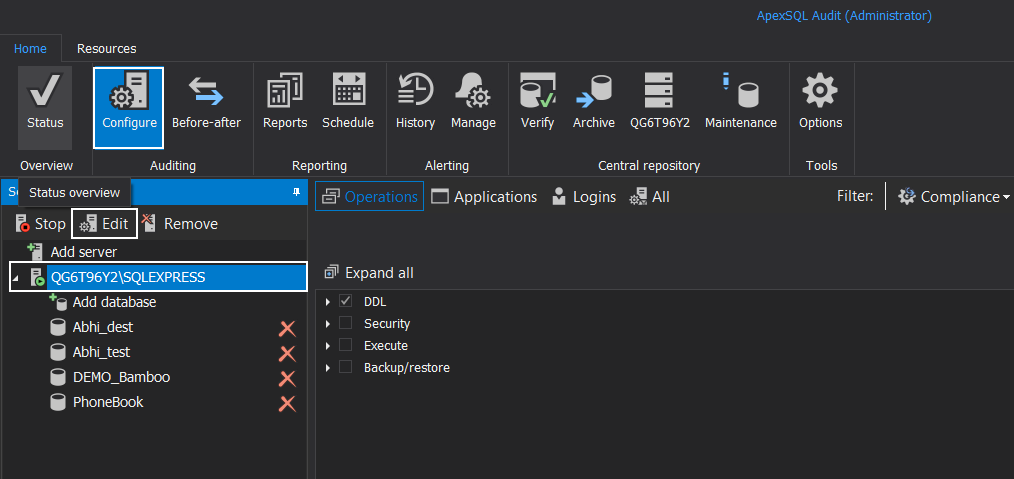
This dialogue will appear when a new audited SQL Server instance is added in the Configure view, but it can be invoked by selecting an existing audited instance and clicking the Edit button. In there, the temporary files location can be changed:
Low storage space for the central instance
As mentioned, collected SQL audit data is stored in a central repository database and can consume a lot of space through time. The archiving method allows emptying the central repository database by creating an archive database from the repository and creating a new repository database. Still, this archive is going to be attached to the same SQL Server instance as the central repository database, so the accumulation of store date will still continue.
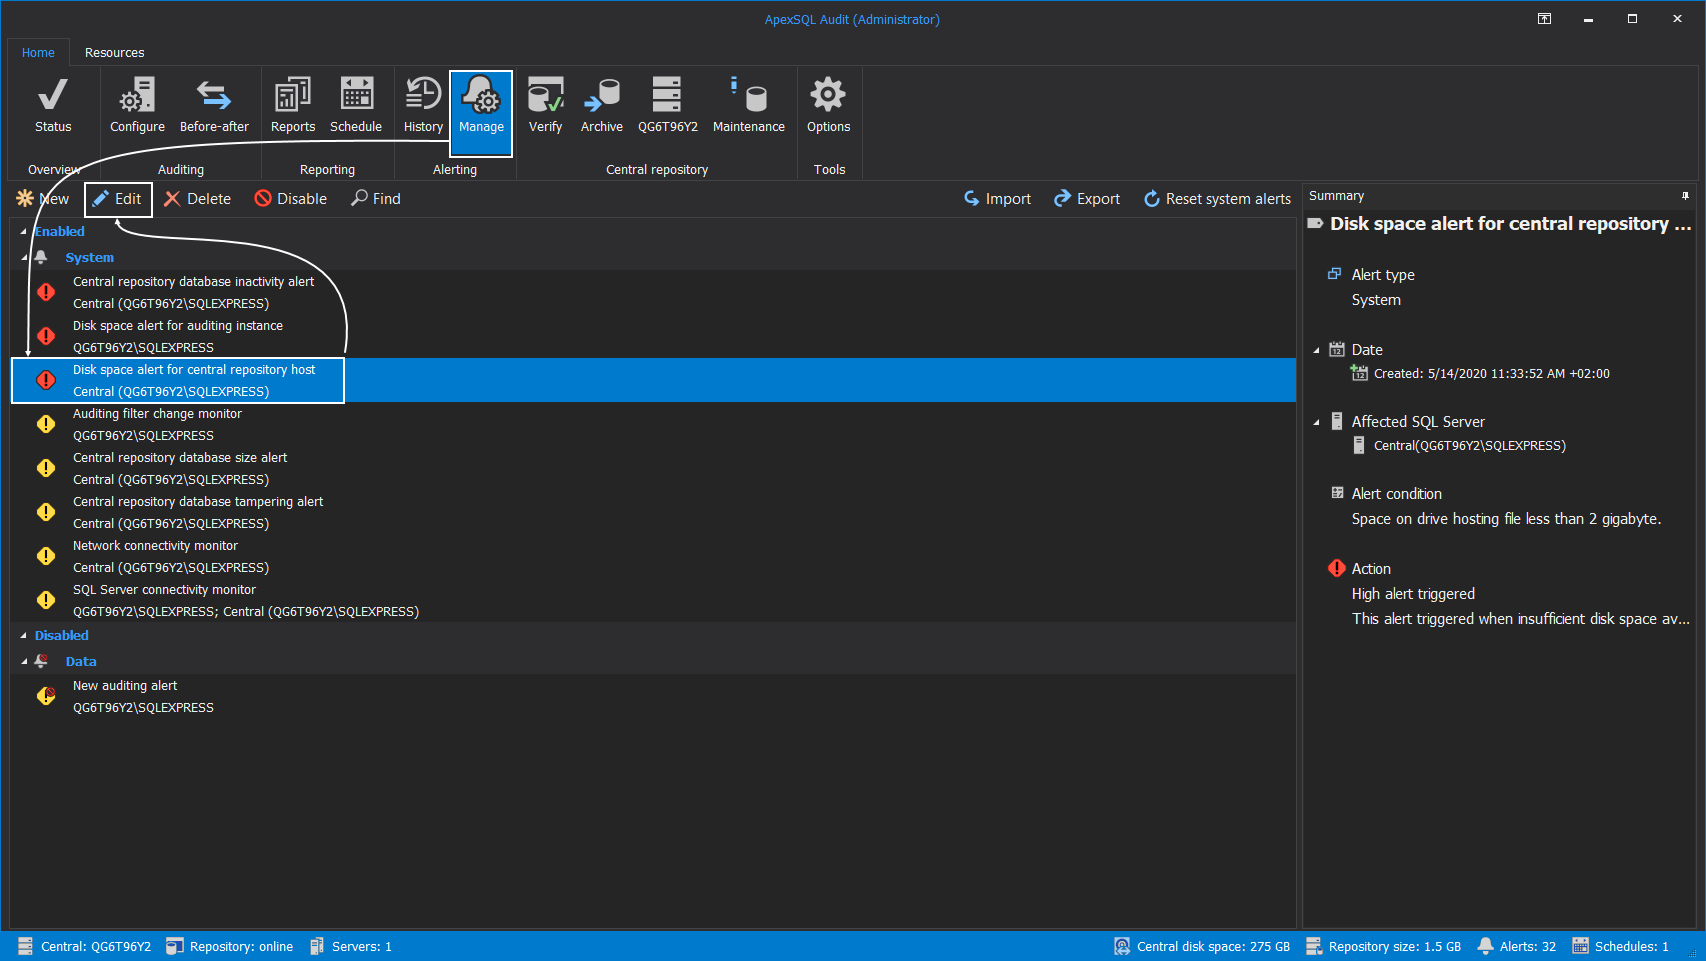
For critical situations when a low storage space event occurs, on the machine where the central repository database is hosted, ApexSQL Audit has built-in alerts, a notification system to inform an operator by email that the event occurred. Setting this alert to work properly will require defining the email recipient as well as some general settings.
To do that, click on the Manage button in the Alerting section of the main menu, then select the Disk space alert for central repository host alert item, and then Edit to open configuration wizard for this alert:
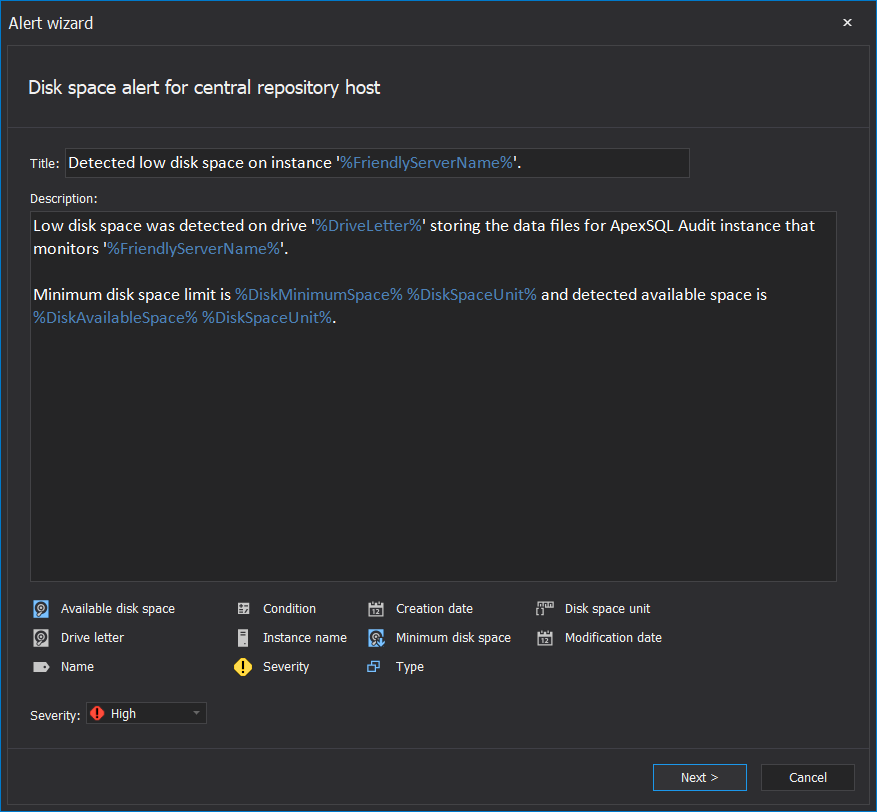
The first step of the wizard is where the email content is defined:
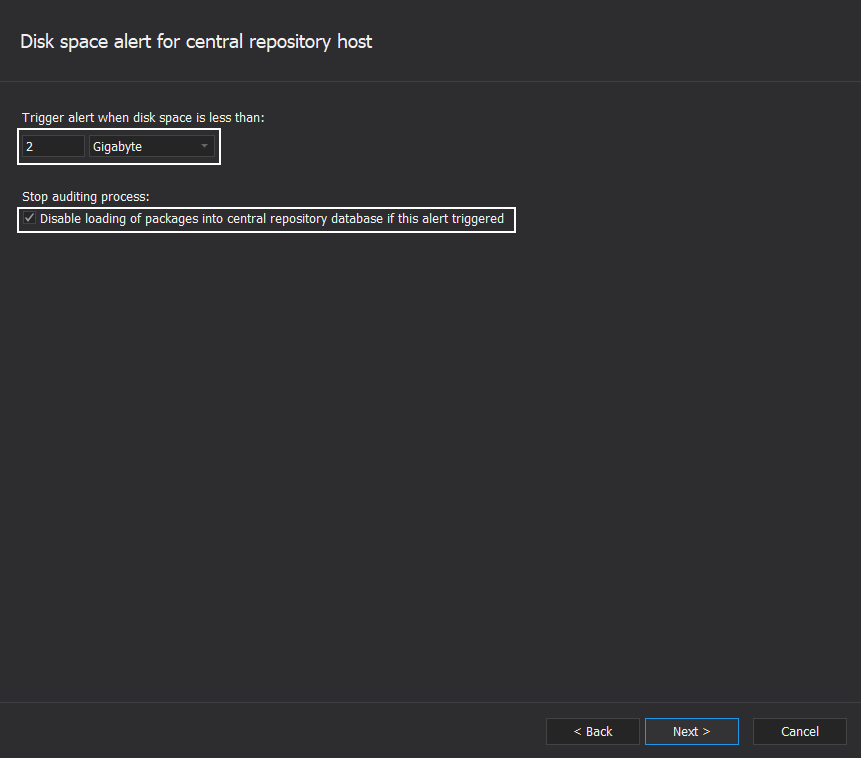
When email content is defined, the following of the wizard will require a definition for remaining storage space before alert triggers. This is where the option to stop collecting auditing data can also be set if the event occurs:
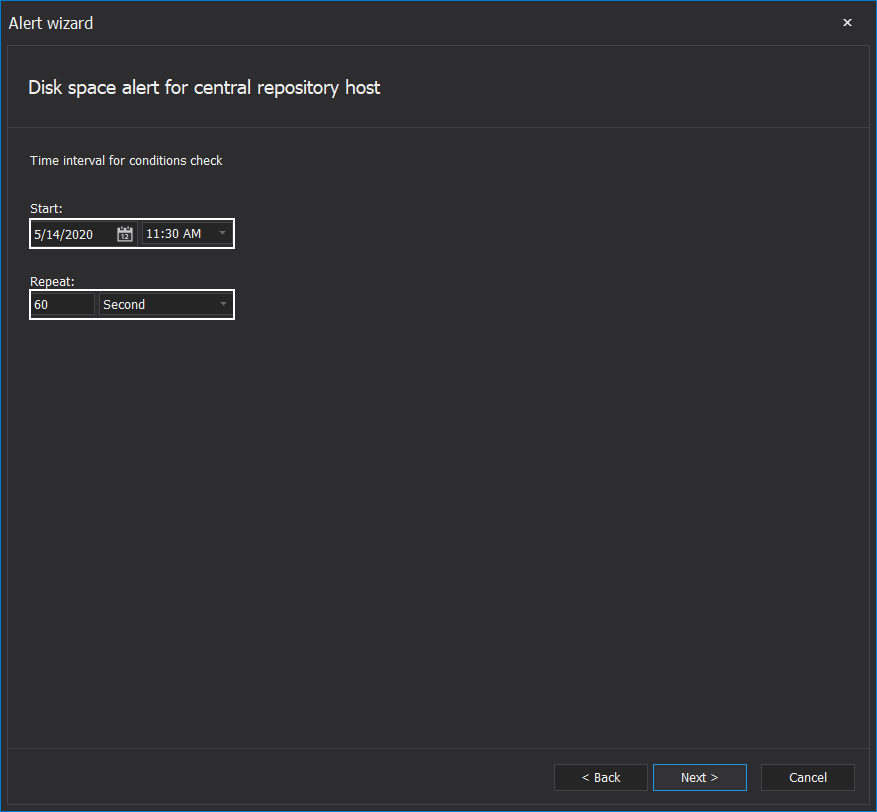
The following step defines when the storage space monitoring should start and what would be the checkup intervals:
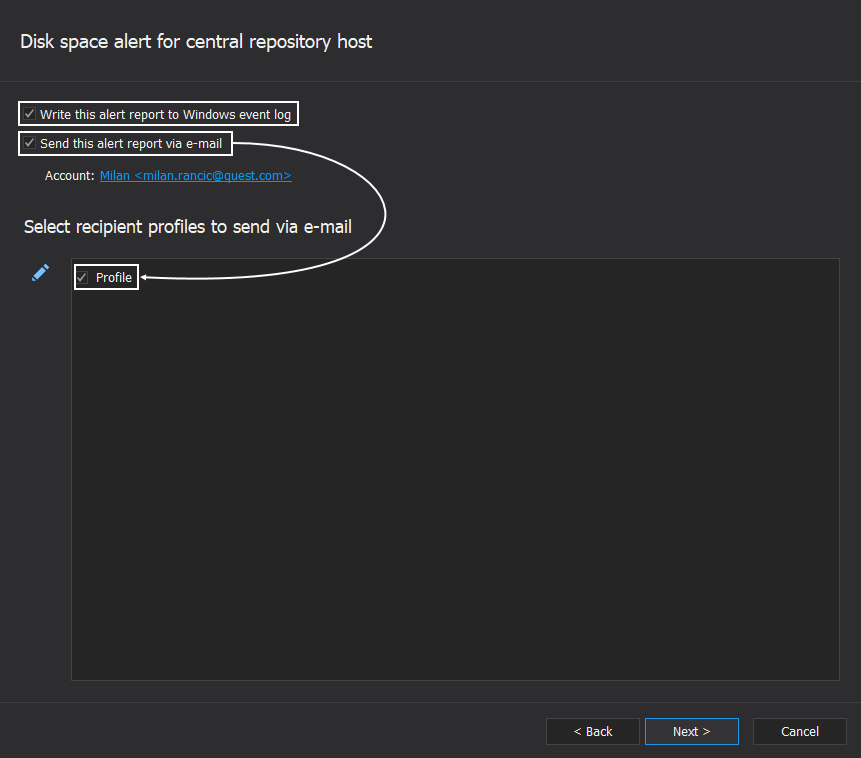
The next step is where the alerting notification can be turned on to be recorded in the Windows event logs and sent to the selected email contact profile:
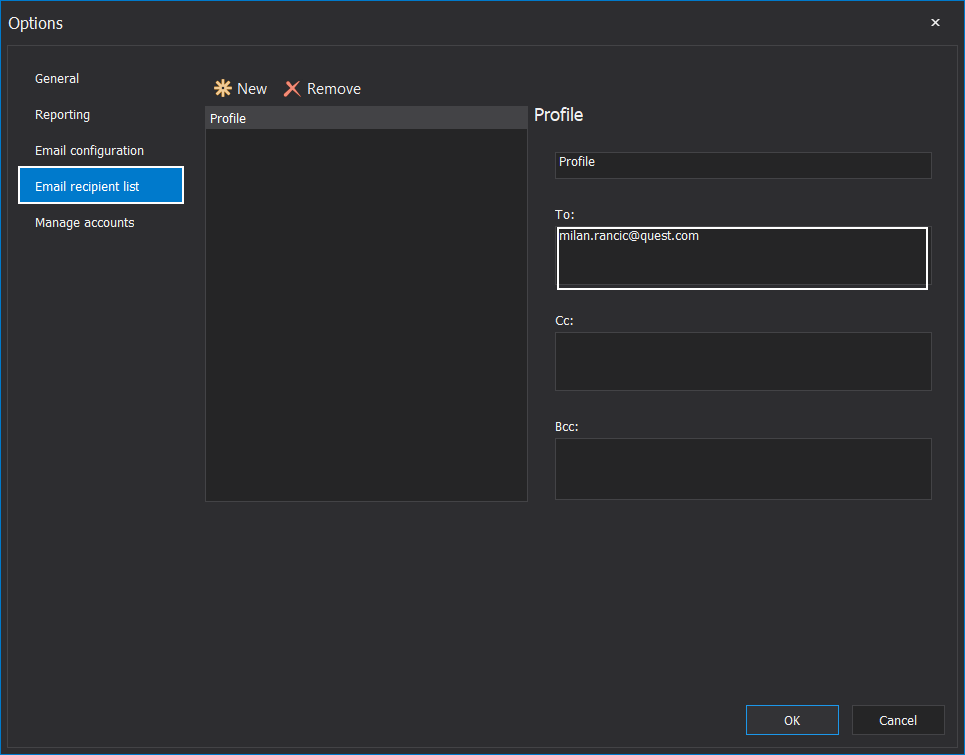
The contact profile is configured in the Email recipient list tab of the main application Options window:
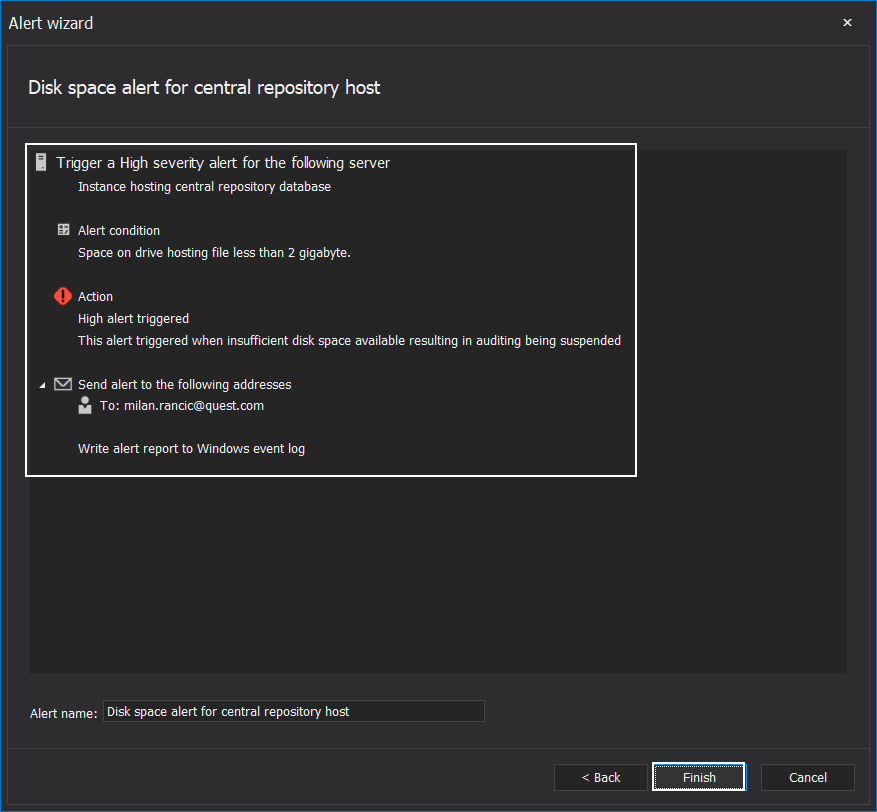
The final wizard step shows a summary of the alerting configuration, which can be confirmed with the Finish button:
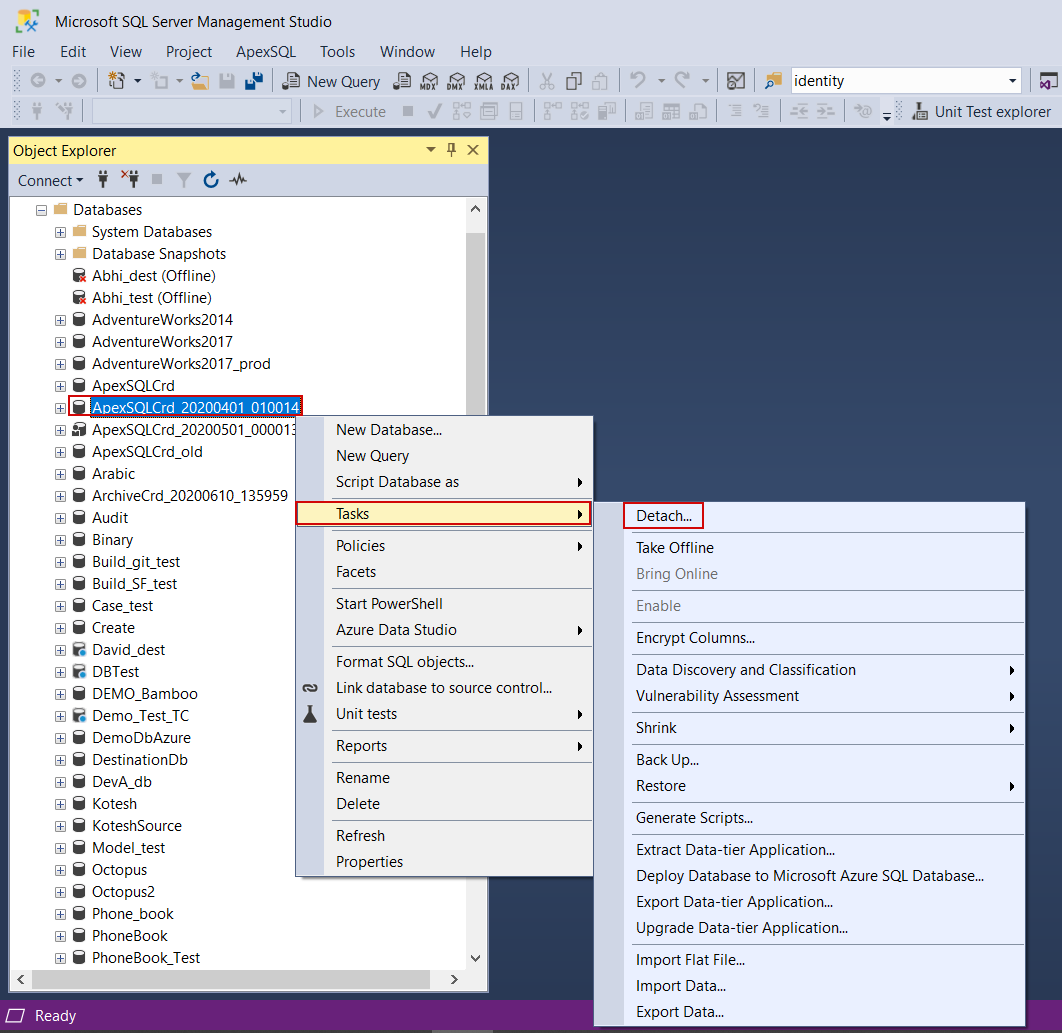
If an SQL audit manager receives this notification, some actions can be performed to remedy the situation. One of the possible actions would be to detach some of the archived central repository databases from the hosting SQL Server and migrate the database image (the associated .mdf and .ldf files) to another storage then reattaching the database to that or another SQL Server instance:
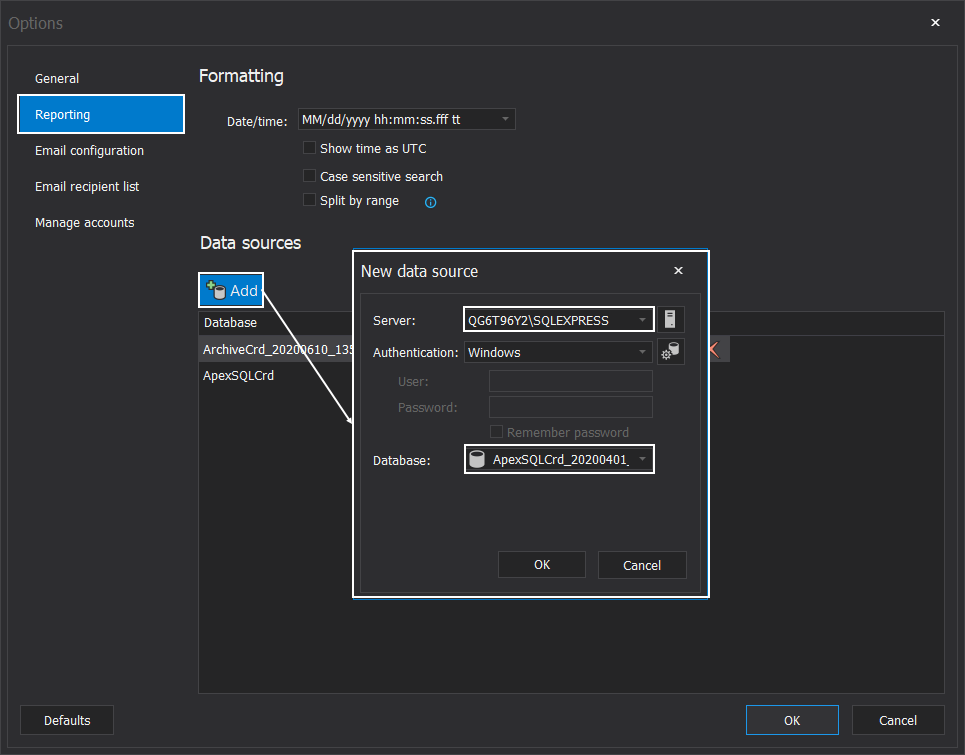
For the changes like that, it would be necessary to check and update reporting data sources from the Reporting tab of the application main Options window. If the archive is relocated to another SQL Server instance, that instance should be targeted and the archive database selected:
Low storage space handling with PowerShell automation
It is possible that a low storage space situation occurs and left unattended for a longer period of time. At this point, there will be a risk that SQL audit data collection will not be working. In cases that this situation occurs on a virtual machine, it is possible to automate the process of resolving the low storage space situation by expanding the virtual drive through PowerShell.
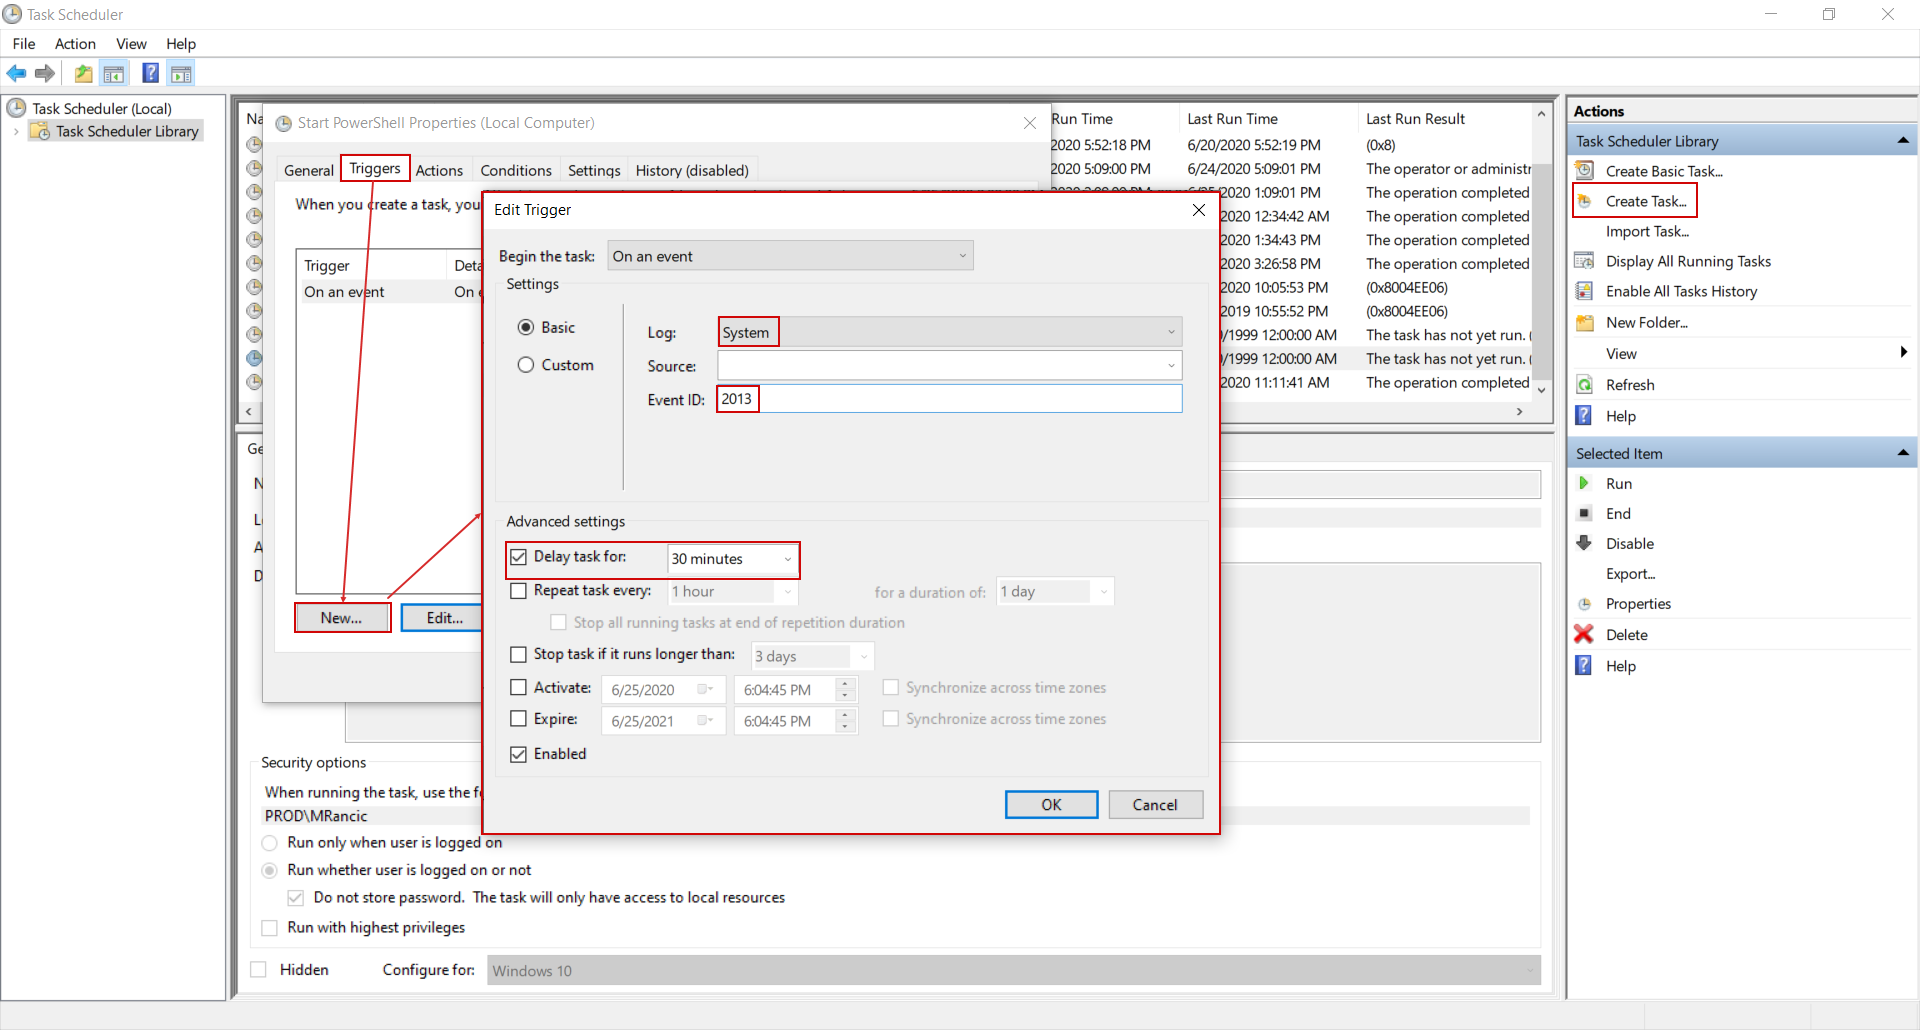
This automation setup starts by setting up the scheduled task to be triggered on the Windows event ID that identifies low storage space events. This is categorized as the System event with ID 2013:
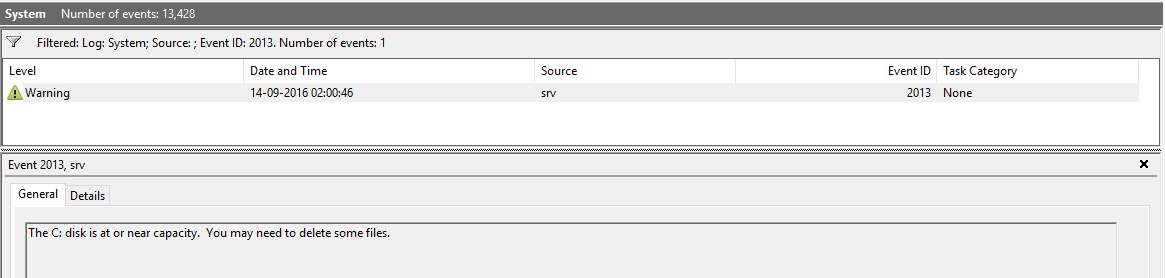
Setting the scheduled task is performed as usual. Use the Create task option in the Windows task scheduler, and set the trigger to activate it on the System event from the Log drop-down list and type in number 2013 in the Event ID field. It would be advisable to set a delay for this task execution to leave some time for a manual intervention:
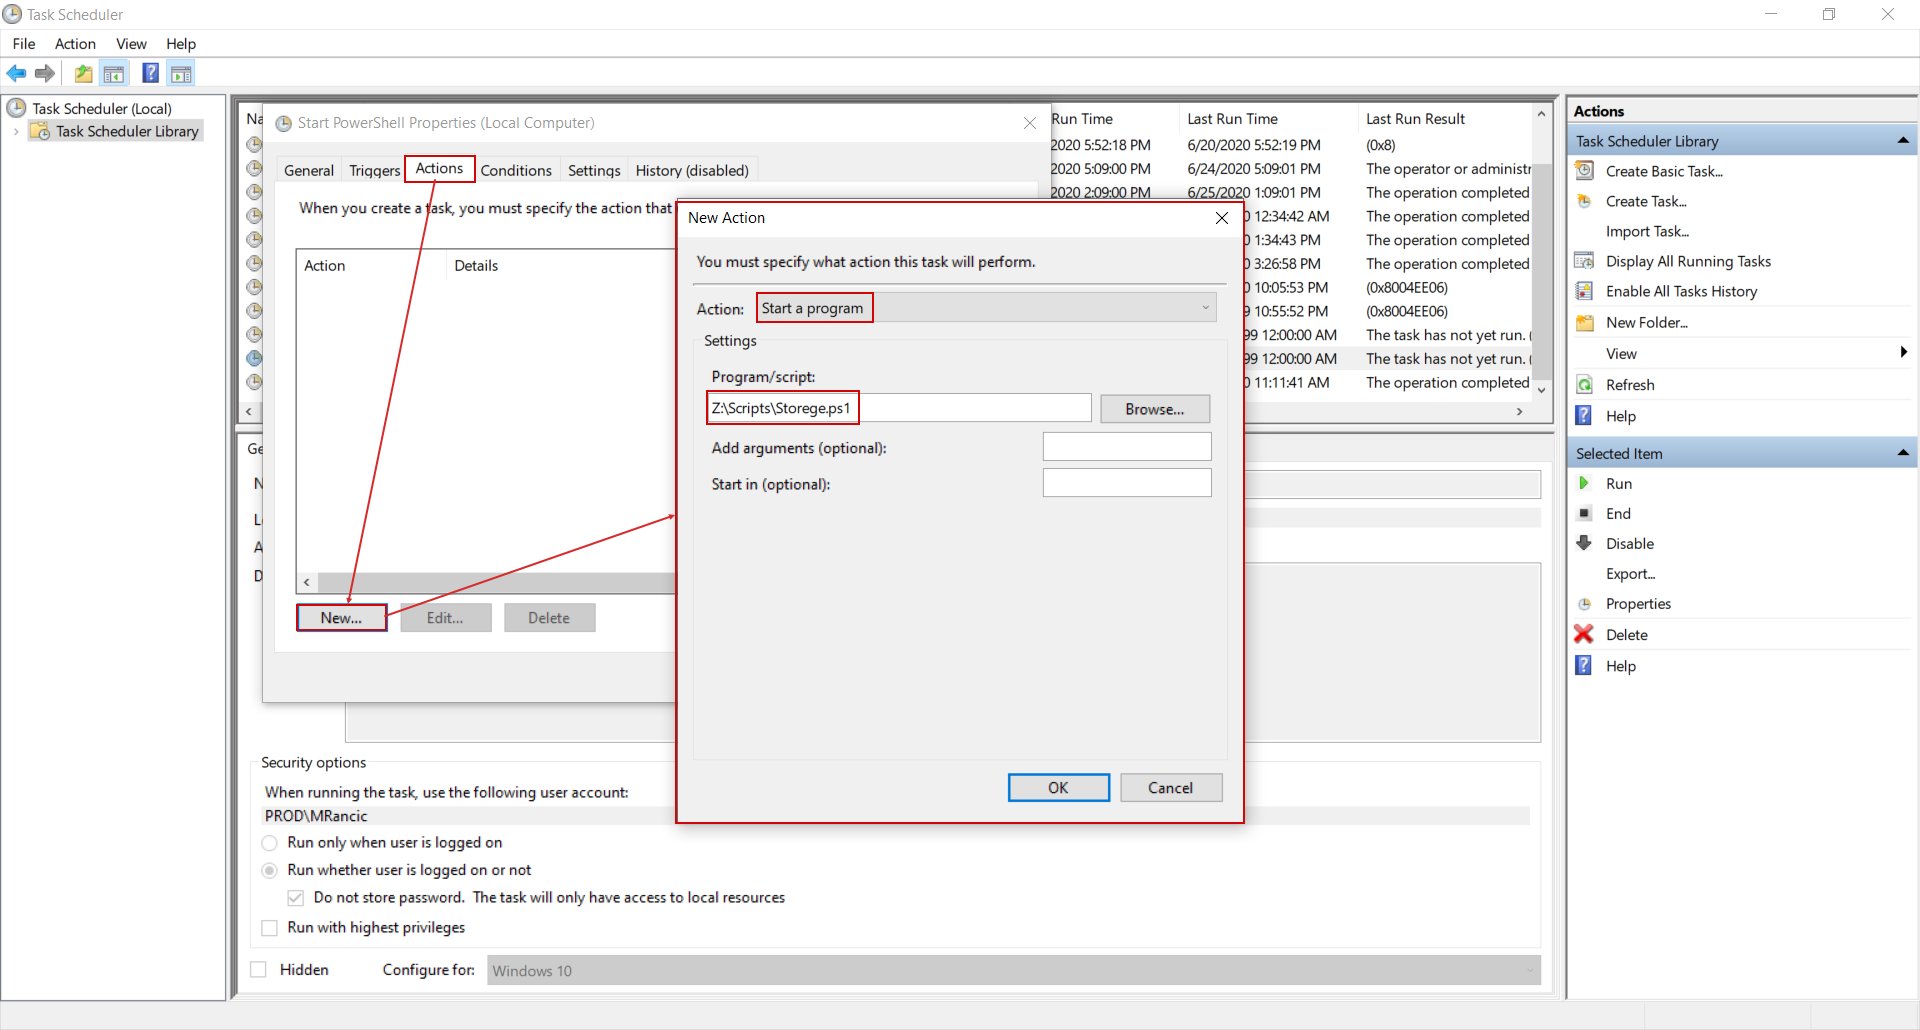
As for the action that is going to be triggered, go to the Actions tab and create New action defined as Start s program and insert the path to the PowerShell automation script file which will be created:
The location for the PowerShell automation script that will be executed will have to be some network shared folder or a network drive. Resizing a virtual drive usually requires shut down of a virtual machine, this applies to Azure virtual machines, until Microsoft introduces this feature to Azure, and Hyper-V machines unless their storage is hosted with a SCSI controller, in that case resizing can be done “live”. This is not a popular measure to shut down the working machine, but in these critical events, when attendance is not expected for a longer time, it would be beneficial compared to full machine operation halt due to lack of storage space.
This is why the resizing operation has to be performed from a remote location.
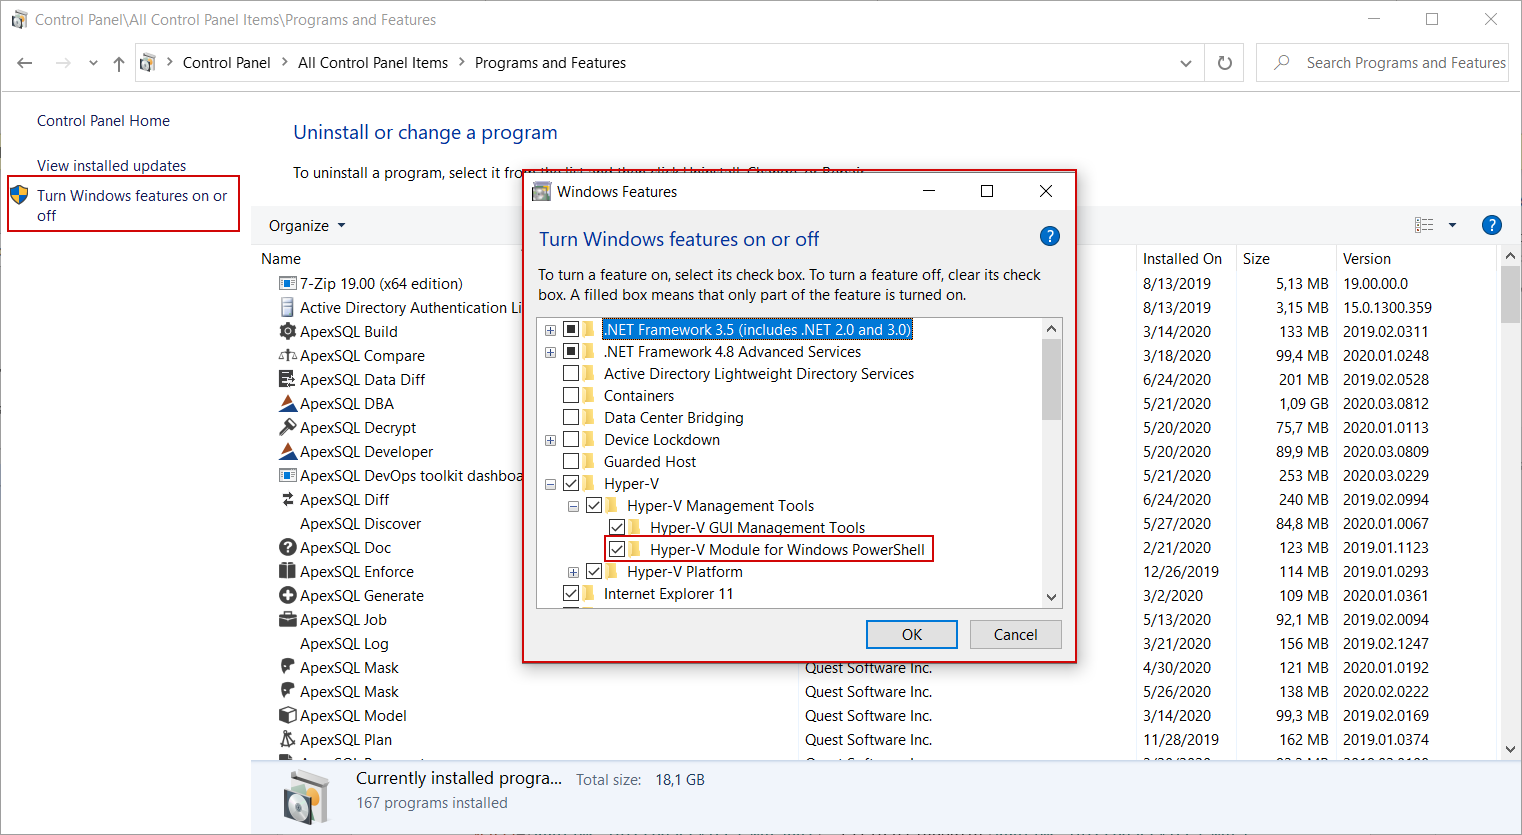
The single requirement for the PowerShell automation scripts to work with the Azure environment would be the Azure PowerShell module that can be installed by executing the command Install-Module -Name Az from the PowerShell console, and for the Hyper-V PowerShell automation management the Hyper-V module for Windows PowerShell will have to be installed from the Windows Features location:
Azure script
At first, the connection to Azure resources will have to be established from within the script. The commands will have to be created that the connection is established automatically, without prompting for credentials:
#Read the username for Azure logon
$Username = "Domain\User"

#Read the encrypted password for Azure logon stored in a text file
$EncryptedPass = Get-Content -Path "C:\Credentials\AzurePassword.txt"

#Convert encrypted password to usable secured string
$Pass=[Runtime.InteropServices.Marshal]::PtrToStringAuto([Runtime.InteropServices.Marshal]::SecureStringToBSTR((ConvertTo-SecureString $EncryptedSCPass)))

#Create credentials object with username and password to be used for connection
$Creds = New-Object -TypeName System.Management.Automation.PSCredential -ArgumentList $Username, $Pass

#Connect to Azure services using created credentials object
Connect-AzAccount -Credential $creds
The password part (where the password is read from a saved file) can be resolved using instructions from the following article:
PowerShell encrypt password techniques for SQL Server
With established connection, the script can continue with following commands that will manipulate the Azure virtual machine:
#Select focus to desired Azure subscription where resources are hosted
Select-AzSubscription -SubscriptionName 'Name for subscription where VM resource is located'

#Define the resource group name where VM is located
$ResourceGroupName = 'DEVOPS'

#Define the name of the VM where SQL audit central repository database is located
$VirtualMachineName = 'Win-10'

#Read properties of the VM and store them in an object
$vm = Get-AzVM -ResourceGroupName $ResourceGroupName -Name $VirtualMachineName

#Stop the target VM, use the Force parameter to prevent prompting for confirmation
Stop-AzVM -ResourceGroupName $ResourceGroupName -Name $VirtualMachineName -force

#Change the value in the VM object for the disk size property attached to VM
$vm.StorageProfile.OSDisk.DiskSizeGB = 150

#Update VM definition with new disk size value
Update-AzVM -ResourceGroupName $ResourceGroupName -VM $vm

#Start the VM
Start-AzVM -ResourceGroupName $ResourceGroupName -Name $VirtualMachineName
Previous commands will be used to handle unmanaged disks. If a virtual machine profile includes managed disks, then the commands will have to address directly disk properties instead of virtual machine properties. The commands after the stopping command would be:
#Read properties of the Disk from the VM properties and store them in an object
$disk= Get-AzDisk -ResourceGroupName $ResourceGroupName -DiskName $vm.StorageProfile.OsDisk.Name

#Set the value for the DiskSizeGB property of the Disk object
$disk.DiskSizeGB = 150

#Update Disk definition with new disk size value
Update-AzDisk -ResourceGroupName $ResourceGroupName -Disk $disk -DiskName $disk.Name

#Start the VM
Start-AzVM -ResourceGroupName $ResourceGroupName -Name $VirtualMachineName
Analog to this, a drive attached to Hyper-V machine can be extended; this time credentials would not be necessary as it is considered in a local network:
#Stop the VM machine with a given name
Stop-VM -Name 'Win 10'

#Red the properties of the virtual drive attached to the virtual machine
$disk = Get-VHD -Path 'C:\Users\MRancic\Desktop\converted\win 10.vhdx'

#Read the velue for disk size property, increment it by desired amount and store the value in object
$disksize = $disk.Size + 20gb

#Set the new value, stored in the $DiskSize object, for the virtual disk
Resize-VHD -Path 'C:\Users\MRancic\Desktop\converted\win 10.vhdx' -SizeBytes $disksize

#Start the VM machine with a given name
Start-VM -Name 'Win 10'
The resizing operation is not done here; now we have unallocated space that the partition will be expanded with. This means that another scheduled task should be set triggered at startup:
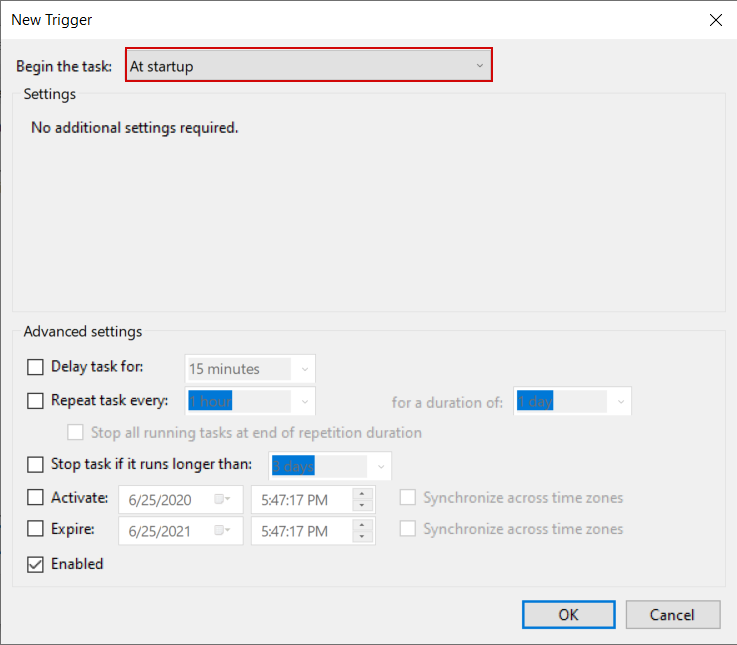
The action will be to execute another PowerShell automation script which will check if there is contiguous unallocated space present and if so, to expand partition with that space:
#Define the drive letter that will be checked for expansion
$Drive2Expand='C'

#Read the amount of available unallocated space and store the information of current disk size
$CurrentDisk = Get-Volume | Where DriveLetter -eq $Drive2Expand | ForEach-Object {
    $Size = Get-PartitionSupportedSize -DriveLetter $_.DriveLetter
    If ($Size.SizeMax -gt $_.Size) { $_ }
}

#Check if current disk size is smaller than possible max size, with offset of 10000 bytes to avoid  cases where some unallocated space is left smaller than the cluster size
if ($Size.SizeMax -gt $CurrentDisk.Size+10000)

{

#Get the partition number for chosen drive letter
$PartitionNum=(Get-Partition -DriveLetter $Drive2Expand)
#Get disk number of default hyper-v boot drive but change if expanding a secondary or non-boot drive
$VirtDiskNum=(Get-Disk | Where IsBoot -eq Yes )

#Expand drive C using all unallocated space available
Resize-Partition -PartitionNumber $PartitionNum.PartitionNumber -Size $Size.SizeMax -DiskNumber $VirtDiskNum.number
}
As stated before, this script will perform the action only if unallocated space is detected.
This PowerShell automation solution, along with other application built-in methods, can prevent critical situations where SQL audit operations might come to a halt because of low storage space events.
June 29, 2020


