


Importing data in SQL database is playing an important role when working with SQL servers. There are various techniques and tools to facilitate data entry into the SQL database. This article will explain how to import data in an SQL database from an Excel file by using two methods:
- SQL Server Management Studio (SQL Server Import and Export data wizard)
- ApexSQL Pump
Import data in SQL database via SQL Server Import and Export data wizard
SQL Server Management Studio allows users to import data from different data sources, which will be explained in this chapter.
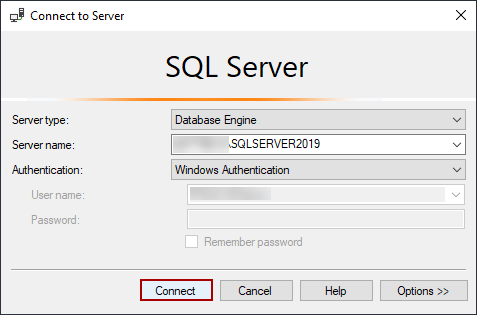
On SQL Server Management Studio launch, the Connect to Server window will be opened. Choose the Server name and the type of Authentication, provide credentials, and click the Connect button:
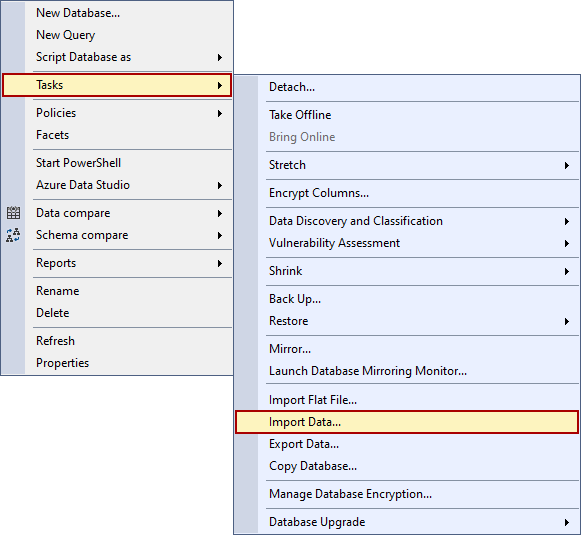
When SSMS is connected to the chosen instance of SQL Server, right-click on the desired database and navigate to Tasks > Import data option from the Tasks submenu:
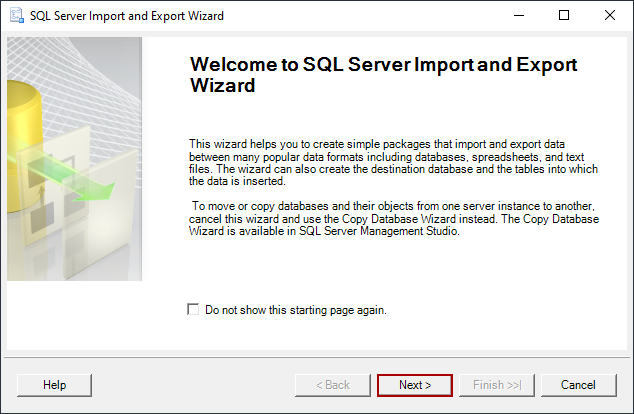
That action will open the SQL Server Import and Export Wizard window. The first step of this process gives us a brief overview of what the wizard does. It’s designed to help users import and export data between many popular data formats including databases, spreadsheets, and text files. By clicking on the Next button, the wizard will go to the next step:
The Choose a Data Source step will be the next on the journey through import data in SQL database with this wizard. The source from which data will be copied will be selected in this step.
From the Data source drop-list list, choose Microsoft Excel as the source. The section below will be changed with options following the selected data source. In the Excel connection settings section, the path to an Excel file will be chosen by clicking on the Browse button:

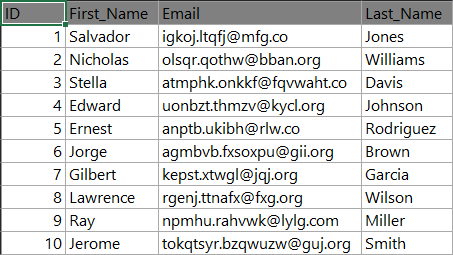
The data from the dbo.Export_data Excel file will be used for importing in the desired database:
When the data source is chosen, click on the Next button to continue. The following warning message might be shown:
- The operation could not be completed.
Additional information:
The ‘Microsoft.ACE.OLEDB.12.0’ provider is not registered on the local machine. (System.Data)
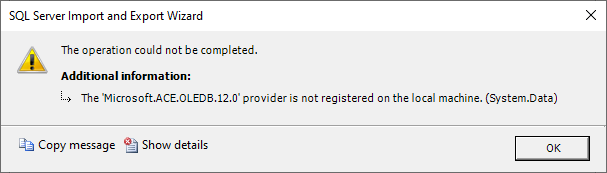
This warning message is usually encountered on a 64-bit operating system in a combination with the 32-bit version of SQL Server Management Studio. To bypass this issue, close SSMS, go to the Start menu, find and open the 64-bit version of SQL Server Import and Export Wizard:
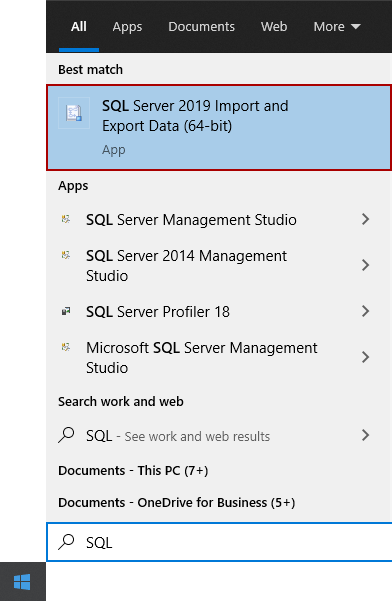
Like on the 32-bit version, the same welcome step will be presented with the exact same steps. When everything previously mentioned in the article has been set, from the Choose a Data Source window click on the Next button.
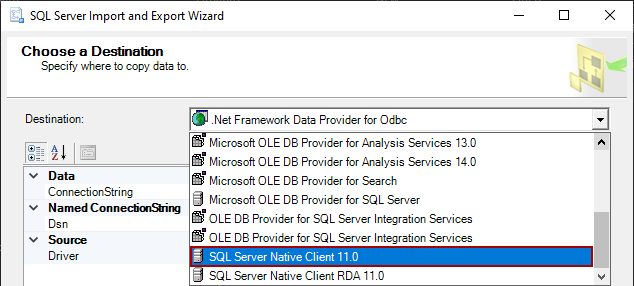
Choose a destination step will be next in which the Destination where the data will be copied to will be set. From the Destination drop-down list, choose SQL Server Native Client 11.0:
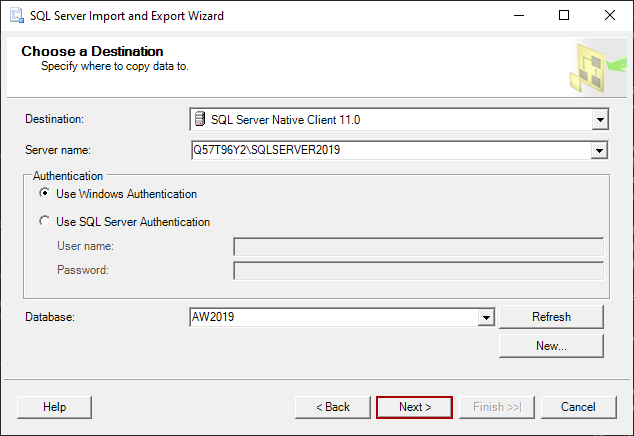
With the selected destination, the section below the Destination drop-list will change automatically. Here, the Server name, type of Authentication, and the Database need to be set. Click on the Next button when all is specified:
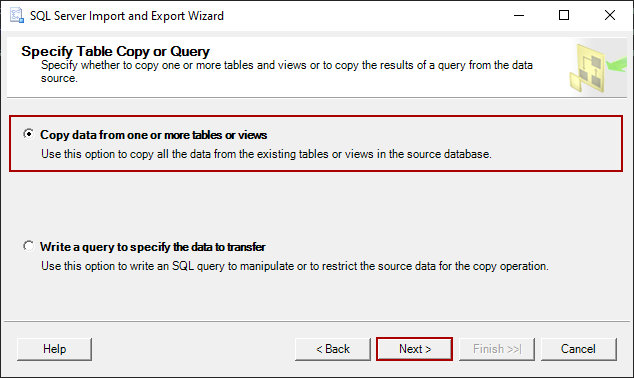
Moving on, in the Specify Table Copy or Query step, there are two options available:
- Copy data from one or more tables or views
- Write a query to specify the data to transfer
The Copy data from one or more tables or views option will be selected in this case. Click on the Next button to continue the process of importing data in SQL Database:
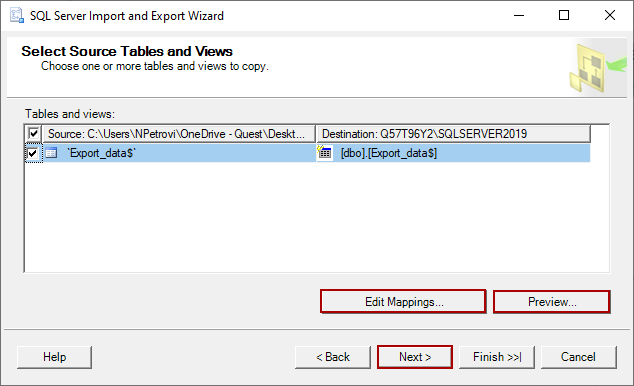
The Select Source Tables and Views step is next in this wizard. It allows users to chosen one or more tables and views to copy data. For this article, dbo.Export_data table is selected. Furthermore, it allows users to edit mappings by clicking on the Edit mappings button, and to see how the imported data will look in the database by clicking on the Preview button. Click Next to continue the process of importing data in SQL database:
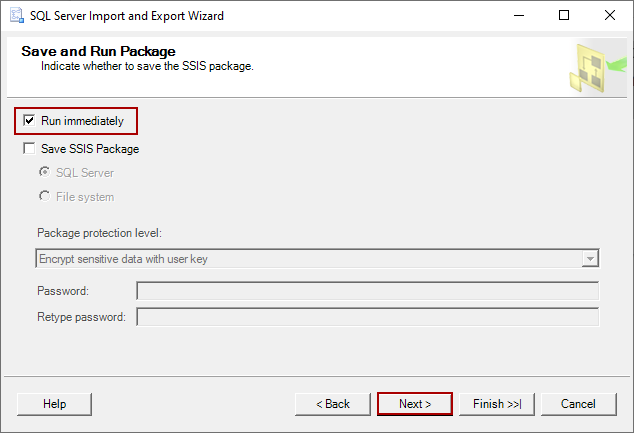
In the Save and Run Package step, the user can choose whether to save the SSIS package. The default option is Run immediately. Click on the Next button to continue the importing process:
Last but not least, the Complete the Wizard is the last step in the processing of import data in SQL database. Here, a summary of the choices that were made through the process of importing data is listed. Verify that everything is okay and click Finish to end the process:

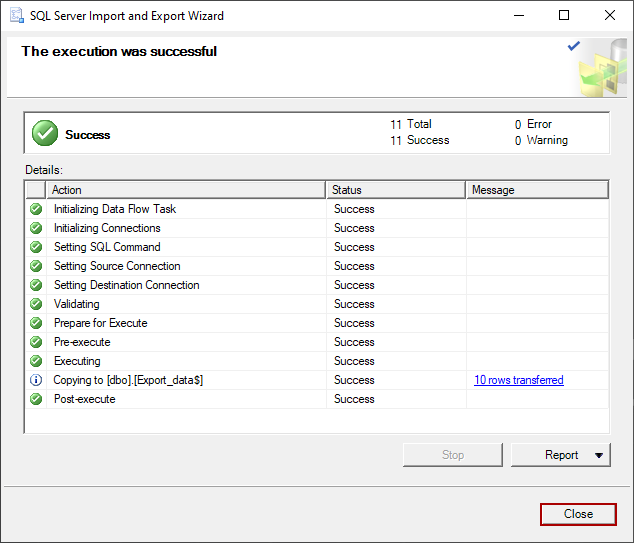
The execution was successful message is shown with a brief status of the done operation. Click Close to exit the wizard:
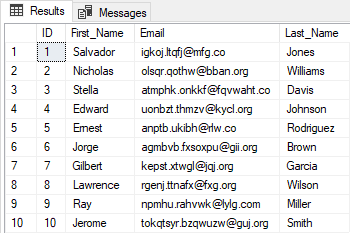
The targeted database will be populated with the newly created table and data as can be seen below:
Import data in SQL database via ApexSQL Pump
ApexSQL Pump is a database pump tool, which allows the users to easily export or import data in SQL database and reverse.
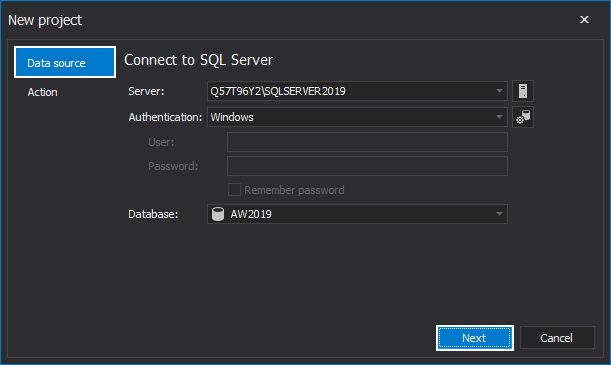
On ApexSQL Pump launch, the New project window will be shown. In the Data source tab, choose Server, the type of the Authentication, and the Database. For this article, the AW2019 database will be used. Click Next to continue:
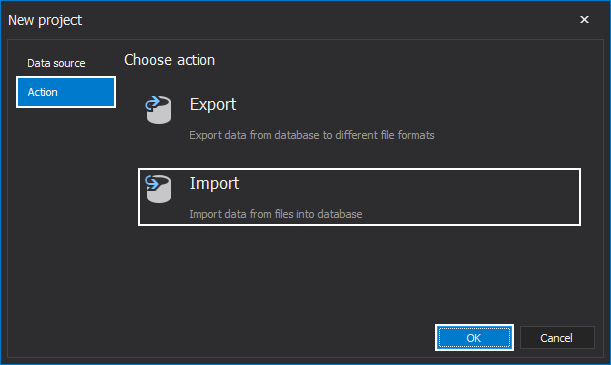
Under the Action tab, the Import action will be selected. Click OK to connect to the targeted database:
The main window with tables and views from the targeted database will appear in the main window:

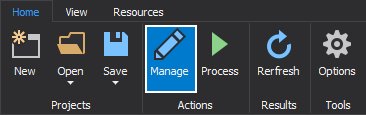
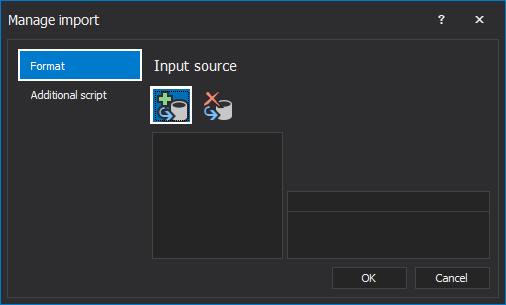
To import data in SQL database, click on the Manage button in the Home tab:
The Manage import window will be opened. Click on the Add button in the Format tab to add the external file for import:
The Add import source window will appear where users can choose between the Database or the File data source for importing. The File option will be checked for purpose of this article. When checked, and File option with the Browse for folder button will appear:
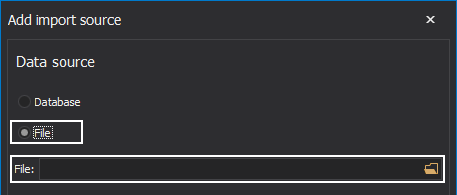
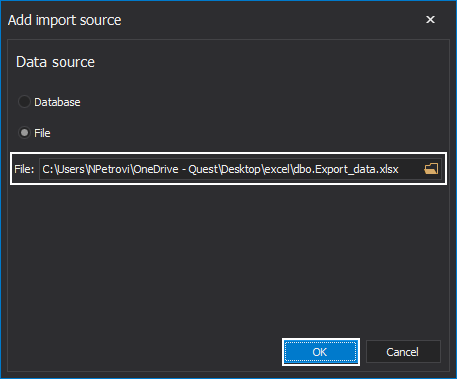
Click on this option in which the file for import data in SQL database will be selected. In this case, dbo.Excel_data Excel file will be selected. Click Open to continue:

Click OK to close the Add Import source window:
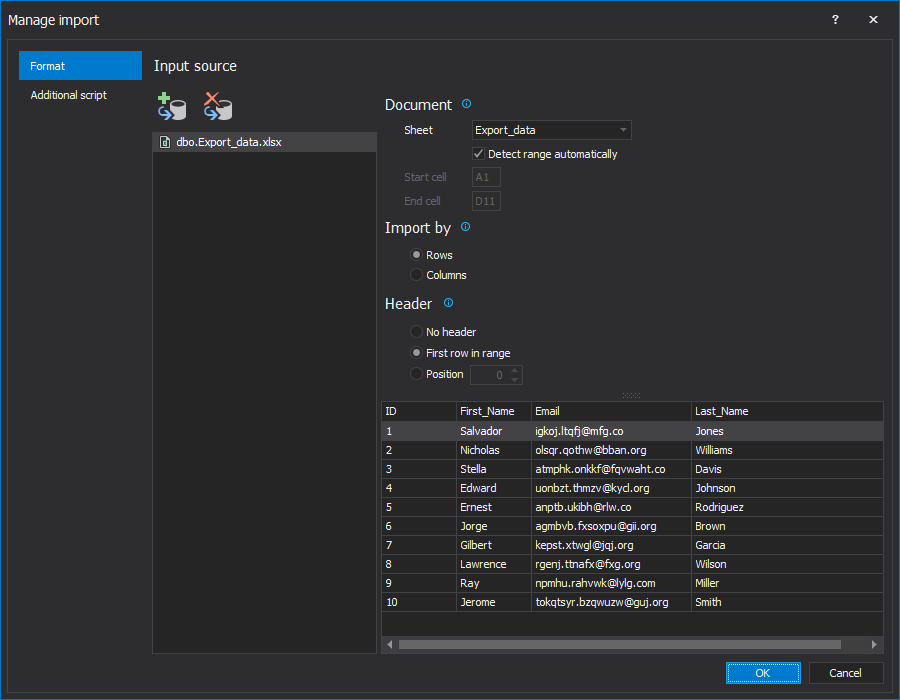
When the import source is added, on the right side of the Manage import window, additional options for an imported data source will appear. In our case, options for the Excel file.
From Import by section, the option for Rows will be ticked by default, and in the Header section, the First row in range option will be checked. The Preview window shows how imported data will look in real-time. When all is set, click OK to continue:
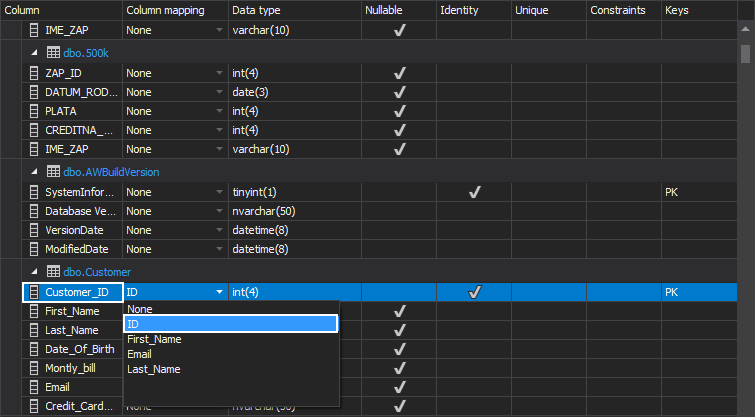
The view will go back to the main grid, where columns from the chosen table will be used for mapping columns from the imported file, in this case, the dbo.Customer table will be used:
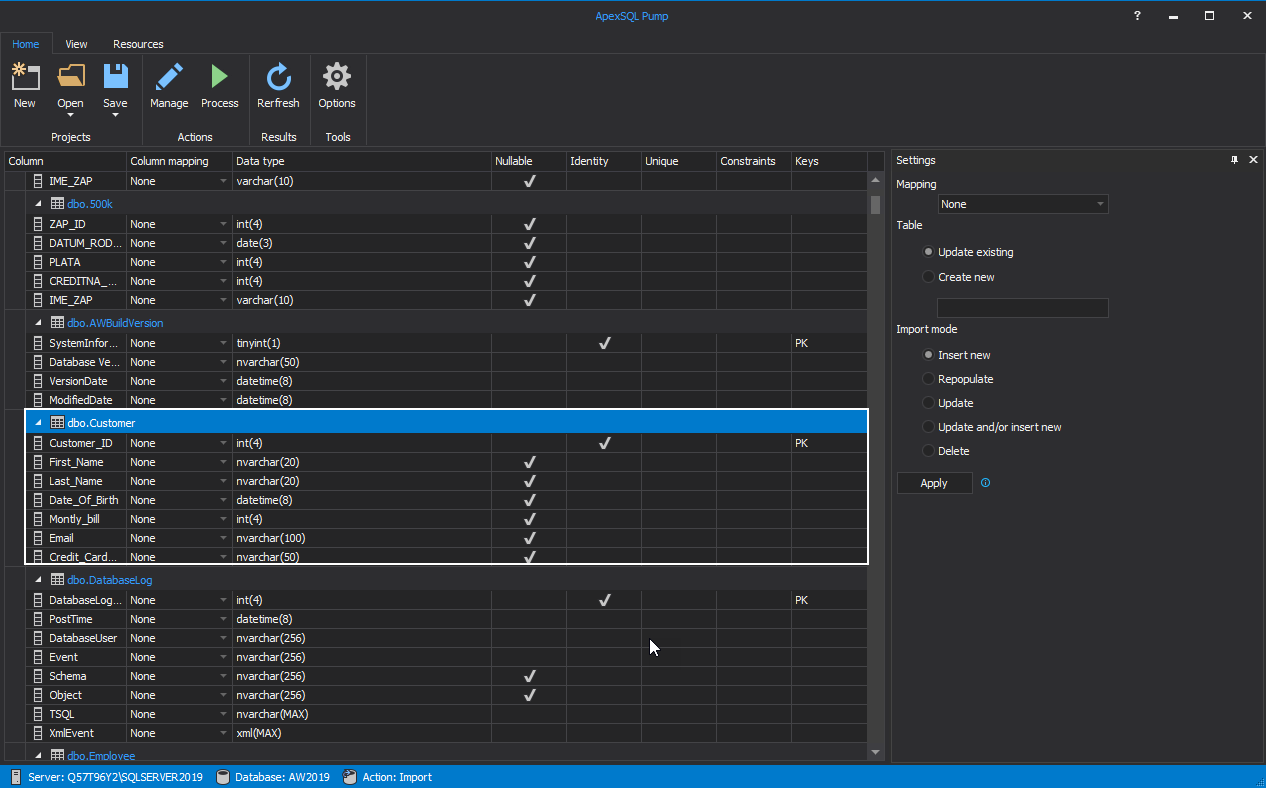
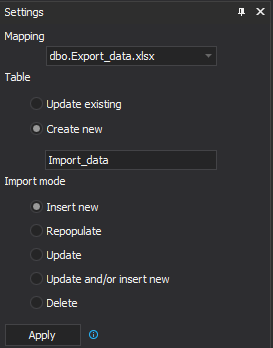
The next step is to go into the Settings window on the right side of the main window.
From the Mapping drop-down list, choose the previously selected dbo.Export_data Excel file. Then under the Table section, click on the Create new option, and in the field below type the name of the new table. Last, from the Import mode section, click on the Insert new option:
Moving on, in the main grid, go to the selected table, and from the Column mapping drop-down list choose which columns will be paired, for example, Customer_ID column with ID column in imported file source:
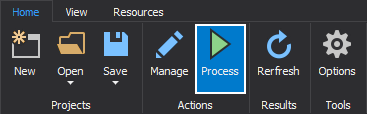
When all columns from the imported source are mapped with propriety column from the selected table, click on the Process button in the Home tab:
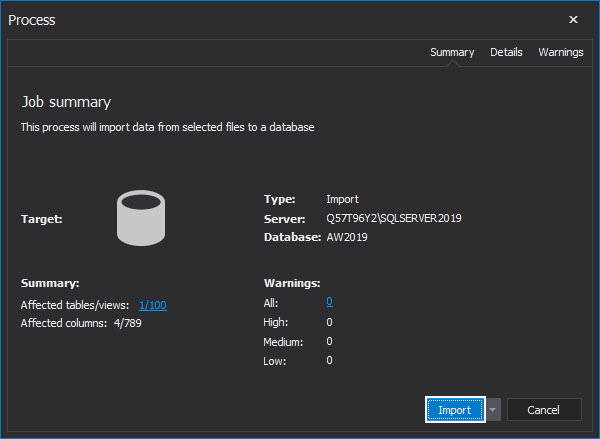
The job summary window will be opened, whereby clicking on the Import button, import data in SQL database process will be started:
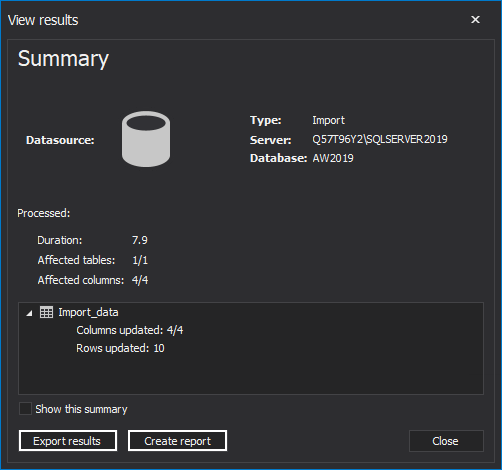
The View results window with all results will be presented. This window also allows the users to Export results or Create report as shown below:
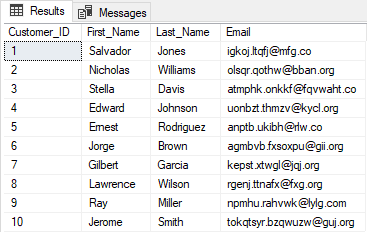
Back to SSMS, do a Select Top 1000 Rows command from right-click in the Object Explorer to verify that the imported data in SQL database was successful:
January 27, 2021


