


To a proactive DBA, it might be of crucial importance to have its SQL Server instances regularly checked for possible issues as there certainly are the multiple benefits to be gathered from this practice. At the long run and when not addressed timely, these issues might cause a major disaster, slowing or stoppage of production SQL Servers causing an enormous headache to everyone involved, and not to mention the cost of having the production environment down for a few hours or, god forbid, days.
Fragile as they are, when not monitored frequently enough, SQL Servers may end up causing huge performance issues, so it is always advisable to be cautious when interacting with them.
However, it’s not all that easy when monitoring the health of SQL Server instances and ensuring the best possible performance, as this task may be a big challenge to even the most experienced DBAs.
Once the inevitable occurs, it may become extremely difficult and overwhelming to pinpoint the root cause of the performance halt.
That’s why the best possible practice here would be to ensure those scenarios are not met, or at least not to the extent mentioned.
There are a lot of possible causes for a SQL Server or its poor database performance, so conducting frequent SQL Server health checks is a great place to start.
In this article, we will take a look at how to provide a high-level analysis of discovered instances using a third-party SQL Server instance management tool, ApexSQL Manage. The main focus will be on executing health check rules on remote instances.
Discovering remote SQL Server instances
To initiate a scan process in the search for remote instances, head over to the Inventory tab and click the Scan button:
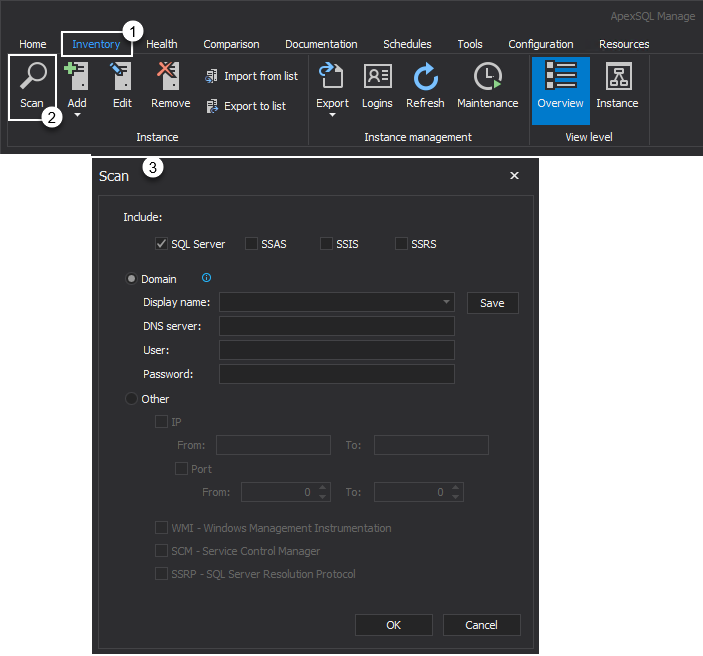
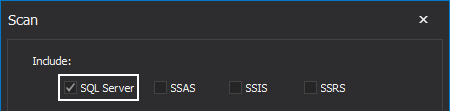
Under the include area, ensure that SQL Server checkbox is checked as it will be the main target of the scan:
The next step would be to configure the Domain scan option. The following needs to be set properly:
- The DNS Server field requires the valid IP address of a domain controller
- In the User field enter user with login access
- Provide the valid password for the user in the Password field
- Click OK to initiate the scan process

|
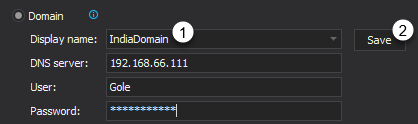
Quick tip:
Once the valid credentials are provided for the specific domain controller, enter a preferred name in the Display name field and click Save to store those settings for later use when searching for SQL Server instances:
|
Additionally, in case the machine running the SQL manage instance tool is part of a domain, then all domain-related settings under the Scan window could be entirely omitted without affecting the results of the search.
Connecting to discovered instances
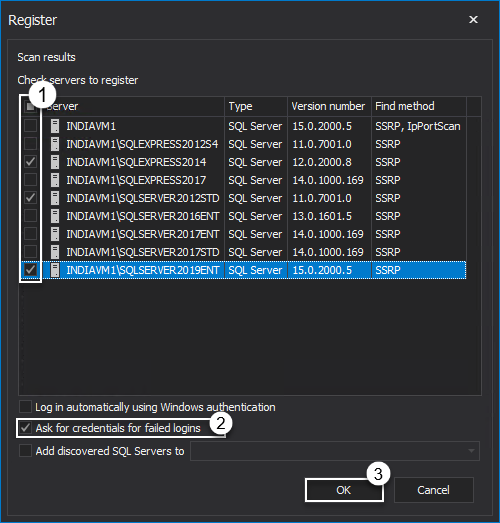
Once the scan process is finished, the results are shown in the Register window. Choose SQL Servers to make a connection with and make sure that Ask for credentials for failed logins option is checked since SQL Server credentials are required for remote connections. Click OK to continue:
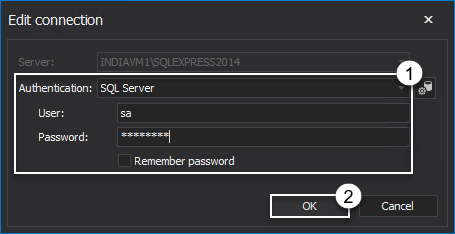
In the Edit connection window, enter the valid SQL Server instance credentials and click OK. These steps should be repeated for all chosen instances:
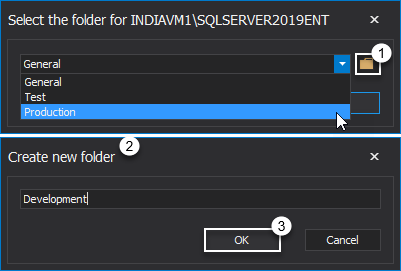
In the following step, assign chosen instances to one of the offered folders for better management, or create a custom one for the same purpose if that’s more convenient. Click OK to confirm either the folder selection or the folder creation:
Running high-level analysis
Health checks can be performed in three different ways within the SQL manage instance application. Let us briefly cover all three of them.
Quick Health check
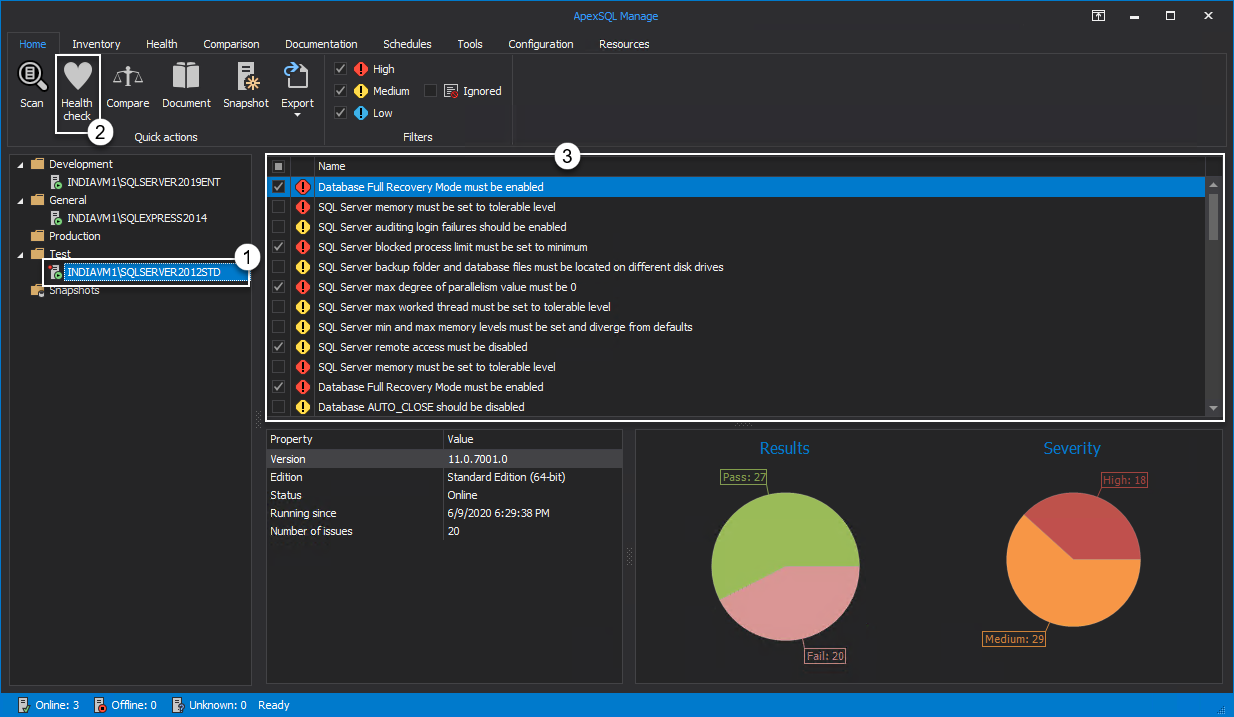
From the Home tab, after selecting a SQL Server instance, click the Health check button. The results of the conducted high-level analysis are shown in the main grid of the Home tab:
For more information on how to configure quick health check actions, please consult the following Configure and execute quick actions in SQL manage instance software article.
Configure high-level analysis
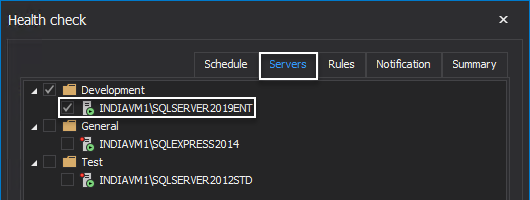
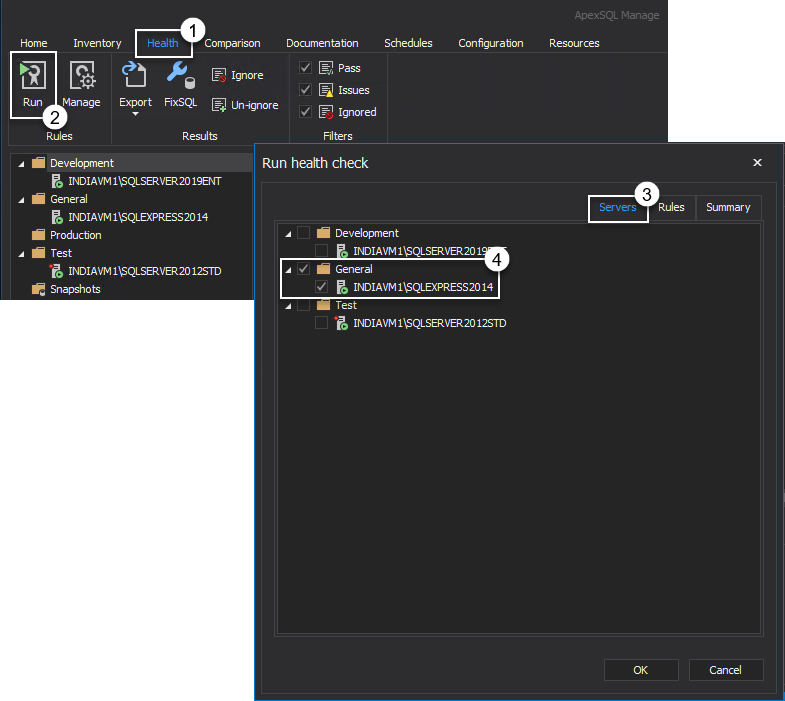
Head over to the Health tab and click Run to open the Run health check window. Under the Servers tab, check an instance as a target of the analysis:
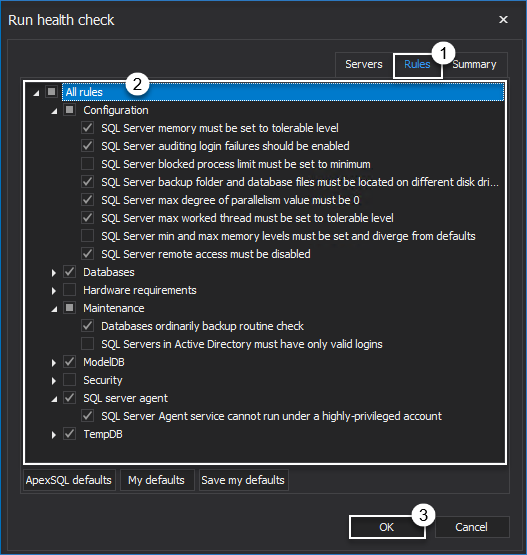
Proceed to the Rules tab where all rules are grouped into categories. Choose the desired ones to be included in the analysis and click OK:
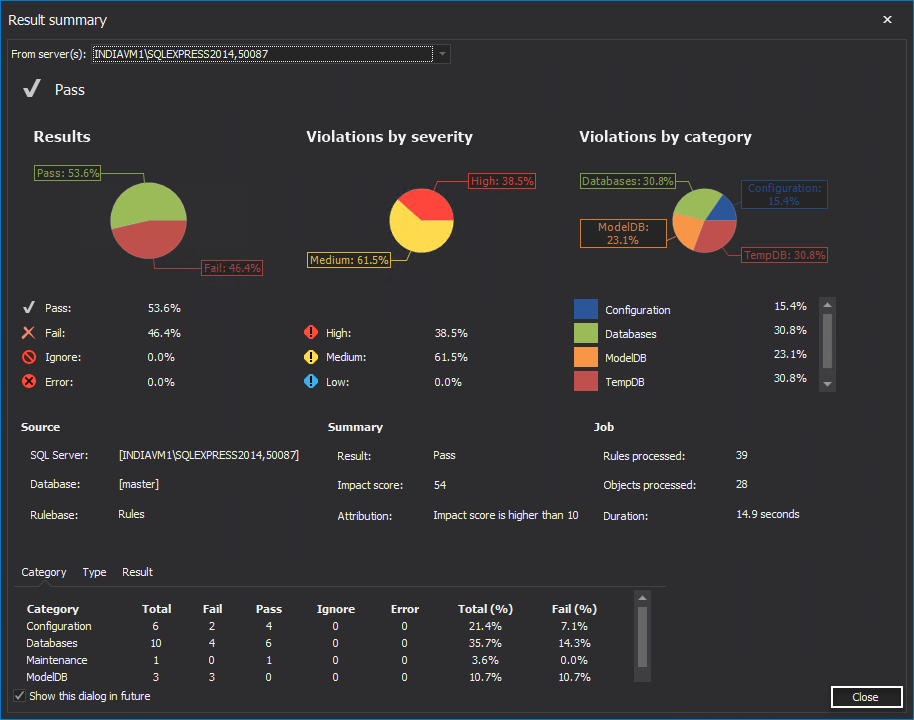
Once the rules are executed against the selected SQL Server instance, the health check results are displayed in the Results summary window in the form of a pie chart percentages. Click Close to exit the window:
All rules that were included in a high-level analysis are shown in the main grid of the Health tab, with their details grouped into specific grid columns. Check a failed one and click the FixSQL button to fix the issue.
For a step-by-step guide on how to remedy the health check issues of a SQL Server instance, please refer to the Run SQL scripts to fix SQL Server health check issues article.
Schedule a health check analysis
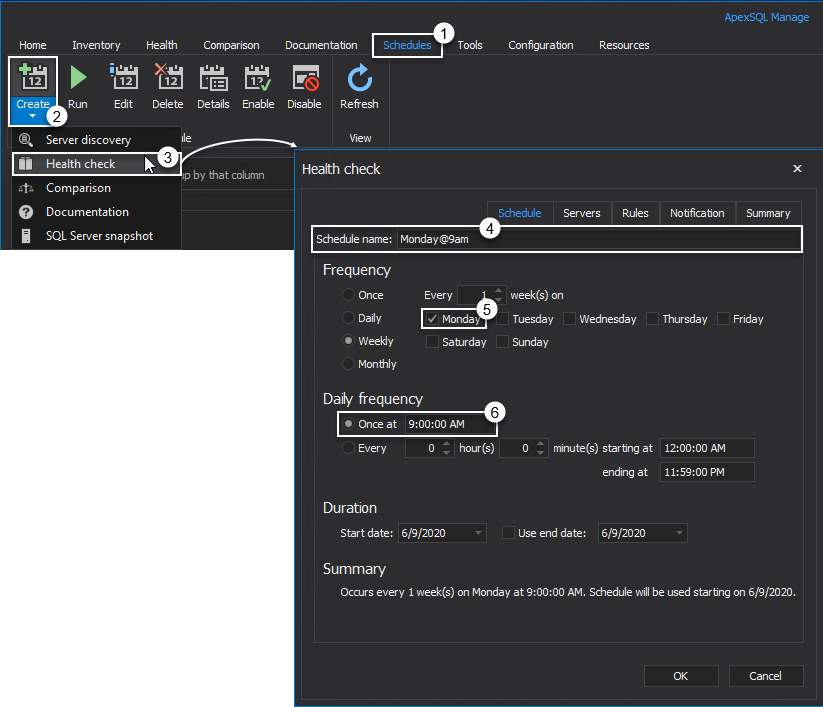
In this section, the main focus will be on configuring the health check automation process. First, head over to the Schedules tab, click the Create drop-down menu and choose the Health check. In its window, provide a name for the schedule then proceed to select day and time of its execution:
In the Servers tab, choose a SQL Server instance as the target of the high-level analysis:
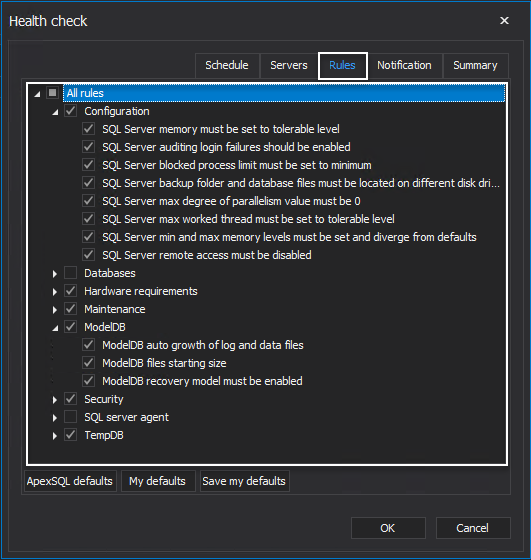
Choose the set of rules from the Rules tab:
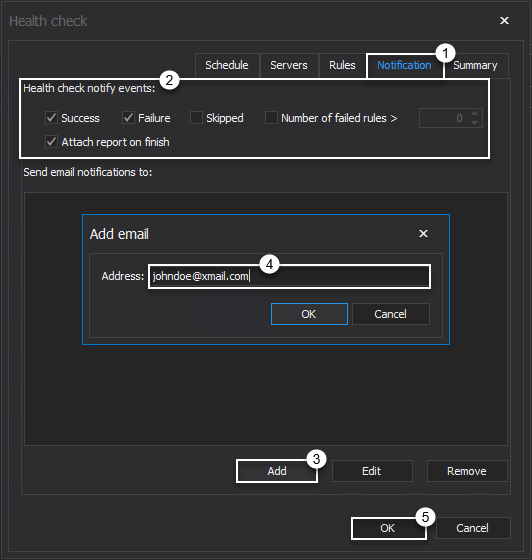
In the Notification tab, check a desired notify events and add email. Click OK to create the schedule:
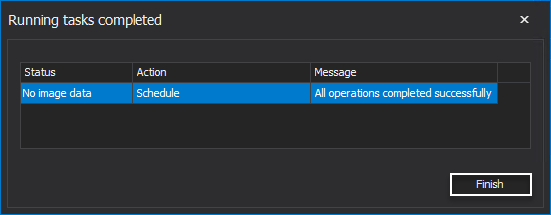
Click Finish in the Running tasks completed window to confirm the creation of the schedule:
The health check schedule is now listed in the main grid of the Schedules tab and awaits its execution time:

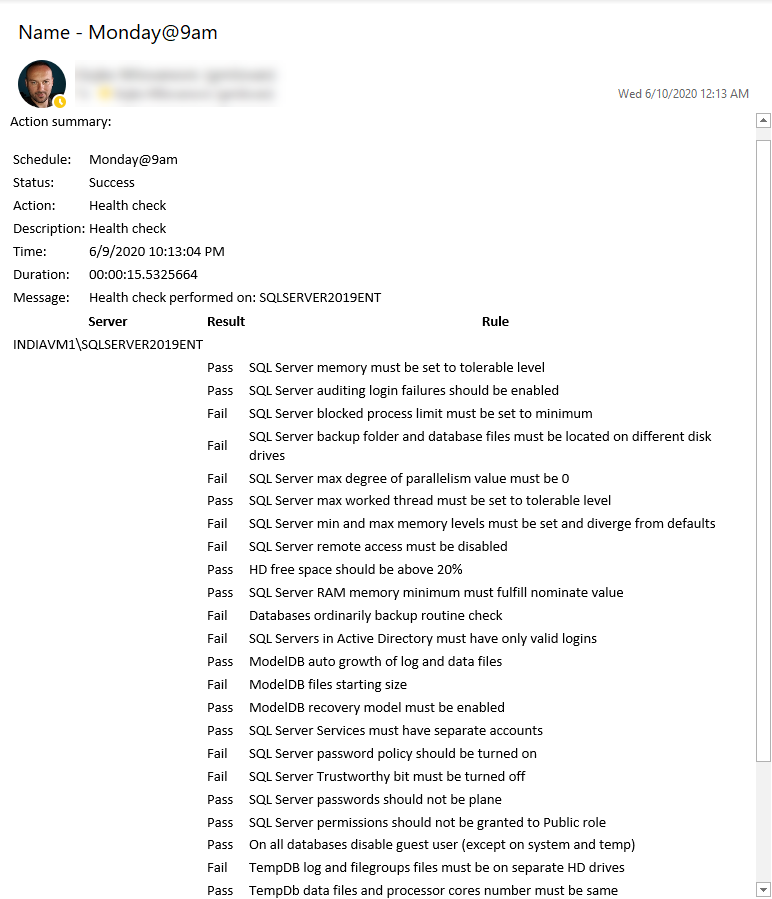
Once executed, the email will be sent to the provided email account results of executed health check details along with the previously chosen notify events:
Conclusion
In order to maintain a healthy SQL Server instance, the health checks must be regularly performed, at least once a week, if not more frequently.
In most cases, this practice will ensure optimal SQL Server performance.
June 10, 2020


