


SQL Server Management Studio (SSMS) is an integrated environment for managing SQL Server instances. By using SSMS, one could access, configure, manage, administer, and develop all components of SQL Server.
As official and the most recognizable “all in one” client user interface, its design is quite user friendly and comprehensive. Furthermore, the software combines and brings together a range of both graphical and visual design tools and rich script editors to ensure simplified interaction with SQL Server.
On top of all, it’s worth mentioning that with every major release, the application is better in terms of security and performance.
And to any database administrator (DBA) productivity and versatility may prove to be very important. Productivity will allow the job to be done easily and swiftly, and versatility ensures different ways of accomplishing one single task.
However, with all the mentioned perks, there are some downsides to its functionality, that are time-consuming and sometimes very tedious.
One of which, that SSMS clearly lacks the possibility of adding multiple SQL Server instances at once.
Understanding the problem
Don’t think that this is an overblown statement. Just imagine large corporations with a huge amount of SQL Servers, we’re talking hundreds here, both local and scattered around the network waiting to be discovered and used.
And now, here is a person that needs to do a simple task like pulling the build numbers for all SQL instances that are currently managed. First and foremost, the connection between every single one of those instances needs to be established in order to use and manage them. To connect them via the SSMS, every SQL Server instance needs to be manually added. Just imagine hundreds of instances that need to be added one-by-one. It is clearly an exhausting task, without any exaggeration.
In this case, the performance and productiveness of a database administrator could take a massive hit, and to some, this may end up being a dealbreaker, to others the necessary hassle.
Another thing that needs to be mentioned here is that once the SSMS is closed or restarted, on the new application launch, the connection to previously managed instances is lost, and those needs to be added again, manually.
In this article, we will take a look into the process of adding SQL Server instance via SSMS and then provide an insight into the different ways of accomplishing the same by using the 3rd party alternative, ApexSQL Manage.
With all being said, let’s dive into the process of connecting a SQL instance in the SQL Server Management Studio.
Connect SQL instance in SSMS
To connect a SQL instance in SSMS, one should do the following:
Launch the SQL Server Management Studio
Once the software is initialized, by default, the Connect to Server window will pop-up:
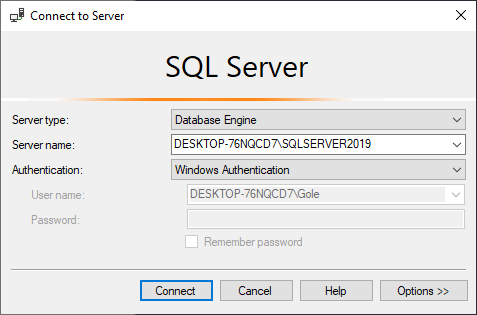
Here, configure the following:
From the Server type drop-down list bellow can be selected:
- Database Engine – the core component of SQL Server instance used for storing, processing and securing
- Analysis Services – SSAS is a multidimensional analysis tool that features Online Analytical Processing (OLAP), powerful data mining abilities and reporting used in Business Intelligence to ease your managing data tasks
- Reporting Services – SSRS is a reporting and visualization tool for SQL Server, and by using it, one can create, manage and publish reports and dashboards
- Integration Services – SSIS is a fast and flexible data warehousing tool that can be used for data extraction and for executing a wide range of data migration tasks
- Azure-SSIS Integration Runtime – the Integration Runtime (IR) is the compute infrastructure used by Azure Data Factory to provide the data integration capabilities across different network environments
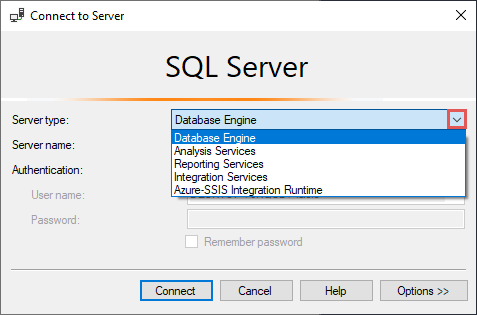
This is where the Database Engine option should be chosen.
In the Server name drop-down list, choose the preferred SQL Server instance to make a connection with. Here, the previously used SQL instances are listed:
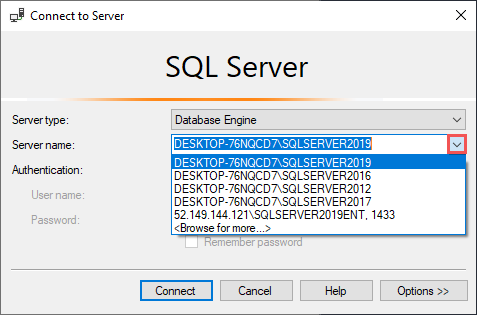
If the desired SQL instance is not listed, choose the Browse for more… option at the bottom of the drop-down list:

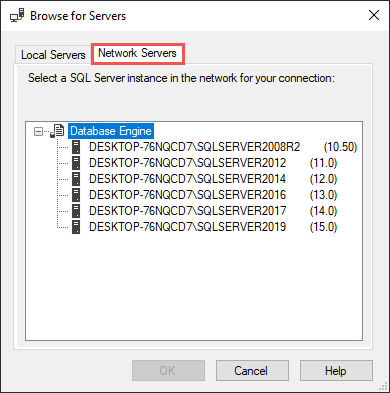
Under the Local Servers tab of the Browse for Servers window, displayed are all SQL instances installed on the local machine. In addition to this, under the same tab, all configured SQL Server Services are listed as well:
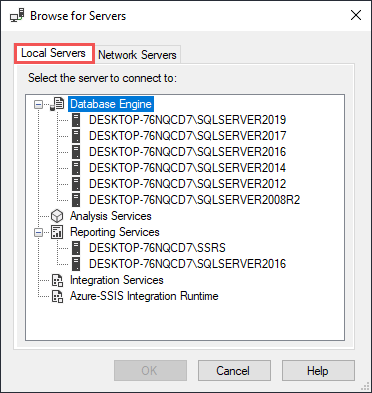
In the Network Servers tab, SQL instances discovered across the network are shown:
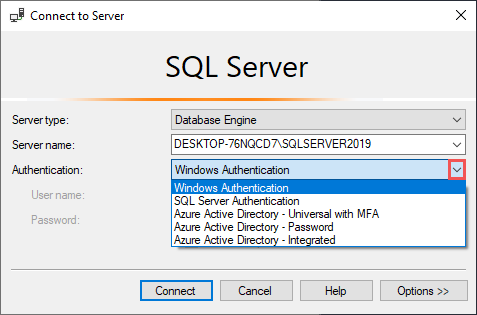
Once the SQL Server instance is selected, proceed to choose the Authentication mode. In its drop-down list the following options are displayed, and the majority of those with their own set of configurable settings:
- Windows Authentication – this mode allows a user to connect through a Windows user account
- SQL Server Authentication – anytime this mode is used, proper login and password credentials are required
- Azure Active Directory – Universal with MFA – this mode delivers strong authentication with a range of different verification options the user can choose from: phone call, text message, smart cards with a pin or mobile app notifications
- Azure Active Directory – Password – use this mode for connecting to SQL Server instance database and when logged in to Windows using Azure AD credentials from a domain not combined with Azure
- Azure Active Directory – Integrated – this mode is used when connecting to SQL Database and logged in to Windows using Azure Active Directory credentials from a federated domain
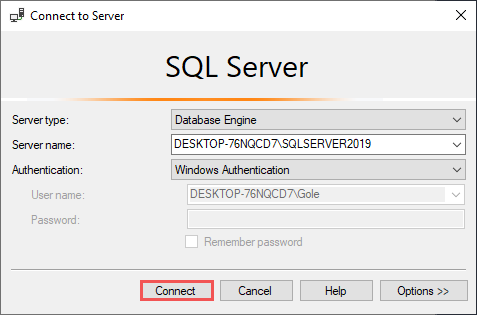
After the proper authentication is chosen, click the Connect button to establish the connection between the SQL Server Management Studio and the selected SQL Server instance:
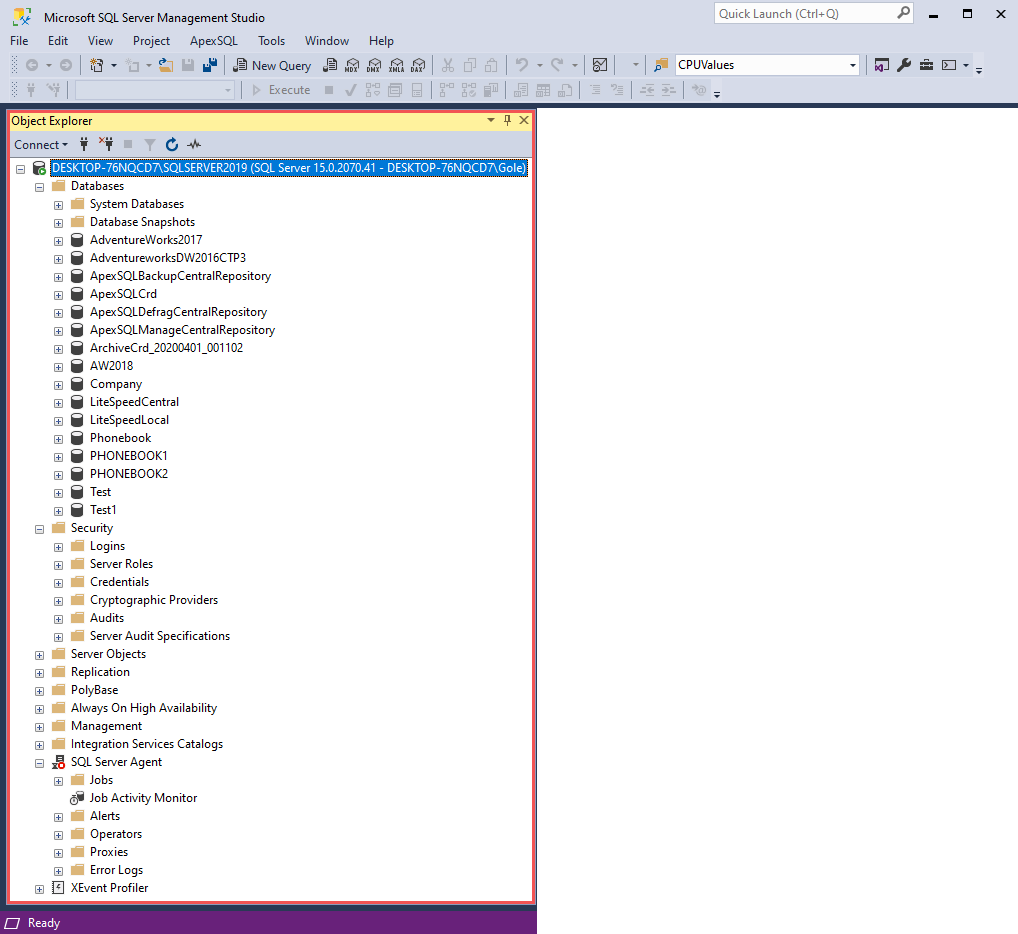
Now, the SQL instance is shown in the Object Explorer on the left with all its properties and objects:
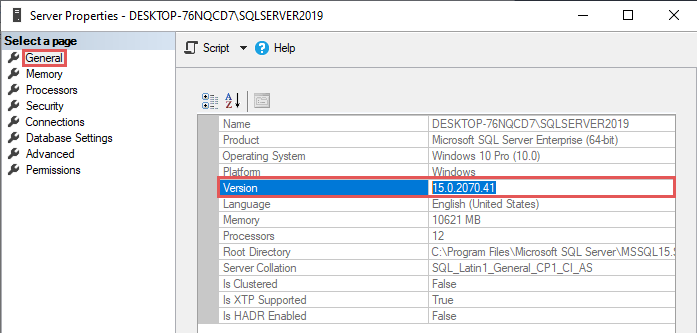
To view the build number for this newly connected instance, right-click on its name and choose Properties:

Build number details are now listed in the General tab of the Server Properties window:
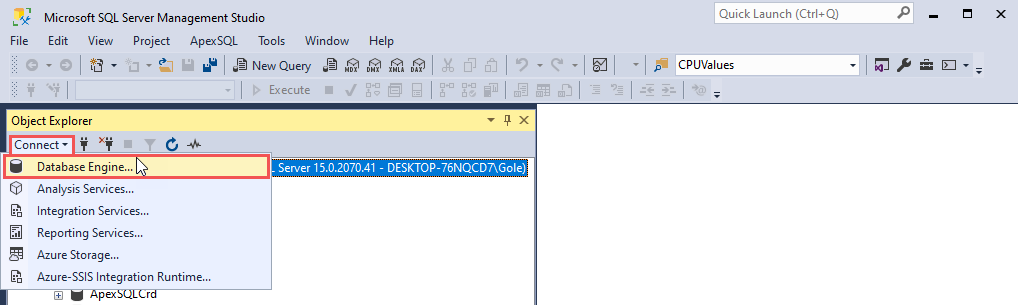
To add another SQL instance and view its build number, click the Connect drop-down menu and choose the Database Engine option:
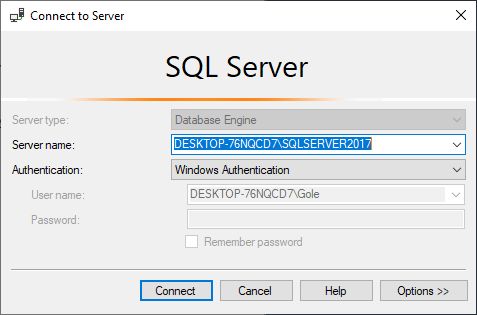
In the Connect to Server window, configure the same settings based on the previously described steps:
Once a new instance is added, repeat the same steps to see its build number.
And this set of actions will have to be repeated numerous times in order to complete one simple task.
Using 3rd party software
ApexSQL Manage is a powerful application used for managing SQL instances. Some of its core features and capabilities ensure the user can easily discover instances across the network, execute high-level analysis in the search for SQL Server health issues, capture real-time state and condition of SQL Server instance by creating its snapshot, to make a comparison between instances and snapshots as well as to document them in various file formats.
In this section, the focus will be on the versatility mentioned in the introduction part of this article.
In that regard, the SQL manage instance tool offers a few more options when it comes to adding SQL Servers and making connections to the preferred SQL instance and the application itself. Also, it offers the “welcomed” capability of easily adding multiple SQL instances at the same time.
Following are the mentioned options:
- Add SQL Instances manually – like in SSMS, SQL Server instances could be added manually and only one at a time
- Add SQL instances discovered on a network – configure a search setting that will ensure scan will be executed on the specific area of network
- Add SQL instances from the last scan – no new scan is required since the SQL manage instance tool remembers the results from the last scan being performed
- Add SQL instances automatically – a scan can be automated and set to be executed in the desired time and frequency
- Add SQL instances with quick action option – execute quick scan based on the previously configured settings
-
Note: For more information on this topic, please visit the Different ways of adding SQL Server instances in a SQL manage instance software article.
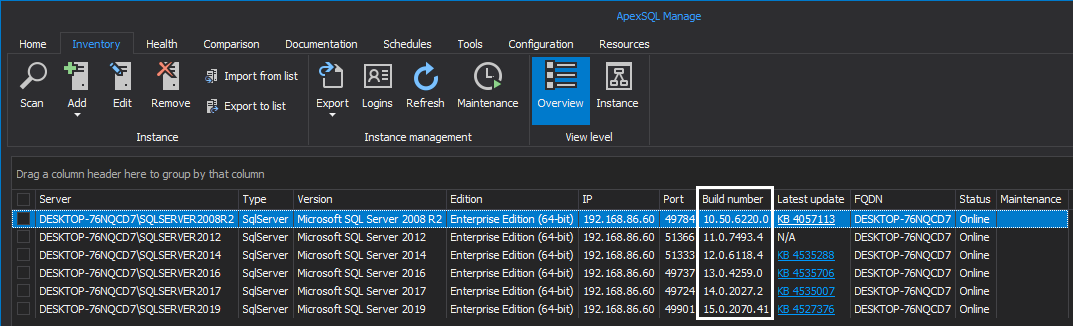
Completion of the example task will now look quite different, i.e., it can be done in just a couple of steps. The first step is to choose the preferred method for adding SQL instances, and with the connection between them and SQL manage instance software is established, they will be listed in the main grid of the Inventory tab. Their build versions will be displayed in the Build number column.
The second and final action would be to just read out build versions from the column. It is quite convenient that all build versions of connected instances can be seen at once:
Conclusion
When in need to manage multiple SQL instances at the same time, one doesn’t have to add them one-by-one to perform certain management tasks since there is a solution to achieve this feat instantly and quickly. This will save some valuable hours from daily work chores, helping up in reducing some pressure and, to an extent, increasing one’s productivity.
August 11, 2020


