


Challenge
In the DevOps world, it is a common practice to set up database continuous integration solutions for project deliveries, with as many steps included in a single workflow as possible. For the SQL Server project types, most of the database continuous integration and continuous delivery use cases are covered with ApexSQL DevOps toolkit solutions, including both standalone and continuous integration servers plugins. Multiple tasks, including building, testing, and deploying SQL database code, can be done through a single pipeline, but the question remains if there is a possibility to perform some non-database project-related tasks within the same pipeline, i.e., without the need for additional intervention.
Solution
This article explains how to utilize simple PowerShell projects and integrate them into a pipeline created with the ApexSQL DevOps toolkit database continuous integration steps. This includes an example demonstration for Jenkins, TeamCity, Bamboo, Azure DevOps plugins, and the standalone ApexSQL DevOps toolkit – Web dashboard application.
One of the most basic uses cases when it comes to database projects would be building a database with updated code and installing a client application to test or manipulate the database version with it. So we will create a PowerShell solution that will detect if the application exists and install it from a dedicated installation repository (simple location in a local file system where application installers are located). Additionally, we will check if the installed version is higher than the one already installed so we can skip this operation in case versions are matching.
PowerShell script
As mentioned, we need to create a script to install an application from a local folder and, for this example, would want to install the latest version of ApexSQL Diff application, which will be used to manipulate the schema created with the database continuous integration pipeline.
In the beginning, the path for the desired installer will need to be set with the following command:
$path = "c:\InstallRepo\ApexSQLDiff.exe"
Now, the installer details should be read to check if this application is already installed. These details can be found within the Details tab of the installer Properties window:

First, the correct product name should be read from the file:
$Product = (get-childitem $Path).VersionInfo.ProductName

$Product = $Product.Trim()
And then the correct product version:
$ProductVersion = (get-childitem $Path).VersionInfo.ProductVersion

$ProductVersion = $ProductVersion.Trim()
Note: the “Trim” function is used to remove the excessive space character that will be present at the end of the extracted value.
Following step is to check if the product is already installed. With this command the logical value True/False will be generated based on condition if the Product name exists in registry:
$installed = (Get-ItemProperty HKLM:\Software\Microsoft\Windows\CurrentVersion\Uninstall\* | Where { $_.DisplayName -eq $Product }) -ne $null
Based on the logical value, if the application is not installed, this command will start the installation in silent mode immediately (through CLI execution):
$installed = (Get-ItemProperty HKLM:\Software\Microsoft\Windows\CurrentVersion\Uninstall\* | Where { $_.DisplayName -eq $Product }) -ne $null
In case the application is installed we would need to check the version. We will read all registry parameters for the application, which includes the version also:
$installed = (Get-ItemProperty HKLM:\Software\Microsoft\Windows\CurrentVersion\Uninstall\* | Where { $_.DisplayName -eq $Product }) -ne $null
The parameters would look like this:
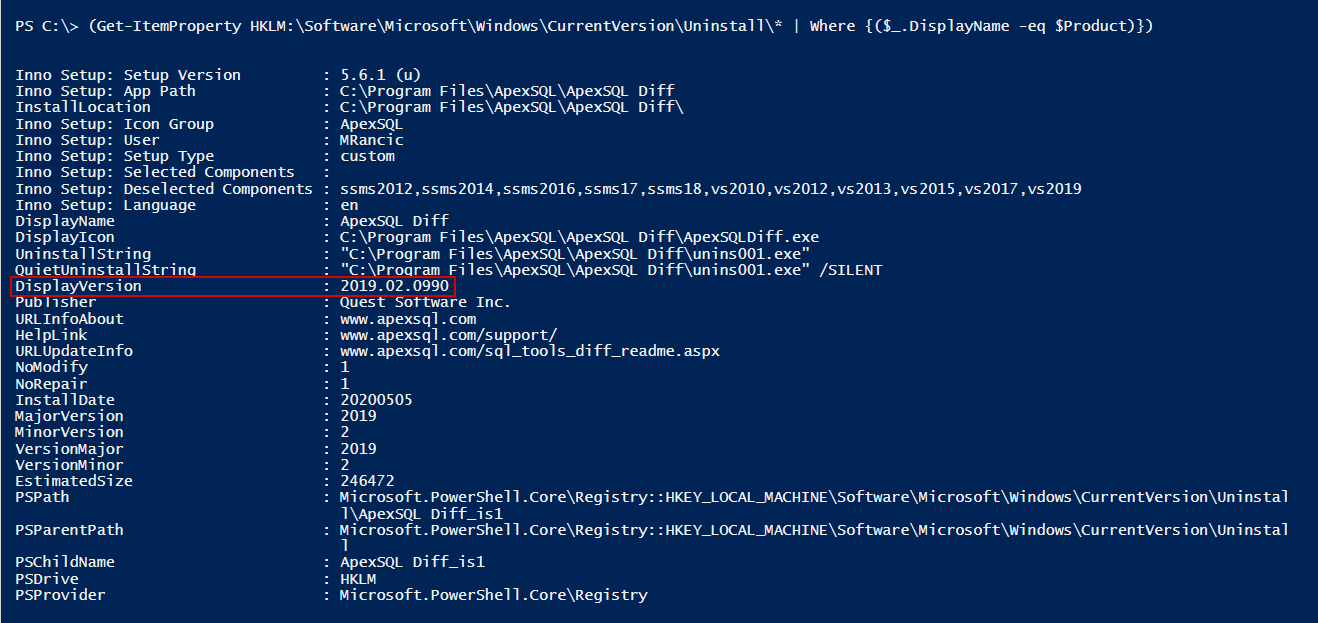
In the end, the script will check if the version from the registry is lesser than the one in the installer, and if so, the silent installation will start:
if($ProductParams.DisplayVersion -lt $ProductVersion)

{Start-Process $path -ArgumentList "/VERYSILENT /SUPPRESSMSGBOXES /NORESTART" -Wait}
Note that the start-process command has the -Wait parameter, which prevents continuous integration servers from ending the process when the task finishes.
Entire script will look like this:
#set the installer path

$path = "c:\InstallRepo\ApexSQLDiff.exe"

#read the product name

$Product = (get-childitem $Path).VersionInfo.ProductName

$Product = $Product.Trim()

#read the product version

$ProductVersion = (get-childitem $Path).VersionInfo.ProductVersion

$ProductVersion = $ProductVersion.Trim()

#check if installed

$installed = (Get-ItemProperty HKLM:\Software\Microsoft\Windows\CurrentVersion\Uninstall\* | Where { $_.DisplayName -eq $Product }) -ne $null

#start installation if not installed

if (!$installed)

 {Start-Process $path -ArgumentList "/VERYSILENT /SUPPRESSMSGBOXES /NORESTART" -Wait}

 else
{
#read the installed parameters

$ProductParams = (Get-ItemProperty HKLM:\Software\Microsoft\Windows\CurrentVersion\Uninstall\* | Where {($_.DisplayName -eq $Product)})

#check the version and start installation

if ($ProductParams.DisplayVersion -lt $ProductVersion)

  {Start-Process $path -ArgumentList "/VERYSILENT /SUPPRESSMSGBOXES /NORESTART" -Wait}

}
$LastExitCode
And it should be saved as a ps1 file to execute it in the database continuous integration pipeline.
In the following sections, we will consider a basic pipeline that will consist of the Build and the Package steps. So simply, this pipeline will build a database from a SQL code located in source control and create a database package with scripted database objects. No further details for configuring database continuous integration pipeline will be disclosed, but this information can be found in the ApexSQL DevOps toolkit knowledgebase.
Jenkins
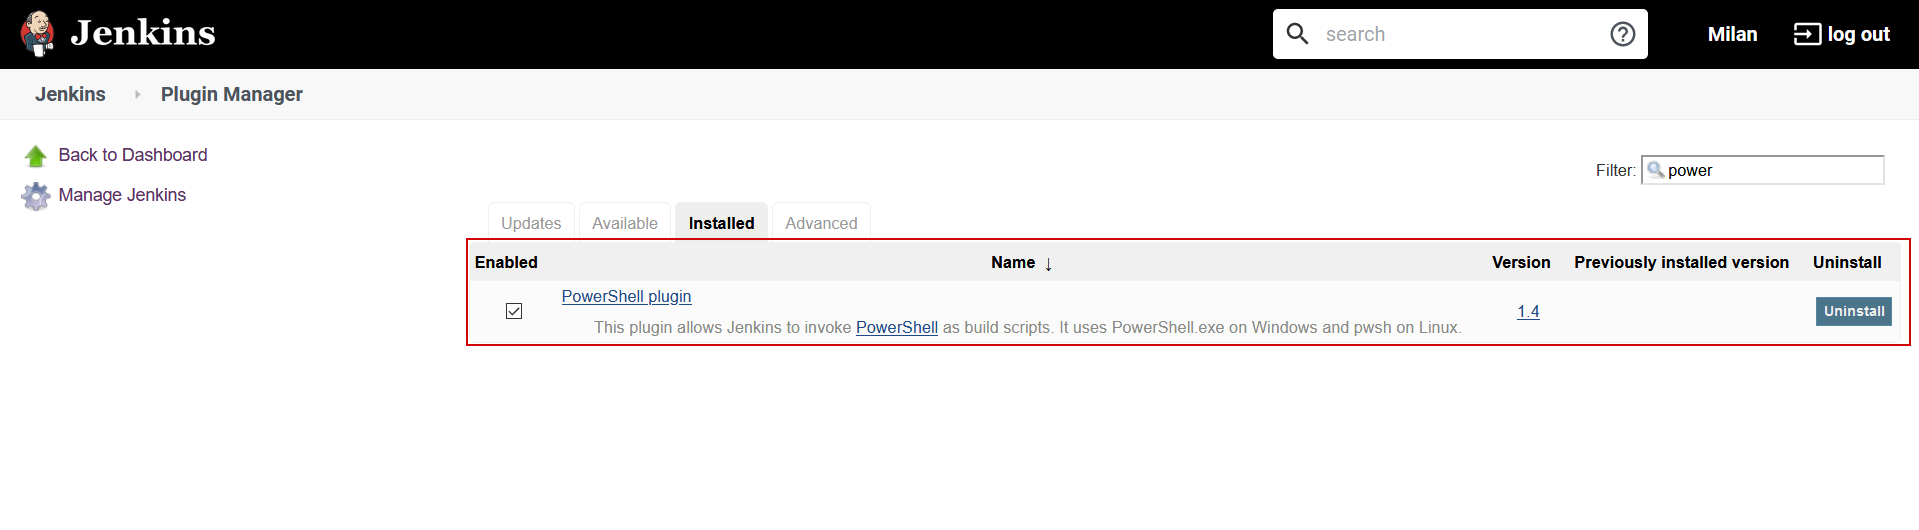
What differs Jenkins from other continuous integration servers, is that it doesn’t have native, i.e., built-in PowerShell support. This means that it requires a plugin which can be installed from the Jenkins gallery:
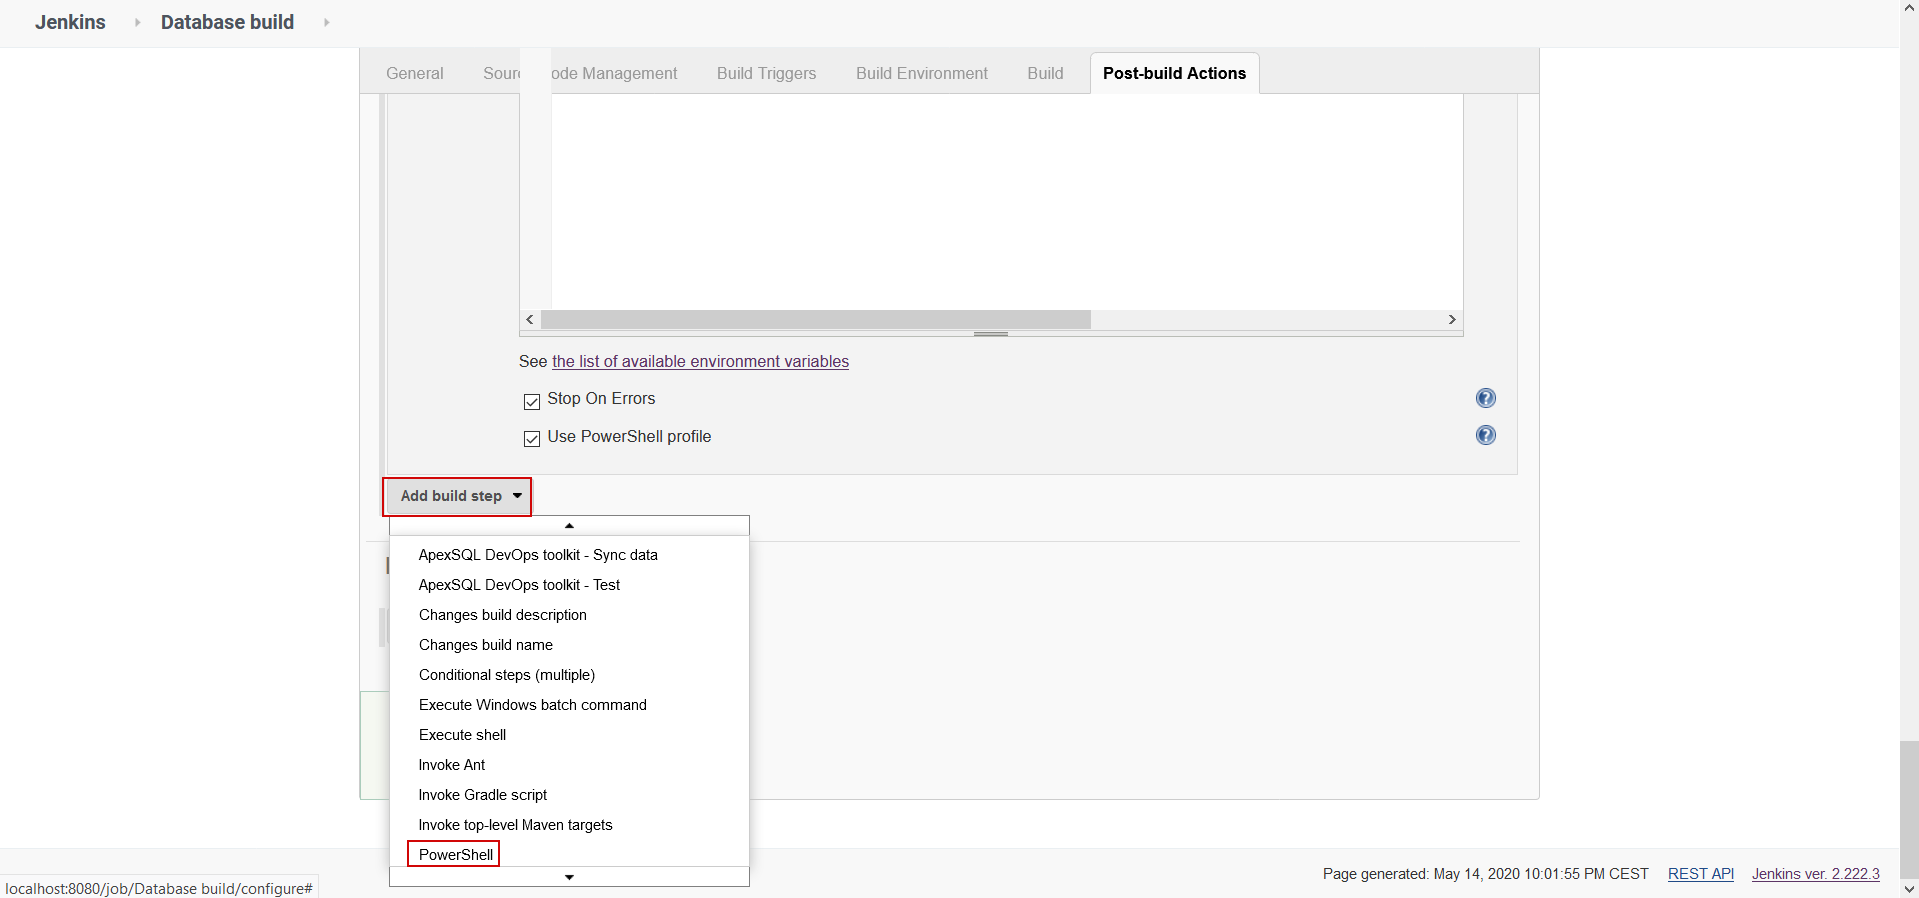
With the plugin present, the PowerShell step can be found in the Jenkins build steps gallery:
When added, the step will show a text box where the PowerShell script can be inserted. Natively, this PowerShell plugin does not directly support execution by PowerShell script file so the entire script should be placed here:
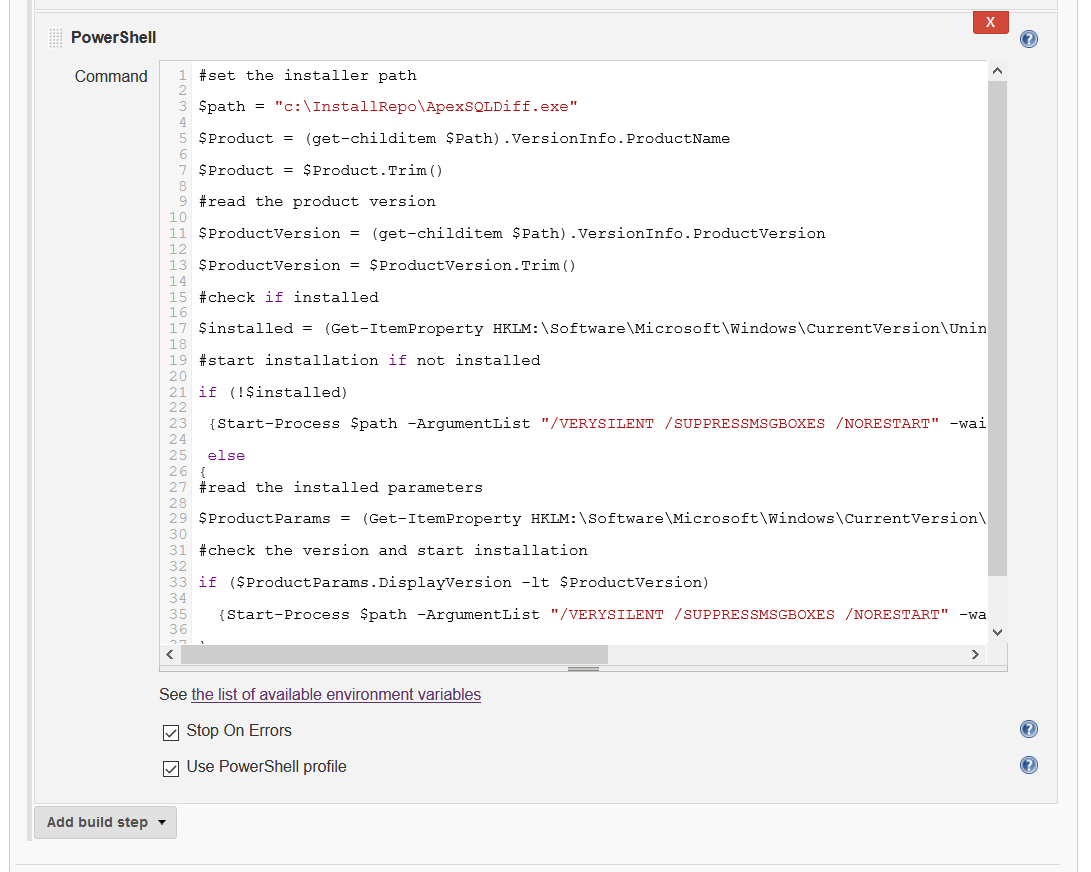
After that, we can just save the database continuous integration pipeline and execute it.
TeamCity
In contrast to the Jenkins CI server, TeamCity has built-in support for PowerShell execution, so it is ready to be used right out-of-the-box.
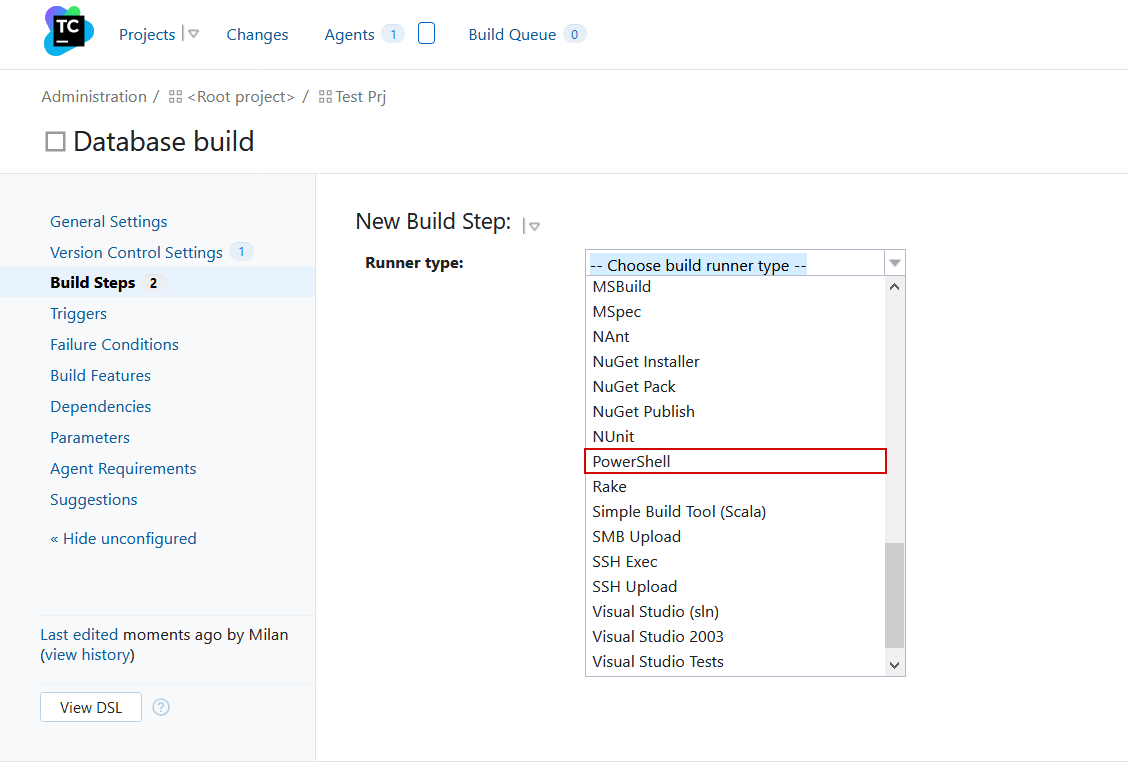
To use created PowerShell script in TeamCity the PowerShell runner type should be chosen to add to the database continuous integration pipeline with ApexSQL DevOps toolkit steps in the current build configuration:
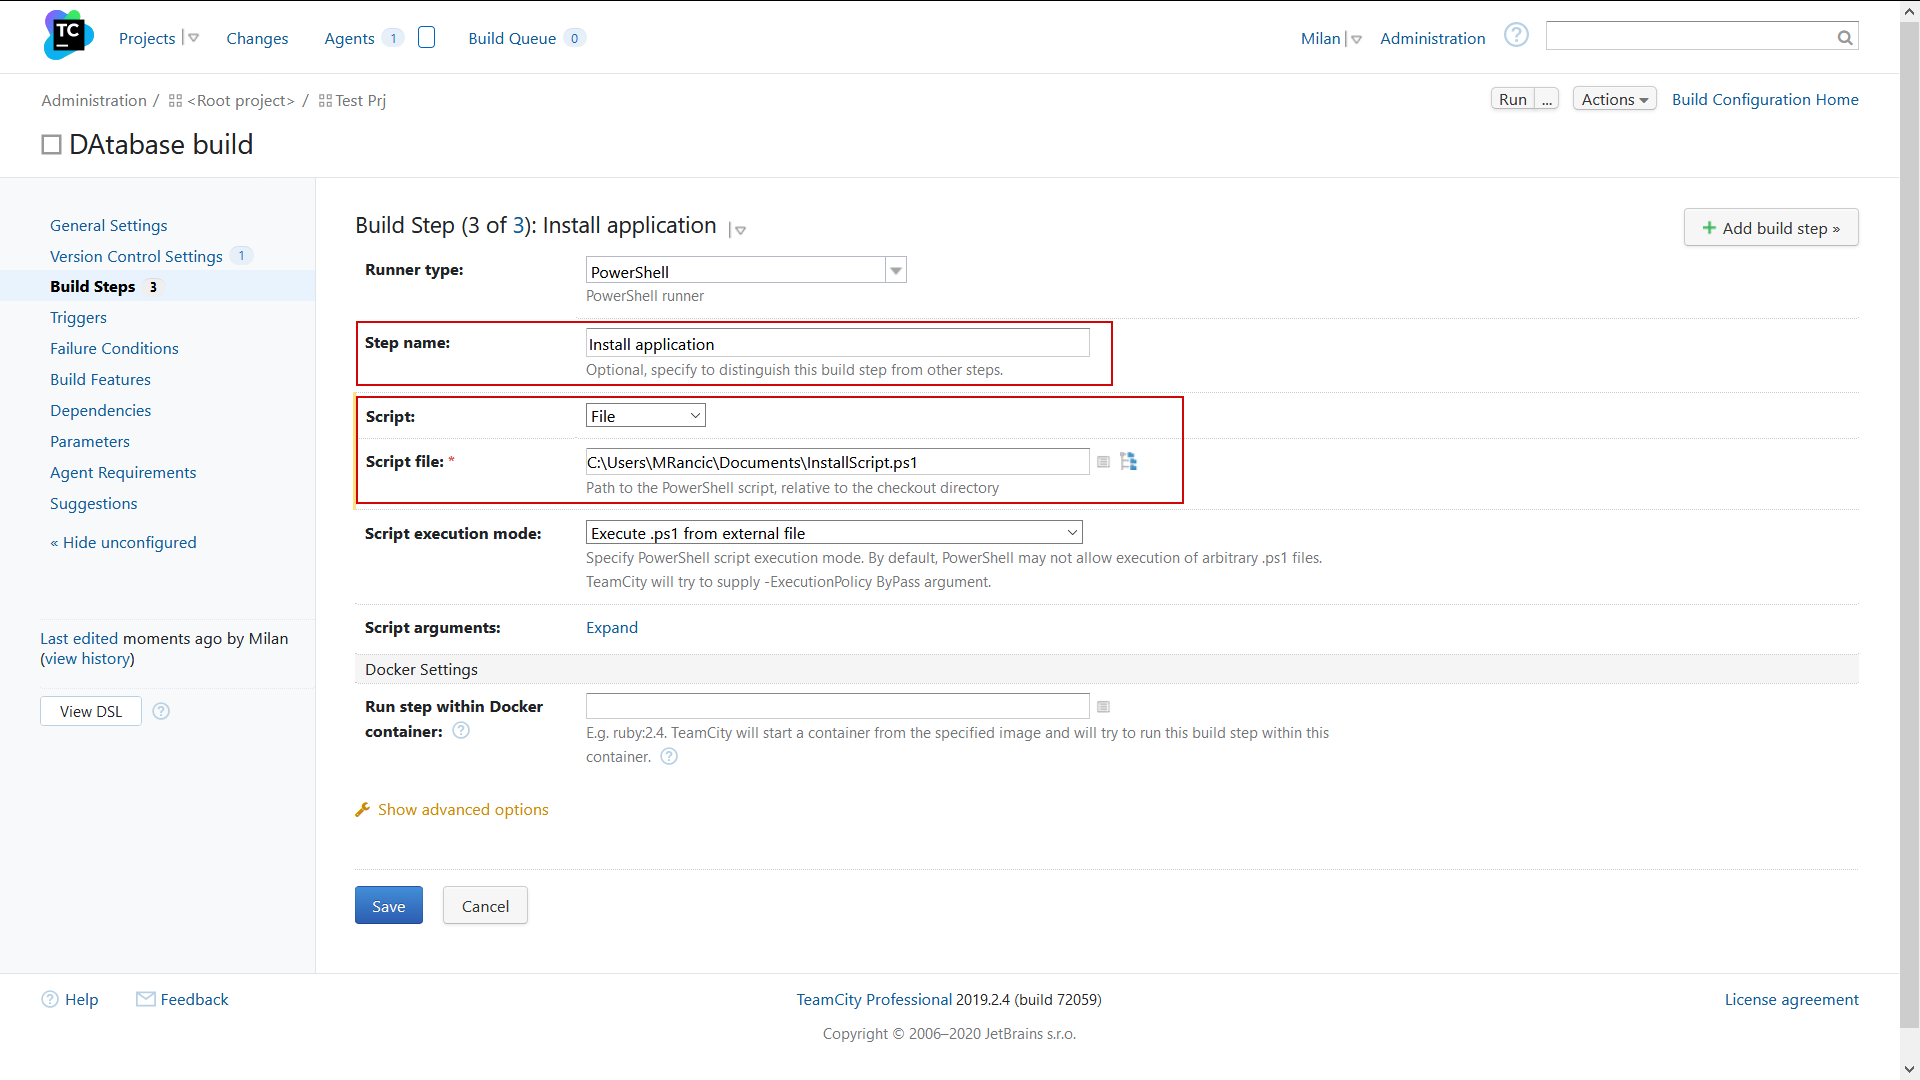
When selected, the PowerShell runner will show its configuration layout. Here, the Script option should be set to the File value, so the created PowerShell script can be imported by filling in the path to it in the Script file field. Optionally the Step name field can be populated to assign a recognizable name for this step:
When step configuration is saved, the database continuous integration pipeline will look like this:
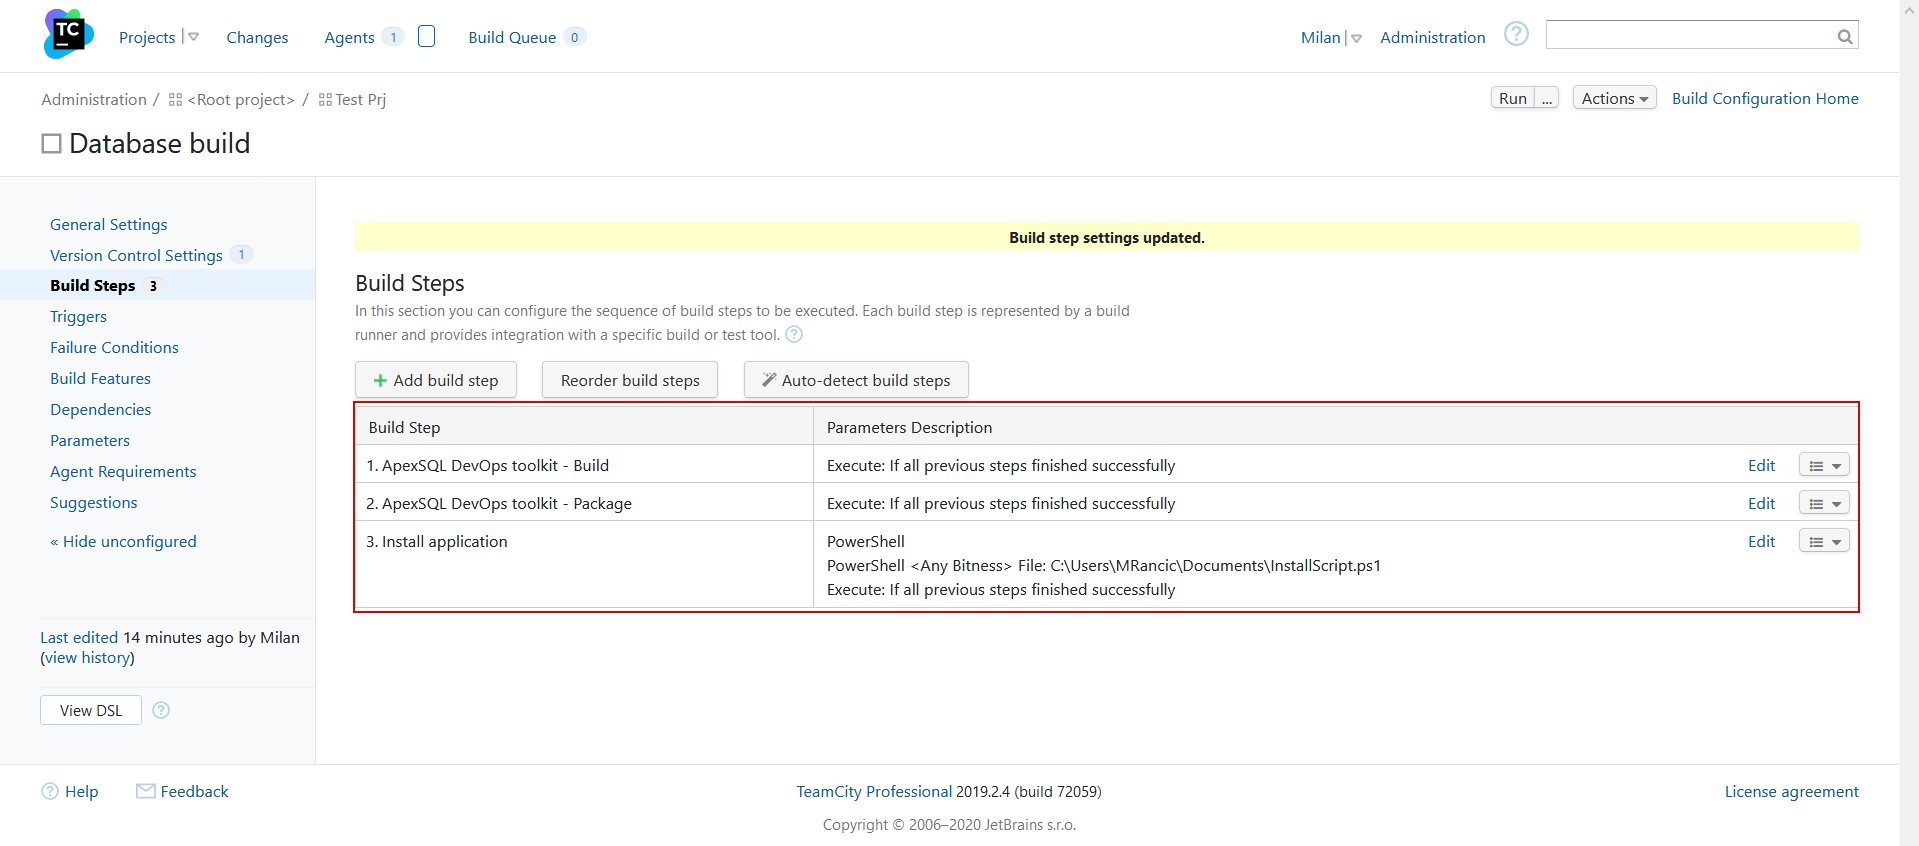
Finally, it is ready for execution to build a database and install the application.
Bamboo
Analog to the TeamCity, the Bamboo CI server also has built-in support for PowerShell execution. In the created database continuous integration pipeline with the ApexSQL DevOps toolkit steps, the PowerShell step should be added to finish additional tasks.
To execute any PowerShell script, the integrated Bamboo Script task should be chosen. It can be found in the gallery under the Builder category:

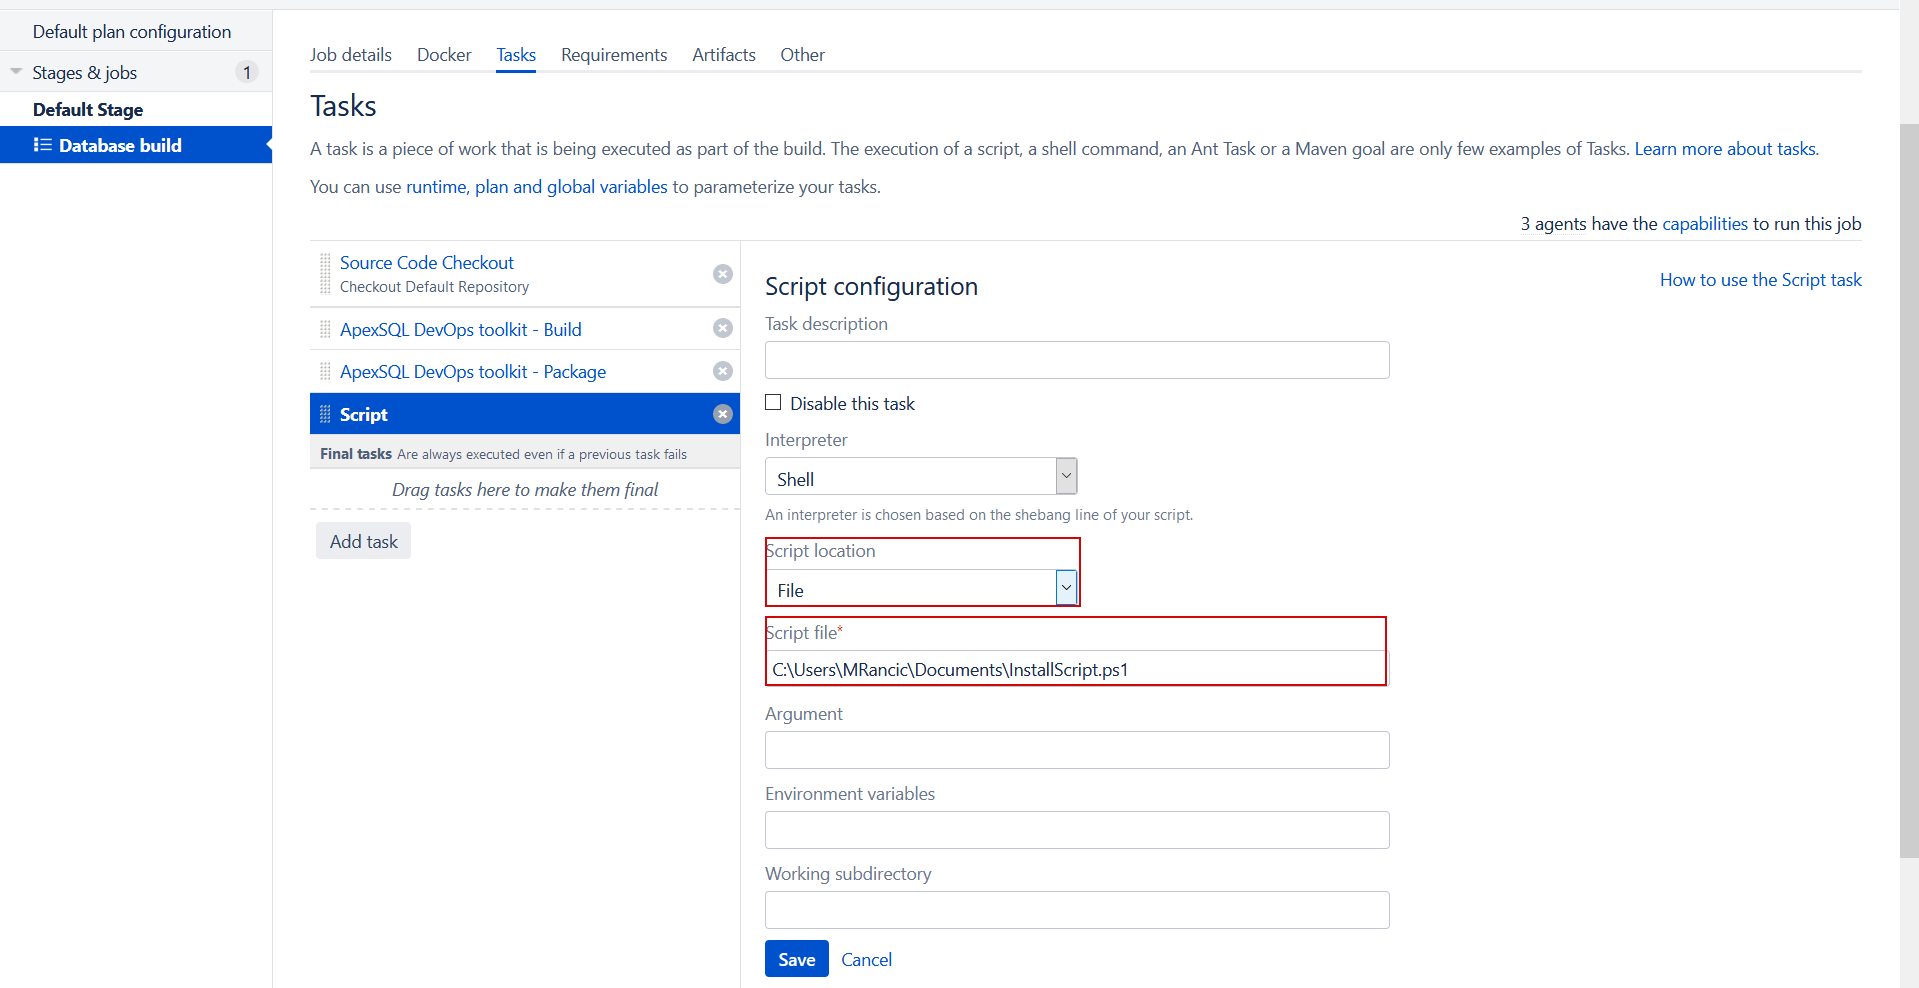
This task supports has interpreters for three types of scripts, Windows PowerShell, Linux, and Windows command-line, which can be chosen manually or autodetection can be used. The Shell option autodetects type of script based on the first line in it:
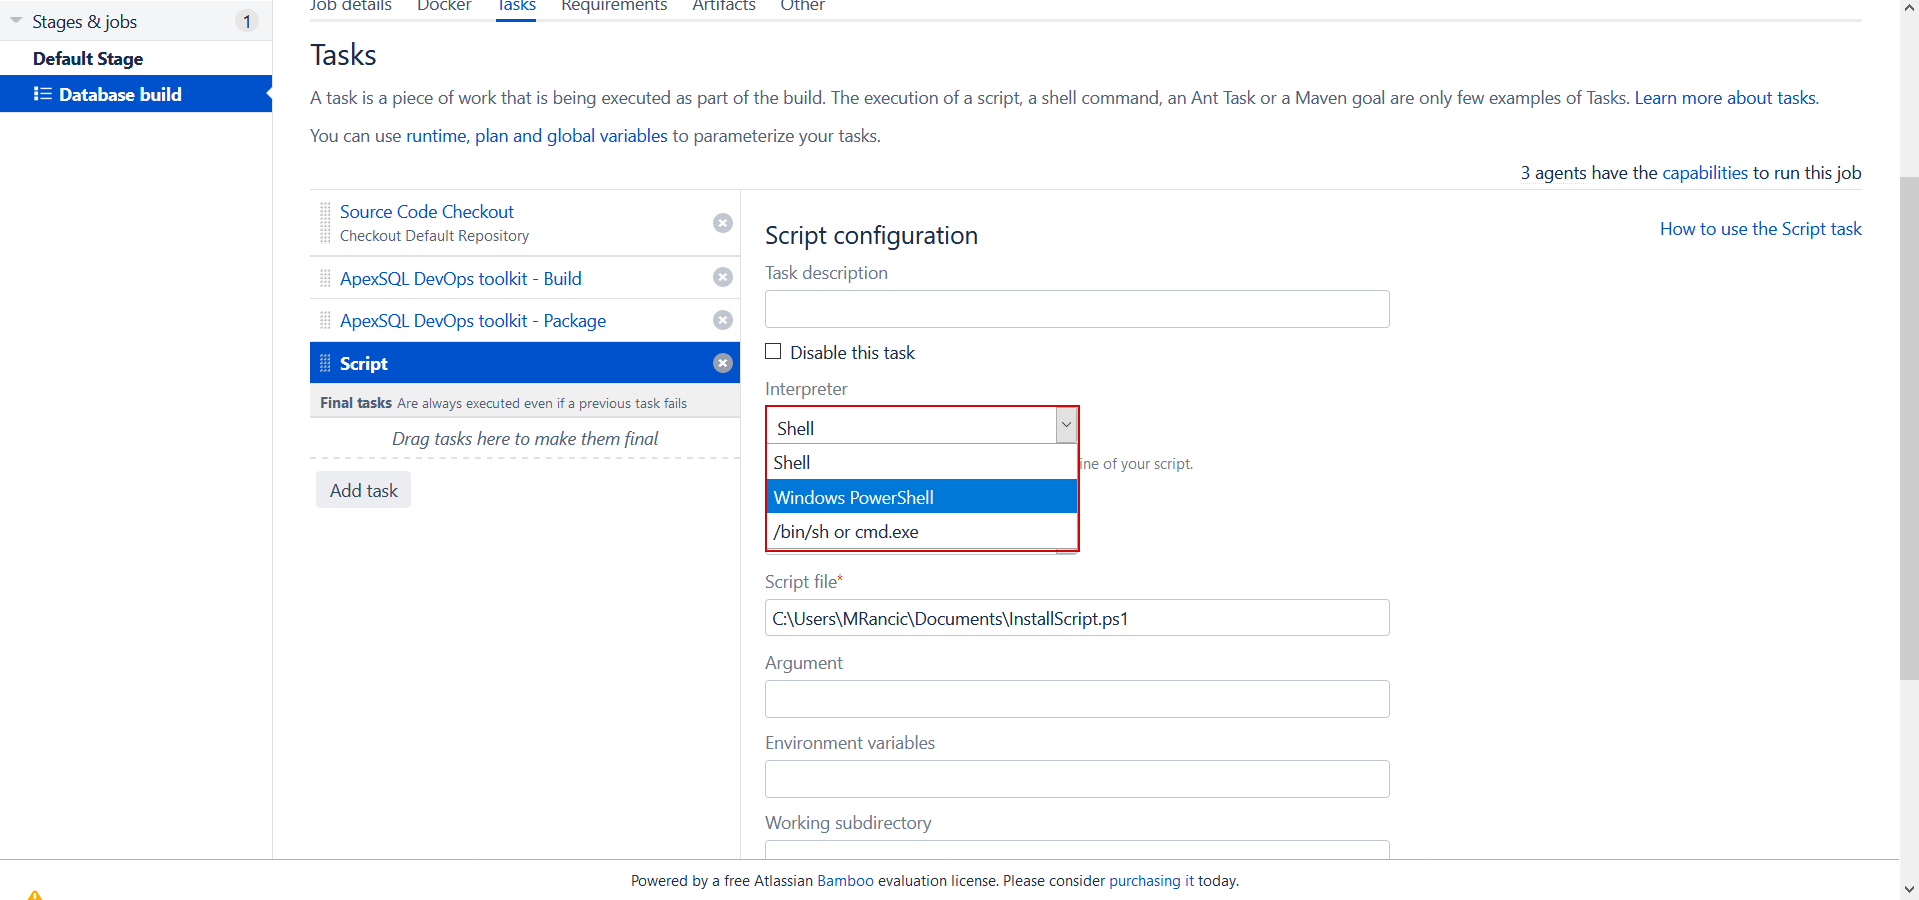
Let’s pick the Windows PowerShell option directly and continue by setting the File in the Script location select-box (as opposed to Inline – direct script) and adding the path to our created script:
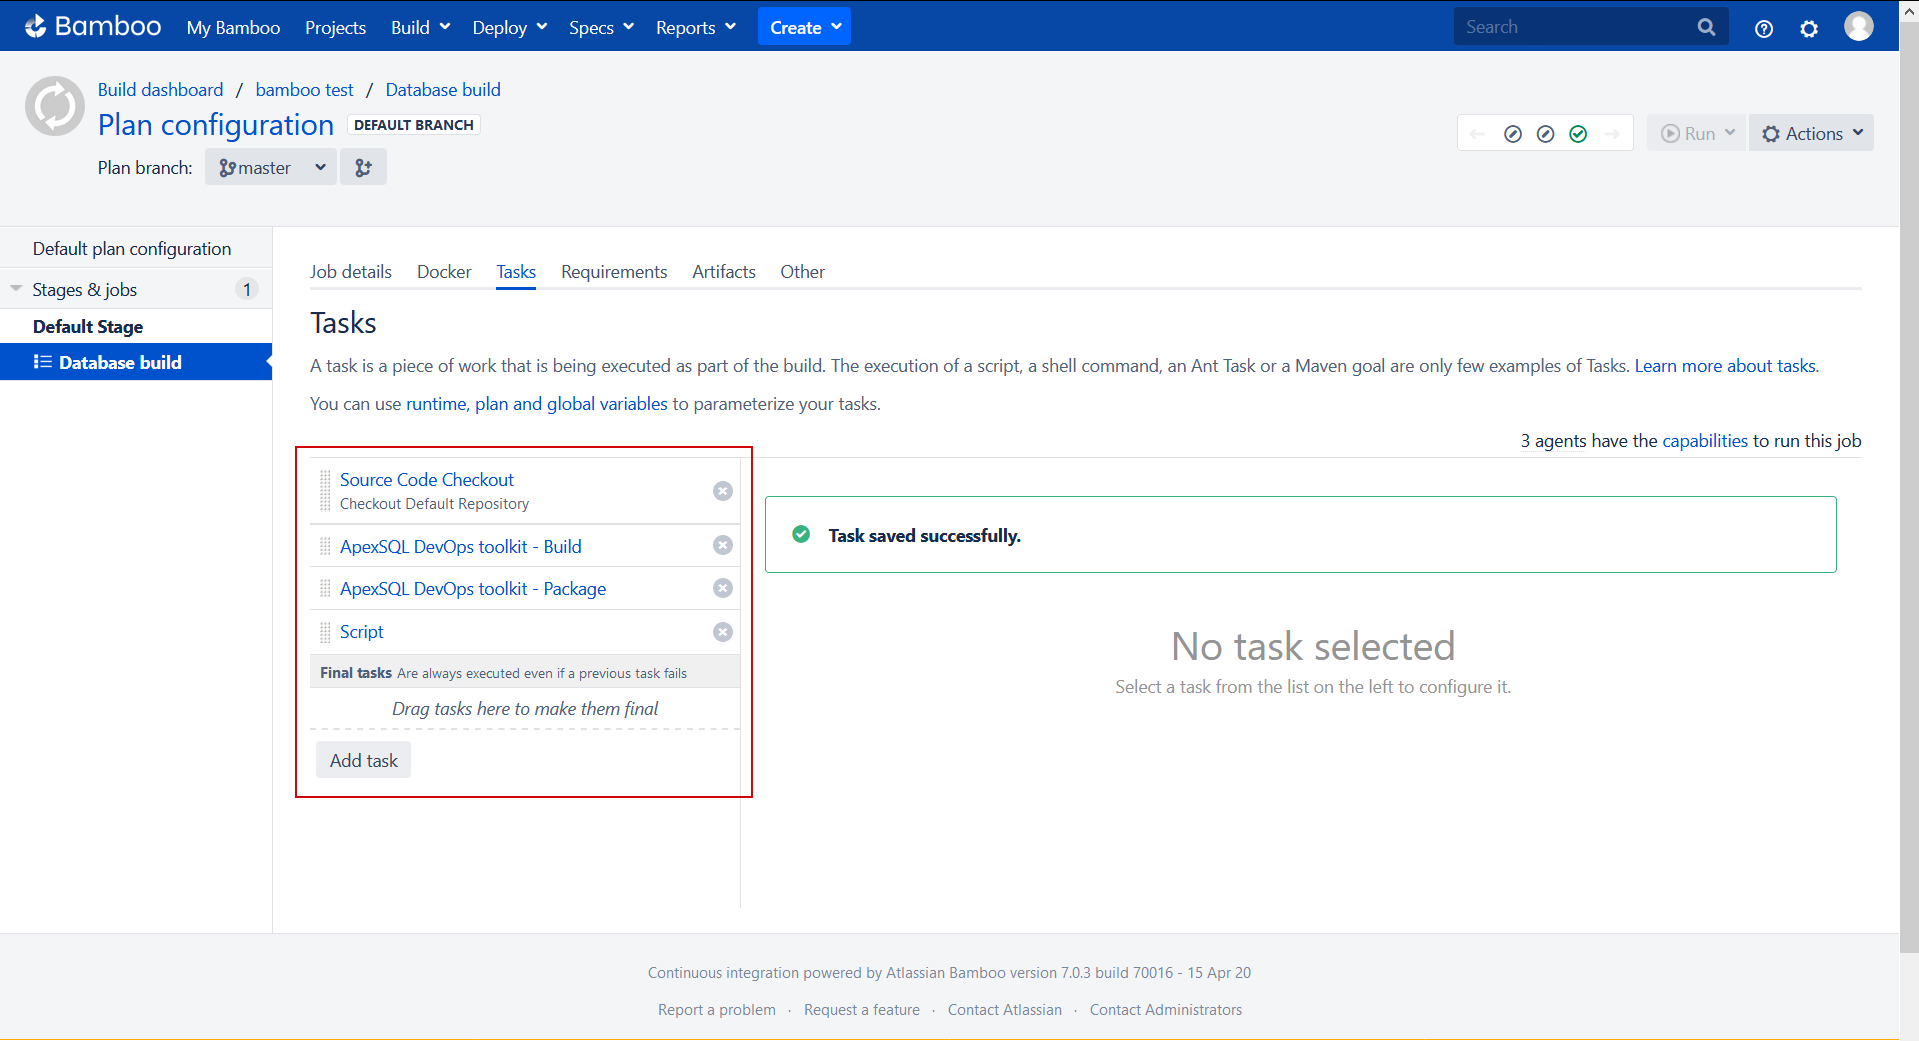
The database continuous integration pipeline with the additional task will look like this and is ready for execution:
Azure DevOps Server/Services
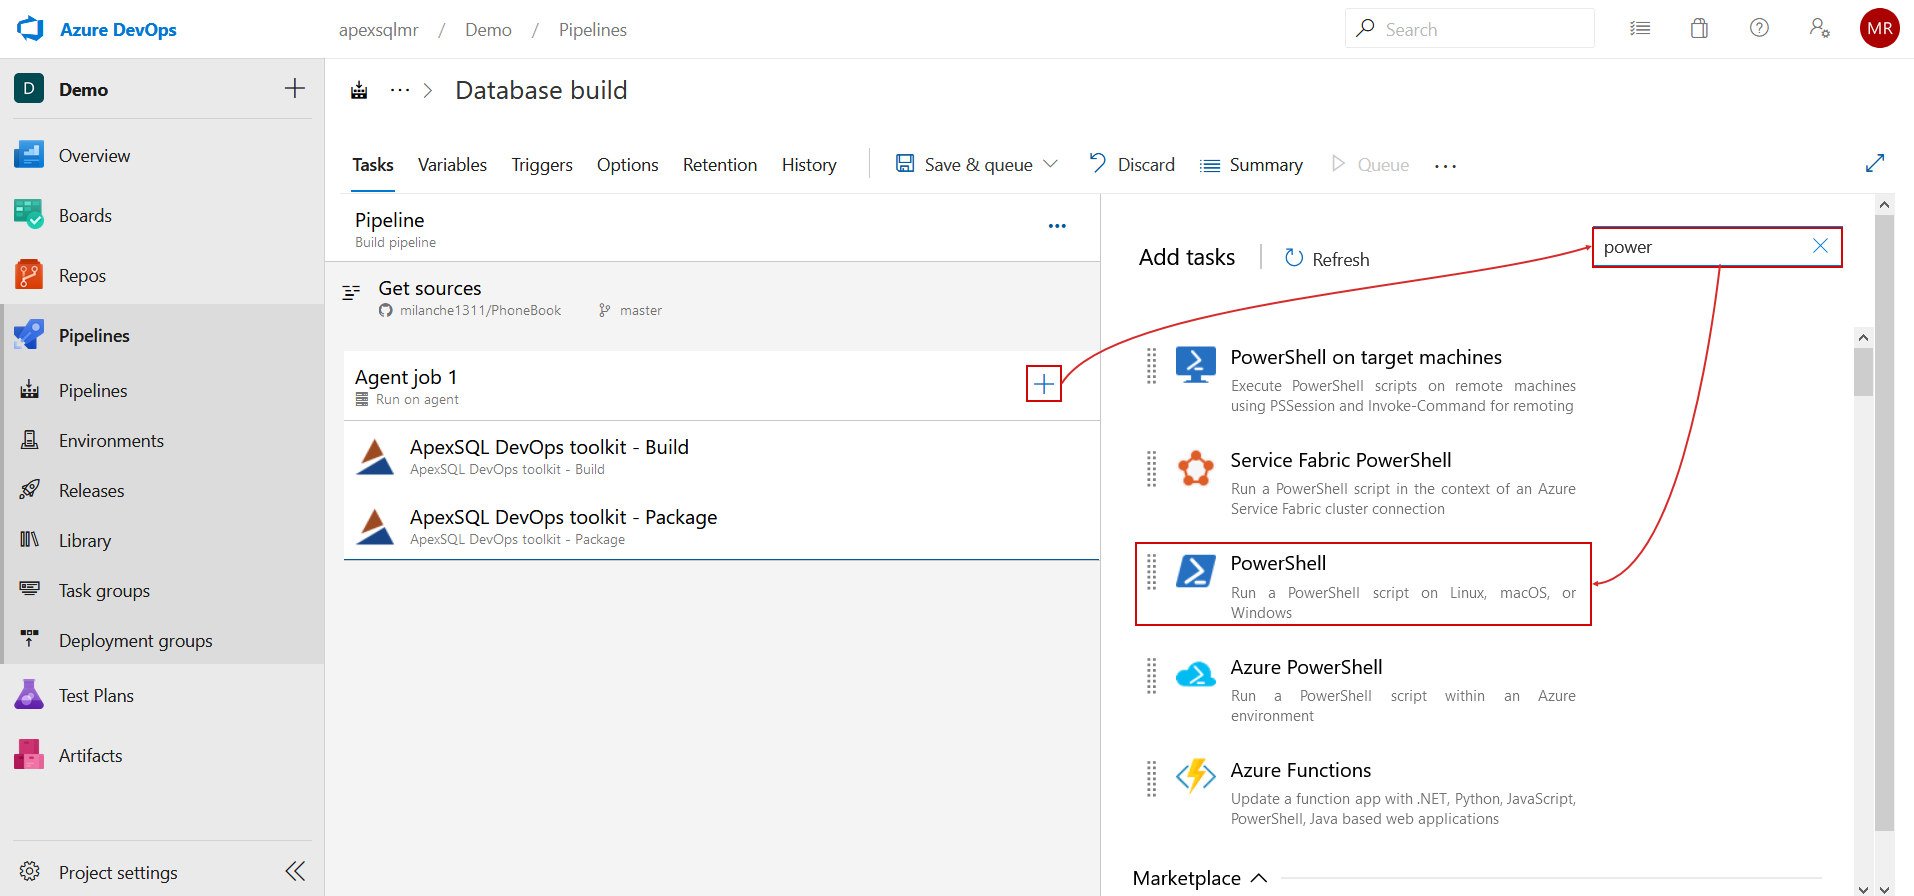
The Azure DevOps also has integrated support for PowerShell execution and configuring it is similar to previous examples. In the pipeline, formed with the tasks that come from the ApexSQL DevOps toolkit extension, we should add a new task and from the gallery of tasks find the PowerShell task. The gallery can be filled with lots of different Azure DevOps tasks, so the easiest way to find the PowerShell task would be to insert the search pattern:
When added, the task will require setting the source Type as the File Path and the location of the script in the Script Path field:
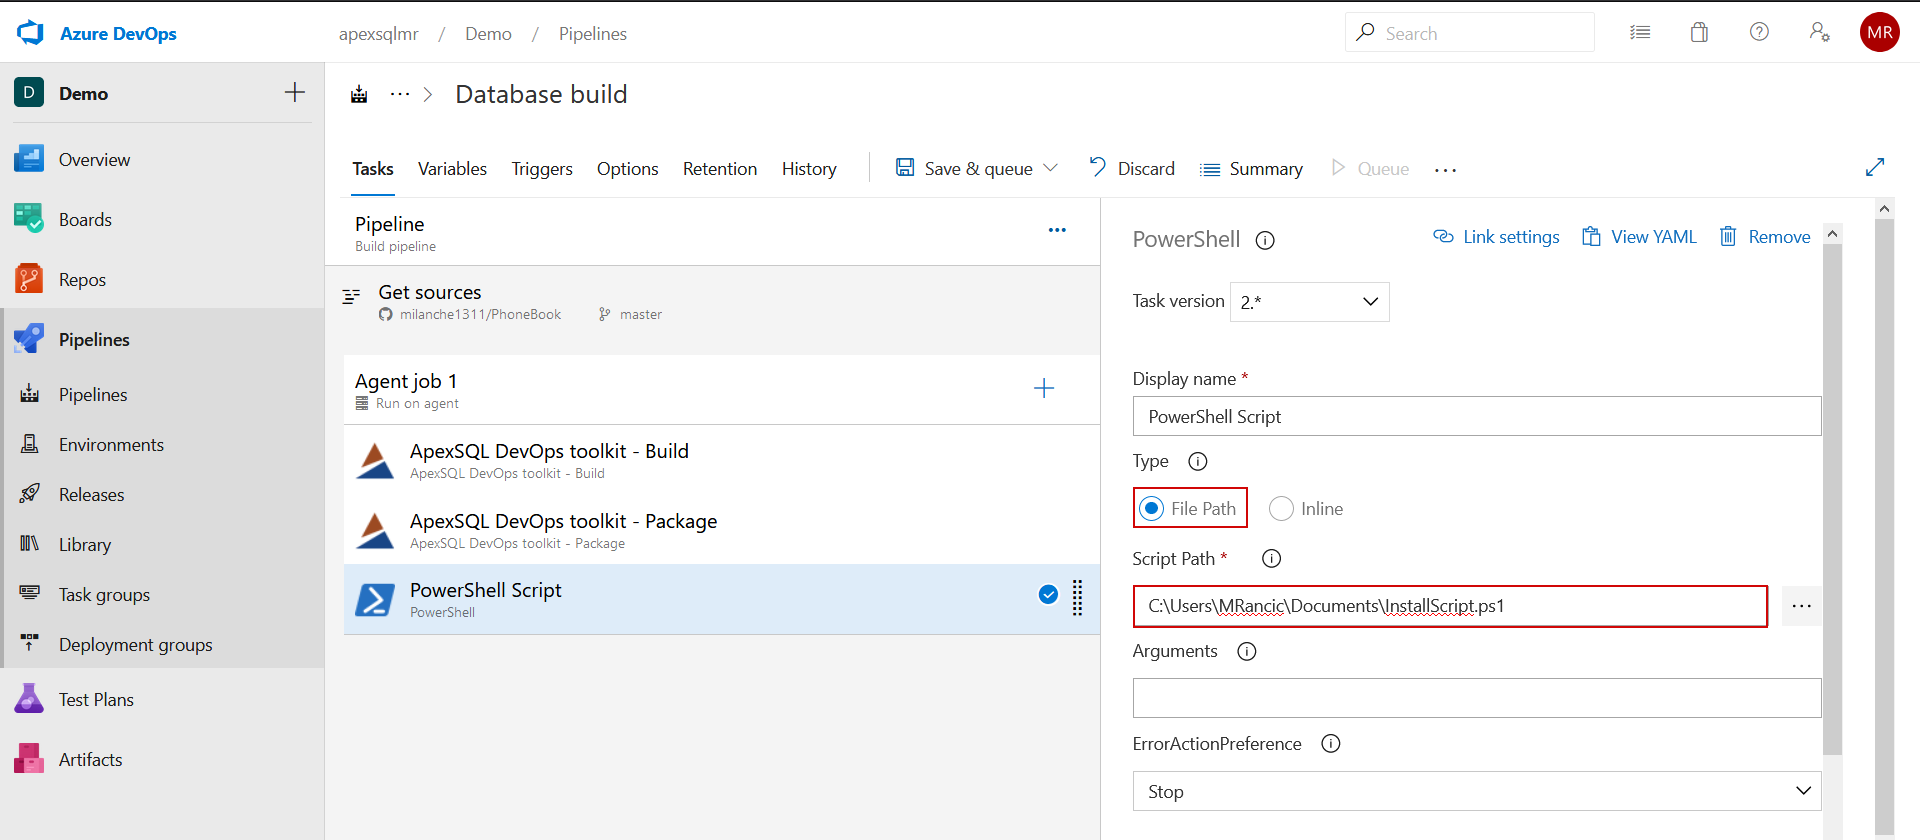
Just like that, the Azure DevOps pipeline is complete.
Web dashboard
Although considered as a specialized database continuous integration solution, the standalone ApexSQL DevOps toolkit – Web dashboard provides additional project flexibility with support for the PowerShell execution.
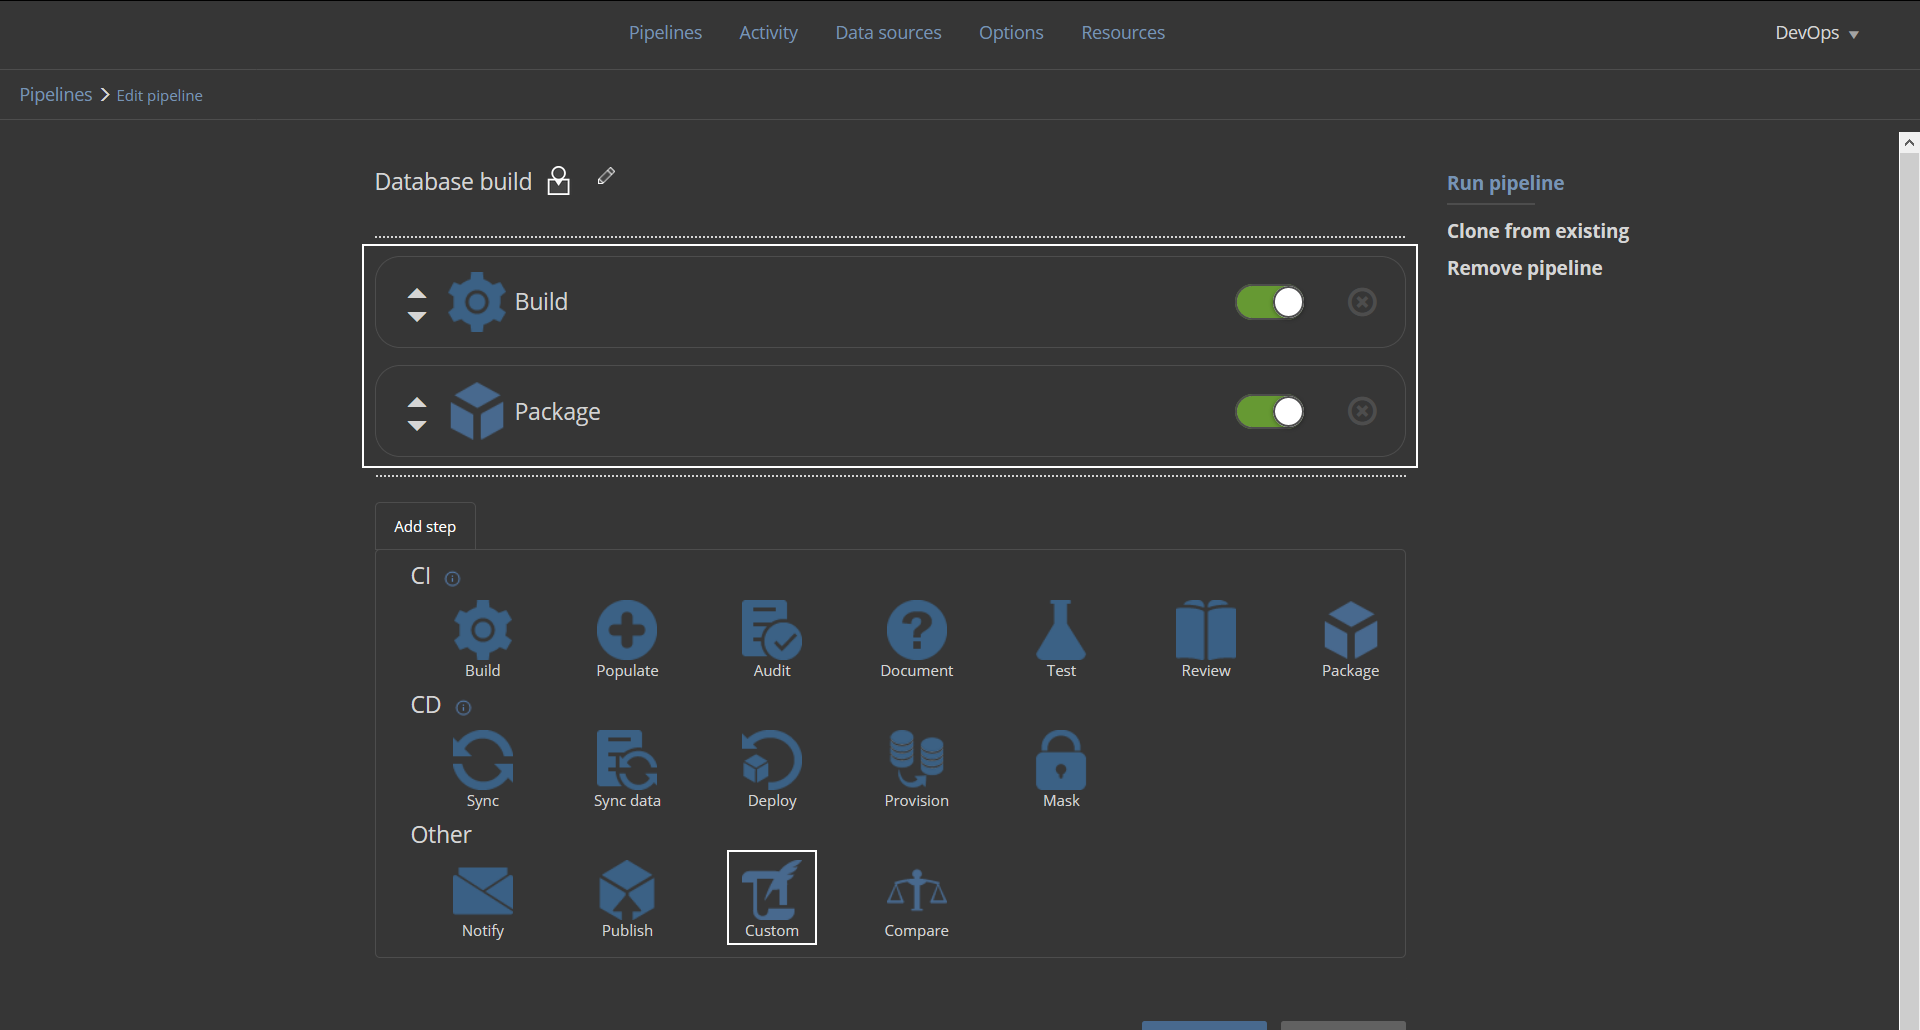
In the image, we can observe the same example with the Build and the Package steps that form the basic CI pipeline. To this sequence of steps, we can add the Custom step in order to use the created PowerShell script:
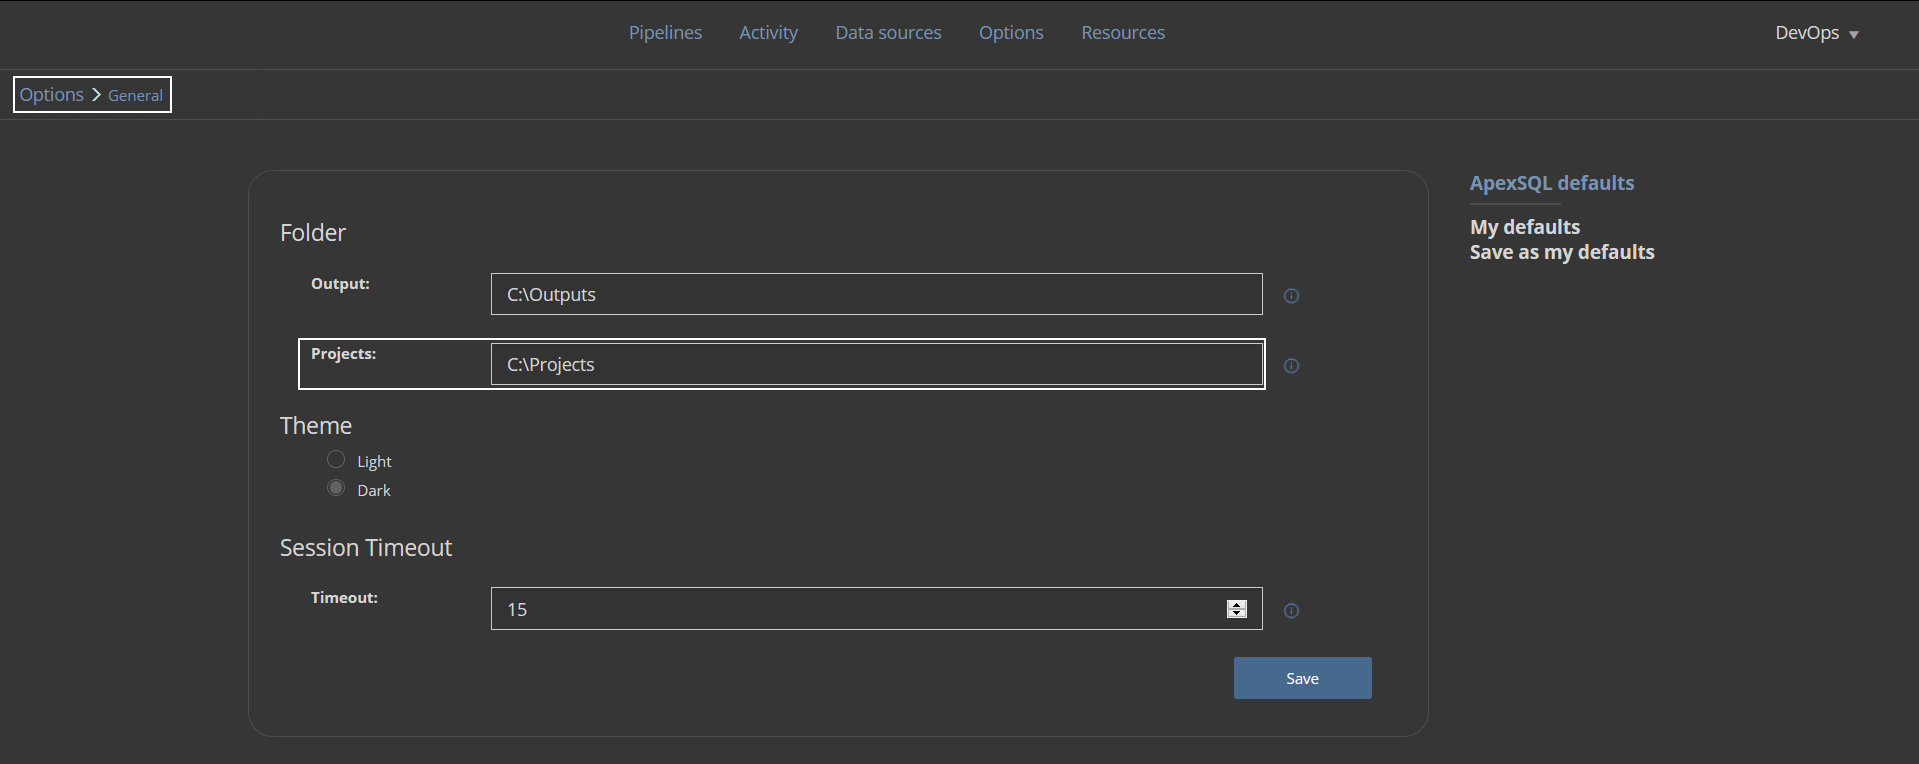
The Custom step configuration is as simple as all previously explained examples. The only difference here is that the script will have to be placed in the Web dashboard’s user-defined project folder as the application uses that location for external inputs:
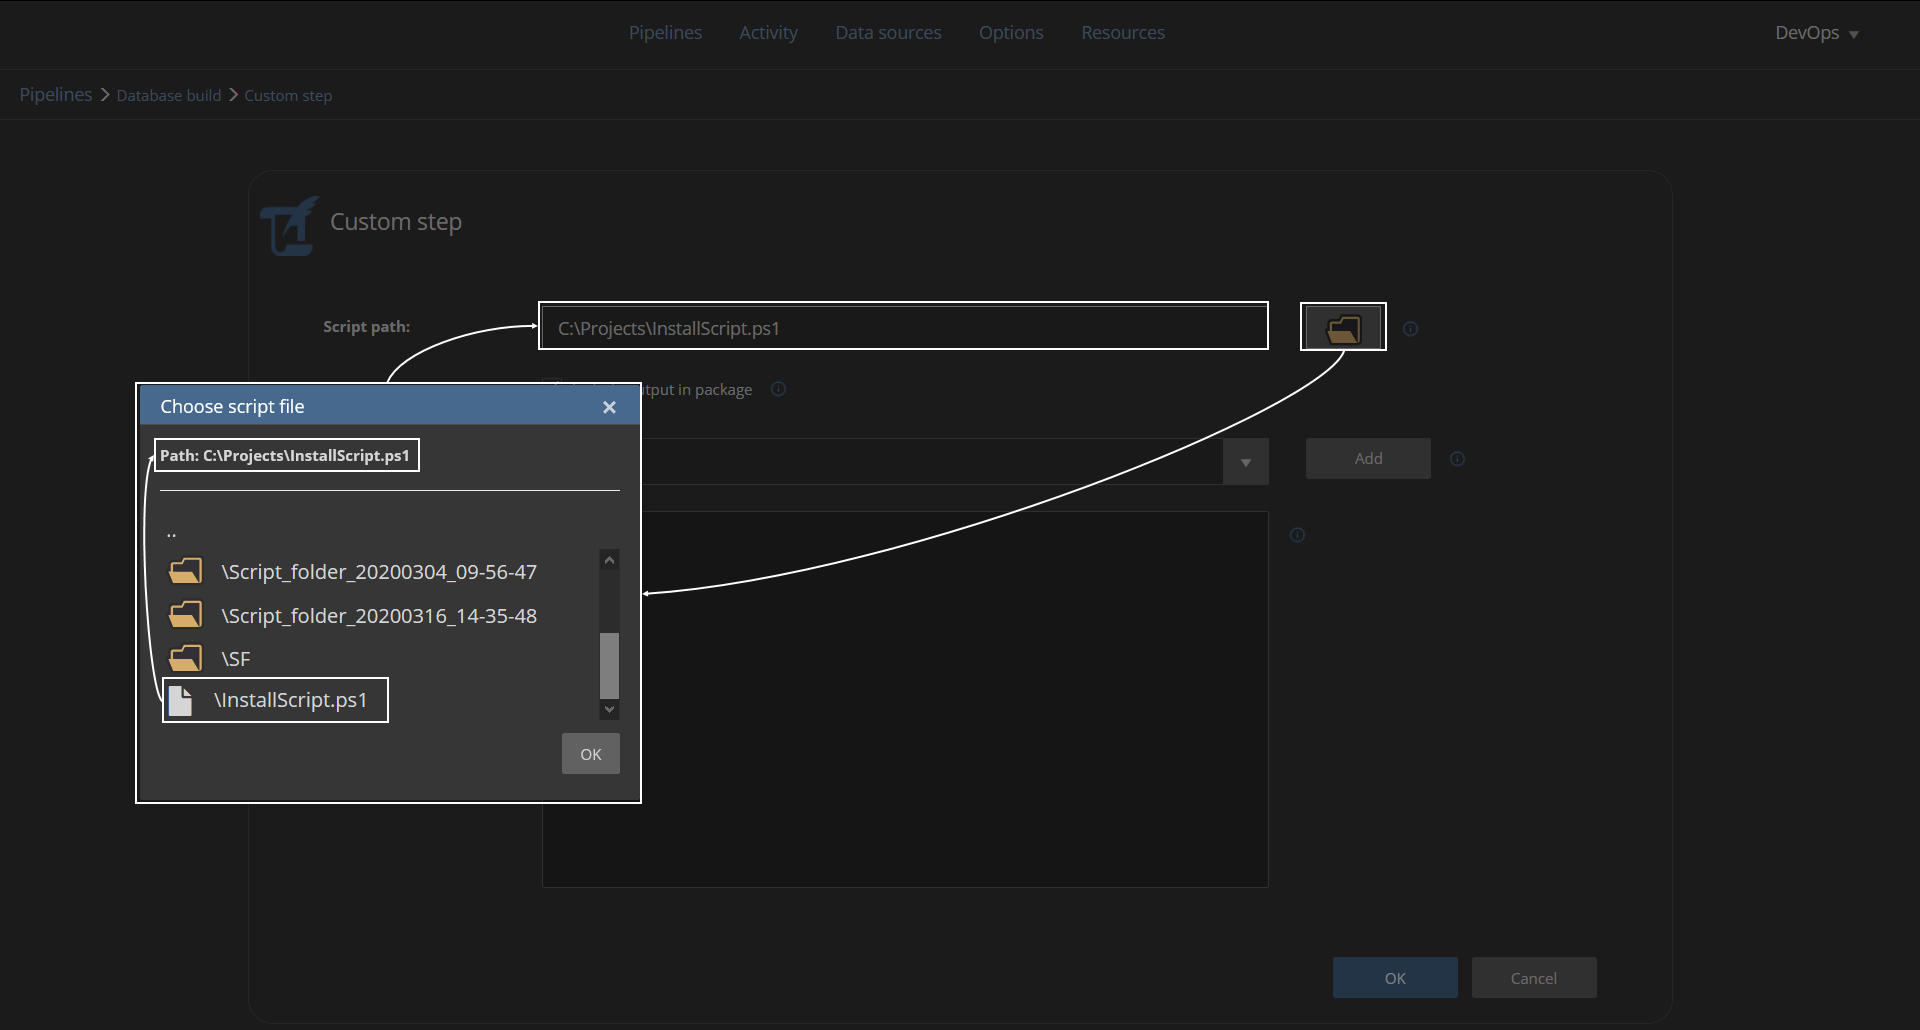
First, the PowerShell script file should be provided for the Script path field. The folder browser button should be used here to open the project folder location and pick the appropriate script:
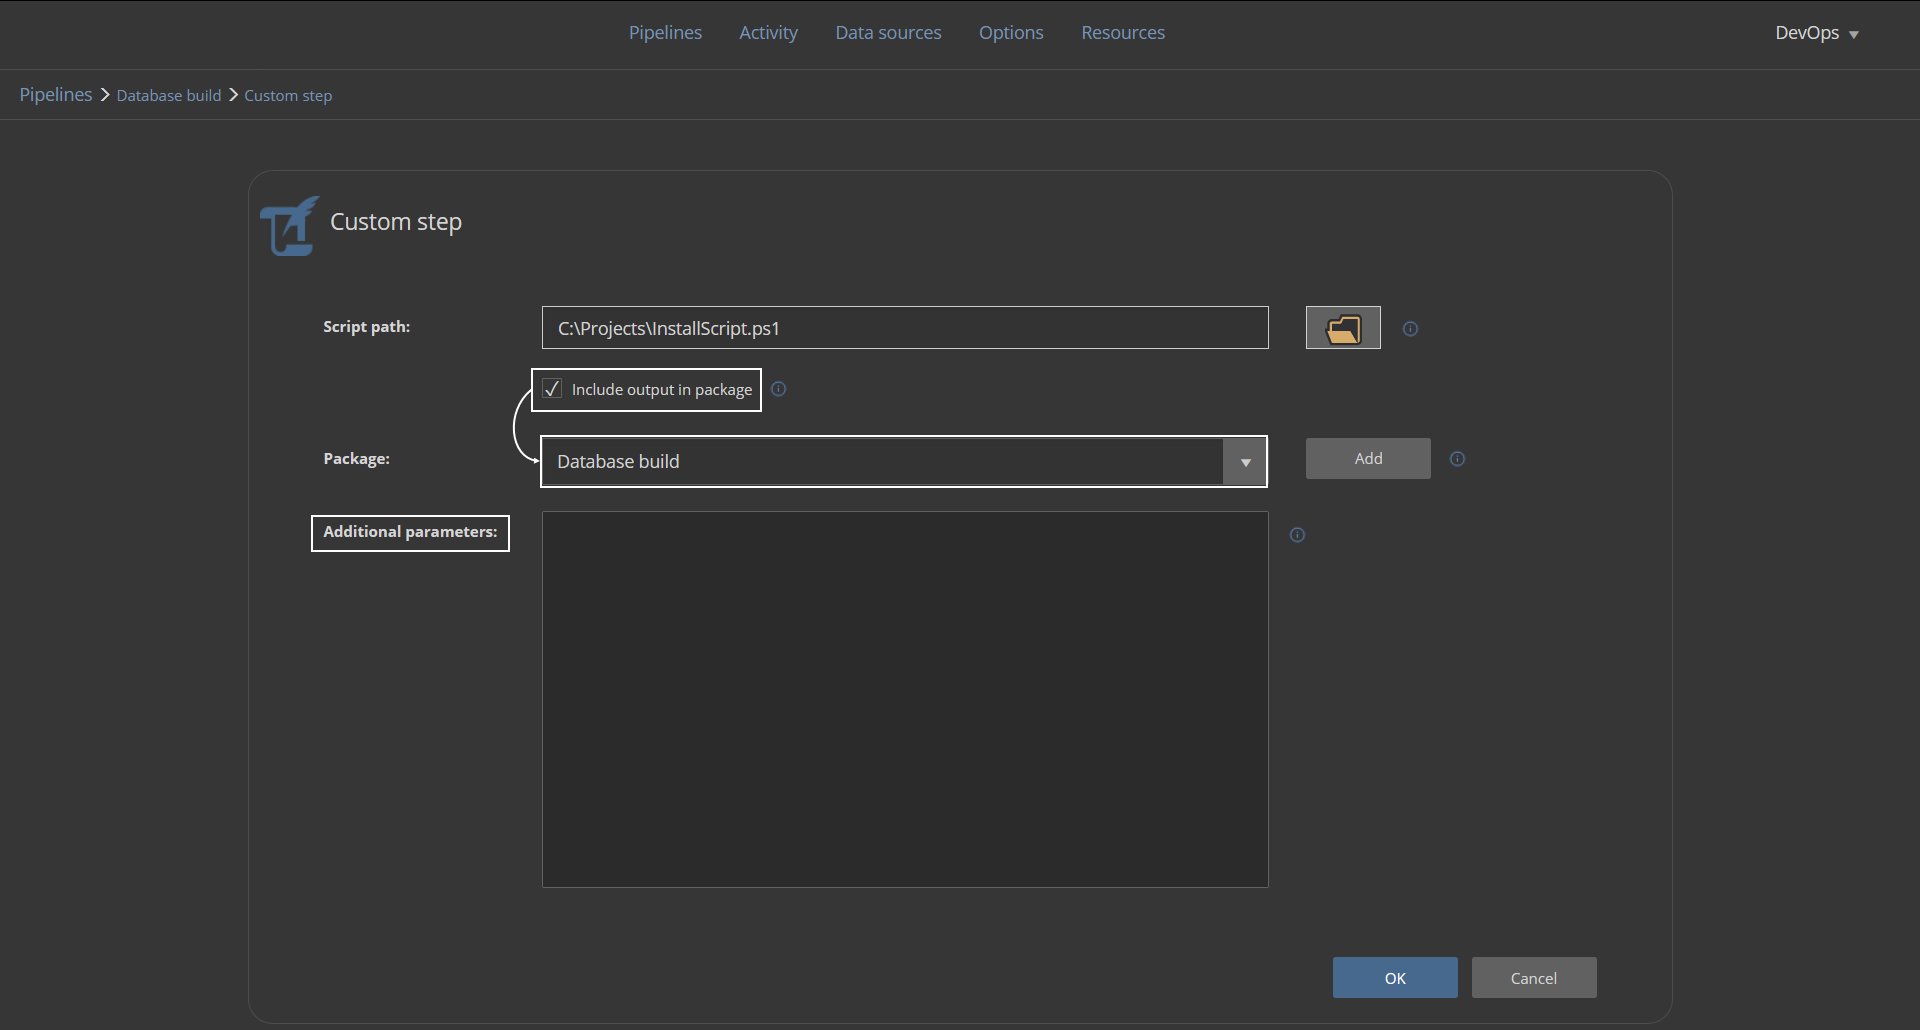
The Include output in package is optional and, if used, the step’s output, which is basically just the PowerShell execution summary, will be stored in a NuGet package (this can be the same package used for the rest of the steps in the pipeline); and the Additional parameters field can be used if with the script execution some external parameters are required for a successful run:
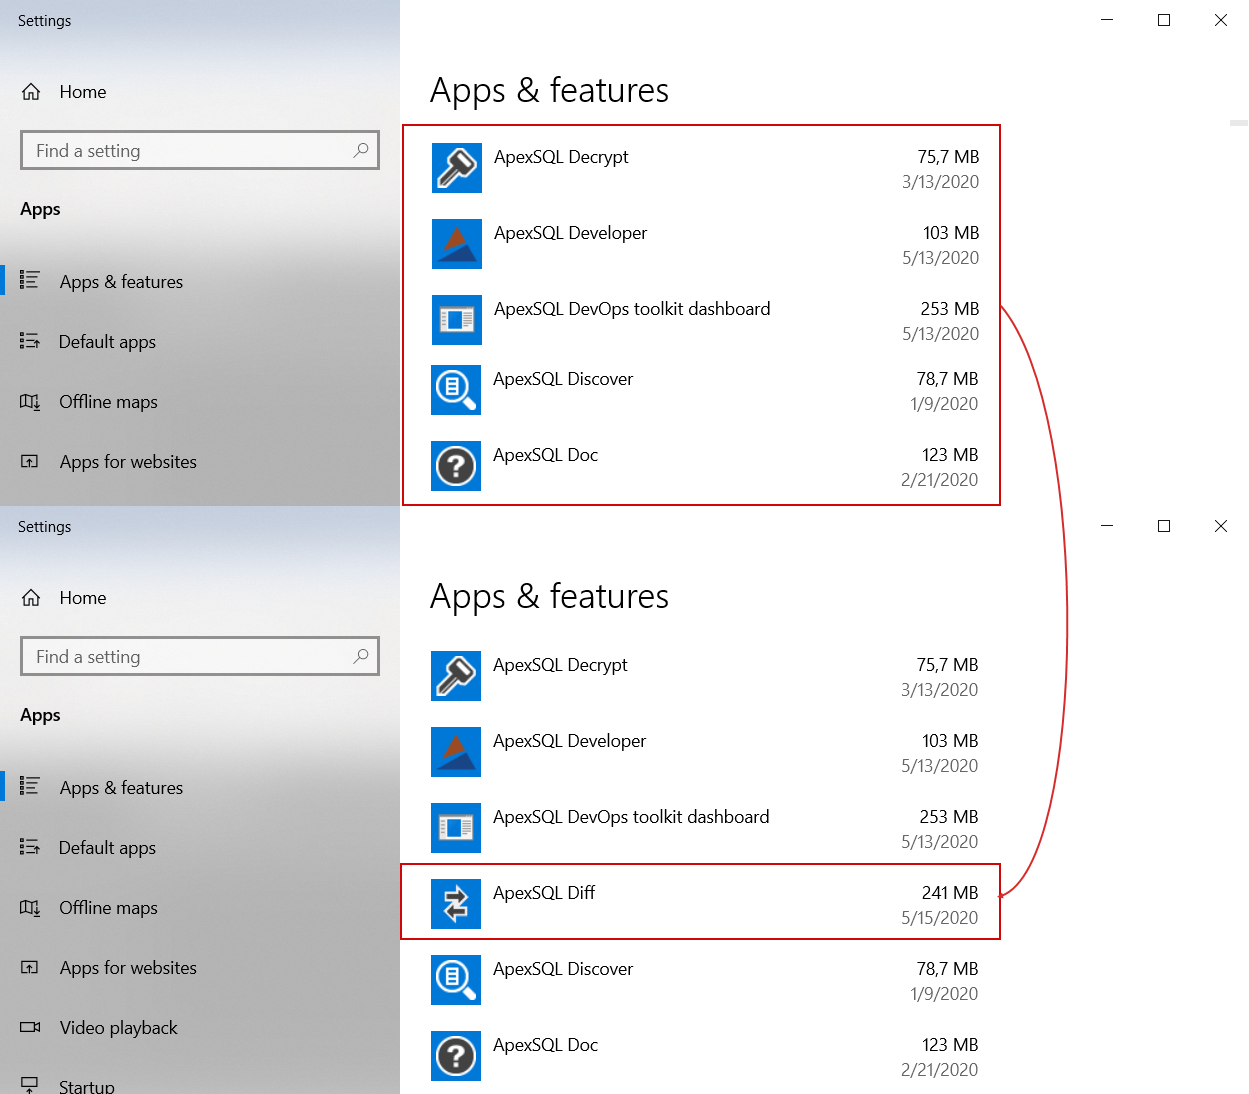
As a result of the executed example PowerShell script, we can easily observe that the desired application is indeed installed:
Conclusion
This example is just a small measure of what can be done on-the-fly by using the PowerShell in combination with database continuous integration pipelines provided by the ApexSQL DevOps toolkit solutions and fully automate all possible use cases.
May 18, 2020


