


Introduction
For a SQL Server DBA handling multiple databases on any given time, knowing how to set up regular backup schedules, backups with unique names on a daily basis, making backup mirrors for redundancy, cleaning up old backup files is important. Equally important is automatic confirmation that the backups have been successfully created for the databases with an email notification. There are a couple of different ways to set up email notifications which can be done from Microsoft’s SQL Server Management Studio.
In this article, we are going to cover three different ways to set up email notifications for backup jobs in SQL Server:
- Setting up email notifications with SQL Server Agent
- Setting up email notifications using SQL Server maintenance plans
For the SQL Server Agent service to be able to send email notifications for backup jobs, as well as for Maintenance plans, there are a couple of prerequisites that have to be performed first which we will go through.
Those prerequisites are:
- Enable Database Mail
- Configure SQL Server Agent to use Database Mail
- Create an Operator
-
Enable Database Mail
Database Mail can be enabled in two ways, via Database configuration wizard or using templates, specifically Simple Database Mail Configuration script.-
Configuring Database Mail using Database configuration wizard
First off, we need to open up SSMS and connect to our server. After that, expand the instance node for which we are configuring the Database Mail for. Expand the Management node, right click Database Mail and select Configure Database Mail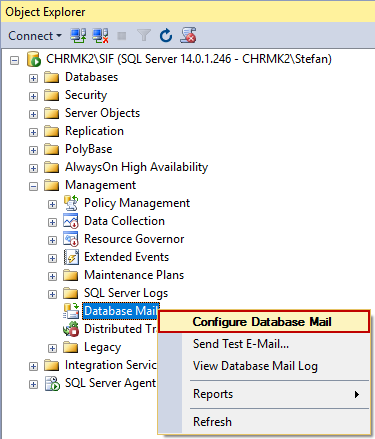
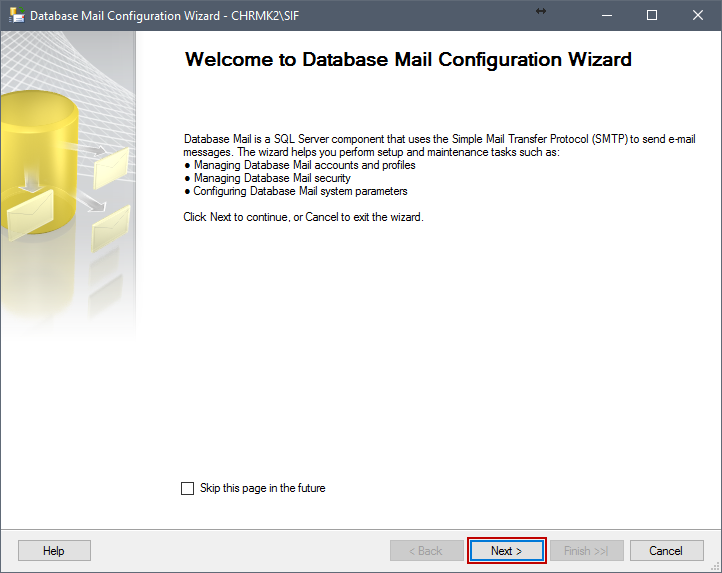
The Database configuration wizard opens to the Welcome page where we click on Next. Optionally, we can check the Skip this page in the future checkbox before clicking on Next
In the Select Configuration Task page, since we are configuring Database Mail, select the first option, Set up Database Mail by performing the following tasks and click on Next
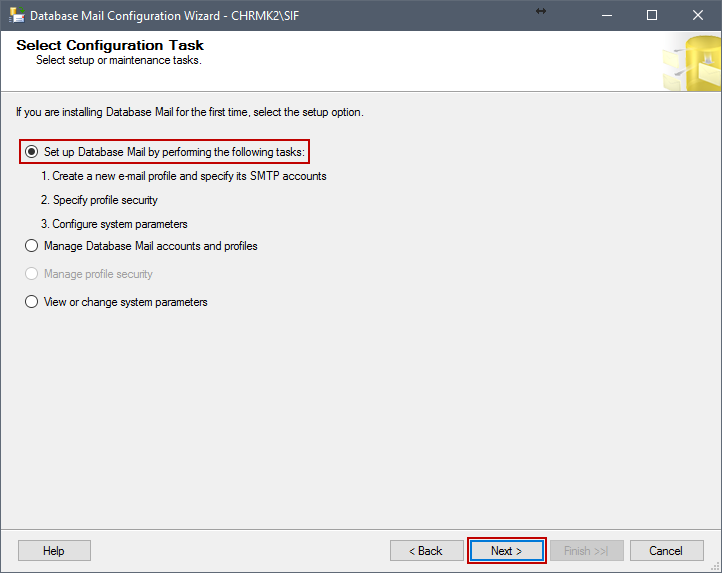
Note: After pressing Next, if Database Mail has not been enabled previously, a message will pop up saying: The Database Mail feature is not available. Would you like to enable this feature? Clicking on Yes will enable this feature
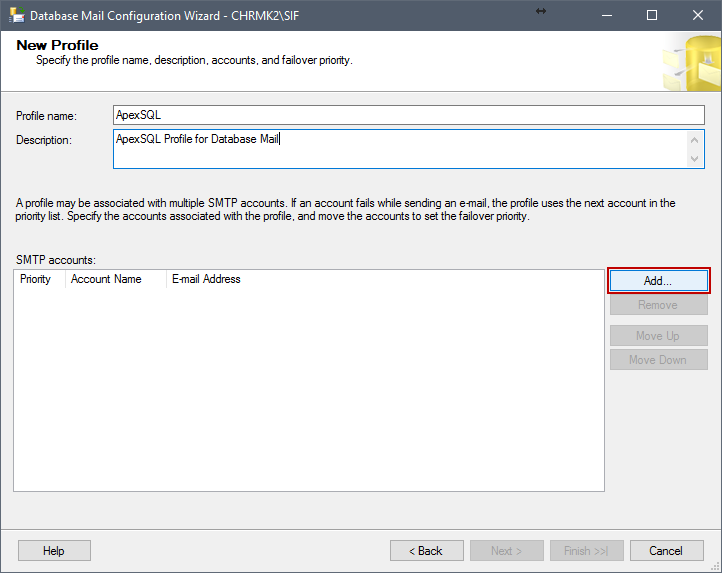
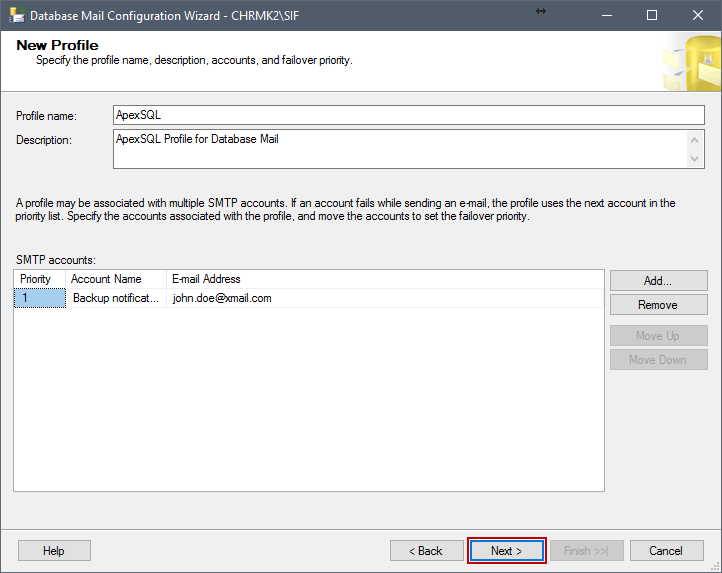
In the New Profile page, we input the Profile name and optionally, Description, and after that click on Add..
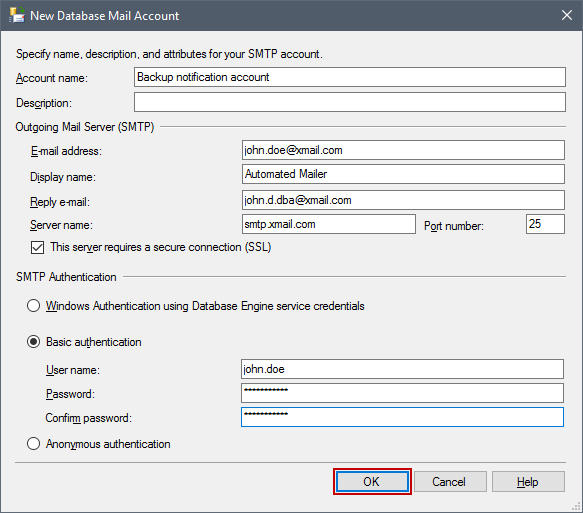
In the New Database Mail Account page, we are going to create a new Database Mail account containing the information for sending email to an SMTP server.
Under Account name we input the name of the new account, under Description optionally enter the account description.
Under E-mail address we input the email address that email notifications are going to be sent from. Under Display name we input the name which will be shown on email notifications sent. Under Reply e-mail, optionally we can input the email address where replies to email messages sent from this account will be sent. It can be the email of the database administrator, or it can be left blank. Under Server name we input the SMTP address for our mail server, which is most commonly in the form of smtp..com. After that we input the port number for the server under Port number. In most cases, the port number is 25, however, it is advised to consult the mail administrator for further information. Afterwards, checking the option This server requires a secure connection (SSL) will encrypt communication using Secure Sockets Layer.
Under SMTP authentication, we are presented with three options for the authentication. The type of authentication varies, in this case we are going to choose Basic authentication which then requires to fill the User name, Password and Confirm password text boxes with information used to log on to the mail server. After filling all the fields, we click on OK to finish the creation of new Database Mail account.
After that we have created a new account which can be then seen under SMTP accounts. At this point we can create more accounts which can be sorted by priority as a fail safe in case that some of the accounts fails to send the email notification. After that, we click on Next onto the next page
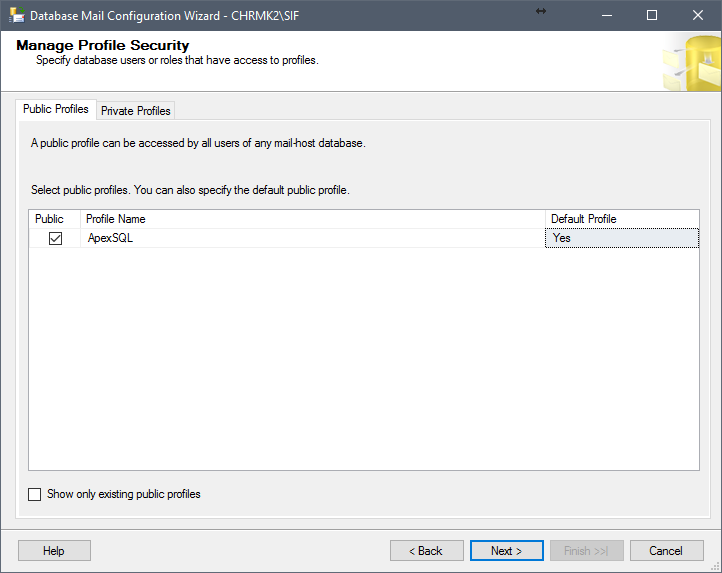
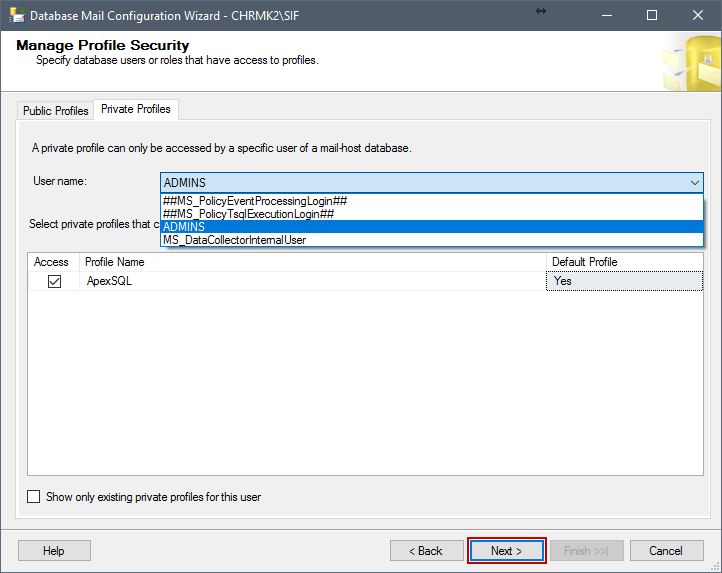
Under the Manage Profile Security page, we have two tabs, Public Profiles and Private Profiles. In the Public Profiles tab, we configure the account that will be available to any user or role with access to mail host database (msdb) to send email notifications using that profile. In the Private Profiles tab, we select the users and which profiles they can use, and after that we click on Next to continue
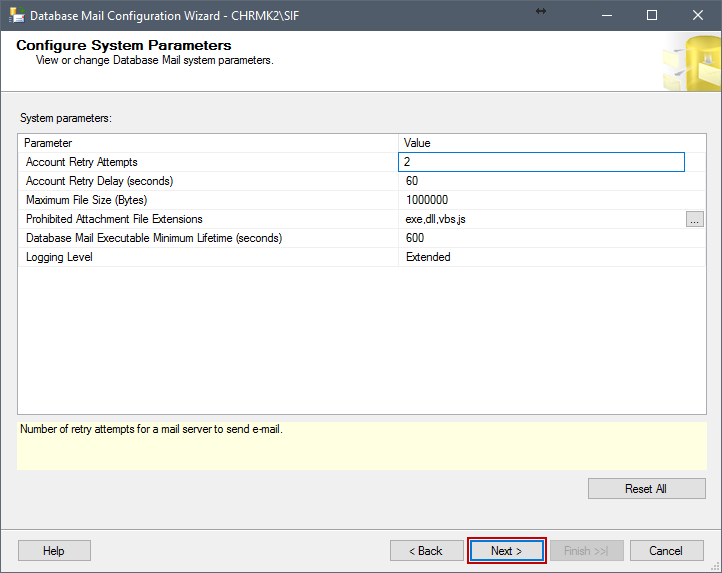
In the Configure System Parameters page, we can adjust some of the parameters for the emails. After that, we click on Next
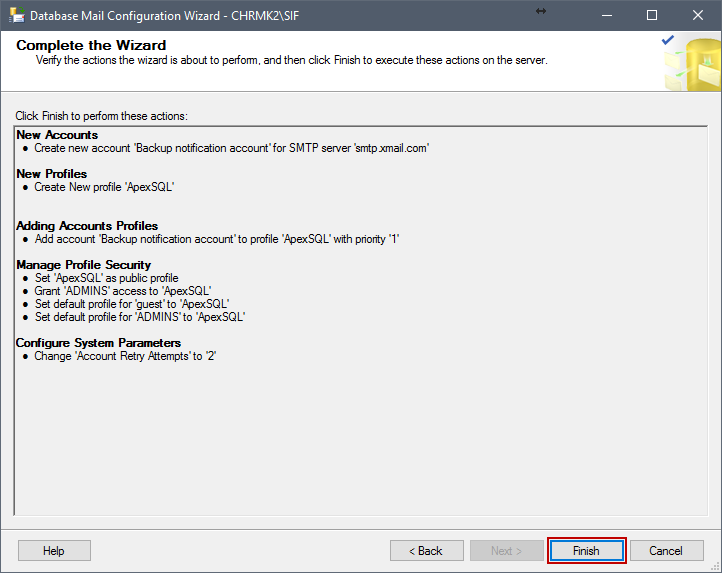
In the Complete the Wizard page, we can overview the operations which will be completed. If everything is set up properly, we can click on Finish to complete the wizard, if not, we can go back to the problematic part and correct it, afterwards selecting Finish if everything is in order
After pressing Finish, the wizard will perform all the actions and show them in a window stating if they were successful or not. After that, we click Close to close the wizard

-
Configure Database Mail using Simple Database Mail Configuration template
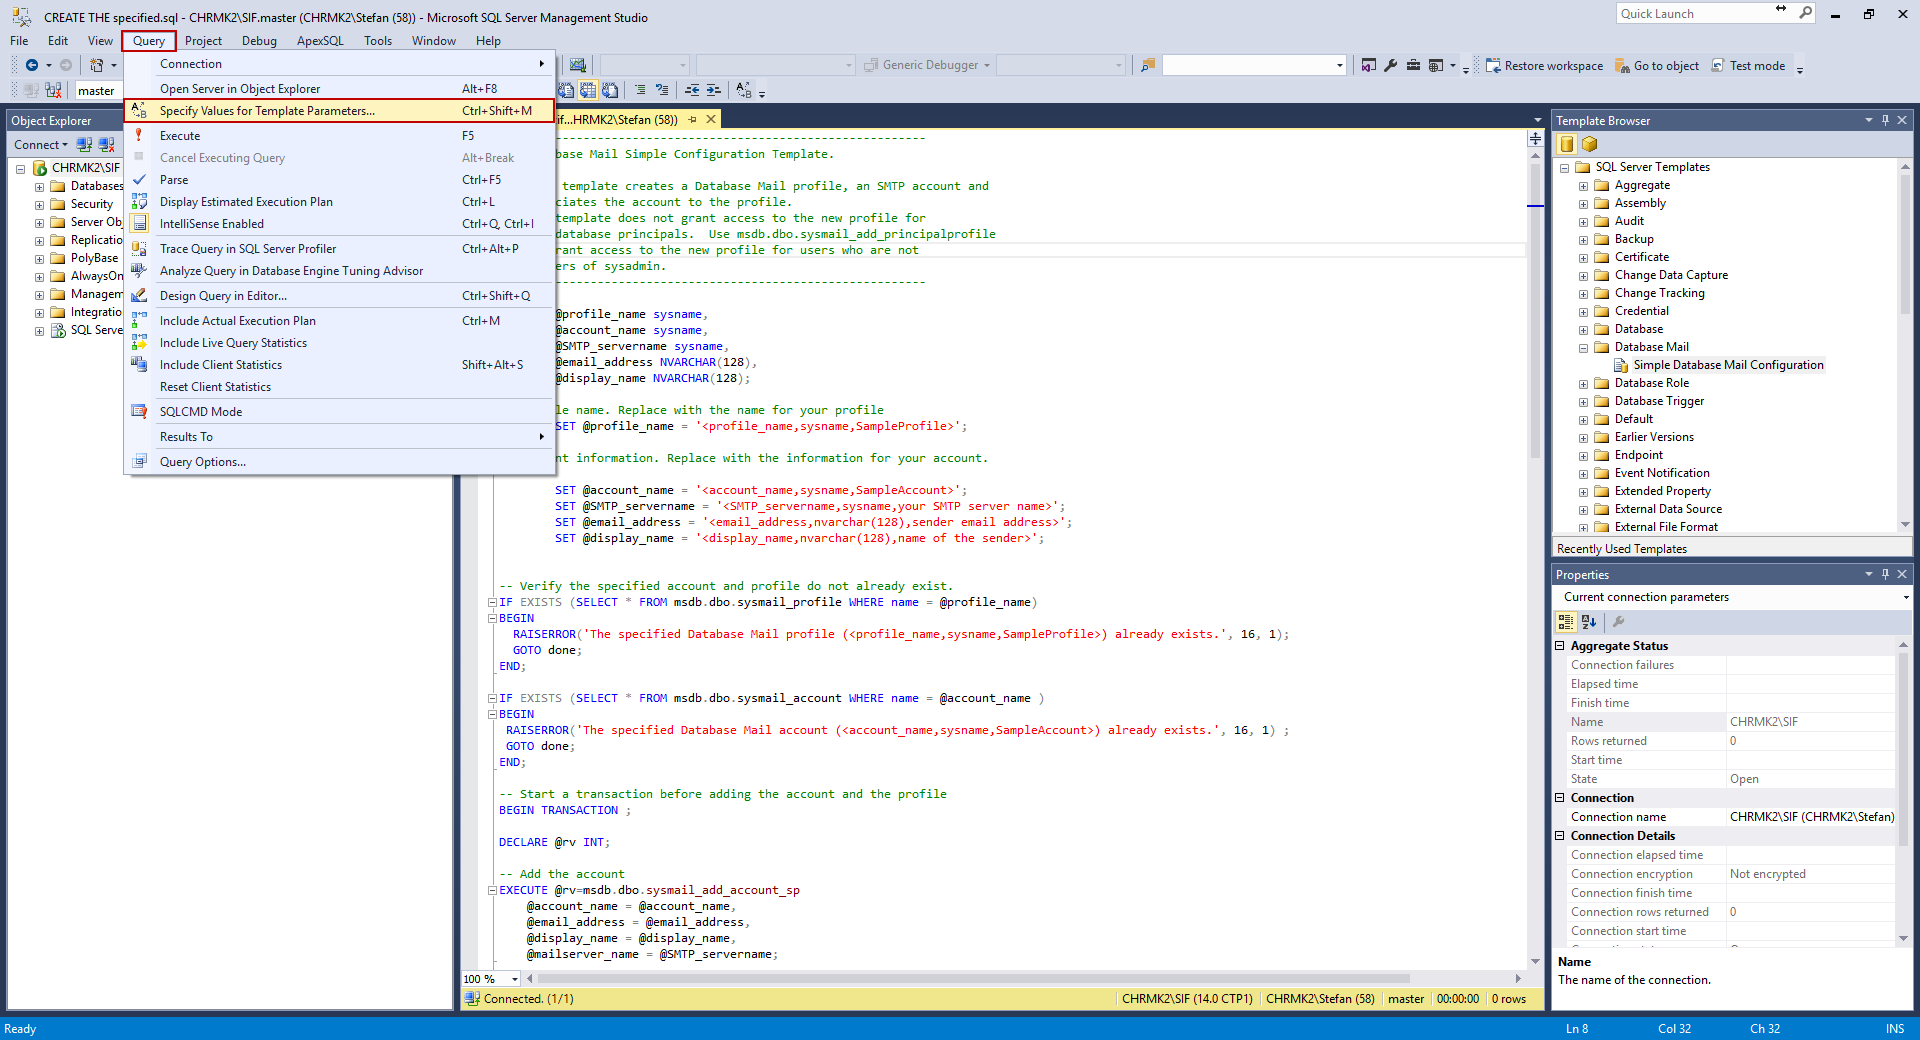
Open SSMS, go to View and select Template Explorer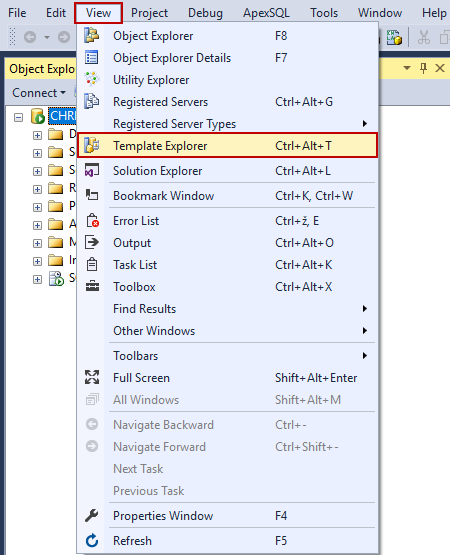
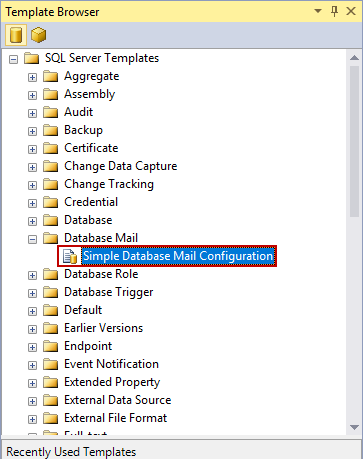
After the Template Explorer opens, find and expand the Database Mail node, then double click on Simple Database Mail Configuration, which opens up a query window.
Go to Query and select Specify Values for Template Parameters… or press Ctrl+Shift+M on your keyboard to open up Replace Template Parameters window
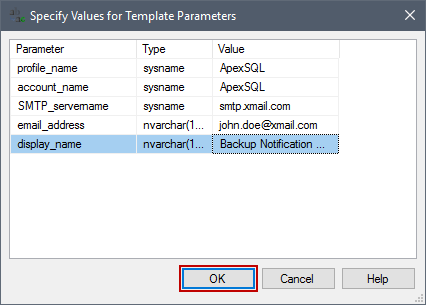
In the Replace Template Parameters window insert appropriate information for the parameters and press OK
Execute the script by pressing F5 on your keyboard after which you should get the message: “Command(s) completed successfully.”
Note: Although this script enables Database Mail and creates a new account and profile, it does not grant any database users access to the profile and by default, only the members of the sysadmin fixed security role can use this profile. If you would want to grant access to profiles, please read this document
-
-
Configure SQL Server Agent to use Database Mail
In the Object Explorer, expand a SQL Server instance, right click on SQL Server Agent and click on Properties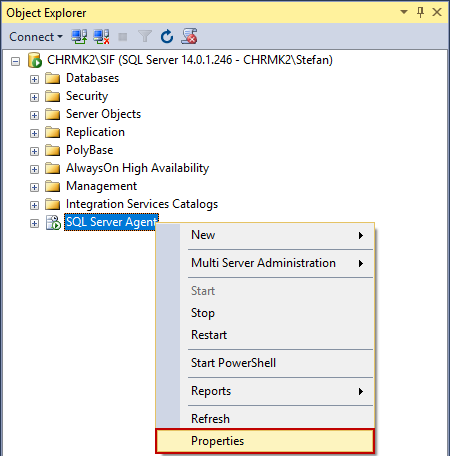
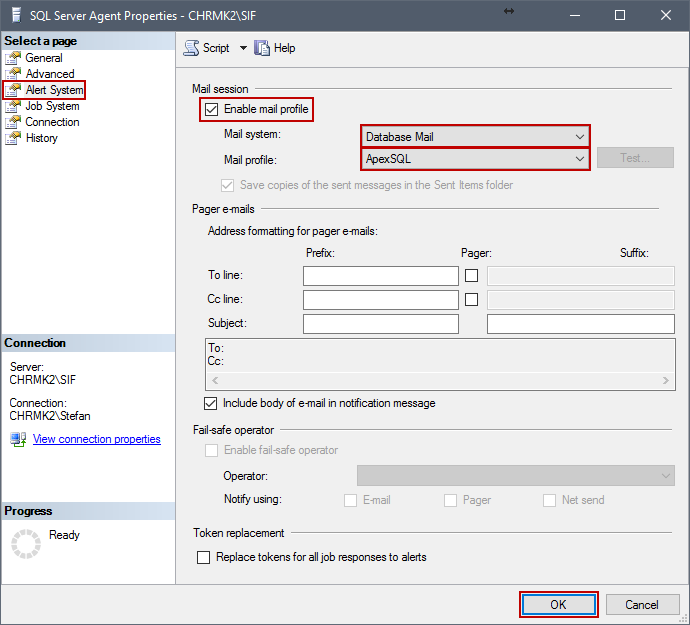
In the SQL Server Agent Properties window, select Alert System from the navigation tab to the left. To the right, check the box near Enable mail profile, for the Mail system set Database Mail, for Mail profile set the profile we created and after that click on OK. After that, restart the SQL Server Agent service
-
Creating an operator
As with enabling Database Mail, creating an operator is a process which can only be accomplished by a member of sysadmin fixed server role. To create an operator, expand the SQL Server agent node, right click the Operators folder and select New Operator…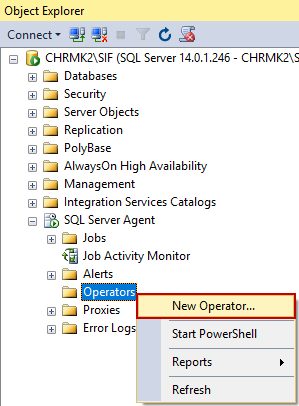
In the New Operator window, under General tab, enter the Name for the operator and operator’s email address under E-mail name under Notification options. Also make sure that the Enabled checkbox is ticked. Click afterwards on OK to confirm the creation of the new operator
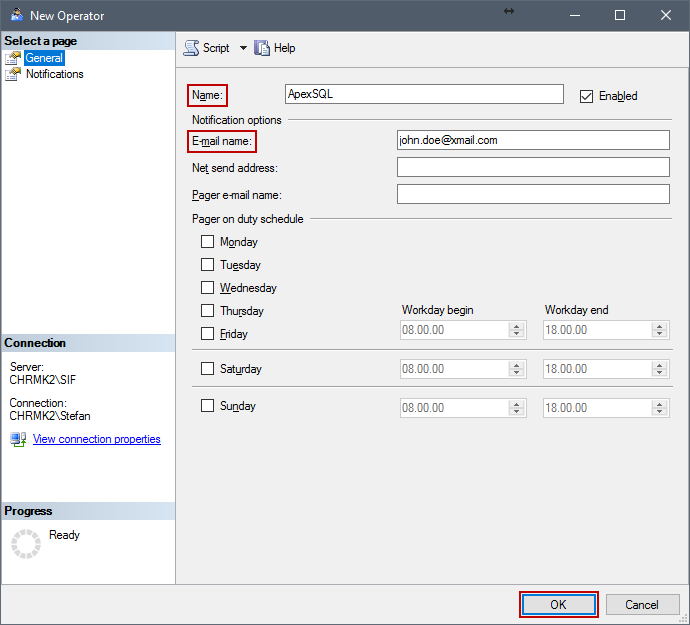
An alternative way to create an operator is through a T-SQL script provided below
USE msdb;
GO

EXEC dbo.sp_add_operator @name = N'ApexSQL',
	@enabled = 1,
	@email_address = N'john.doe@xmail.com';
GO
For more information about adding operators through Transact-SQL, and the stored procedure sp_add_operator, see here
Setting up email notifications with SQL Server Agent
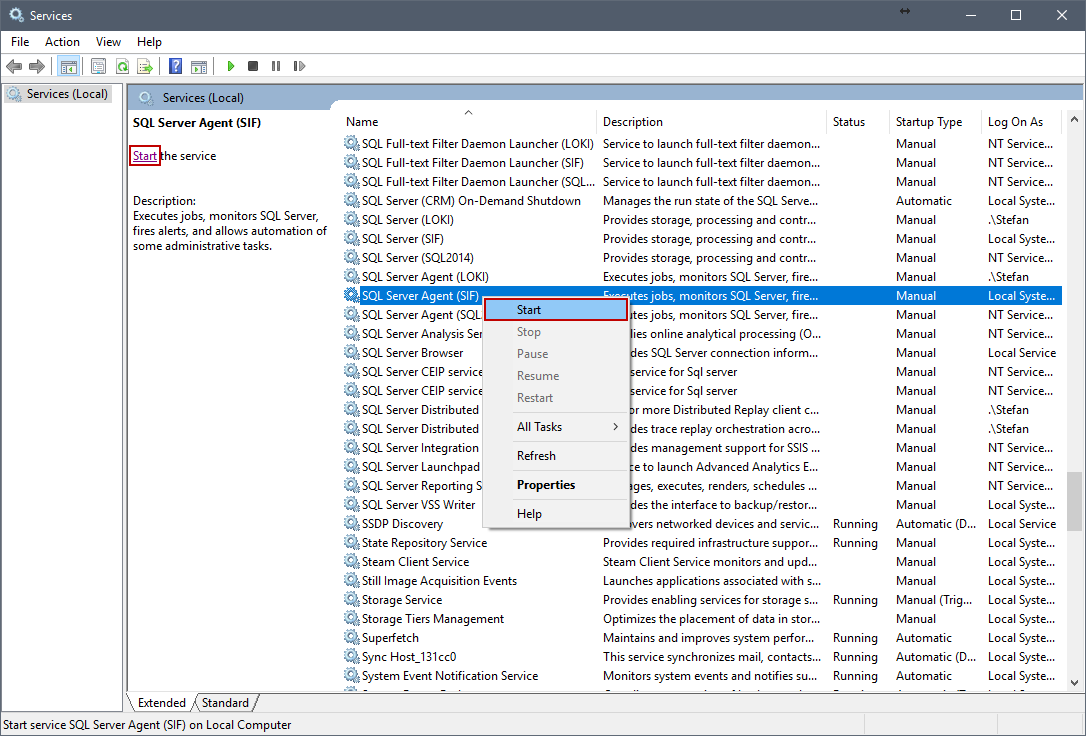
Email notifications for backup jobs using the SQL Server Agent are usually set up when creating the backup job. For this, you have to have SQL Server Agent service running. One way to check that is to open up Services by going to Start -> All Programs -> Windows Administrative Tools -> Services. Note that this may differ slightly from the operating system to the operating system. Another way is to search for Services using your operating system’s search feature. When opened, scroll to find SQL Server Agent (Server_name), and check if it’s running. If not, right-click the service and click on Start or press Start in the top left corner of the window
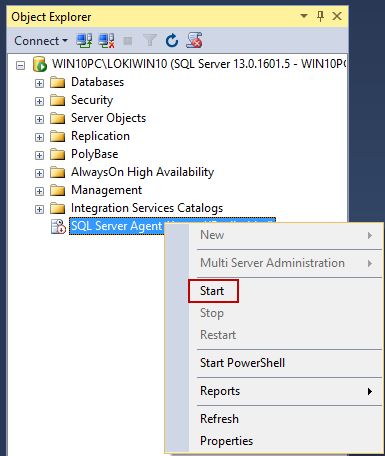
An alternative way of starting SQL Server Agent is through SSMS’s Object Explorer. For the server upon which email notifications for backup jobs should be set up, right-click on SQL Server Agent and click on Start to start the service. In the window that appears, asking whether we are sure to start the agent, click on Yes and the service will proceed to start.
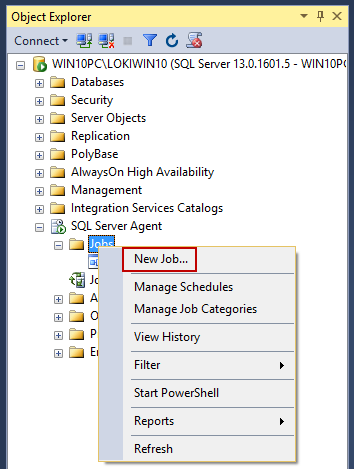
After that, proceed to make a new job by expanding the SQL Server Agent, right clicking on the folder Jobs and clicking on New Job…
For the sake of conciseness of this article, the procedure of creating regular scheduled backup jobs is explained thoroughly in this article. In this article, only the email notification for backup jobs will be addressed
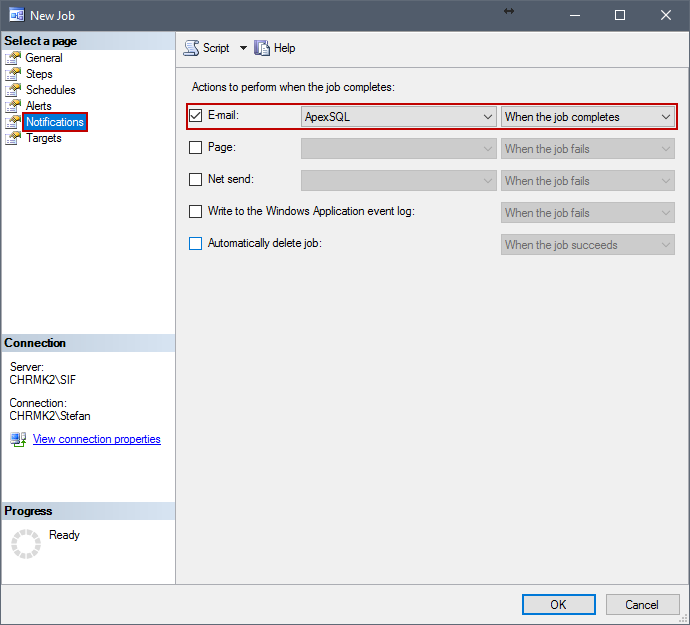
In the New Job window, click on Notifications tab in the navigation pane. There, check the box near E-mail, from the first dropdown menu choose the operator, from the second, choose when to notify: When the job succeeds notifies the operator via email notification if the backup job has completed successfully, When the job fails notifies the operator via email notification for backup jobs if the job has failed and When the job completes notifies the operator via email notification for backup job when the job is completed, successfully or not. After selecting that, press OK to update the already created job, or continue creating the job by selecting any of the tabs in the navigation pane
Setting up email notifications for backup jobs using Maintenance plans
Maintenance plans are another way of setting up backup jobs with varying degrees of customization. In this article, we are going to go over creating a backup job using Maintenance plans in short. More detailed procedure on creating backup jobs using Maintenance plans can be found in this article
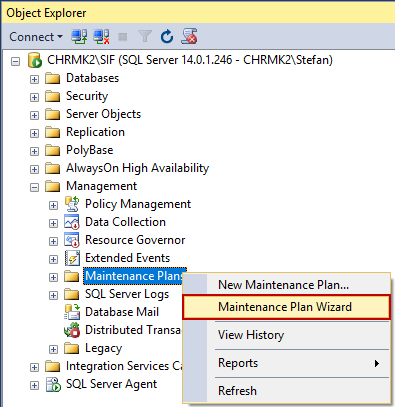
First open SSMS. Expand the node for the server you are using, after that expand the Management folder, right click on Maintenance plans and select Maintenance Plan Wizard
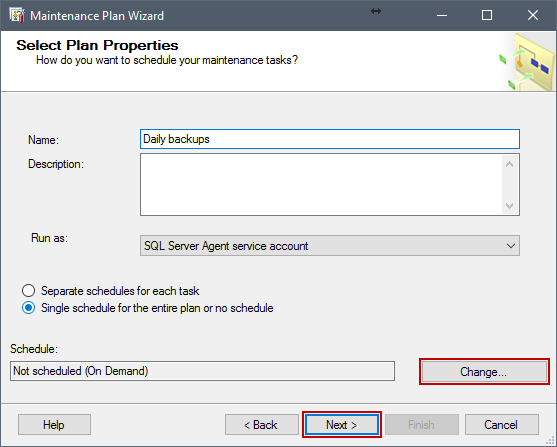
In the Welcome page we press Next and land on Select Plan Properties page where we input the plan name, optionally a description, under Run as we choose to run the plan as SQL Server Agent service account. Next we choose will the each task have separate schedule or will they all run at once. On Change… we can setup the schedule for the plan, after that click on Next
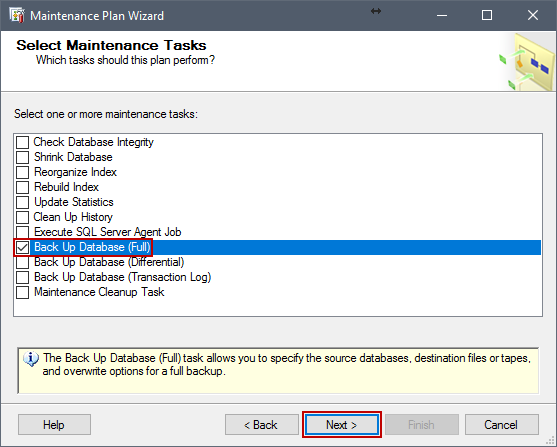
In the Select Maintenance Tasks page we select the tasks we want to perform. In this case we will select Back Up Database (Full) and click on Next
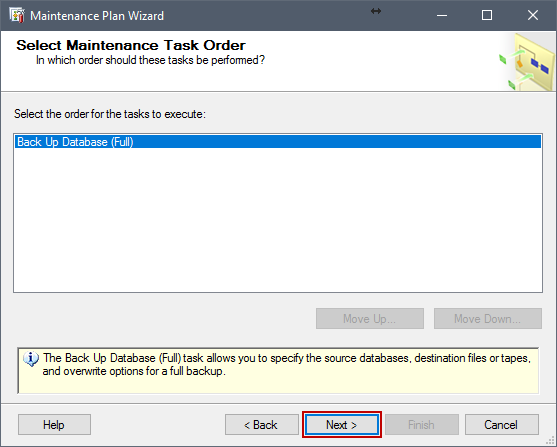
In the Select Maintenance Task Order page, since we have only one task, there is no order of tasks to make, so we click on Next to proceed to the following page
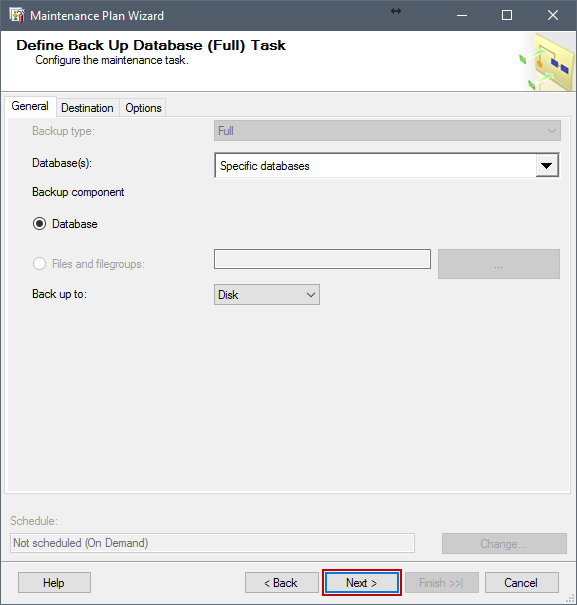
In the Define Back Up Database (Full) Task page, under General, Destination and Options tabs we can configure the task more in depth. After that, click on Next
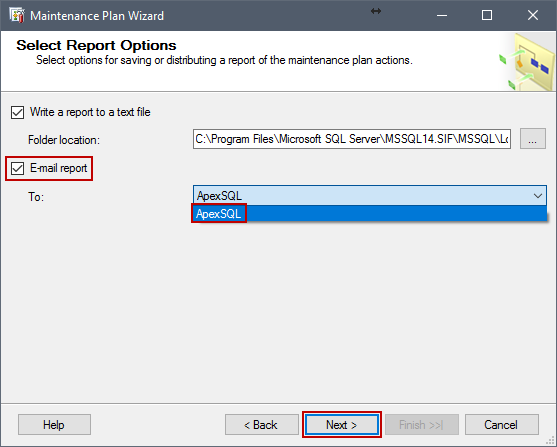
In the Select Report Options, we choose whether we would like to have a text file report of the maintenance plan actions written, as well as setting up the email notification for backup job we are creating. In the To: dropdown menu, we select which profile to use for email reports. Since we have only one profile created, we choose that one for the reports. Afterwards, click on Next
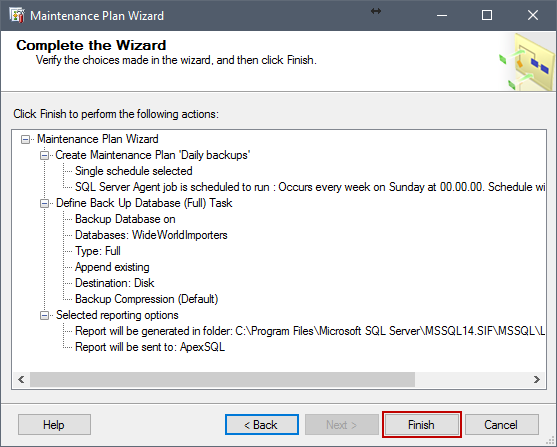
In the Complete the Wizard page, we review the plan, if anything is not as intended, we can go back to change that. In case everything is as intended, press Finish to create the plan
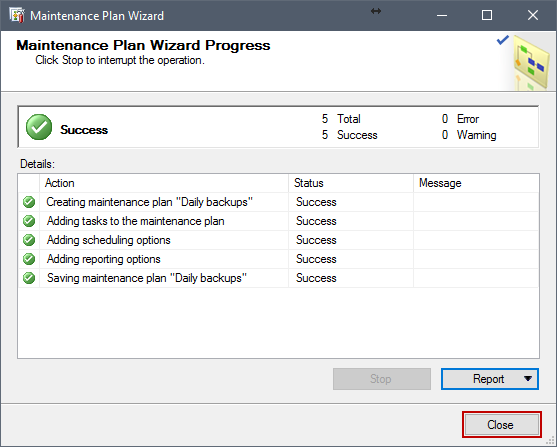
After pressing Finish, the plan will be created and we are going to be presented with an overview of completed tasks. Click on Close to finish the Maintenance Plan Wizard
April 3, 2017


