


This article will cover remote database synchronization using a database comparison and synchronization tool that will create a standalone database installer to execute a script, to complete the a synchronization and update between two remote database
Challenge
These days, there are still some SQL remote databases that don’t have access to internet or it’s a limited one, but remote database synchronization still must be done to obtain the latest changes. So, there has to be a way to get these SQL remote databases synchronized with latest schema changes that were made on the master SQL database.
In order to achieve remote database synchronization, the first step would be to create a database backup or a snapshot of the remote database. Next, a backup or snapshot should be sent to a coworker that has access to the master database. That coworker should compare the master database with a remote database backup or snapshot in order to create the update (synchronization) script. Also, that script needs to be packaged and sent back to a coworker on a remote SQL Server that will execute it and a remote database synchronization is finally completed with the latest schema changes.
Solution
In this article, the synchronization of specific objects on SQL remote database will be described by using ApexSQL Diff’s database installer package.
ApexSQL Diff is a third-party tool for comparison and synchronization of SQL Server schemas between databases, backups, script folders, ApexSQL snapshots and source control projects. Furthermore, it also supports remote databases synchronization, as it can package synchronization scripts in two ways as: C# solution and executable installer. The most important difference between these two ways of packaging is that executable installer is a built application (end product) which cannot be edited, while a C# solution is a code for building executable installer that can be edited and built in Visual Studio. On the other hand, the purpose for both of these installer packages is the same – schema synchronization. Learn more from the article on all about ApexSQL database installer packages.
In the following example, ApexSQL Diff’s database installer package will be used for fulfilling remote database synchronization. In other words, the package will be used for comparing remote database backup against the master SQL database, create and package the update script for specific objects, and executed on the remote SQL Server.
To do so, the following steps need to be done:
- Run ApexSQL Diff
-
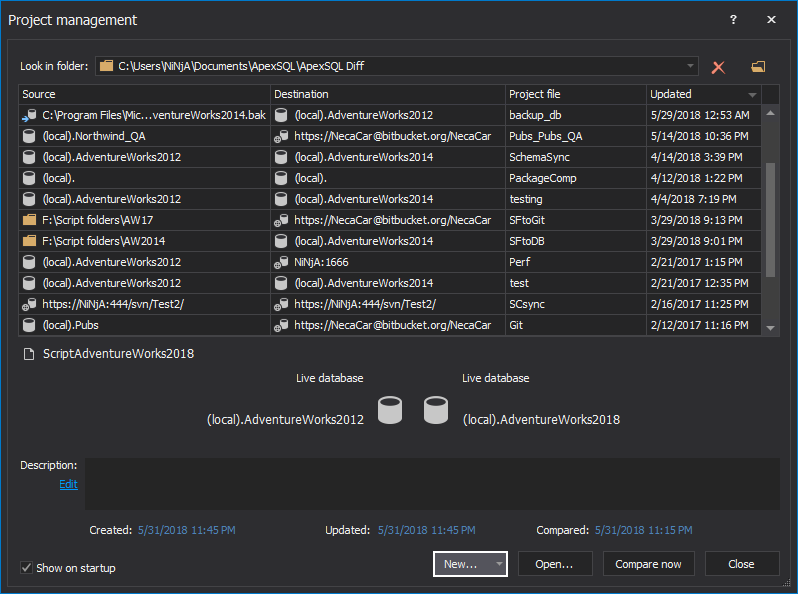
Click the New button in the Project management window:
-
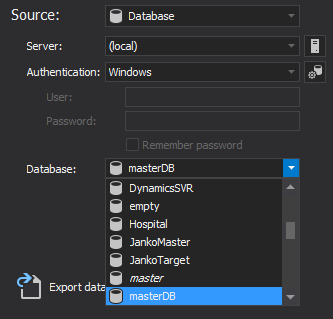
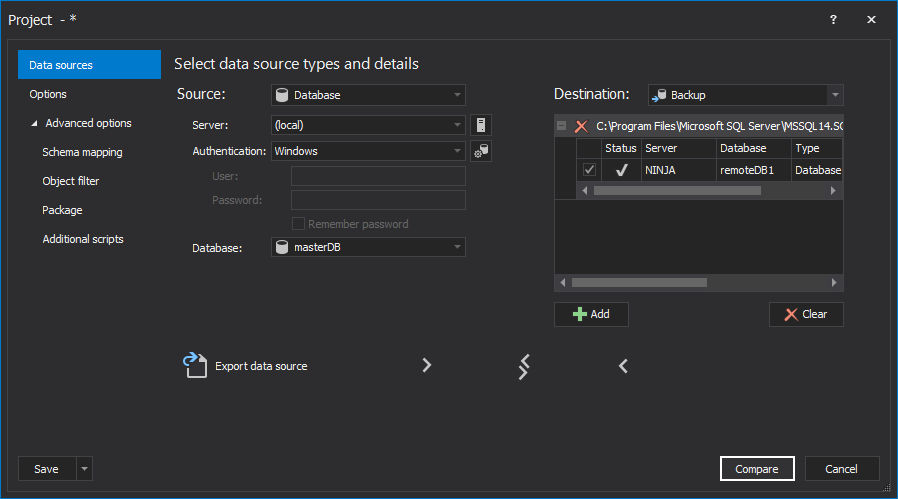
Under the first tab of the New project window – the Data sources tab, for the Source side:
- Choose SQL Server where the master database is located
- Choose the way of authentication
-
Select the master database from the Database drop-down list
-
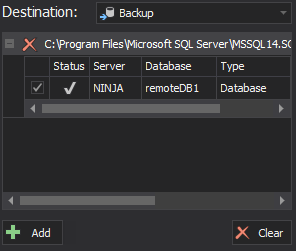
For the Destination side under the Data sources tab:
- Select Backup data source type from the Destination drop-down list
- Click the Add button and provide a path where the received remote database backup is located and load it
-
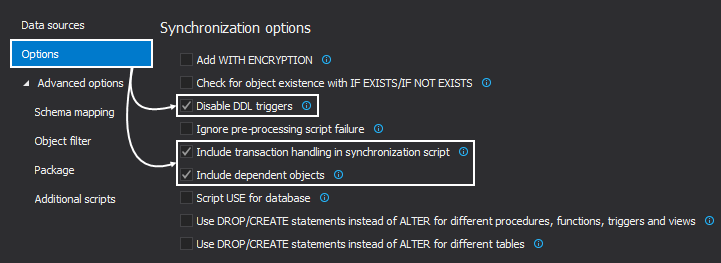
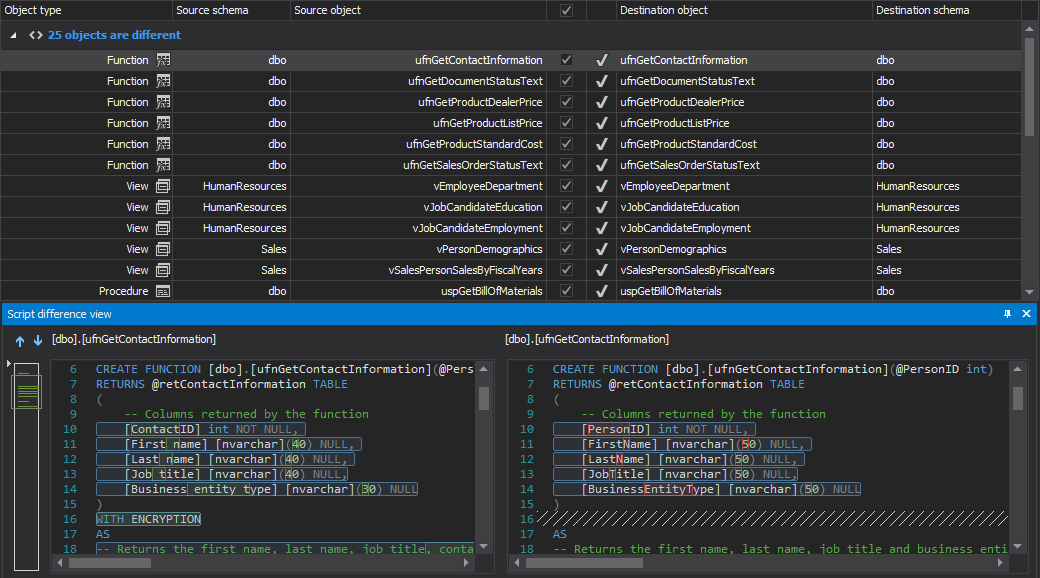
Switch to the Options tab and in addition to the options that can ignore specific things during the comparison, the Synchronization options can be set as well to avoid any synchronization failure:
-
Once the source and destination data types are set and loaded, along with the synchronization options, expand the Advanced options in the left navigation bar and click the Package tab:
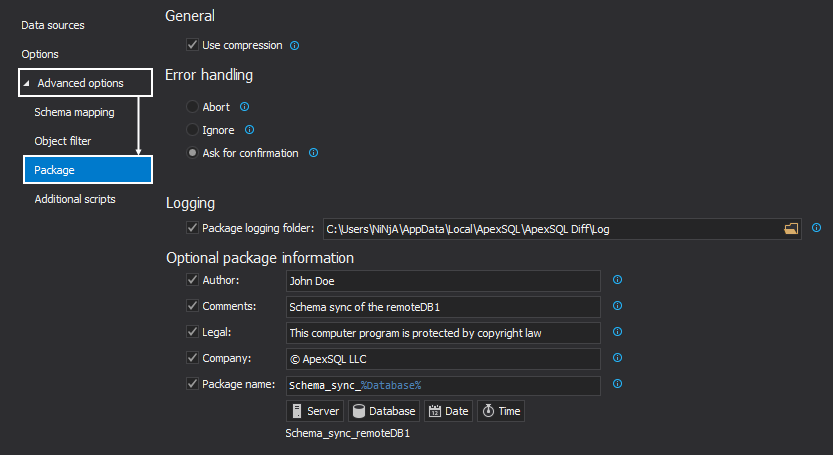
Here, a couple of package options can be set to facilitate usage of database installer packages. For example, when there is a need to execute large number of schema changes, the Use compression option can be quite handy in reducing the size of the created database installer package.
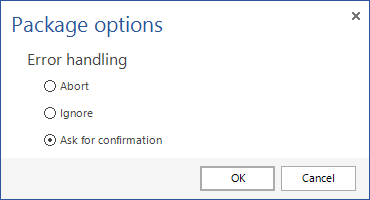
Also, the Error handling option can be very useful while executing database installer package by setting it to Abort, Ignore, or Ask for confirmation if any error is encountered during the execution.
Package logging can be also set and a path to the log file can be customized based on user’s preference.
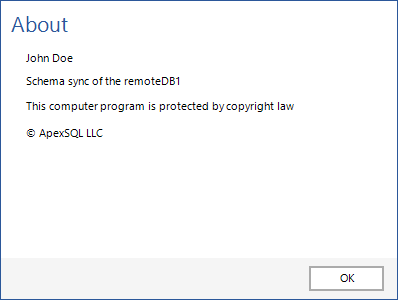
The last, but not the least, a couple of Optional package information options can be set and provide more details along with the database installer package, such as: Author, Comments, Legal, Company, and Package name.
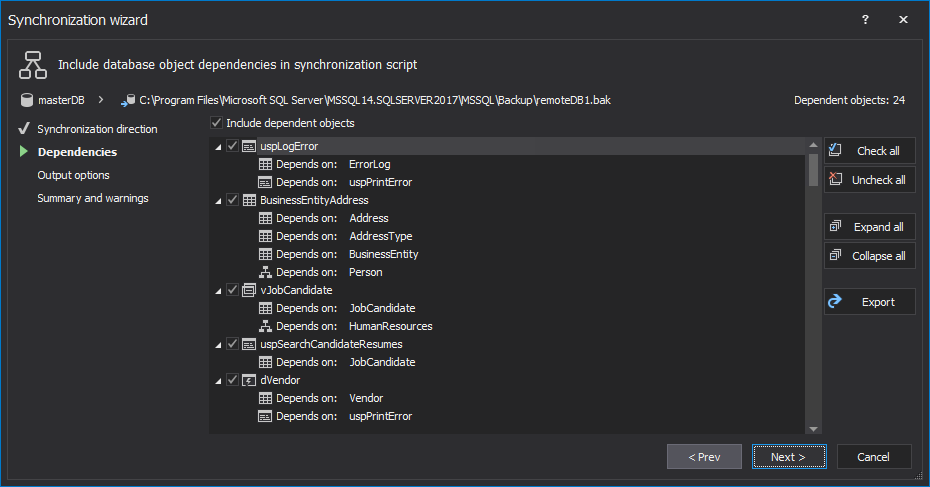
By default, all object types and their objects are checked by default. So, in order to check only specific ones, uncheck All objects in the left tree view panel and then click on the object types to choose which specific objects should be included in the comparison and creating of the update (synchronization) script for database installer package:
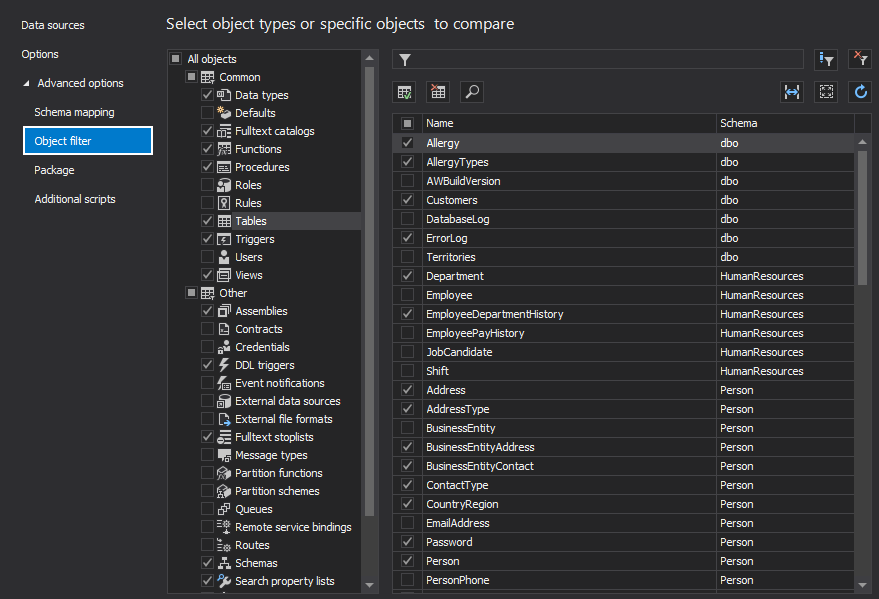
To learn more about object filtering, check out the article on how to narrow schema comparison and synchronization to affected objects only.
By default, all objects will be checked for synchronization, but each one can be unchecked and therefore excluded from the resulting update (synchronization) script if it’s not needed to be updated.

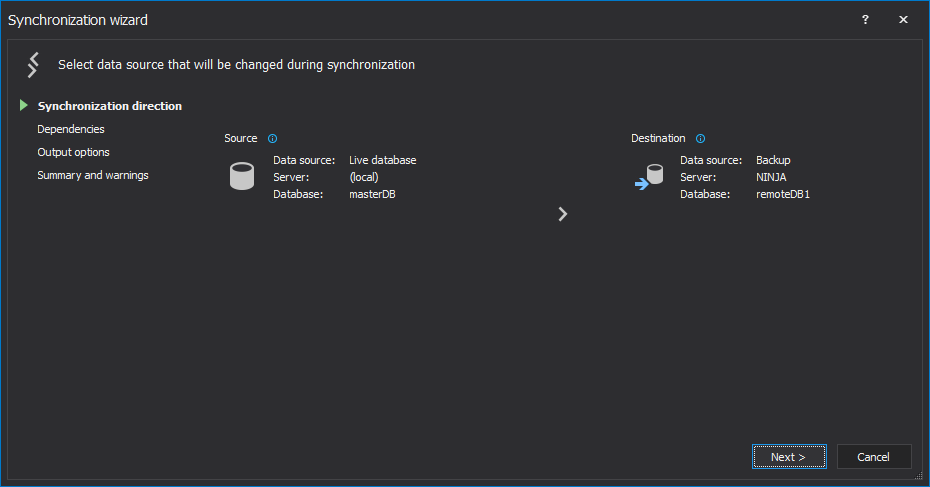
By default and in this example, the synchronization direction is set from left to right (source to destination), but it can be reverted with a click on the arrow button.

Additionally, a couple of executable installer options can be set, such as:
- Run executable now – it’s unchecked by default, as in most cases an executable installer will be run on a remote SQL database
- Create a CLI executable file – it creates the CLI executable that can be run using the Command Prompt to automate the process further
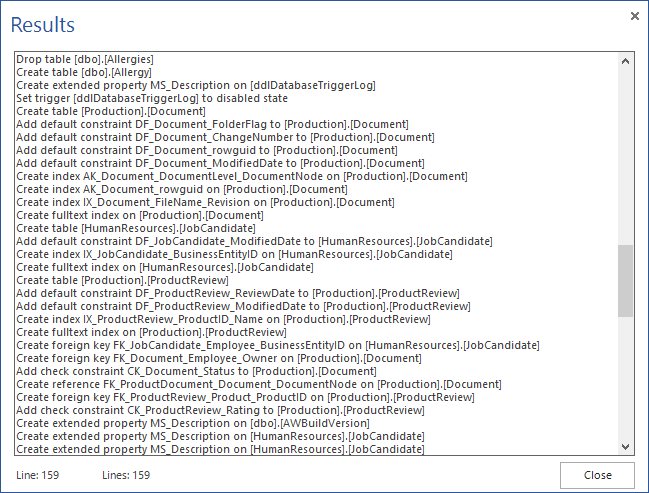
- Create a script file – it creates a script file that contains SQL code for updating (synchronizing) a remote database
- Create a manifest file – it will create a .manifest file, which contains information about OS compatibility versions, for which this application is designed to work with, and it sets the Windows User Account Control level to allow the application to run without any additional permissions
|
Quick tip: When creating executable installer, it can be created and run without all three mentioned files |
- Indicate a default database – it sets a default database against the generated update (synchronization) script
- Specify the Visual Studio version – it can be set based on the installed Visual Studio version on a machine where executable will be run
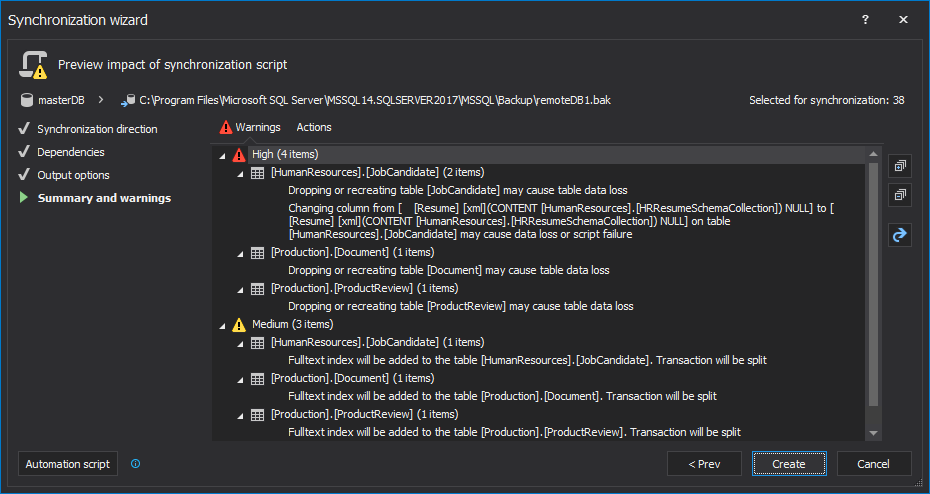
Once switched on the Actions tab, all execution actions will be shown:
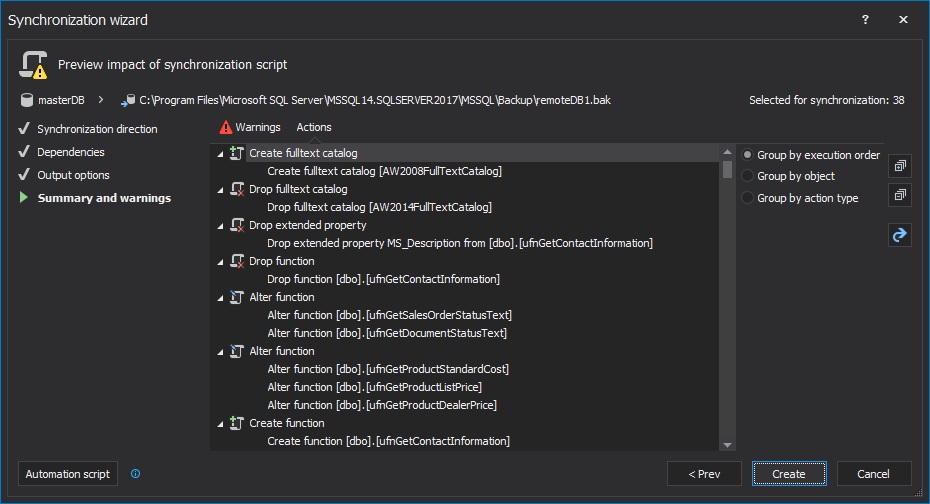
Actions can be grouped in three different ways and exported in six different output files, if needed.
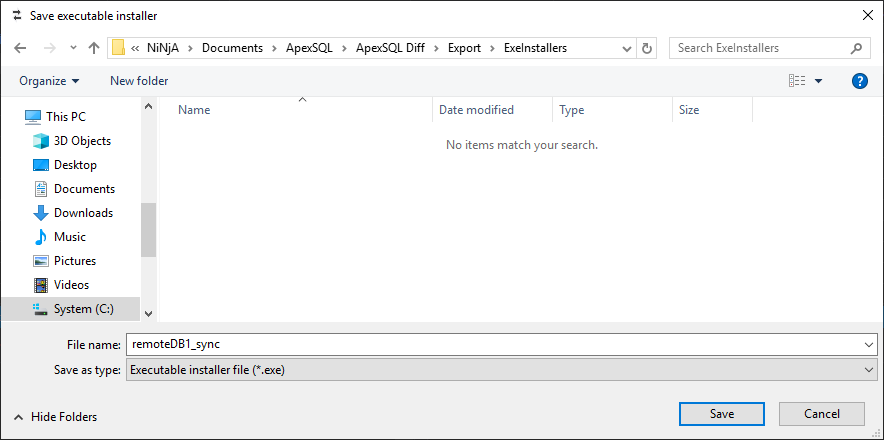
Once the Save button is clicked the information message will be shown about successful creating of an executable installer.
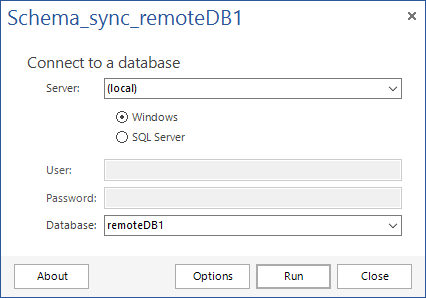
Similar to the Data sources tab in ApexSQL Diff, when database is chosen as a source or destination, here the same options can be set for server name (if there are more SQL Servers on remote machine), an authentication way or to change a database on which the executable installer will be run (if there are more remote databases on that remote machine that should be synchronized, but differently named than default one that was previously set)
Hopefully, this article should prove useful for your next remote database synchronization. Thanks for reading.
March 4, 2019


