


Every production database requires maintenance and improvements in order to meet the ever-changing demands. The easiest way to test the new requirements, such as new functionalities and improvements, is to try them on a test database.
So, creating the test base from the backup of the production database would be the easiest way… at least that’s what it looks like. But, is this really the case?
Next question, just how big is this database anyway? A database backup of a production database with a lot of BLOBs could easily reach over 500GB, and it is not unusual for them to swell up well over 1TB. Restoring a database backup that big is time-demanding. Now, it needs to be looked to free disk space. What can be deleted to free up some space for restoring the backup? OK, so data that will be deleted needs to be backed up and archived, to free up enough storage space. And let’s assume that the restoring of production database backup is tested and is hopefully going to work. So, the entire day is wasted to make the test database, and that nobody will call to ask for the data that was removed to gain enough storage space. But usually, somebody always makes that call.
That’s a very stressful experience that everyone would like to avoid. And all that is needed is an empty database which will be used to test stored procedures, user-defined functions, and triggers.
Back to the future
Today, there are tools available which can be used to get rid of all those time and space-demanding processes. For this scenario, the database comparison tool ApexSQL Diff will be used.
Using ApexSQL Diff will wipe away most of the problems that are encountered using the classical way of restoring backups. In the first place, there is no need to squeeze out the last KBs from our limited disk space. Second, there is no need to wait for a 10-hour long backup restoring process… if it is assumed that it works. Instead, an empty test database and ApexSQL Diff are going to be used, to easily identify the pertinent objects and their dependencies in the backup, and then synchronize them against the test database. This way, there will be no pressure to look for disk space and no time will be wasted waiting for the backup to recover.
To restore objects from a backup into a test database:
- Start ApexSQL Diff
-
In the Project management window, click the New button:

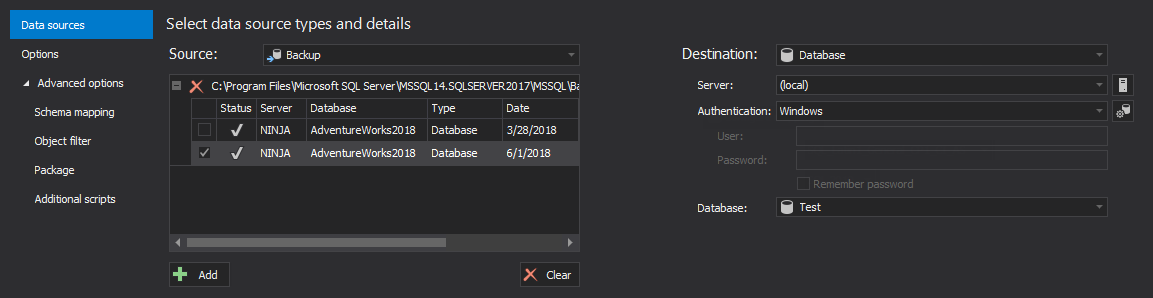
- To select database backups as the data source:
- In the Source drop-down list, select the Backup data source
- Click the Add button to load database backups into the Backup files list
- Select the backup that need to be used
- To select a database as the data destination:
- In the Destination drop-down list, select the Database data source
- Connect to the SQL Server
- Select the database
- ApexSQL Diff offer users useful options, including the powerful – Object filter:
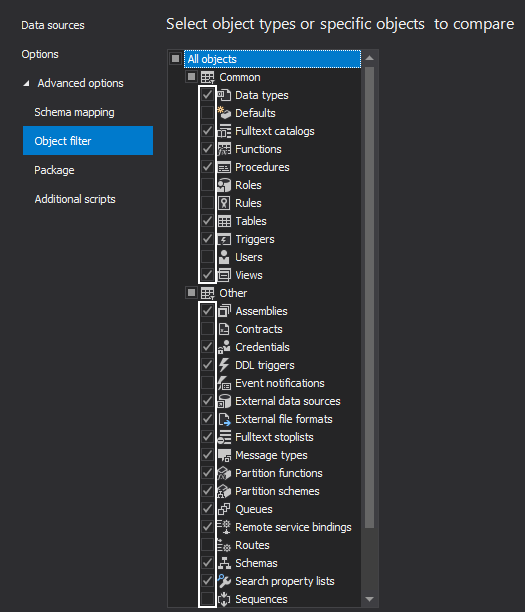
- Expand the Advanced options and select the Object filter tab
-
In the left panel of object types list of the Object filter tab, exclude individual object types from the comparison by unchecking them:
-
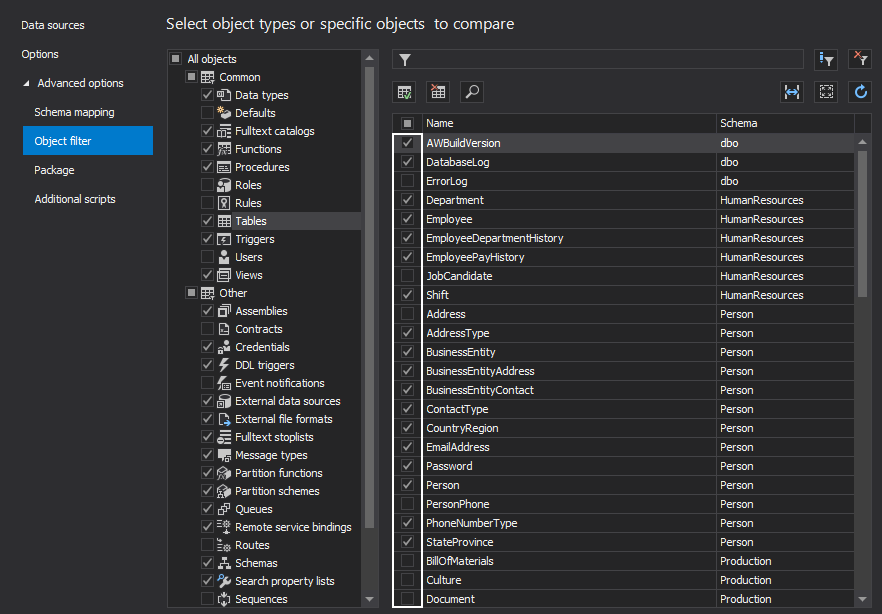
Additionally, it is possible to set up a more advanced filtering, with a click on any object type in the left panel, the list of all objects for the selected object type will be shown on in the right panel list where individual objects can be included/excluded:
- Once everything is set, click the Compare button in the bottom-right corner of the New project window
-
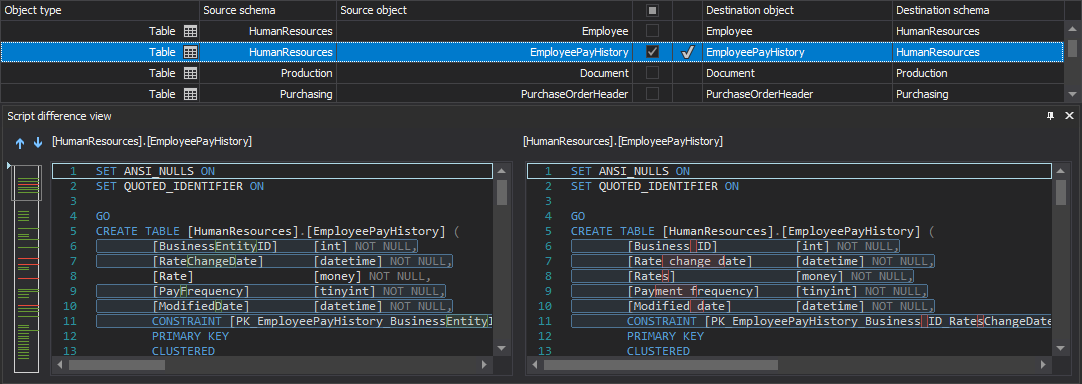
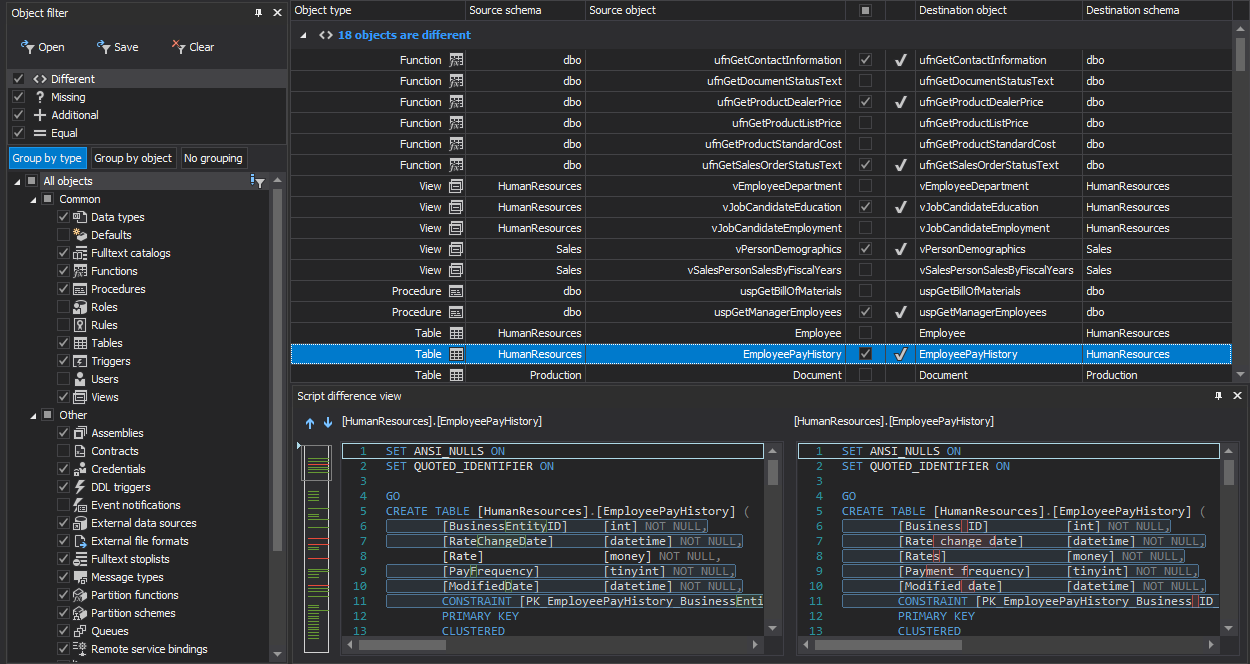
Analyzed objects and differences results will be listed in the application’s Results grid. It will show each compared object, as well as the DDL script differences details of an object selected in the Results grid, in the Script difference view panel:
- To select what should be synchronized:
- Choose the objects for synchronization
-
The Object filter panel on the left side of the main application window can be used to additionally eliminate unneeded objects
-
Once the project is set up and the objects for synchronization are selected, start the synchronization with the click on the Synchronize button from the Home tab:

-
During the synchronization process, in the Dependencies step, it can be chosen whether to include dependent objects into the synchronization script or not:
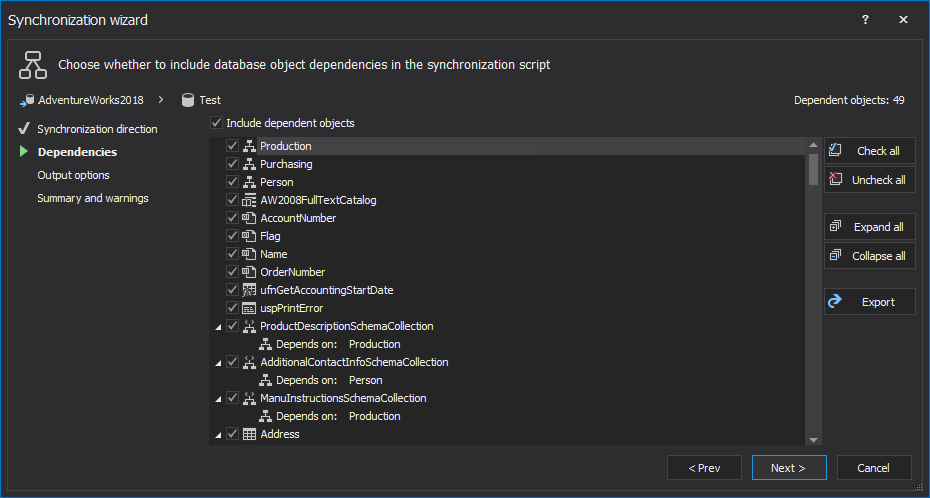
-
Under the Output options step, select the Synchronize now action from the drop-down list:

-
The Summary and warnings step provides a detailed list of the actions that will be taken to synchronize the data sources, along with any potential problems that might occur during synchronization:
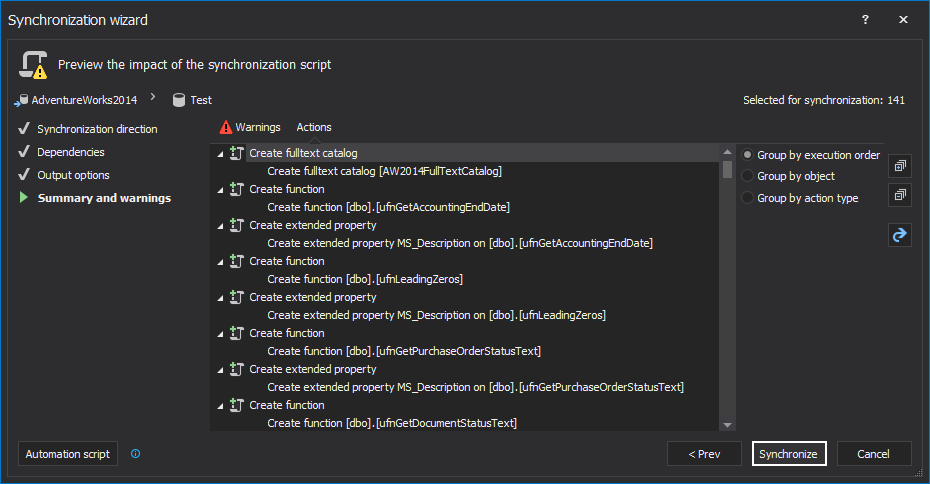
- Once everything is reviewed, click the Synchronize button to complete the process
After a successful synchronization, the recovery of the objects into the Test database is completed.
Use ApexSQL Diff in order not to waste time on restoring the huge production database backup while desperately trying to find enough free space on hard drives.
April 4, 2013


