


Prevention is one of the most powerful approaches against any inadvertent or malicious events. But it is not always possible to prepare for all different calamities which may take place in SQL Server environments. Inadvertent changes, SQL injection attacks, malicious manipulations are some of the most frequent disasters SQL Server DBAs and engineers encounter. While the recovery process for the specific events which has negatively impacted the database is paramount, the next critical task in all situations is to find out who or what made the changes, what was changed and when. Gathering this information is a key for preventing other similar events which can affect SQL Server databases and endanger the data, as well as the business itself.
When an incident occurs, regardless of the reason, it is important to act swiftly and have effective diagnostic and investigative tools ready to face many challenges and ensure that the consequences are minimal. Unfortunately, in many cases this means that bulky, performance intensive, or disk space heavy auditing must take effect at the time of the disaster for most approaches to even gather part of the critical information on it.
Forensic auditing
[1]
Just as the definition of the word indicates, forensic auditing is a scientific method, in our case using sophisticated technology to read the SQL Server transaction log to perform an investigation. Although many scenarios don’t’ involve actual crime, many involve at least the inadvertent damage of data and often malicious changes as well.
At ApexSQL, we’ve worked with many organizations to investigate white collar crime, hacking and other actions by bad actors that resulted in altered data for criminal purposes. In one example, a large online auction house was able to track incidents where prices of big ticket goods were decreased immediately prior to purchase, by users known to be associates of employees. ApexSQL Log was vital to review the row history of the prices, when they were changed and by who, to solve a case of embezzlement.
This is where the forensic auditing takes over from the regular auditing. On demand auditing,for forensic purposes, is not intrusive or performance intensive, doesn’t encumber the environment and is cost effective. Let’s see how we can tackle some rogue changes in the SQL Server database, even before the forensic tool was installed.
With the event background where a SQL Server database in the full recovery model has been affected with some unexpected changes, the very first task that should be performed is to investigate the nature of the changes – to find out who made them, and what and when was changed so we can create a solid foundation for the investigation and either clear those changes as intended or mark them as inadvertent.
Using a transaction log reader
ApexSQL Log, a SQL Server transaction log reader is a powerful tool which reads transaction log files, including online transaction logs, backups or even detached LDF files to investigate all records on all DDL and DML operations executed on the database.
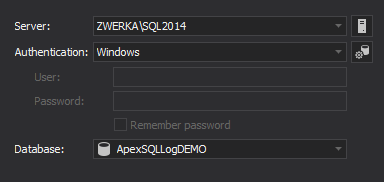
- To start the process, run ApexSQL Log, choose SQL Server and database and provide connection credentials
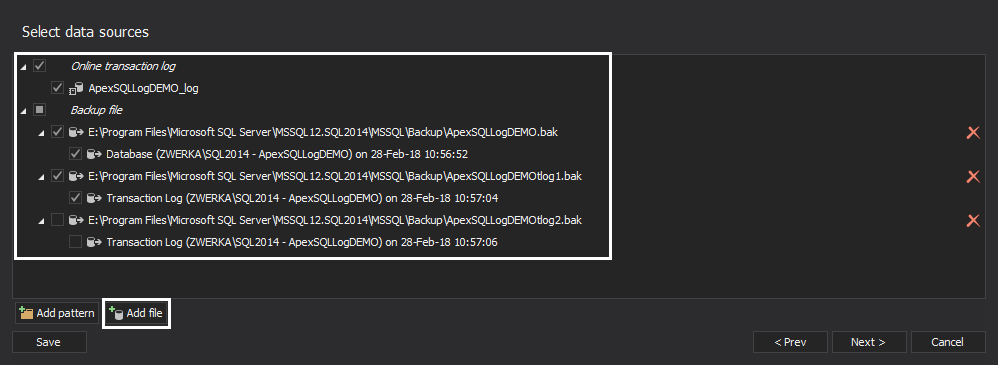
- Next, in the “Data sources” step of the wizard, add transaction log files/backup which will be audited and check them
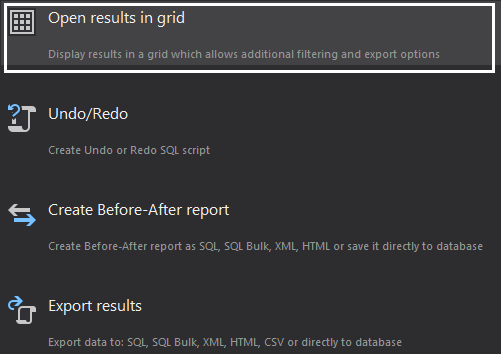
- In the “Open results in grid” step of the wizard, choose to “Open results in grid” which will provide visual insight into all transaction log records
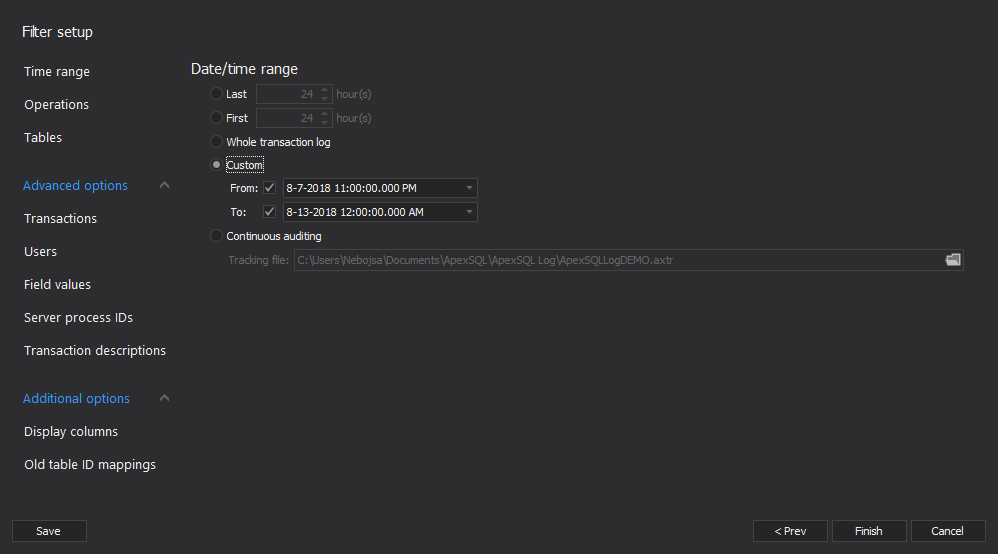
- In the “Filter setup” step of the wizard, it would be the best to use as many filters as possible to minimize the auditing trail based on the known information (e.g. choose shortest known time frame, include only operations which could have caused the issue (e.g. only delete operations in case of the missing data), include only users which might had executed the changes, and more). While auditing with as much filters as possible will yield best results, it would not be a good idea to impose any filters where user is not absolutely sure that transaction log records which might have been included in the incident have been hence excluded from the results
- To finalize the wizard, click on the “Finish” button, and after short processing, ApexSQL Log will display the results in the grid where the “real” investigation can begin.
Now that we are facing the innards of the transaction log files, we can start gathering the critical information for the forensic task.
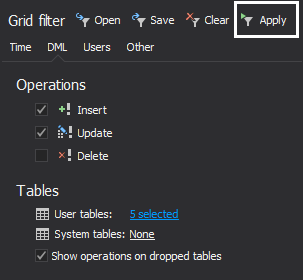
Filtering our results
First, we can work further on our auditing trail by adding more filters to the auditing results to achieve even more precise results. Add more filters and hit “Apply” to quickly refresh the results
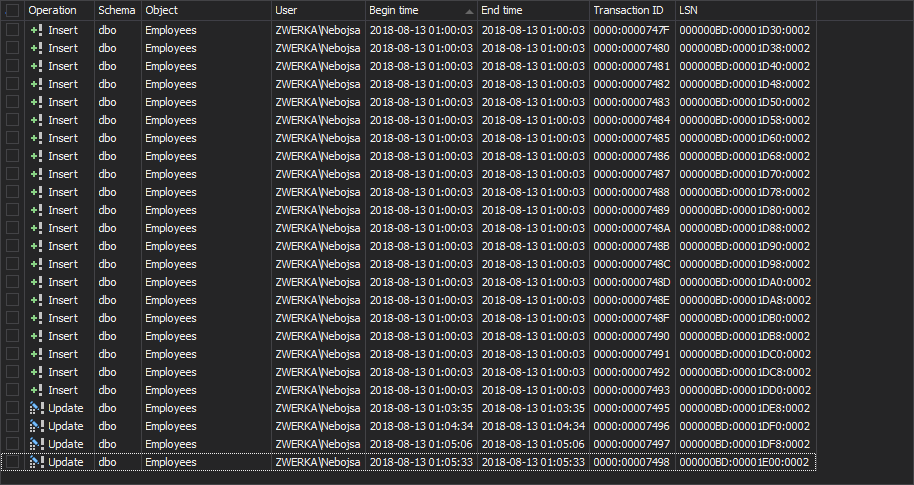
Now we can commit to looking at the actual operations which have affected our database. For each change we can see the exact information on what was the change, who made the change, which object was affected, what was the time of the execution, as well as some other information like SQL Server transaction ID, LSN and more.
Furthermore, we can investigate each operation in great detail by looking into the several panels located in the bottom of the application window.
Before and after auditing
First, click on the operation in the grid that needs to be investigated.
Next, click on the “Operation details” view tab in the bottom and see the full information for the affected database table, even including the table columns which were not affected by the change which will certainly provide good help in understanding what was changed.
The proverbial “money shot” here are the before-after values. ApexSQL Log allows full insight into values before the change and after the change.
In the example below, we can clearly confirm that the column “Salary” in the “Employees” table was changed from “1155.6600” to “2999.9900” – clearly, someone got a hefty raise.
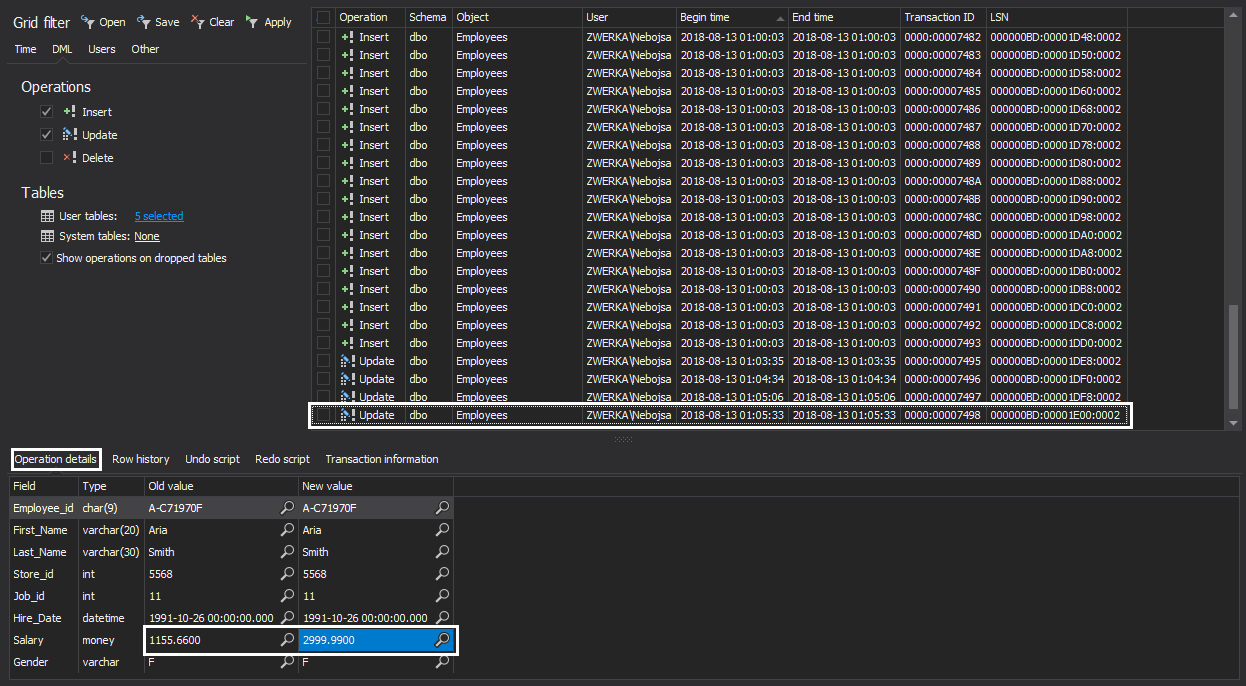
Additionally, we can confirm that the change was made by the user ZWERKA\Nebojsa and see the exact time when the transaction was executed on the SQL Server. This bring us much closer to the investigation conclusion.
Row history
Another handy feature which can greatly help here is the “Row history” view. This view provides complete insight into the history of the row, all the way from the initial insert to all subsequent updates or deletion.
Looking at our example below, we can confirm that several changes were made throughout the history to this particular table row from the first insert, all the way to the final update which now allows full information on the history changes helping us identify if the changes were indeed malicious or if they were true.

With this, we should have more than enough information and resources to invoke a fully-fledged forensic auditing analysis which will result in identifying both the culprit, time of the event and complete nature of changes.
Reversing damage
As a bonus feature, in most of cases which negatively impacted the database and resulted in either data loss or inadvertent/malicious changes, actual data recovery will be required. In addition to the analysis mechanisms which ApexSQL Log provides, the tool offers recovery solutions in the shape of rollback scripts which can be pinpointed to exact operations and will result in the complete rollback of the data to the original values as they were before the changes, nullifying the disaster effects in this way. More on the recovery solution can be found in How to recover SQL Server data from accidental UPDATE and DELETE operations article.
[1] www.google.com
August 14, 2018


